-
Damn - seeing your SCZA makes me cringe at mine. It's sticking way further out than yours. Did you struggle with adjusting it at all? -
Nice and clean underneath! It always feels good to do a proper “while you’re in there” when you’re working on a project.Leave a comment:
-
January 2019
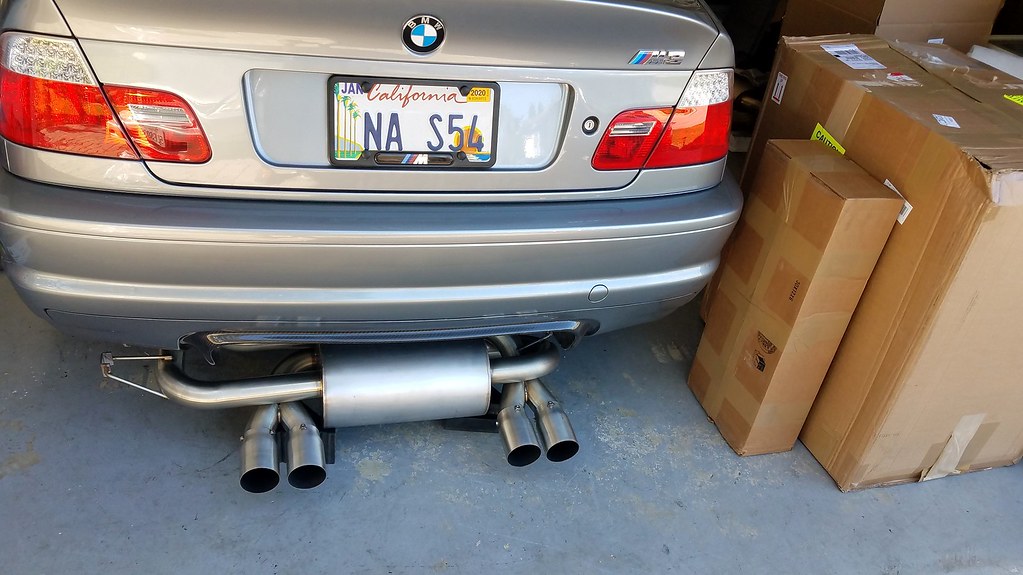
I bought a barely used SGT SCZA muffler. I already have the OG scorza, but my friend loves them too so he could take one and plus I thought it'd be cool to see how close it was to the og.
Mees hermanos may he canos know bout that blanket super suave

Well they look really similar as far as dimensions. Different steel, slightly different mounting arms. Mostly just looks newer. Same 2.5" piping, mostly similar welds. Sgt's feels slightly cheaper/sloppier. To be fair, the og isn't like my SS sport either though.
I had gotten lucky and come across a separate set of sgt tips in 82mm brushed stainless only weeks prior to getting the scza. My original plan was to put them on my stock exhaust for when I'm ready to calm it down, but it worked out where I could use them for the scza as it came with new 76mm black tips (similar to dinan).
Something in those big boxes
 Mounted:

.

I had been contemplating a rack switch. I narrowed it down to zcp(csl) blue or zhp yellow 712. I found a 74k really nice zhp one on ebay for a song (I love ebay deals; a trend throughout my journal).

At my mileage, I like to replace basically everything when I work on an area. I first got a new Rein high pressure line, but shy'd away (due to not so good rep) when a friend gave me his newer, low mileage OE part. I bought new OE lines altogether, plus a new housing and fluid of course.
Oh ya, and after liking the TMS sway, but wanting to lower weight, I got a hotchkis front bar too and new lemforder links cause why not.
Nasty. Used the special disconnect tool. Didn't work too well, had to pry them off with a flat head too.

.

.

.

New hose clamps on the boot to rack ^. v Polished the plate lil bit
 Last edited by Tbonem3; 08-27-2020, 10:54 PM.
Leave a comment:
-
Thanks!
September 2018
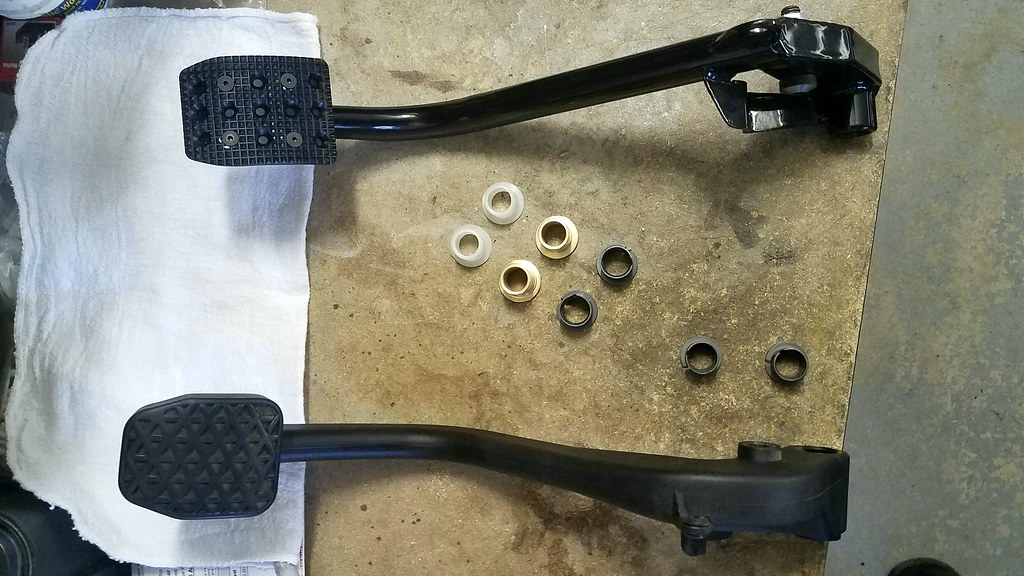
TMS had a great sale at the end of '17 on their pedal kits. I wasn't a big fan of most pedal kits with large rubber grips plus I didn't want silver with my mostly black theme. TMS' black pedals were my fav anyway, so I grabbed them on sale. I also then got a Mason Engineering clutch pedal (formerly GSP). I also grabbed a set of brass bushings for the clutch and delrin bushings for the brake pedal. These are self lubing and thicker so as to eliminate slop. I also, manually (as opposed to software) disabled the clutch signal to start the car.


We've been learning more about RACP issues, and the fixes that many of us long term owners have done are now incomplete/insufficient. While I wait to further reinforce the car, I picked up a cheap rear strut bar (ebay). It came white. I had left over yellow caliper paint so I thought I'd be smart and match 'em.


I also wanted to get a custom license plate. Growing up in Socal, I've always loved the "arts" plate with the palms trees and sunset. I figured I'd take it a step further with a little inside code, NA S54.
 Last edited by Tbonem3; 07-24-2020, 01:26 PM.
Leave a comment:
-
Thanks. Sounds like you get it 😆. For me, it was scotch brite pads and wd-40. Polishing the pipes on my dirtbikes, as ritual. The e46 m3 is a perfect segue for me and my "tendencies"Leave a comment:
-
I love the attention to detail, it takes me back to my military days of cleaning window sills with windex and q-tips and polishing brass pipes with brasso and wool pads 😂.Leave a comment:
-
August 2018
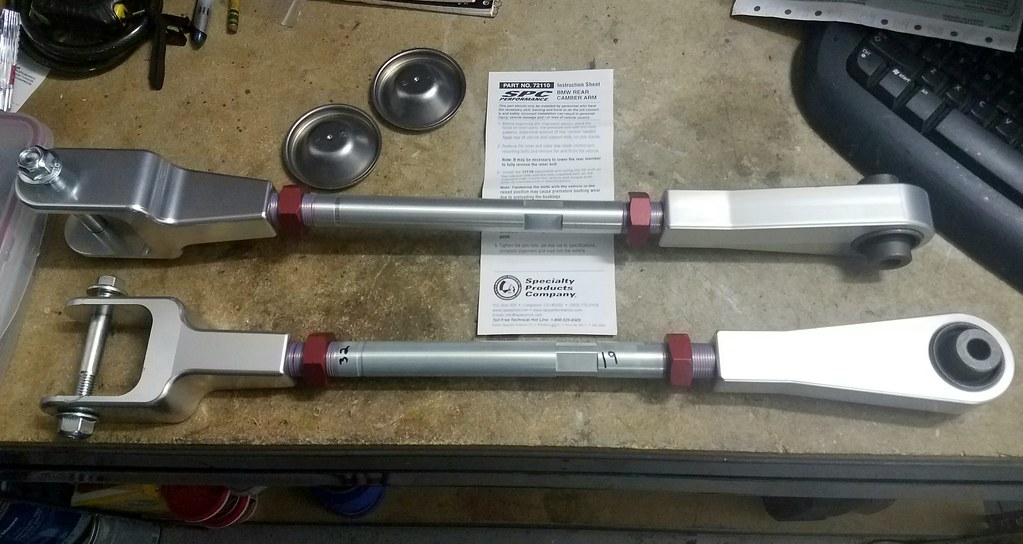
I was getting tired of the 4.10s and found a fellow member who wanted to buy it where I could inherit their stock diff. At my mileage, my original diff's LSD was toast, so if i was gonna go back to stock, I wanted a lower mileage diff as I know how important a working LSD is to the dynamics of this car. I also wanted to get more than -1.7 camber in the rear. I had been keeping an eye on adjustable LCAs, mainly aluminum for weight savings, when I got lucky and saw a vendor mis-list some eibach/SPC alloy arms on Amazon for the steel price (half). They quickly re-upped the price after I purchased
Lubed up. Wrote wrench sizes for easy alignment


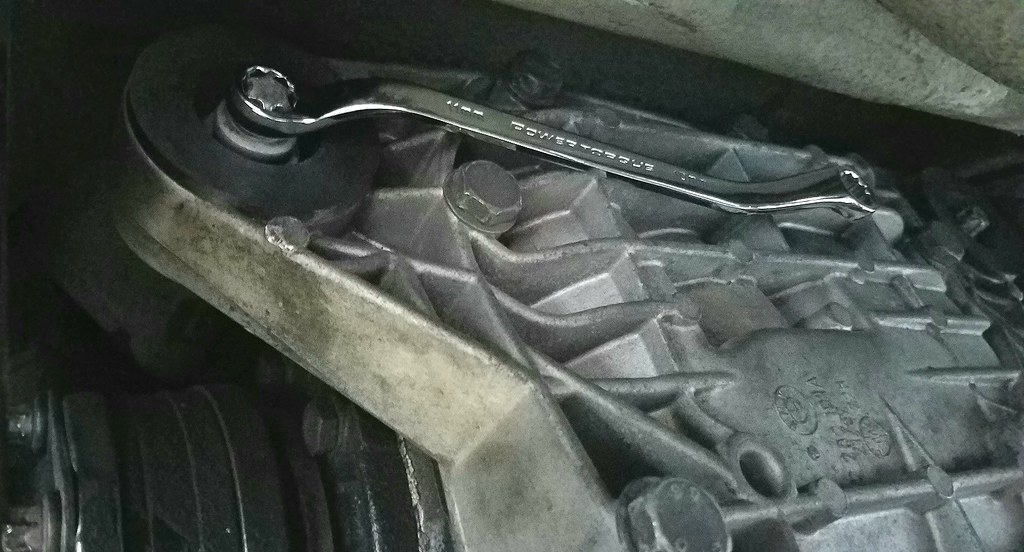
If your socket wrench isn't slender enough, as you're backing out the rear diff bolts (etorx e12?), an 11mm iirc, offset box end wrench fits perfectly!
Late night swapping by myself When you've done it before, recently, it's not too bad. This stock diff had 71k which I was happy with. I swapped my diff cover back over since it has the AKG poly bushings. Used a new gasket, a new gasket for the drive shaft end, and then new OE SAF XJ + fm booster fluid.

This is why you must remove or loosen, and lean back the diff to R&R control arms (well, the long bolt). The passenger side has enough room iirc, but the driver side doesn't.

Matched exact length to maintain alignment

Leverage; my old friend, Archimedes.


Shiny

With how few miles the car gets, I'm on annual oil changes now.
 Last edited by Tbonem3; 07-03-2020, 10:34 PM.
Leave a comment:
-
Should have used that name ! LOLOriginally posted by Tbonem3 View PostLeave a comment:
-
July 2018
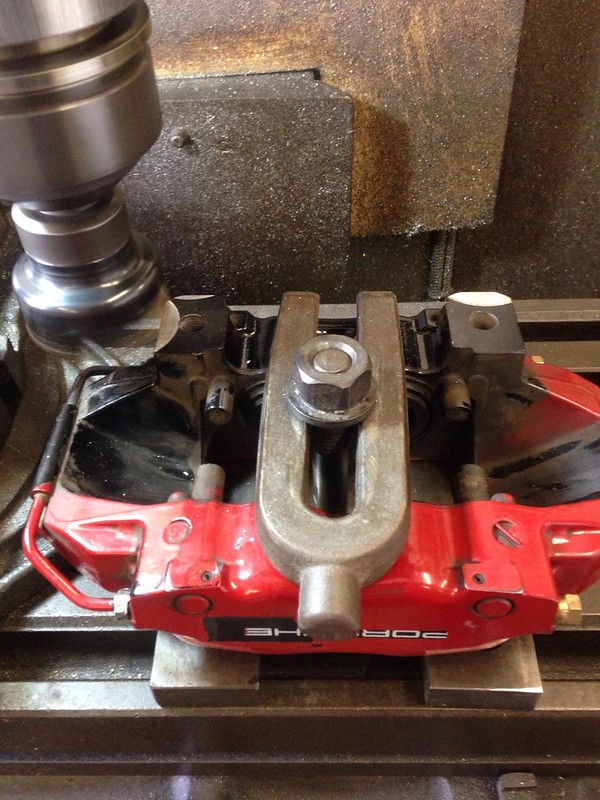
I was thinking of my brakes, and the little mods to make them better like brass guide pins, euro pads/rotors, etc., but I then started researching 996 Brembo conversions. Turns out, if you DIY it all, it's very affordable. I ordered rotors/pads from FCPeuro for future replacement, brackets and lines from ECS, and a set of used Boxster S calipers from a dismantler.
My father is a machinist, so he took care of the front mounts for me. I DIY'd the paint job and install. I'll post some photos, but real info/details can be found in my DIY thread: https://nam3forum.com/forums/forum/m...bbk-conversion


While installing the fronts, I first took the opportunity to replace the hub (bearings) with OE FAG.


OLD

NEW


Rears


D737 vs. D738


I've learned a lot since then, so what I've posted here has changed. I've refinished my set a few times now, chasing perfection. I also went with Rallyroad brackets for the front to drop weight (half the weight of CM).
Latest version:
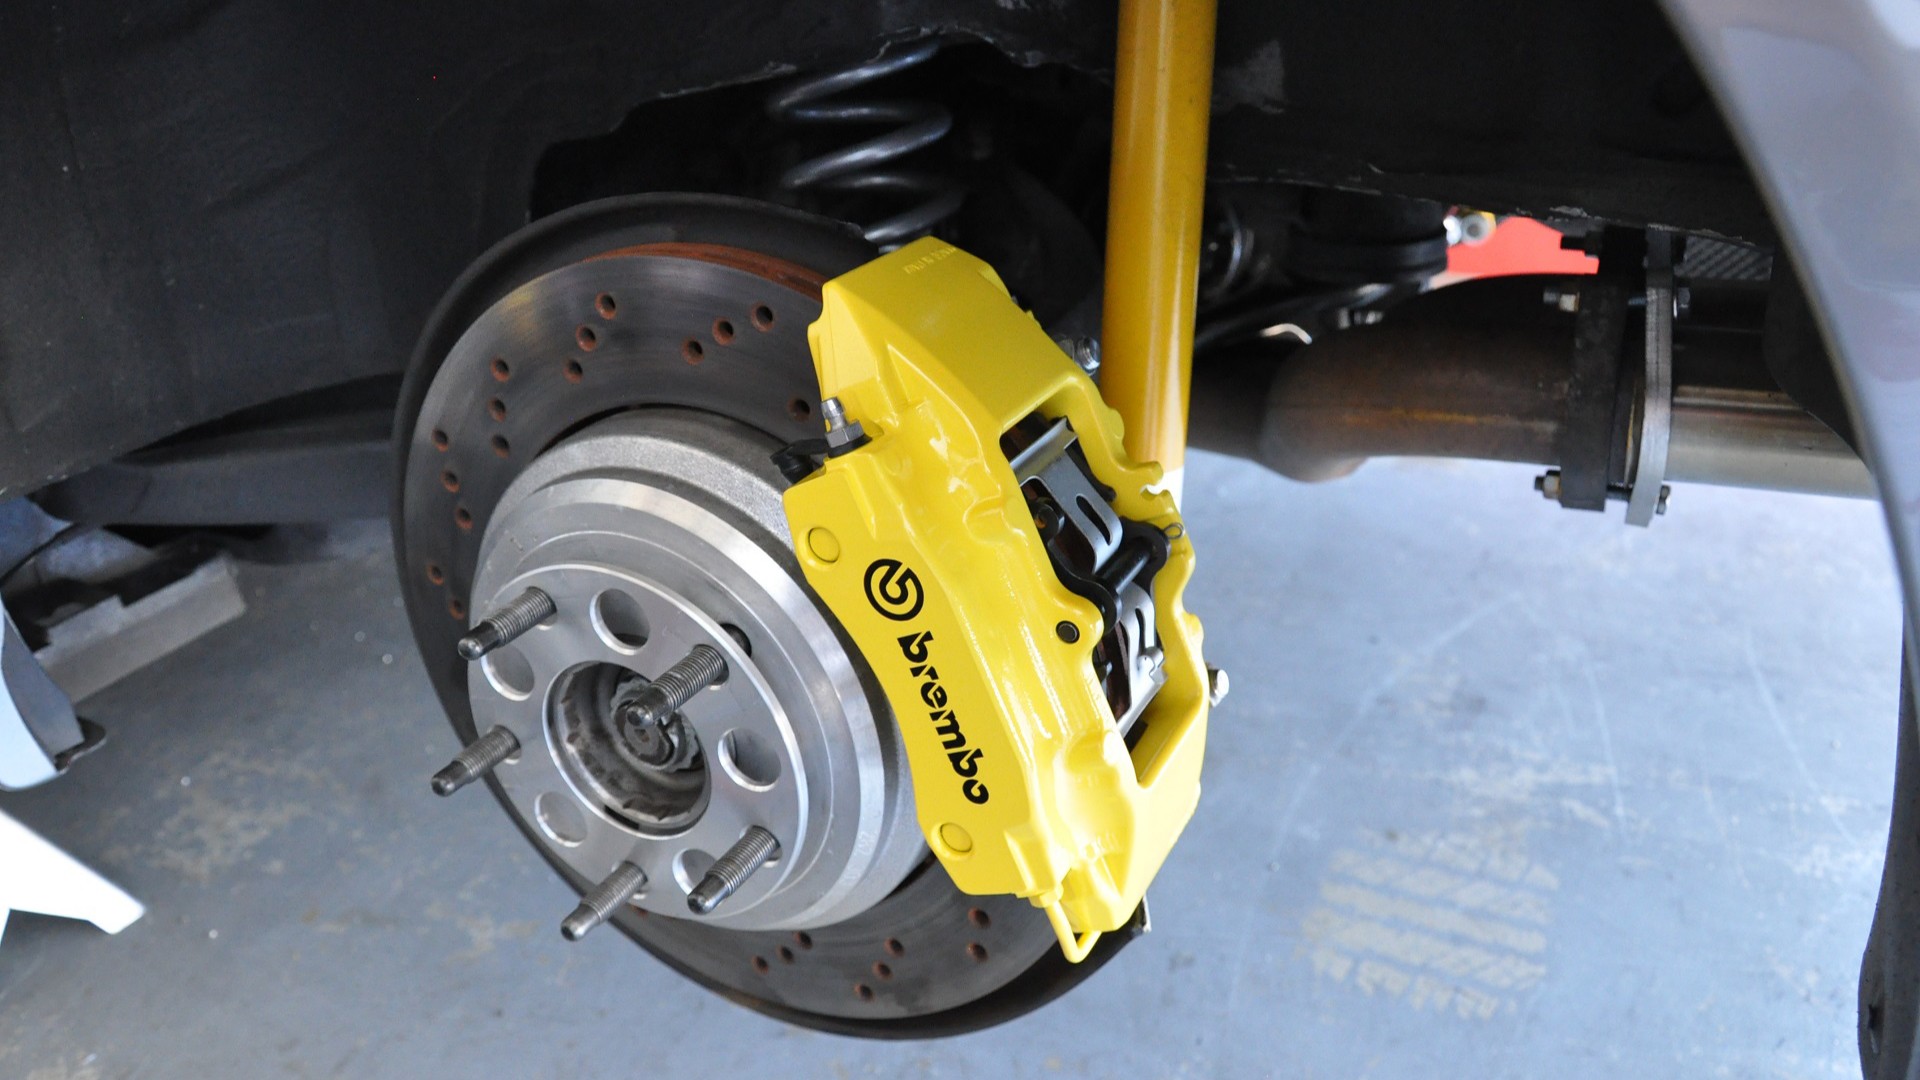
My favorite thing about this "BBK" is the weight loss (unsprung weight). The car feels lighter overall, and very tossable and fun. Looks are there too of course, not gonna lie, especially after I worked out how to get my perfect yellow finish. For street use, braking isn't that much of an upgrade, actually. OE brakes are touchier (esp zcp), work better cold and better initial bite IMO. These brakes shine once up to temp and after repeated stops, which is what suits me for my car's use. The pedal feel is insanely firm as well. I'm using OE Porsche comp textar & ate pads. Fluid is ATE Type200 (higher boiling point).Last edited by Tbonem3; 06-09-2020, 09:17 PM.Leave a comment:

Leave a comment: