Announcement

Collapse
No announcement yet.

Retirement is over Cesil

Collapse
X
 
  • Filter
  • Time
  • Show
Clear All
new posts

    #16
    Originally posted by Trawler View Post
    And what's wrong talking about key rings? :hahaha: I've just bought one :blalalala:

    On a more practical note what if any preventive maintenance is worthwhile? Lots of talk about head casket, bearings, etc. Probably a new thread on preventive maintenance might be an idea. Thought about sending the oil off for analysis. I understand this should indicate bearing wear.
    Absolutely nothing wrong with a csl key ring, we should all have one :smokin: personally I never stop maintaining car, nothing better to do:whistle: Never have enough work theses days, to much time on my hands.. as for preventative as I’ve posted on here. Rust points to me is one of the main things to don’t let take hold,, almost everything else can be unbolted and changed, When my head gasket went I didn’t really notice,, just didn’t feel quite right,, compression test confirmed it for me .. 68k mileage so did shells and rings while at it,, diy job for me fortunately,, so under £1k. :smokin:

    Comment


      #17
      Originally posted by rstoughy View Post
      Totally depends on which circuits you are going to.
      I have a friend who ran his E46 M3 for a very long time on CSL front brakes / Std rear brakes. He had RS29 pads, good fluid, braided hoses and brake cooling. Only shorter circuits would give him problems as not enough space between braking zones to get the discs back down in temperature. The ring for example was fine and he could do sub 7min with this set up.

      I use Intrax 1K2 on the race car and they are fantastic. perfect for my limited ability on suspension set up, I think with anything more then Id be in a world of pain at a race meeting twiddling knobs unaware of what i was actually doing :bigcry: :hahaha:

      KW do some pretty good stuff and are equally on par with a lot of higher end set ups. Worth serious consideration if you are looking at kits.
      Thanks for feedback, I think std brake kit for now will be good enough then:thumbs: never know somebody may donate a free bbk :whistle: Ps it’s a bare silver shell at the moment,, and have named it micshell ! And After treatment body colour will be white :smokin:

      Comment


        #18
        I now have Garage Envy :thumbs:

        Comment


          #19
          Originally posted by Chad View Post
          I know we all know what they look like, but get some pictures of her undercarriage , don’t mind if pictures are filthy :whistle:
          With Photobucket no longer free, it's a bit of a mission to get photos uploaded now, as I have to down load them from my phone to the PC at work and then upload them to Imgur, which is a bit of a ballache :whistle:.

          If you are young enough to have Instagram, the pics are on there :blalalala::gayfight:.

          Comment


            #20
            Originally posted by Chad View Post
            Absolutely nothing wrong with a csl key ring, we should all have one :smokin: personally I never stop maintaining car, nothing better to do:whistle: Never have enough work theses days, to much time on my hands.. as for preventative as I’ve posted on here. Rust points to me is one of the main things to don’t let take hold,, almost everything else can be unbolted and changed, When my head gasket went I didn’t really notice,, just didn’t feel quite right,, compression test confirmed it for me .. 68k mileage so did shells and rings while at it,, diy job for me fortunately,, so under £1k. :smokin:
            If we are not careful after key rings we will start taking about the colour of the seat stitching as per gt3 threads. :hahaha::hahaha:
            I don't know which end of a screw driver to use so have to trust a friendly mechanic to keep cesil in good order. Always been of the mind if it's not broke leave well alone, but don't want to end up with a fooked engine.

            Any thoughts on getting the engine oil analyiised?

            Comment


              #21
              Originally posted by Mike R View Post
              With Photobucket no longer free, it's a bit of a mission to get photos uploaded now, as I have to down load them from my phone to the PC at work and then upload them to Imgur, which is a bit of a ballache :whistle:.

              If you are young enough to have Instagram, the pics are on there :blalalala::gayfight:.
              Wish I was young enough, do the maths older lad lee is 40 next , So I’ve no chance :whistle:

              Comment


                #22
                Originally posted by Mike R View Post
                With Photobucket no longer free, it's a bit of a mission to get photos uploaded now, as I have to down load them from my phone to the PC at work and then upload them to Imgur, which is a bit of a ballache :whistle:.

                If you are young enough to have Instagram, the pics are on there :blalalala::gayfight:.
                Mike,
                I'm using Postimage for this thread. Id say it was actually easier than Photobucket :smokin:

                Comment


                  #23
                  So just a small update from the weekend.

                  The car has suffered from sitting around and I was in deep despair with its under-cracker condition until I done some searching online and discovered it was actually not that bad compared to a lot of them out there.

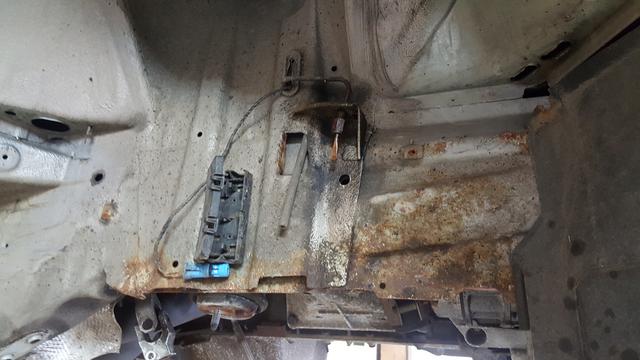
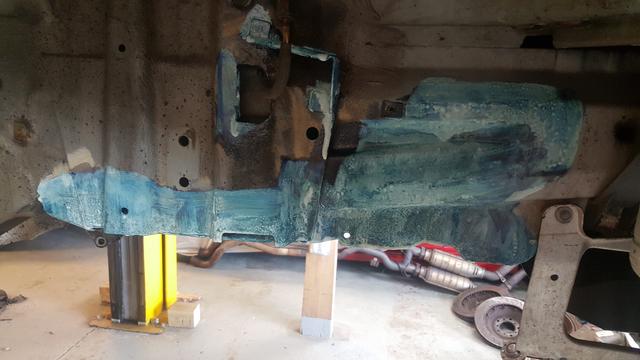
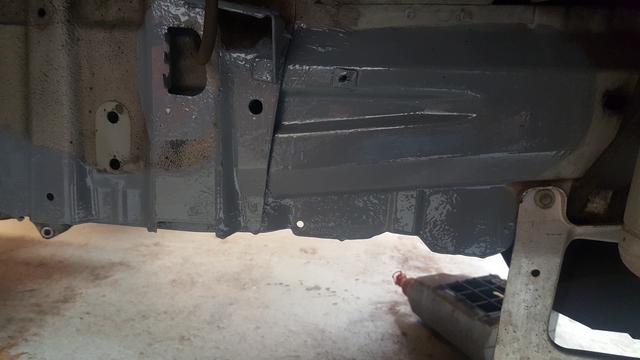
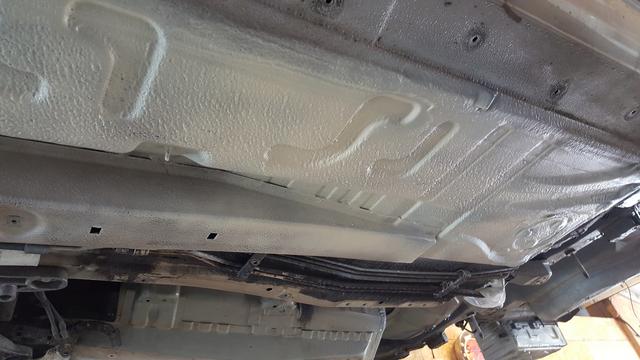
                  I stripped back any corrosion and treated with a rust modifier (3 treatments) These areas were then painted with POR15 (3 coats) then new seam sealer added, stone chipped and painted. I sourced a primer that was as close to the OEM as possible and then once all completed dusted the areas with some Silver Grey as it would have been when leaving the factory.

                  I am really happy how this is turning out but it is no easy task that's for sure.

                  There were lots of areas where the corrosion was starting to show so everything has been given the same attention as the few pictures below.

                  We need to remember these cars are old now so if not done already I do recommend getting under there and checking yours out. I recon I just caught this in the nick of time, another year and I think it would have been a different story.

                  O/S Inner wing as found


                  Area Treated


                  Primed and painted


                  Some Colour added
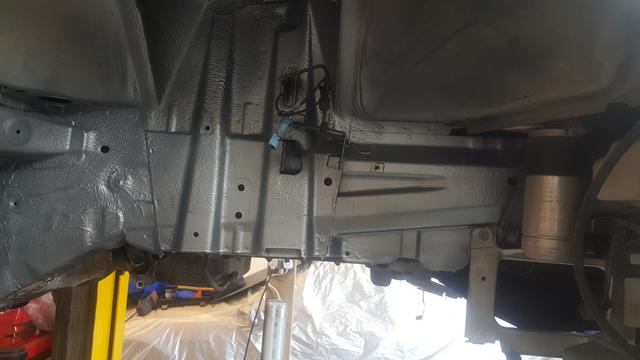


                  Floor all cleaned, stone chipped and primed as per factory finish (pre overspray)


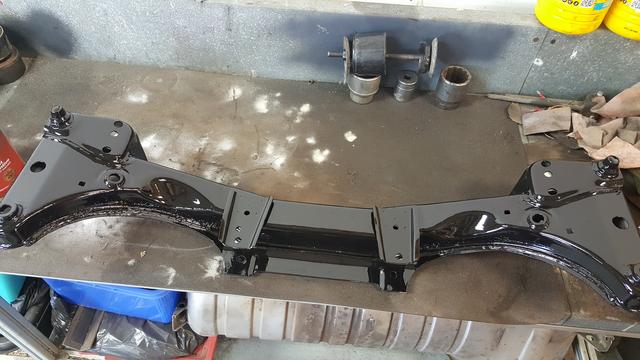
                  The engine X member and part of rear sub frame painted


                  I'll keep updating as I go.

                  Comment


                    #24
                    Yes all really typical,, around that area up front ,,, make sure you check around the rear arches lip . I found just a slight crack in sealer until I scraped it back moisture gets under. But get in early and if should be just a good wire wheel to clean up ready for prep and paint. Also around the top rear damper mount. Same thing,, Worth a check around the grommets holes front and rear foot wells , I just welded this area on track build shell ,, Ive spent hours preparing that shell used a really aggressive wire wheel To get it as rust free as possible,, also had to put a 2inch plate the entire curve or rear arches on that. Will waxoil in the grommet holes on that, worth waxoil the same on csl. Check under cill covers Around the clip holes ,, If you haven’t looked :thumbs:

                    Comment


                      #25
                      Cheers Chad :thumbs:

                      Arches are all done. Die Grinder with wire wheel and removed all sealer etc from inside both arches. All treated and re sealed / stone chipped and painted.

                      All 4 damper mounts have been buffed back and treated with POR15 grey and now look like new.

                      Any corrosion on the floor has been dealt with in the same way. It was actually around the large metal plate in the rear foot well that was showing signs of rust so that was buffed back and treated.

                      I have also removed the bracket from the battery box as that was just harboring corrosion. Not needed so chopped it and binned it.

                      Sill covers have been removed and all is good in there. Bit dirty but all solid.

                      Wings and bumper off next so I can get to the bad bits on the leading edge of the sill (where the stones hit from the front wheels)

                      Originally posted by Chad View Post
                      Yes all really typical,, around that area up front ,,, make sure you check around the rear arches lip . I found just a slight crack in sealer until I scraped it back moisture gets under. But get in early and if should be just a good wire wheel to clean up ready for prep and paint. Also around the top rear damper mount. Same thing,, Worth a check around the grommets holes front and rear foot wells , I just welded this area on track build shell ,, Ive spent hours preparing that shell used a really aggressive wire wheel To get it as rust free as possible,, also had to put a 2inch plate the entire curve or rear arches on that. Will waxoil in the grommet holes on that, worth waxoil the same on csl. Check under cill covers Around the clip holes ,, If you haven’t looked :thumbs:

                      Comment


                        #26
                        Originally posted by rstoughy View Post
                        Cheers Chad :thumbs:

                        Arches are all done. Die Grinder with wire wheel and removed all sealer etc from inside both arches. All treated and re sealed / stone chipped and painted.

                        All 4 damper mounts have been buffed back and treated with POR15 grey and now look like new.

                        Any corrosion on the floor has been dealt with in the same way. It was actually around the large metal plate in the rear foot well that was showing signs of rust so that was buffed back and treated.

                        I have also removed the bracket from the battery box as that was just harboring corrosion. Not needed so chopped it and binned it.

                        Sill covers have been removed and all is good in there. Bit dirty but all solid.

                        Wings and bumper off next so I can get to the bad bits on the leading edge of the sill (where the stones hit from the front wheels)
                        Looking great paul. Will be good for another for another 15 years :thumbs:

                        Comment


                          #27
                          Will look awesome when finished Paul!!!

                          Comment


                            #28
                            Cheers folks,
                            Been away with work so updates have been a little slow over the past couple of weeks.

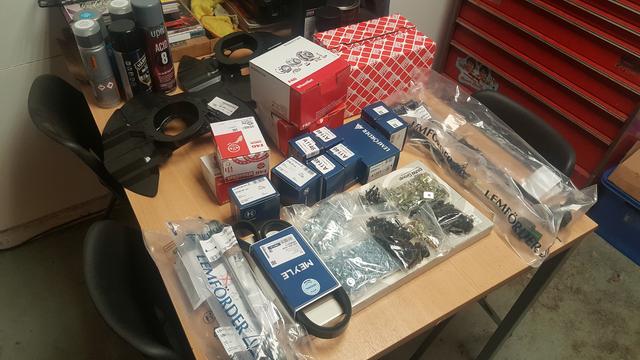
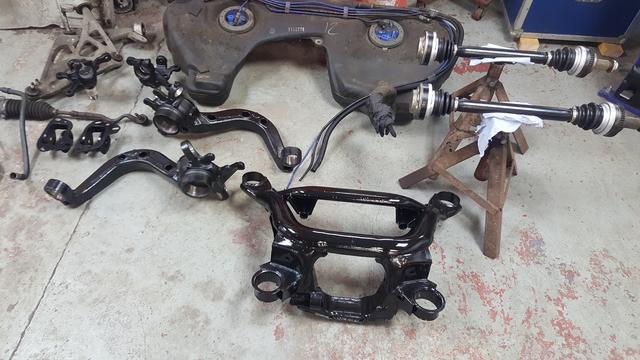
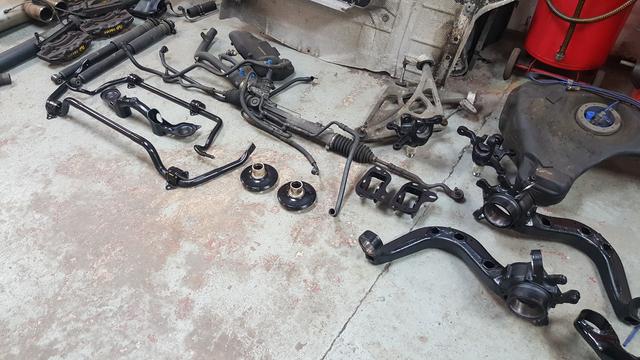
                            Most of the underside parts are now done and ready for bushes. Just been slowly buying up all the bits and bobs required and it has been so hard not to go down the "modify" route with it. I have to keep reminding myself that I have the race car which is predominately for that sort of stuff :hahaha:

                            The rear suspension mounts all cleaned, prepped and coated
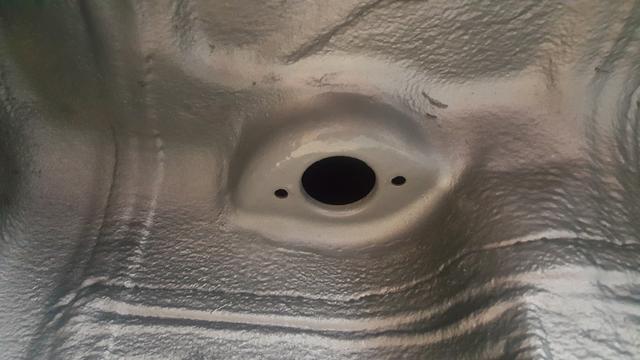


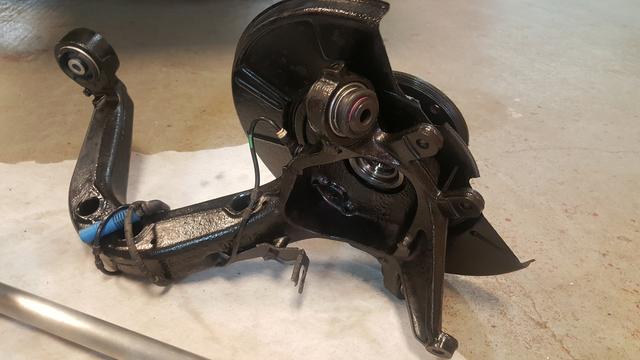
                            Front suspension mounts cleaned, prepped and coated
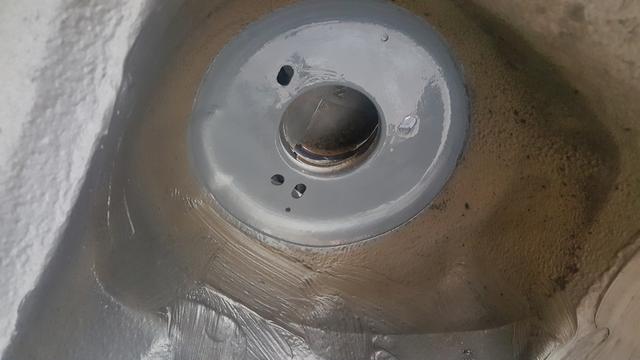


                            Rear shafts stripped (as far as they could be), cleaned, re packed and painted ready for re fitting. Just awaiting delivery of new large boot clips


                            And just some of the other parts scattered around the workshop.


                            Comment


                              #29
                              Originally posted by rstoughy View Post
                              Cheers folks,
                              Been away with work so updates have been a little slow over the past couple of weeks.

                              Most of the underside parts are now done and ready for bushes. Just been slowly buying up all the bits and bobs required and it has been so hard not to go down the "modify" route with it. I have to keep reminding myself that I have the race car which is predominately for that sort of stuff :hahaha:

                              The rear suspension mounts all cleaned, prepped and coated


                              Front suspension mounts cleaned, prepped and coated


                              Rear shafts stripped (as far as they could be), cleaned, re packed and painted ready for re fitting. Just awaiting delivery of new large boot clips


                              And just some of the other parts scattered around the workshop.


                              ~Awesome Paul, keep posting the updates

                              Comment


                                #30
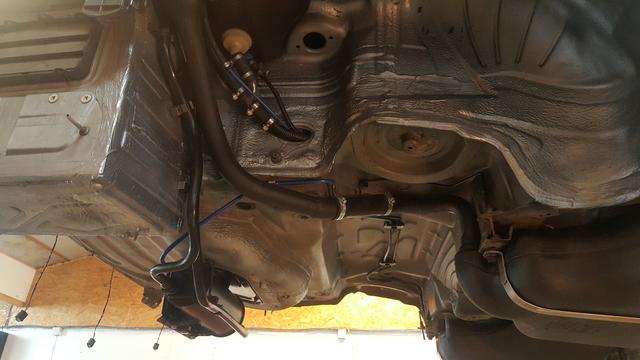
                                So started to put the jigsaw back together over a few hrs yesterday.

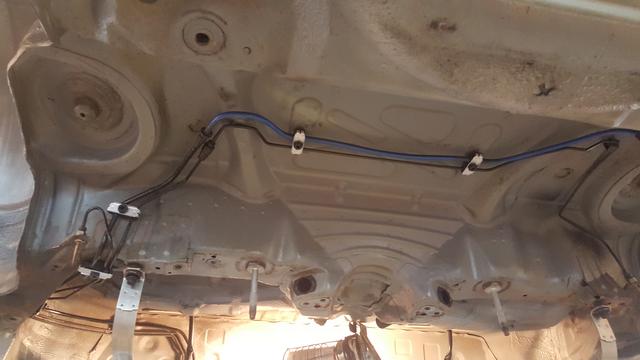
                                Pipes all done.
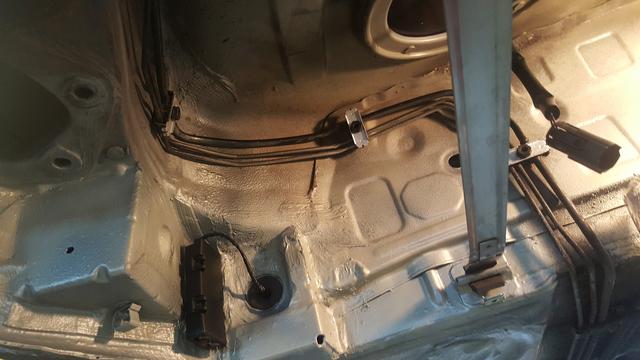


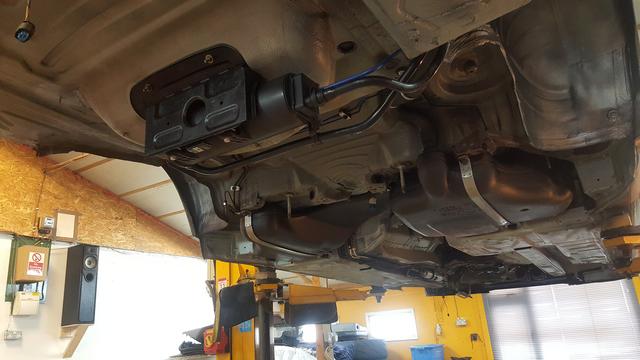
                                Tank ready to go back in,
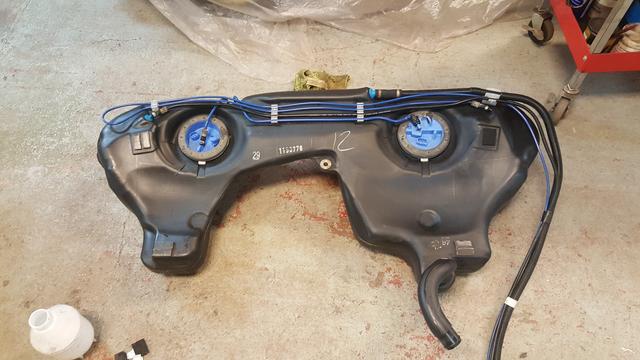


                                And all plumbed back up with filler and vapor trap re installed.


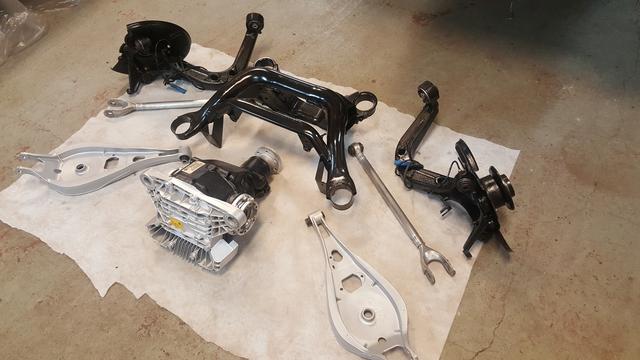
                                Started to look out all the rear subframe parts ready for assembly.
                                Every bush and bearing has been replaced so it should be nice and tight back there when complete.

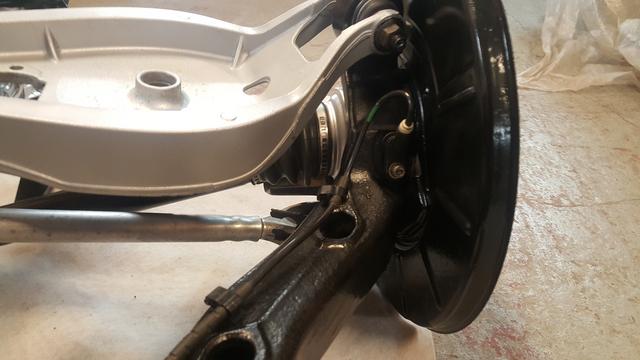
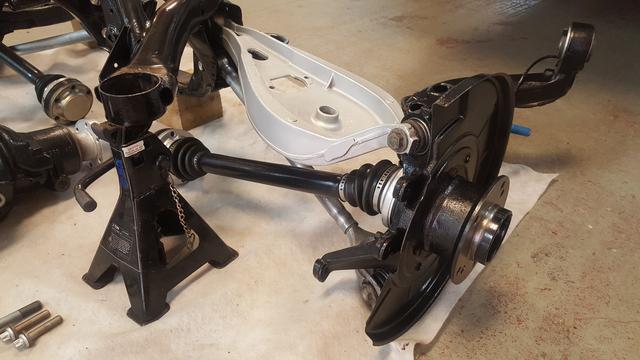
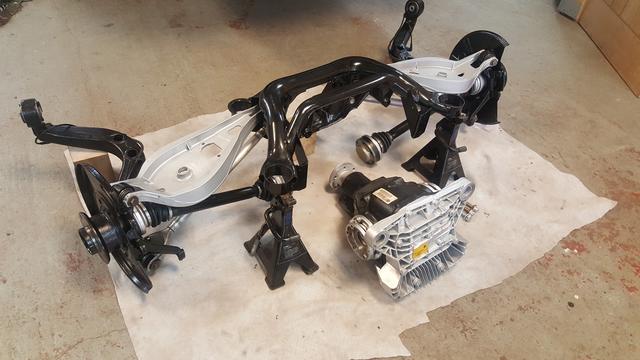


                                This coming week should see the diff re fitted and I will then get things like the heat shields done and hopefully get the subframe bolted back up.

                                Really chuffed with how its starting to look.

                                Thanks for the comments folks :thumbs::thumbs: I appreciate it.

                                Comment

                                Working...
                                X