Announcement

Collapse
No announcement yet.

Swapping driver and passenger seat upholstery

Collapse
X
 
  • Filter
  • Time
  • Show
Clear All
new posts

    Swapping driver and passenger seat upholstery

    After 100k km there was a small area on the drivers seat that started to look, well, not fully brand new. Just a hint of wear so far. You know the spot where you wear it a little bit extra each time you get in and out of the car. The passenger seat was as brand new so i decided to swap the alcantara, seat and back cushions between the two to get a brand new drivers seat that would last waaay beyond 200k km. If I'd left it as is I would probably run into real wear problems in maybe two-three(?) years time and then a swap would be too late.

    So I went about swapping it all yesterday. I was surprised how easy it was even though it took a couple of hours for me being a total imbecile mucking about with cars.

    If anyone is interested or has any questions please ask! This is what I did:


    Remove the seats from the car
    - four bolts
    - unclip connector under each seat. On the short end of the connectors there are black plastic locking devices you just pull out to release the connectors

    Do NOT turn on ignition when being disconnected. This will (I've been told) generate a fault code that needs to be reset at a shop.

    Remove the plastic shroud on the outer side of the seat.
    - small screw holding the flip-the-seat-forward-lever.
    - three torx holding the plastic shroud

    Remove the upholstery
    - Remove the whole "bum" seat cushion. All is attached by velcro plus two clips inside a long plastic piece under the seat at the very front of it
    - Remove the back cushion, all velcro
    - There is a metal wire going round the outside of the whole seat (inside the upholstery) holding all the rest into place. Disconnect this by unhooking it from itself where there is a long spring and hook under the seat at the very front. The whole spring is covered in foam (so not to rattle)
    - When the wire is free start removing all the upholstery carefully. It's attached with a lot of velcro
    - Pull up the upholstery over the seat and that's that.

    The is-someone-sitting-in-the-passenger-seat sensor
    Under the passengers bum cushion there is a sensor. Simplest way forward is to keep this cushion on the passenger side. I carefully removed the sensor and glued it back on to the other cushion since I wanted to swap the cushions.

    Put everything back in reverse order
    - If your seat is at it's lowest height setting at the rear, getting the side plastic shrouds back is a headache. Due to a tight fit between the folding seat wire mechanism and the seat edge lip that you need to get the shroud under. Even though just in one particular spot, slight and careful violence required. If that's not an oxymoron.


    #2
    Great idea and good write up, ideal for the High milers amongst us.

    Out of interest, can you buy new seat covers/upholstery?

    Comment


      #3
      Originally posted by sailorbaz View Post
      Great idea and good write up, ideal for the High milers amongst us.

      Out of interest, can you buy new seat covers/upholstery?


      Shop used cars for sale on PistonHeads. Find and buy your perfect used car with PistonHeads Classifieds.

      Comment


        #4
        Great contribution thanks.

        This looks like it could be one of those jobs I regret starting 30 mins in (like all my DIY) but I'll give it a go. I'm also going to plastidip the seat backs in black to protect them whilst I'm at it.

        I'll report back.

        Comment


          #5
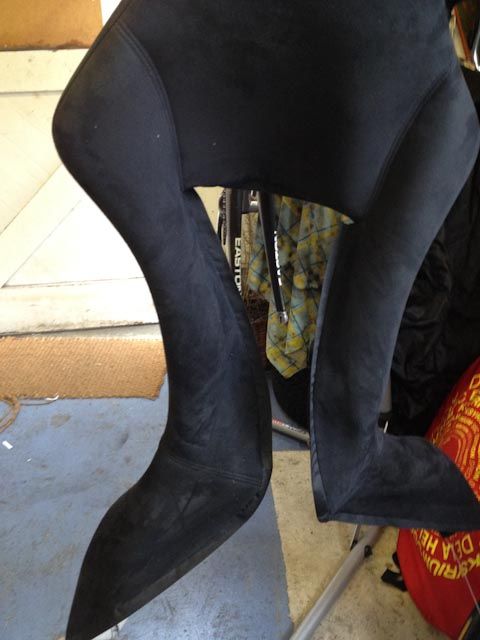
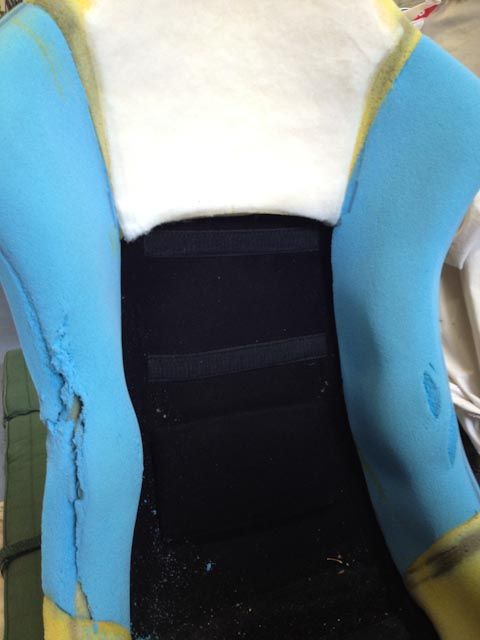
          Swapped the seat covers today. The guide is excellent, nothing too difficult. I'd allow three hours so as not to be rushed. Here's the upholstery off the seat.


          Things I noted, the foam bolster on the drivers side where you get in and out was starting to deteriorate, nothing too bad but noticeable. Cover went on again over it fine.


          Getting all the velcro in exactly the right place was a bit fiddly and reconnecting the wire hook was a little awkward because you need to make sure it is pulled tight all the way round to get enough to re-join. Took a few attempts.

          And it is true, there is very little clearance between the side plastic shrouds due to the tight fit between the folding seat wire mechanism and the seat edge lip that you need to get the shroud under. Also took a few attempts.

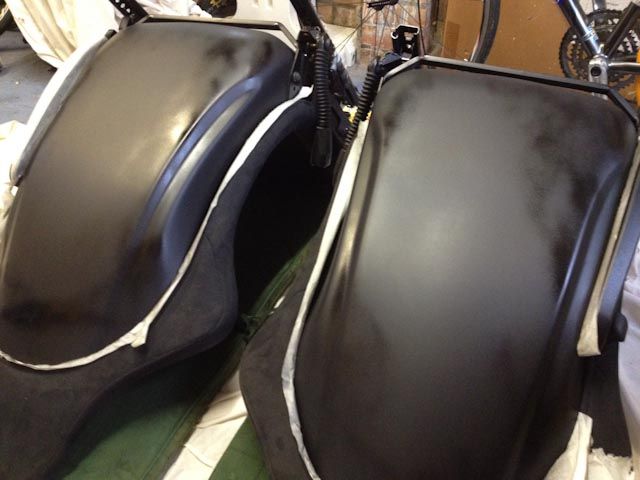
          As the seats were out of the car I took the opportunity to plastidip the backs to protect them. Seemed to work really well, here they are drying :


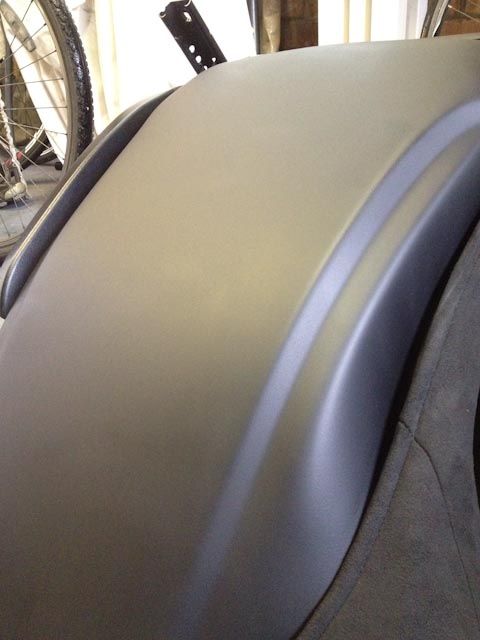
          And after a few coats. Leaves a great matt finish and hopefully will give a layer of protection to stop them getting scuffed.
          Even if never peeled off in the future I think it is a good re-furb solution if there are marks etc.


          I also bought some clear-coat to cover the door CSL sill plates to stop them milking...I get the feeling there is no limit to what you can plastidip

          Comment


            #6
            That looks good was there any marks on the back of the seats before you coated them ?

            Comment


              #7
              Originally posted by Mark CSL View Post
              That looks good was there any marks on the back of the seats before you coated them ?
              They were in really good condition, just a few little scuffs. It's was just annoying because you basically can't even touch them without the white undercoat potentially coming through. So now can relax a bit hopefully.

              A few coats of plastidip seems to covers any marks, and if you aren't happy you can always peel it off.

              Comment


                #8
                Thats looks like a great job, plastidip seems to be very handy from what I have seen of it.

                Heard of a guy I know here making a novel mod, now I have not seen them yet but when I do I'll take pics. Basically he has got the recaro bucket BMW performance seats and got the material used in the csl and has got them reupholstered so now he has reclining seats.
                They look first class from what I have been told.

                Comment


                  #9
                  Hi, The seatbacks look amazing after applying plastidip!!

                  For future reference before I decide to do mine..

                  I take it you used the spray on plastidip as per the link below


                  Does the plastidip fill any scratches on the seat backs or does it just cover imperfections and they are still visible once the plastidip has been applied?

                  Thanks

                  Comment


                    #10
                    That's the stuff. Also got some clearcoat in the same.

                    You can cover up deeper scratches by just putting more layers on plastidip on. In theory it takes 4 hrs to dry, but I put on several layers with about 25 mins between (checked it wasn't tacky to touch) and it covers up defects to the point where you wouldn't notice. You don't even need to worry to much about masking off, it's not paint and just peels off.

                    I can't comment on it's durability yet as the seats have only just gone back in the car, but it is relatively cheap, looks really good and must offer more protection than nothing. Plus as I say, you can always peel it off.

                    Comment


                      #11
                      They look great Mark - brought the seat backs from near perfect to perfect condition! :-D Next up the rear seat centre section!?

                      Comment


                        #12
                        Yes, think I'll do that. Also very prone to scuffs.

                        I am struggling with the clearcoat though, I can't get a nice finish on the replacement door sill strips I bought and have peeled it off again. Just ends up way too cloudy compared to the shiny natural finish (before they go milky…). So I'd hold fire on that one.

                        Comment


                          #13
                          Originally posted by 0836whimper View Post
                          Yes, think I'll do that. Also very prone to scuffs.

                          I am struggling with the clearcoat though, I can't get a nice finish on the replacement door sill strips I bought and have peeled it off again. Just ends up way too cloudy compared to the shiny natural finish (before they go milky…). So I'd hold fire on that one.

                          I did mine with armor fend 4 years and still like new :thumbs:

                          Comment


                            #14
                            Nice. I'll follow suite, those strips aren't cheap !
                            Could you link to the exact product ?
                            Thanks

                            Comment


                              #15
                              This is where i get my film but there are companys here in the uk that sell it
                              Protect your vehicle with Auto Paint Guard's top-quality paint protection services in Tampa. Contact us today for an exceptional paint protection experience.


                              Auto Paint Guard Inc. 1,497 followers · 15 talking about this. We offer the best paint protection available and the “cleanest” installs due to our extensive experience of 20 years. Stop by and check...

                              Comment

                              Working...
                              X