Announcement

Collapse
No announcement yet.

Preferred exhaust manifold studs?

Collapse
X
 
  • Filter
  • Time
  • Show
Clear All
new posts

  • Arith2
    replied
    Originally posted by PSUEng View Post

    That's the next Milwaukee M12 tool on my list. So, you removed the nuts with that? When you say you had to move the N54 studs around, what do you mean--change position and mix/match with the original studs? I need to order some studs, and on the fence with the N54 or stock studs. As you may know from my other thread, I'm doing the SS headers as well.
    For SS headers, just do all S54 studs. Sometimes they will stick out too far and you can't tighten one down under a pipe. It's super annoying. I upgraded from Megan headers and while they noce headers, getting them on was not that easy. The SS headers took 10 minues to get in and torque.

    Leave a comment:


  • PSUEng
    replied
    Originally posted by Arith2 View Post
    I recently put my SS headers on and it was definitely better having stock studs. I previously had N54 studs and I had to move them around just to get sockets on the nuts. That upper 6th stud wasn't too bad. I use my electric ratchet on all but 5 bottom nuts so it took about 10 minutes versus the hours last time. I've also learned to move the reservoir and unbolt the metal coolant hose. Start to finish from lifting to driving out was about 5 hours. Everyone should invest in an electric ratchet. It's seriously worth it.
    That's the next Milwaukee M12 tool on my list. So, you removed the nuts with that? When you say you had to move the N54 studs around, what do you mean--change position and mix/match with the original studs? I need to order some studs, and on the fence with the N54 or stock studs. As you may know from my other thread, I'm doing the SS headers as well.

    Leave a comment:


  • Arith2
    replied
    I recently put my SS headers on and it was definitely better having stock studs. I previously had N54 studs and I had to move them around just to get sockets on the nuts. That upper 6th stud wasn't too bad. I use my electric ratchet on all but 5 bottom nuts so it took about 10 minutes versus the hours last time. I've also learned to move the reservoir and unbolt the metal coolant hose. Start to finish from lifting to driving out was about 5 hours. Everyone should invest in an electric ratchet. It's seriously worth it.

    Amazon.com: Milwaukee 2457-20 M12 Cordless 3/8" Lithium-Ion Ratchet (Bare Tool) : Tools & Home Improvement

    Leave a comment:


  • Slideways
    replied
    Just saw this trick for installing the stock exhaust manifold studs using one of the valve cover cap nuts -

    Click image for larger version

Name:	1.png
Views:	662
Size:	350.3 KB
ID:	176095 Click image for larger version

Name:	2.png
Views:	667
Size:	327.0 KB
ID:	176096 Click image for larger version  Name:	3.png Views:	0 Size:	319.3 KB ID:	176094


    Last edited by Slideways; 07-15-2022, 12:19 PM.

    Leave a comment:


  • Cubieman
    replied
    Originally posted by PSUEng View Post

    In prep for my SS system install I’m looking at how to delete the SAP; would you be able to direct me to some good info on how to code this out? It seems one needs to disable the SAP DTCs but also the “cold start”? I’ve no experience coding on this car.
    You can use NCS, but I would recommend a much easier method using the MSS54 Binary Modification Tool:

    Below is a list of downloads hosted by ECUWorx, the Binary Modification & Remap Tool will always be available from this page so be sure to grab the latest version from here. Recently Updated! – MSS65 / BMW E6x M5/M6 Binary Modification & Remap Tool BMW E6x M5/M6 Binary Modification Tool – Build 1.6.3 (exe) BMW E6x M5/M6 Binary Modification Tool – Build 1.6.3 (zip) Recently Updated! – MSS60 / BMW E90/E92/E93 M3 Binary Modification & Remap Tool BMW E90/E92/E93 M3 Binary Modification Tool – Build 1.9.5 (exe) BMW E90/E92/E93 M3 Binary Modification Tool – Build 1.9.5 (zip) MSS6x Flasher


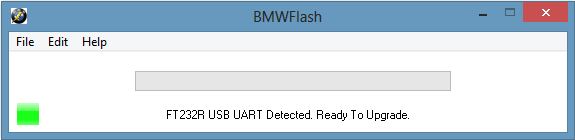
    You also need the program "BMW Flash"


    You will also need a KDCAN cable/laptop, instructions for the program are on the site as well.


    First and foremost, ECUWorx offer no warranty of any kind, we are not liable if you break your car by incorrectly flashing your ECU/DME. You do so at your own risk! You will require the following: A copy of the MSS5x Binary Modification Tool, available here A fully charged laptop and a copy of BMWFlash or MSSFlasher. Available from here: BMWFlash or a copy of from here: MSSFlasher A FTDI based OBD2 diagnostic cable such as a BMTechnic cable / BM or a KKL Vag-Com cable. yIf you don’t have one, you can buy one from here A trickle charger

    Leave a comment:


  • PSUEng
    replied
    Originally posted by Cubieman View Post

    I put a block off plate/new gasket on for the SAP and then coded it out. Most definitely makes it look like something is missing in the engine bay but you get the race car weight savings!
    In prep for my SS system install I’m looking at how to delete the SAP; would you be able to direct me to some good info on how to code this out? It seems one needs to disable the SAP DTCs but also the “cold start”? I’ve no experience coding on this car.

    Leave a comment:


  • mtpktz
    replied
    Originally posted by JeremyJames View Post

    Where are you ordering from? Don’t forget to order the air valve control gasket. I’d also order the exhaust seal rings and the corresponding torx bolts and copper nuts. I ended up dropping my entire system as one piece once disconnecting from my headers so I only had to replace one set of seals+bolts/nuts. My exhaust seals upon removal were absolute trash.
    Just as a heads up, the EGR gasket you have on order is 11727514860, however, RealOEM shows the part number as 11727505259 for the M3 - not sure if there's truly a difference.

    Click image for larger version

Name:	EGR Gasket.jpg
Views:	638
Size:	124.1 KB
ID:	170352

    Leave a comment:


  • SQ13
    replied
    Originally posted by JeremyJames View Post

    Where are you ordering from? Don’t forget to order the air valve control gasket. I’d also order the exhaust seal rings and the corresponding torx bolts and copper nuts. I ended up dropping my entire system as one piece once disconnecting from my headers so I only had to replace one set of seals+bolts/nuts. My exhaust seals upon removal were absolute trash.
    FCP. Deleted the SAP so I’m good there. This’ll be my fourth header install so it shouldn’t be difficult. I replace the seals and hardware every time.

    Leave a comment:


  • JeremyJames
    replied
    Originally posted by SQ13 View Post
    I can’t believe I’m gonna spend $72 on the studs. Oof
    Where are you ordering from? Don’t forget to order the air valve control gasket. I’d also order the exhaust seal rings and the corresponding torx bolts and copper nuts. I ended up dropping my entire system as one piece once disconnecting from my headers so I only had to replace one set of seals+bolts/nuts. My exhaust seals upon removal were absolute trash.

    Leave a comment:


  • JeremyJames
    replied
    Originally posted by SWRT_M3 View Post


    I think you meant to say 11127593376. I started ordering the complementary parts while I wait for the SSV1 to arrive from the recent GB, your question and member's feedback is much appreciated.

    a bit more info on the studs for those wondering.

    07129900298 (S54 Studs) M7x30
    11127593376 (N54 Studs) M7x39 with torx head (can also be found on the S55)

    Great catch dude! I scanned my FCP receipt too quickly as I ordered both sets of studs and copied the wrong #. I placed an order for both the standard S54 studs and also the N54 studs so I could make a better decision after having both in my hand. I was afraid I wasn’t going to use the N54 studs. Thank you for this call out. I edited my previous comment with the correct part number to prevent any confusion. BMW-11127593376 was in fact the studs that I ordered and installed.

    Leave a comment:


  • SQ13
    replied
    I can’t believe I’m gonna spend $72 on the studs. Oof

    Leave a comment:


  • SWRT_M3
    replied
    Originally posted by JeremyJames View Post
    I am happy I put in the extra efforts to install the N54 studs. I probably would’ve lost my entire mind if I had to double nut those studs back into the head with the engine in the car. I was able to torque all the nuts other than 2. That CYL 6 top nut was an absolute pain in the ass in every aspect due to the coolant pipe but slow and steady got her done. A little trick I did to keep the coolant clean was I siphoned the coolant reservoir before removal. I had 0 coolant loss or mess. I corked the coolant pipe and of course removed the air pump assembly. I ended up disconnecting the headers from the exhaust and then dropped the entire exhaust system as a whole it’s a lot easier to remove the exhaust than fight potentially corroded bolts and nuts and also I didn’t have to replace any gaskets other than the headers to exhaust and on the cylinder head, obviously.

    The trick for this job is definitely having every single possible combination of short, long, medium extensions, swivels, flex heads, and wobble sockets. Having the right tools will make or break this job for sure. I did this job solo but a helping hand would save the up and down.

    I appreciate your guys input / advice. For the people viewing this thread in the same predicament, the part # for the N54 torx stud is #11621318568 x18.

    Cheers!

    I think you meant to say 11127593376. I started ordering the complementary parts while I wait for the SSV1 to arrive from the recent GB, your question and member's feedback is much appreciated.

    a bit more info on the studs for those wondering.

    07129900298 (S54 Studs) M7x30
    11127593376 (N54 Studs) M7x39 with torx head (can also be found on the S55)
    Last edited by SWRT_M3; 06-01-2022, 08:56 PM.

    Leave a comment:


  • JeremyJames
    replied
    I am happy I put in the extra efforts to install the N54 studs. I probably would’ve lost my entire mind if I had to double nut those studs back into the head with the engine in the car. I was able to torque all the nuts other than 2. That CYL 6 top nut was an absolute pain in the ass in every aspect due to the coolant pipe but slow and steady got her done. A little trick I did to keep the coolant clean was I siphoned the coolant reservoir before removal. I had 0 coolant loss or mess. I corked the coolant pipe and of course removed the air pump assembly. I ended up disconnecting the headers from the exhaust and then dropped the entire exhaust system as a whole it’s a lot easier to remove the exhaust than fight potentially corroded bolts and nuts and also I didn’t have to replace any gaskets other than the headers to exhaust and on the cylinder head, obviously.

    The trick for this job is definitely having every single possible combination of short, long, medium extensions, swivels, flex heads, and wobble sockets. Having the right tools will make or break this job for sure. I did this job solo but a helping hand would save the up and down.

    I appreciate your guys input / advice. For the people viewing this thread in the same predicament, the part # for the N54 torx stud is #11127593376 x18.

    Cheers!
    Last edited by JeremyJames; 06-02-2022, 07:15 AM.

    Leave a comment:


  • HennyM3
    replied
    Originally posted by Arith2 View Post
    How do the N54 studs versus stock studs fit with SS headers?
    Recently installed ssv1 headers on a friend's car. When removing his previous headers, I saw that some studs were n54 studs and some were kept stock. Since the mounting flanges are decently thin, it didn't matter much to have the n54 studs since the stock-sized studs had enough threads to catch the nuts.

    There is one stud location where you'd have to be aware of is the top-most stud on cylinder 6. The length that the n54 stud protrudes has very little clearance between the piping to put on a nut if the rest are already mounted. So that would be one place where i would keep the stock stud

    Leave a comment:


  • Arith2
    replied
    How do the N54 studs versus stock studs fit with SS headers?

    Leave a comment:

Working...
X