-
I forgot to conclude the light correction I did on the car.
Finished the sides of the vehicle
Thought this was a cool shot, with direct sunlight on paint:
This was intersting to me, so I took a pic. This is in the garage with indirect light. It was enough light to show the blue color in Jerez, but low and indirect enough to not show any of the metallic. Looks like a flat navy blue. I've seen now 4 different colors that the paint can appear as depending on the lighting.
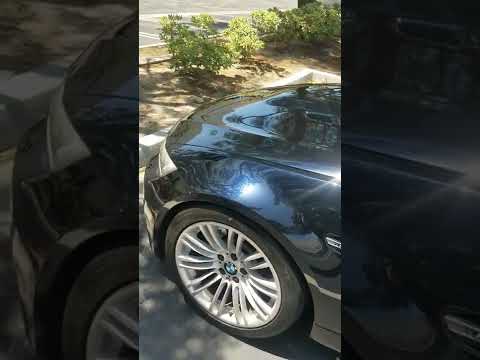
All done with the mild polish and semi-ceramic sio2/tio2 CMX coating. This will hold me over until I decide on staying with sealants or doing a ceramic coating.
Now, out in sun. Just lowering springs (swift) so far, no other mods.
Leave a comment:
-
Same sealant or wax I use for the vehicle, nothing special. I'm relying on 1. little exposure to sun 2. below average annual mileage & 3. annual polishing to keep them looking good. It's actually been 6 months now since I did it, and they look the same still.Originally posted by maupineda View PostLeave a comment:
-
Yeah Tyler, You have been doing a great job with it as usual. For me I would want to slap on BBS LMs or something like CHs or similar design wheels if i Got an E90 M3.Originally posted by Tbonem3 View PostLeave a comment:
-
Thanks Ejaz! You've seen some mods on IG. I hope to update this thread a little faster to share those changes soon.Leave a comment:
-
Post polish:
Roof, boot, both bumpers and headlights/taillights done. Have both sides left to do. No other work needs to be done to the exterior - grilles, gills, emblems, lights, trims are all in great shape.
Leave a comment:
-
Front end restoration. Wet sanding the headlights, then polishing them and the front bumper/grilles.
The headlights were in surprisingly bad shape for a 48k mile garaged car, particularly the driver side. I was warned not to dig too deep so as not to ruin the UV protecting layer. And you can't simply replace the plastic lens like you can on the E46. However, the damage was severe enough to need to level the plastic. I figured with the car being out of the sun a lot, and with my periodic polishing, I'd be able to keep the headlights always looking pretty new, and avoid having to replace them, so I went forward.
(Pardon the orientation of some of the photos)
Existing condition:
And go
I would go for a bit, then check my work. I probably could have stopped here, and it would have looked great after clearing it up, but I still saw fading and scratches that went deeper still, so I went a bit farther down
Then moved to the corner, which wasn't as bad and didn't need as much sanding
Satisfactory
Taped the edges of the painted fender/bumper for this next step of compound
Even after a few passes, it's already looking good
One more set of passes
Passenger side was faster
(*forgot to take pic of pass side after compound)
So headlights sanded down and compound used to remove sanding marks and smooth it all out. Now time to high polish and seal them as well as the chrome grilles and the whole bumper - notably the area covered by the front license plate holder.
I used a very mild green LC CSS pad with the mild Mother's CMX polish and seal in 1 product. Same product I'll use to polish the whole car after I clear up every panel in piecemeal.
tbc...Leave a comment:
-
Thanks Mike, I will DEF not be wet-sanding this car! Just the headlights.Leave a comment:
-
Great work ! Car looks super clean. And yes the orange peel is terrible on mine too. I wouldn't dare wet sand my clear. Such a shame for a 70k car.Leave a comment:
-
More paintwork. Tackled the front fenders and hood. Hood had the most imperfections (obv), though still not bad at all.
Clay bar didn't pick up anything really:
Fenders are plastic, so it takes more time to build enough heat to get any real cut since plastic vibrates more than metal. Luckily the car is in great shape, so not much cut was needed.
We good
There were 2 bad chips, so I filled them in (found a cheap bottle of Volvo midnight blue metallic that matched well to Jerez).
Then later, after doing the fenders, I did the hood with chips filled in.
Blue hydrotech euro foam with Griots correcting cream
In this photo, are the 2 chips from above that you would have seen that are now, for intents and purposes, "invisible."
Close up of the worst one:
This was just a 1 step. Didn't need to dig too deep, and didn't do a final polish since I'll do the whole car at a later time. I did, of course seal the paint after this step. I just used some SiO2 "ceramic" spray wax for now.
I'll do the headlights and front bumper next. Need some wetsanding first on the headlights, so it'll take a little while on its own.

 Last edited by Tbonem3; 10-06-2022, 04:42 PM.
Leave a comment:
-
Trying to catch up on the updates...
My favorite DIY - Paint work!
I don't quite have as much time on my hands as I did in 2020/2021, so I'm correcting the paint in stages. Here, I'm starting with the roof and the trunk lid/back & rear bumper.
Car was taken care of, so the paint isn't too swirled or scratched, nor is it very rough. I still used the clay bar, but it really didn't pick much up.
New ///M emblem on the back:
Man this orange peel is egregious. Oh well, still very pleased to have a car with all original paint again, and in such good condition
For now, I'm just doing a single step - Blue LC hydrotech pad that has good cut and good finish, but on a DA, it's not that powerful. There's no reason to dig too deep anyway - this car has no oxidation, no real etchings, barely any RIDS etc. I have plenty of sealants I can use to lock the paint until I do a final polish with a softer pad. I use bead maker, carnauba paste, Turtle Wax sio2 sealNshine, Mother's CMX (tio2/sio2).
Then, once I'm done with the whole care, at a later date, I'll do a final polish/sealant AIO to finish it out. From there, I should be able to just do annual or bi-annual cleaner wax or polish/sealant 1 steps to keep it glossy. I know ceramic is the move, but I don't wanna get driven crazy by hi-spots, and I enjoy polishing/waxing the cars. We're talking fine polishing, so there's no concern of running through the clear.
Leave a comment:
Leave a comment: