Originally posted by Casa de Mesa
View Post
-
Tyler - thanks for the detailed steps on the P/S shims.Will likely do this over the winter, doesn't look that bad. Wish I had done that when I had the car disassembled.
Yes please! 😀Originally posted by heinzboehmer View Post
I've been delaying the Slon strut brace just due to competing projects on other cars. Very curious about this. Almost looks factory.
EDIT: I just went over to your build thread. Holy hell Heinz! That strut tower conversation there is awesome.
Last edited by Casa de Mesa; 09-28-2025, 03:48 AM.Leave a comment:
-
No need to make it a race car! Here's my solution for the triangulation:Originally posted by Tbonem3 View Post
Keeps all the street car comforts and the braces come off with four nuts for working on the engine.
I really need to get to posting all the stuff from this project so others can adopt on their cars...Leave a comment:
-
Yes that'd be awesome. Maybe if/when I convert this thing to a race car!Leave a comment:
-
Triangulating the strut towers to the firewall will help gain you some of that E90 steering feel you're looking for
Leave a comment:
-
I forgot I had bought a new gas fill neck-gasket IDK what to call it, but my original was badly cracked. I had assumed it was a hard job, so I put it off until 0-60motorsports did his and said it was easy.
Really easy actually. I coated the new one in 303 aerospace which both helped it slip on and made it look fresh rather than so ugly with some sort of protective gunk it comes with.
I also got around to doing the Powersteering pump shim mod... After driving an E9x m3, even with steering servo on low, you get real disappointed when you get back into the ol' E46. The E90's steering is so stiff and heavy, but my favorite part is that it's so linear - it feels stiff from 0 whereas the E46 feels pretty loose at first, then gets a bit better (and I have zhp rack plus wide front wheels/tires!). So I was very interested in something that would reduce boost and get me closer to the E90 feel.
Got shims from @bigjae. Volke said each is about 12.5% reduction iirc. I settled on 2 shims for 25% - didn't want to get too crazy.
Work is done from below, but I removed my airbox "trunk" for more light and so I could refill the PS reservoir at the end. Loosen the big nut on the line
And fluid will drain. Maybe you lose like half a quart? You will definitely need some ATF on hand, not more than a quart/liter imo. Though not a bad time for a complete flush.
Now, remove the regulator with a big hex like 26mm - I only had standard that big and 1-1/16th was perfect
This was the hardest part. The little valve is pretty stuck in there (hydraulically I mean, I think) and it took many tries to coax it out. In the end, the only method that worked for me taking 3 skinny cynlindrical magnets, grouping them together, then pushing on the valve, then pull to use both spring force and magnetism to pull this guy out. It barely worked, but enough to grab it and pull it out.
There's one shim on there by default, now I have 3 total
Topped off and ready to test!
Unfortunately, it didn't make things much better. There does seem to be more effort needed, so I guess the 25% claim is pretty spot on, but the initial "play" is still there, and the springy character remains. It also feels like it gets stiffer in a gradual way. Maybe I could add another shim, but I feel like I've scratched this itch and will let sleeping dogs lie. The E90 can reign supreme on this one.
At least it's an almost free mod!Leave a comment:
-
Another round of miscellaneous updates.
Did an oil change in Nov '24. The garage is still full with remodelling bs, so I'm still working outside 😕
Still had a half bottle of Castrol to use up, but I'm now buying Motul power ester 5w50 for both this car and my E90
Then I finally finished my rear shelf setup, or at least so I thought, until I realized I still need the blind plugs for the headrest holes doh! Thanks to Avedis for the trim blanks and idea!
I've been dedicating all of my free time lately to finally getting comfortable using BMW standard tools (NCS/winkfp/INPA/etc). My E90 needs a lot (TPMS delete, battery coding, DCT tune, engine tune), so I started reading every forum and guide I could find.
Anyway, my E46 is already pretty set up coding-wise, but there was one thing I did want to do, and now I have the knowledge and tools to do so: Mtrack mode for mk60 dsc (non zcp) retrofit
Added ZCP $7MA to the VO via NCS Expert, then coded defaults to kombi and DSC. Then, since I have 996 brakes and ZHP steering rack, I decided to keep the ZCP parameters as I think it'll match up best. my 11/2003 doesn't have the cluster for Mtrackmode, so I did have to edit the trc file for the light (so I will see DSC light for MTM and DSC+BRAKE light for DSC-off).
Pictured above is DSC fully off. My only issue here is that, with the DSC yellow triangle and circle illuminated, I won't have a visual indicator that DSC is intervening (in MTM). Ofc, I should feel the brakes pulsing or fuel being cut, but I did like to see the DSC circle flash when DSC would intervene. I'm not gonna bother with the stalk retrofit.
I don't drive the car very often, but coincidentally, a local E46 guy, Italo, spotted me on the 101! Always fun to see your car captured by others.
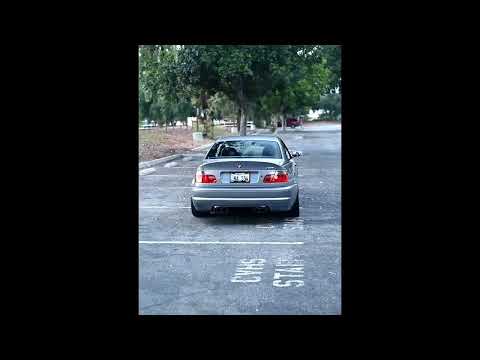
Last but not least, I made a little video of some recent actividades:
Leave a comment:
-
Bi-annual SMOG test
I posted the same thing, basically, 2 years ago, but I have something new to document this time 'round. Here's everything (hardware-wise) that I swap for the test:
Not that I drive it much nor are conditions extreme, but the inside of the (karb) box looks brand new still as does the OE filter. TBs still pretty as well and those I cleaned like 8 years ago (20k)
All set, hardware-wise. Doesn't take long at all. Now to tune.
I've been tuned for about 8 years and have flashed back and forth probably twice that many times. I was starting to get close to the flash counter and, obviously, didn't want to brick the ECU, so I went ahead and finally purchased MSSflasher so that I could reset the FC, and flash faster than BMWflash (free) can do.
Smooth sailing
While flashing my alpha N tune (Evolve-R) back to the car, I wanted to lower the front just a tiny bit. After going down to 343lb rates in the front, I'm still playing with how low I can go without scraping the car in some of my favorite sections of canyons out here. I don't love how the car looks at 13.5" and above, but I know the car needs travel. Luckily I've the hardware and enough spring/light enough car that gives maximum travel, but lower ride height.
Took the opportunity to check on my new HEL brake lines, looking perfect particularly the rubber grommet that holds the line to the strut. The cheaper lines' grommets just crumble in my experience and don't fit too well anyway. HEL is perfect!
I was waiting until the next time I had the strut brace off to install my MPOWAAAAA decal to the airbox.
Light polish and clean
Look at the weave. Just look at it.
Measured and marked
Proper
Next thing to do will be a decon, perfecting polish, and application of ceramic coating, most likely Gyeon Pure Evo that I still have about 40ml of (used 10 on the E90's E88s), but I'm still building out my garage and suffering through a kitchen remodel, so it may be a little while plus the E90/X7 are getting more focus these days :/
Coming up on 15 years of ownership later this year. Still gives me big feels
Leave a comment:
-
Thanks bro! Sadly, no updates for a while, not that there's much left I want to do to the car.Leave a comment:
-
I've lost count how many time's i've viewed this thread to keep up with your updates - such a clean and meticulous build!Leave a comment:
Leave a comment: