If this is your first visit, be sure to
check out the FAQ by clicking the
link above. You may have to register
before you can post: click the register link above to proceed. To start viewing messages,
select the forum that you want to visit from the selection below.
Made a quick video of a cold start, cruise and WOT to show how the car sounds with the new muffler. Still a bit quieter than expected, but that's not a bad thing
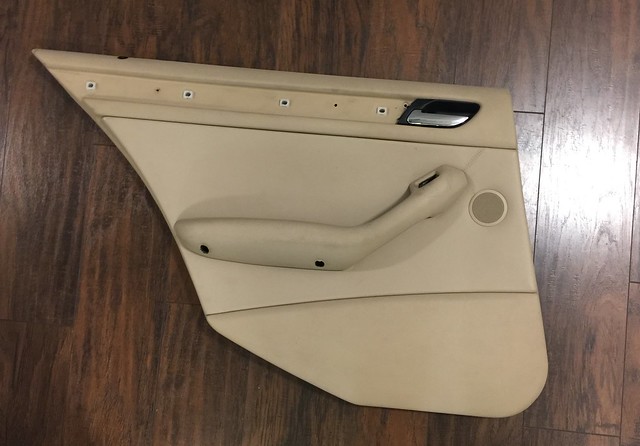
I picked up some black door panels pretty cheap to experiment with as I've been wanting to try a two-tone look.
Hellbeige (literally)
First I drilled out all of the plastic rivets on each panel to separate them. Once I pulled them apart, I swapped the beige insert into the black panel and used some 3/8" long #8 screws to secure it. I can't tell a difference from before, seems very solid and no squeaks or rattles so I would say it was a success.
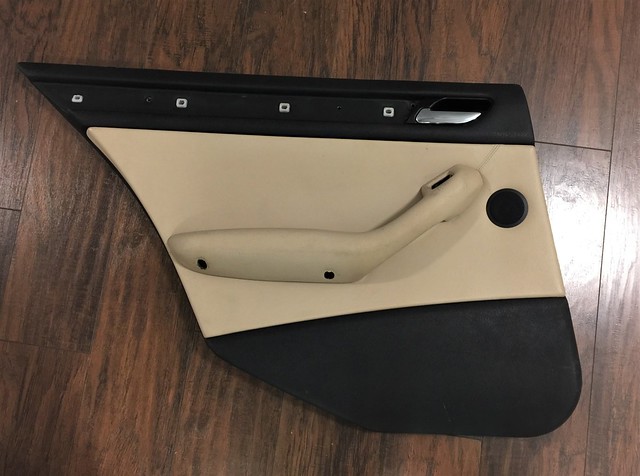
Then I did the rest of them. It didn't really take that long, an hour or two with taking my time.
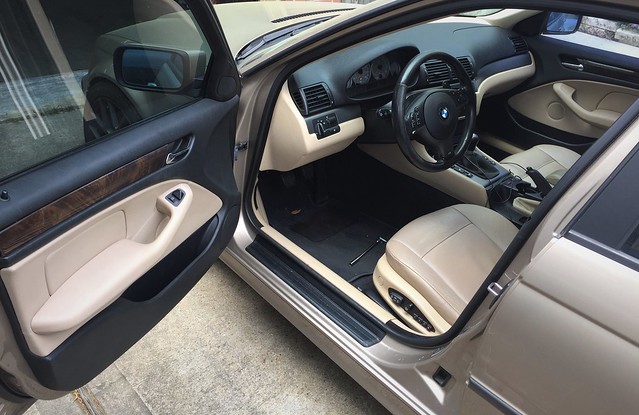
Overall, I like it, but I need to swap in a black dash and kick panels to make it look right. Once all of that is done, I think it'll look pretty good. I'm not looking forward to pulling the dash, but I think it'll be worth it.
I've taken a few weekends off from this car since I've had other things going on and also have been given attention to my newly acquired E36 but I decided to get back to it this weekend.
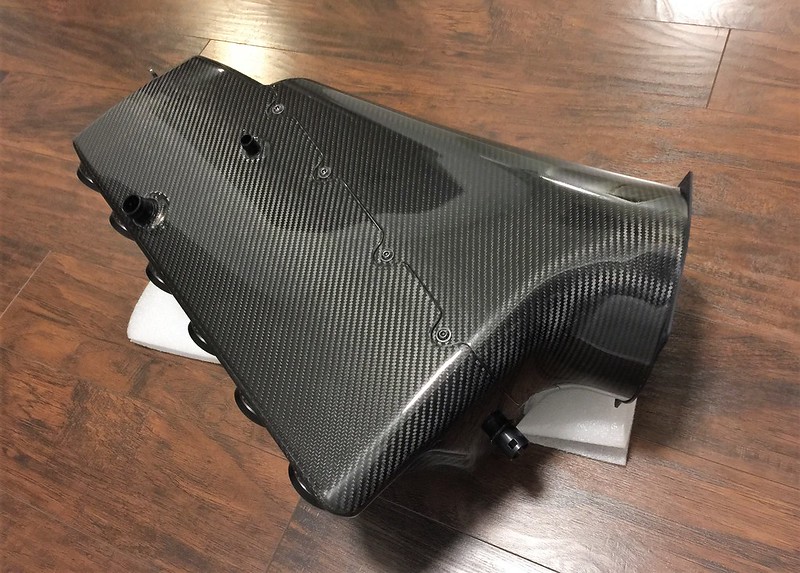
Karbonius intake + Kassel MAP solution + MSSFlasher = The best sound I've ever heard from a car I've personally owned.
This intake is almost too beautiful to put in the engine bay, but here we go.
I went back and forth on the best wiring method and read every source of info I could find at least five times. It seemed confusing, but as usual, I was over complicating things. My final approach was to clip off the MAF plug and wire directly to it. This wouldn't be the best route to go if you plan on running the flap, but for my flapless setup, it seems to have been the most straight forward approach.
All buttoned up. I still want to clean up the wiring a little bit more, but it doesn't look terribly out of place. It could look a little more OE but that'll give me something to do for another weekend as I really wanted to go for a drive to experience the intake sound.
Is this intake worth it? It depends. I think it's 100% worth it, but it probably wouldn't be for everyone. Sound wise, it's simply amazing. Rolling into 2nd gear from 30 mph is fairly intense. It's something that needs to be heard in person rather than on video as the videos I've watched don't quite capture it. Overall, I'm extremely pleased with the car and more importantly, the drivability hasn't really changed thanks to the MAP setup.
My steering wheel has really been bugging me lately since it's pretty worn. I've been meaning to get it redone, but other things have taken priority over it. Had some spare time this weekend and decided to try my leather repair kit on my current wheel. I figured there was nothing I could really lose since it already looked terrible :rofl:
Used crack filler on the really bad areas, lightly sanded the whole wheel and then sponged on dye being careful not to hit the stitching. It's not perfect, but it sure looks a lot better than it did. I'm quite curious to see how it holds up. I'll probably eventually still get a newer wheel, but this was a nice solution for the time being.
Next time I find some time I'm going to try to redo the bottom trim as it's now the biggest eyesore of this wheel
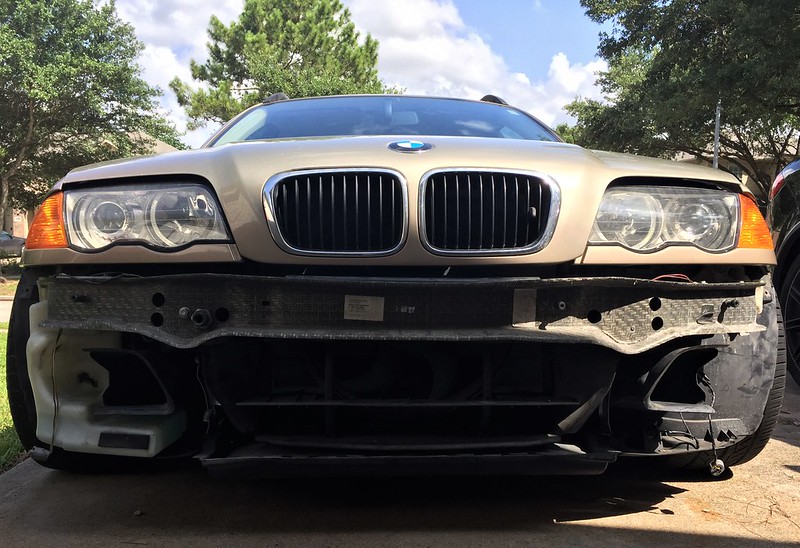
I've been wondering if the M3 bumper would fit on the base pre-facelift body and decided to try it out this weekend. I've been having an issue where the temps creep up in traffic and after finding out the pusher fans are different between the base car and the M3, I decided to swap all of the M3 stuff over. I hope the correct pusher fan and additional ducting will help with my cooling issues, but we'll see.
The bumper is obviously a bit too wide around the fenders, but it looks way better than I thought it would.
Difference in width is quite apparent from some angles
I need to tweak it a bit, but overall, I like the new look minus the mismatched paint.
Took off the front bumper and took a quick shot showing all of the M3 bits installed. Honestly looks pretty aggressive like this, I kind of like it.
With the M3 pusher fan installed, my cooling seems much better. I purposely got stuck in traffic the other day when it was close to 100 degrees outside and the coolant temp needle stayed right in the middle. Cautiously optimistic that it was just a bonehead move on my part by reusing the 323i pusher that was causing my issue.
Also, couldn't take the mismatch and rattle canned my front bumper. Hopefully it'll last until I can get it done the "right way" but it looks good for a scuff and shoot, assuming the paint stays on there.
Probably the only Sahara Beige M3 bumper in the world :rofl:
My wife and I went to Austin for a short getaway and I was able to drop the wagon off to have the rod bearings done while we were there. I try to DIY everything, but the risk seemed greater than the reward on this one, so I left it to a professional.
Dropping the car off at Hill Performance Bimmers
138k mile bearings
Overall, I'm happy to have had this done even thought mine weren't as scary as some that you see. It's hard to explain, but it is almost like driving a car that has just been detailed in that it just seems to drive a little nicer when you no longer have the bearings in the back of your mind. Can't wait to get past the 1200 mile period so I can go back to wasting fuel to hear the induction noise :rofl:
Also, a big thanks to George at HPB as he was very accommodating to work around our vacation schedule and did an outstanding job on my car.
Changed the steering rack with a rebuilt unit from the rack doctor as mine started leaking heavily on the way to Austin to get the bearings done. Pretty straight forward, but brutal in the garage this time of year due to the heat. Worth it though, steering feels much tighter now, reminds me of my lower mileage M3!
Also, a nice side bonus was just how clean everything was underneath the car after I had the rod bearings done. George didn't mentioned he had cleaned the engine and trans to look like almost new, but it was a nice little easter egg to find and much appreciated!
This thing is awesome when it comes to interior room. Managed to fit a 70" TV into it. Felt like I was flying Spirit on the way home, but got it home and that is what counts.
My light rear clunk turned into a heavier one, so I ordered new bushings for the diff. I also did the input seal as it was leaking. This has been my least favorite job ever done on this car but it should drastically improve the driving experience once back together as all three bushings were pretty sloppy and one of them simply fell out after removing the bolt. :rofl:
Right after my rod bearing job my oil level sensor decided to go out. Since the car was already in the air, I went ahead and changed this along with an oil change.
This project started in November of 2018 and these posts represent the overall build process. This car is still an ongoing project and I will continue to update this thread as I go. As of today, I have the rear diff out still as I'm waiting on parts, can't wait to drive it again!


Comment