Announcement

Collapse
No announcement yet.

Visceral M3 / My Estoril E36 M3/2/5

Collapse
X
 
  • Filter
  • Time
  • Show
Clear All
new posts

    Visceral M3 / My Estoril E36 M3/2/5


    Copying from original BfC and M3F posts:

    Longtime forum lurker but not often poster, I figured I'd get this up to help the forums live on in this day and age of social media takeover. I grew up on forums reading for hours and learning how to DIY everything I know. Between here and the Nissan forums I still lurk on the shortage of contribution is evident. I genuinely enjoy reading through other members "journeys" with their cars and engaging with one another to keep the enthusiasm fresh and alive, so here is my story!

    Back when I was in high school, some ten plus years ago, my friends and I took a road trip to Fort Walton Beach, Florida. Being that I'm not much of a lay-on-the-beach all day type of guy I ended up bouncing around town with two of my friends. I had been a die-hard Nissan S-Chassis guy since I could remember, having bought my first 240SX at the age of 14. My best friend, however, was essentially the same with our beloved German automaker, having a turbo 328is and a couple of other odd's and ends. So when we passed by a mom and pop lot with two E36 M3's and an E46 M3 he was quick to exclaim "Dude! Turn around! Let's go back!"

    I remember vividly this is where the DTM Disease began. Having little experience with these things, I didn't really know what I was looking at, and none of the cars really "stopped me in by tracks." They just looked like a dated 3-series to me. My two other friends were on the other side of the lot looking at a black/black M3/2/5 but I was eyeing another car in the lot, a Hellrot Red/Dove M3 coupe with a strange badge on the back. Dinan. The car looked very clean and well kept, but had a very high price tag for something that looked so......old.... My friend came over and explained to me the essence of Dinan just as a saleswoman came out to ask if we needed any help. Being the young shits that we were, we pretended we were interested in trading my 99 323i in on this car and somehow I ended up behind the drivers seat, pulling out of the lot and down the street with my two pals in the car.

    "Dang, this drives totally different than my dull E46."
    "Wait, this thing is responsive and torquey. That's something I don't get from my S14."
    "Hold on a second, that exhaust sounds really ****ing good."
    "Why haven't I known about these sooner?! This is great!"

    These were some of my initial thoughts I had as we enthusiastically ripped down some side roads. We got back to the dealership, I parked the car, got out and turned around and looked at it. I started to feel a weird feeling, like a love at first sight type of way. "This isn't good, I don't have that kind of money, but now I really want one." The sales lady came back out, asked us how everything was, answered a few questions, and we went back to the condo.

    I thought about the car for the rest of the night, trying to work out how many hours and how many jobs I would have to work to afford this while still in high school and with zero credit history. I talked it over with my mom who thought I was crazy, already having two cars at the age of 17, and that paying the car note on my E46, maintenance, modifications and insurance just wasn't feasible for me even while working 6 days a week after school.

    Extremely fortunate for me, however, my mom and I worked it out, and I was the new owner of a 1999 BMW M3 coupe in Hellrot over Dove, with a Dinan Stage 2 package and only 75,000 miles. I was the happiest, and luckiest 17 year old in the state of Florida that day, hell, the whole rest of that week. I don't think I saw the beach for the rest of that trip. I was too busy blazing down the coastal roads with the windows down in my new bright red M3, listening to the sweet symphony of the S52. Driving the car 14 hours back to my hometown at the end of the vacation with my four other buddies between the M3 and my 323i is still, to this day, one of my fondest memories. We left in the middle of the night and for the first three hours or so were the only ones on the highway and definitely didn't drop below 100mph. We made our way though the George Wallace Tunnel outside of Mobile Alabama and think that's when the true love really set in. Dropping from 5th gear into third and listening to the S52 scream all the way through redline through the next two gears had me grinning like some kind of deranged idiot.


    Over the course of the next two years or so I worked everyday after school, year round, at our local car wash. There were days where it was so cold outside that the water dripping off the cars that just exited the wash tunnel would literally "freeze" the car to the ground and all feeling in my toes and fingers were completely gone. But sitting across the lot was my beautiful red M3 with not a speck of dust on it. (Perks of working at a car wash, it was washed almost every other day.) I shoveled snow, I cut grass, I did odds and ends around the neighborhood. All of my money went to that car. My beloved S14 was put on the backburner for quite some time. Didn't care though, the M3 was great. My best friend and I ended up traveling to, I think, Nashville where he bought a 95' Hellrot/beige M3/2/5. We had a blast ripping around together over the next year or so. The local police, however, weren't too fond of our daily full throttle runs around town.


    I thought about selling the car before going off to college but I ended up taking the car with me to campus about two hours away. Life continued as normal and the miles racked up. I'm not sure where I lost touch, I still question it to this day. I think it was a combination of things; I was putting too many miles on the car commuting back and forth from college and my older sister needed a car and always loved my M3. It pains me to say this, but I ended up buying an E46 330i M-Tech I and "sold" the M3 to my sister after she promised to take care of it as I had thus far.


    It was kind of a win-win for me, as the car stayed in the family and I didn't have to keep adding so many miles to it. I'll come back to it someday, I kept telling myself as I dove deep into trying to balance work, college and life in general as a young adult.

    It all came full circle though. Cards just didn't unfold how I would have wanted. My sister wanted to sell the M3 and get something cheaper to keep up with. Paying my own way through college, maintaining my E46 and still playing with my then RB swapped S14 drift car, I couldn't buy the M3 back from her. Hindsight being 20/20, I should have sold my E46 to fund the M3, but for some reason I didn't. The E46 just seemed more practical.

    And so they sold it. For cheap. To a guy who had a small dealership who flipped it. I felt so bad for the car. I could only hope whoever ended up with it took half of good as care as I had. As they say, you don't really know what you've got until it's gone. For the next two years or so I tried not to think about it.

    I guess one day I got a wild hair up my ass, pulled open my laptop and went to work. I don't remember exactly how I found it, but I did. I found an older gentleman who had joined BF.c in a small town not far from mine around the same time that my M3 was sold. I read through his posts, although very few of them, where he mentioned his recently acquired 99 Hellrot M3 coupe. I kept reading and found one post that really stood out; it was him asking about a restrictor size for the hardline to the power steering rack. It reminded me of the time that I had blown off that exact power steering line while I was at college and I started to recall how I repaired it, without the restrictor. This had to be the car! I checked his username again, he hadn't been logged in a while so a PM was likely futile. Through the further powers of the internet I tracked down the guys name and even luckier, got his phone number! It actually took me a few days to work up the courage and the right words to call the guy up. I felt like such a creep essentially saying "hey I stalked around on the internet and found that you own my old M3." The guy was actually really nice though and through a quick chat we came to the conclusion that it was in fact my old car. I was relieved to hear him tell me that it has been garage kept and well looked after and even had some modifications that I never could afford! I told him to save my number and if he ever decided to sell to please call me first. I think this was around 2012 or so. I've probably called once or twice since then and left messages, but I haven't heard back from him since that day.

    *PHWEW.*
    *Wipes sweat off of forehead, takes a sip from glass of water*

    I'm surprised if you're still here. Now that you've got the backstory, I'll bring you up to "present day" quickly.

    Back in 2013, another one of my good friends and long time E36 nut (supercharged M52 E36 and then 1JZ swapped E36 M3) purchased a beautiful Estoril Blue '96 M3. If I recall correctly he planned to use this car as his daily as his 1JZ M3 had crossed the threshold for "daily duty" into full on track car. Being the typical gearhead he is it ended up getting built into a PDX/SCCA car over the years. He ended up starting his own business and needed to sell the car to free up some capital. I didn't have the money at the time so he sold it to our other friend, the one who used to have the Hellrot E36 M3 I mentioned before. That friend ended up moving to Detroit when he was offered a job with Road & Track, and then a year later to Brooklyn for a job with The Drive. Over these two years the car was neglected, barely used, and sat outside through some harsh winters. He realized that the car wasn't get used and hated to see it sit outside in Brooklyn, getting backed into and accumulating parking fees.

    Cue: me. This is the beginning of my new journey with my new M3.

    August 21, 2016.
    Saturday morning my friend who owned the car sent me a text with no words, just a picture. It was a picture of the M3 in front of his parents house, here in St. Louis.

    “Wait, what?” I replied.

    “Yo dawg, I heard you like friends and M3’s, so I put a friend in a M3 and drove it from Brookyln back to St. Louis.”

    I was overwhelmed with excitement. I made my way over there the following afternoon to catch up and check out the car. We sat and shared stories, he told me about all of his crazy endeavors all over the world while working for The Drive as well as Road & Track. Eventually we made our way to the garage where the M3 was stored.

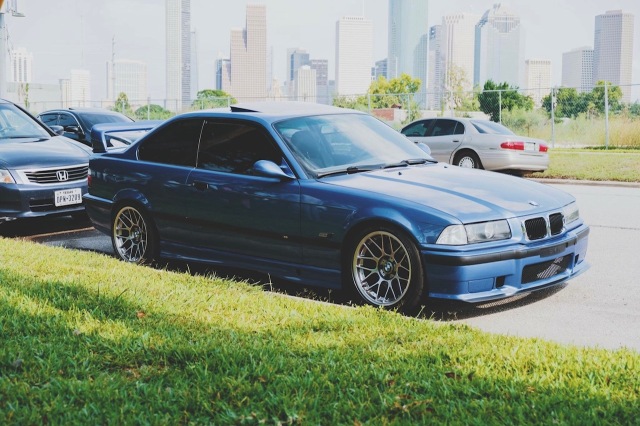
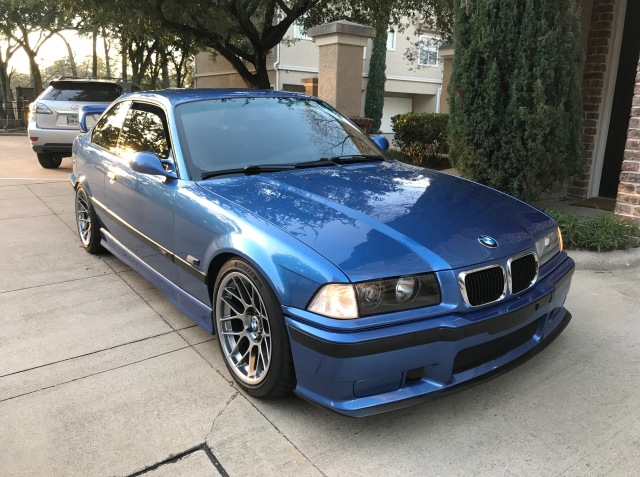
    The last time I saw this car was about two years prior, when Ted still owned it. I remembered the car being a beautiful, clean M3 sitting on some wide APEX ARC8’s, paired with some meaty tires. It had a Reiger front lip and MateoMotorsports rear diffuser. Ted has good taste. See below.


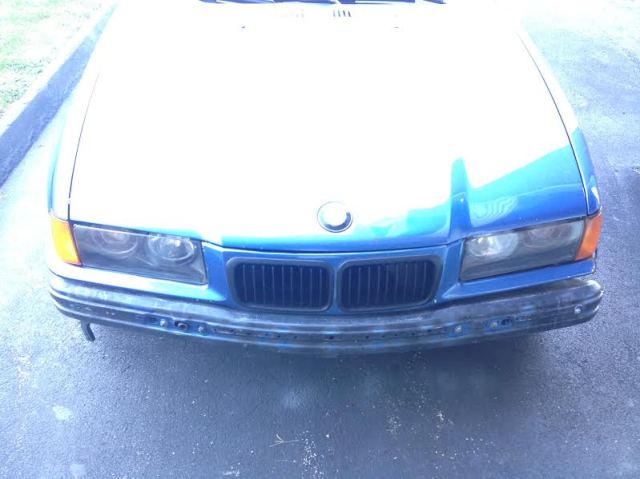
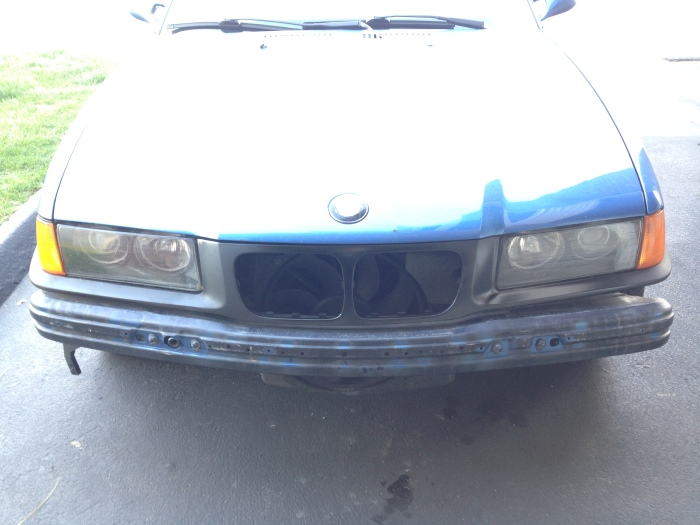
    So when the garage door opened up and I walked around the car, I couldn’t help but think, “What happened?” Don’t get me wrong, the platform was still there and fairly clean, but it was far from the car I remembered. Literally two days after Ted sold the car, it was broken into in downtown Chicago. The drivers window was bashed in and they took was the Euro BMW steering wheel and the radio. Once it arrived at Road & Track’s headquarters in Detroit, it spent most of its time sitting. Outside. Through the winter. Here you can see the dirt accumulated as well as some old vinyl template for the OEM wing.


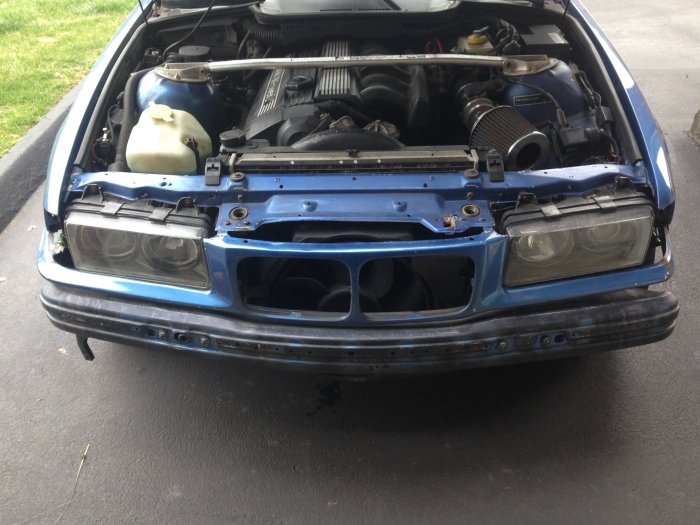
    Next year the car was moved to Brooklyn, where it luckily was stored inside. While it was out on the street, someone backed into the car, resulting in a huge crack in the front bumper and twisting the bumper carrier. Fortunately the bumper shocks don’t appear to be damaged. The driver side fender took some of the hit too, as it’s arched up slightly. The corner light doesn’t sit flush now and the paint is flaked off where it pushed in. The nose panel will need to be replaced entirely, and the bumper carrier that is welded to the car is hanging loose.


    As with a lot of E36’s, the passenger side window trim has since had the original coating wither away, exposing bare metal and resulting in rust. The driver side is still alright, fortunately.


    The front bumper was useless. The rear diffuser was gone. The APEX’s were replaced with some narrow no-names. There are no rear seats and only a Sparco bucket for the fronts. Two of the headlight wires were exposed and rubbing each other, creating a small fire. Three out of five windows have window tint on them. There are some heavy scratches on the drivers side rear quarter panel, not to mention the paint is a complete different shade on that panel than the rest of the car. It’s hard to see in the picture, but I can spot it from 15 feet away in person.


    I’ll be honest. I was a little overwhelmed at first. It needs a lot more than I anticipated. But once I got behind the wheel, put my foot down, and heard the S52 scream through Vanos, it all faded away instantly. It was exactly as I remembered, better even. The slight whistle from the intake, the throaty exhaust note, torque at all RPMs, the short-but-not-too-short gears of the 5-speed, aesthetically it may a bit on the rougher side, but mechanically, this thing is a ****ing boss and everything I could have hoped for.


    Okay, that was a lot of writing. I'm going to take a break and start backfilling the journey from then until now in a bit.

    August 22, 2016

    This car hasn’t been cleaned in ages. I cleaned up the door panels a little bit, but once Dove leather is neglected, it’s damn near impossible to revive. Grey/white leather just doesn’t age well, no matter how well you take care of it. It’ll be a huge pain in the ass, but I think a full black interior transplant is in store.


    Quick cleanup of the dash area. Still need to get down to the nitty gritty with toothpicks and Q-tips.


    August 28, 2016

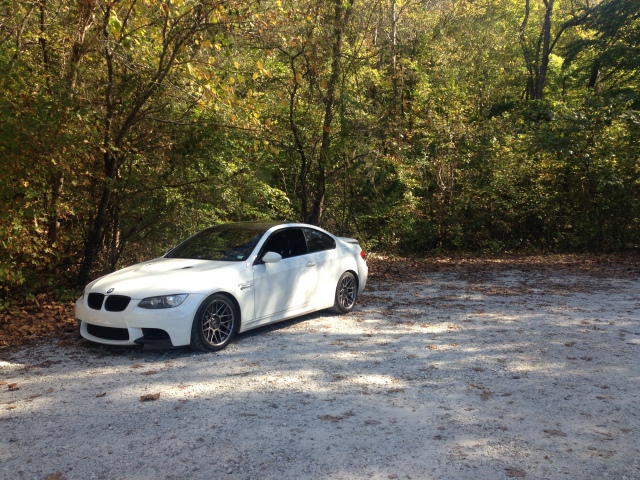
    I drove the car around town a little bit throughout the week and with the nice fall weather we are having, I was excited to get out and spend some time on my favorite back roads this weekend. Even with cheap and narrow all-season tires, the car felt great. Besides the limit of grip from the tires, the car handles amazing and dives in each turn asking for more; brake a little later, carry a little more speed, get on the throttle sooner. With the windows down and the radio off, I blasted through narrow rural roads with the S52 symphony echoing off of the neighboring trees lining the road. I’m a die hard Japanese car nerd, but the Germans really got it right with this car. I pulled over to take a break and took this photo.


    I hopped back in, turned the car on and started to head back towards my house. I decided I had had enough and took it slow on my way back, gently rowing through the gears. It was at that time I started to notice in between gears there was a faint “clunk” from the rear differential. I started to get PTSD of the time I sheared a diff bolt in my old E36 M3, leaving me stranded on the side of a busy road. I slowed down a bit, going from 2nd gear to third, listening very carefully. It was getting louder. I kept thinking, “only 10 miles from home, just be careful and stay in one gear.” Unfortunately it’s not easy to stay in 4th gear AND go slow for some of these turns so I had to change from time to time. Louder and louder the clunks got, until it started making a VERY loud sound, from what I eventually assumed was the input flange on the rear differential rubbing the chassis. It would only make the rubbing sound above 5% throttle, it was silent off throttle. I delicately tried to keep as much speed going without coming out of 4th gear and not giving it enough throttle so it started rubbing. Nerve wracking and frustrating to say the least. I had only put about 150 miles on the car until now and it was already giving me these types of issues? Great.

    Anyways, after a lot of curse words and pissed off people wondering why I was doing 20 mph in a 45, I got it home. It’s Sunday night and will be dark soon, so I’ll mess with it later.

    September 20, 2016

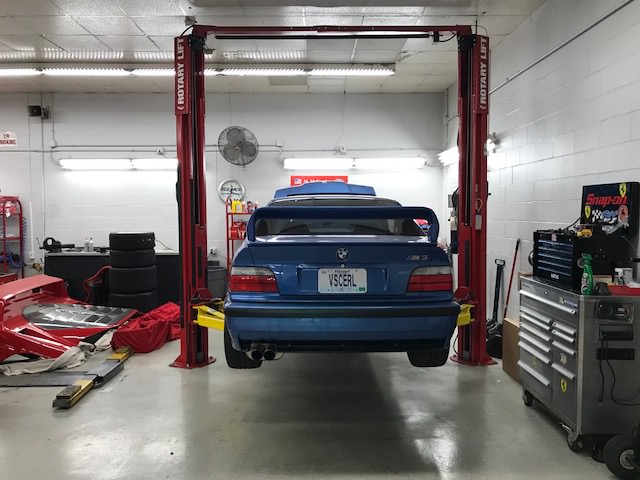
    I ended up having the car towed down to a shop called Kinetic Motors, a one-man indie shop. Jon, the owner, has worked on the car in the past when Ted owned it and is a very knowledgeable fella. He has a badass full-track-spec E36 sedan that he is in the middle of S54 swapping. There was also a Technoviolet E36 M3 on the lift and a nicely set up E39 540i in the shop also. If you’re in St. Louis and looking for a good spot to service your BMW, I would hands down recommend him. Super friendly, super knowledgeable, and not going to charge you an insane labor rate. After talking shop for almost an hour, I left and went home.

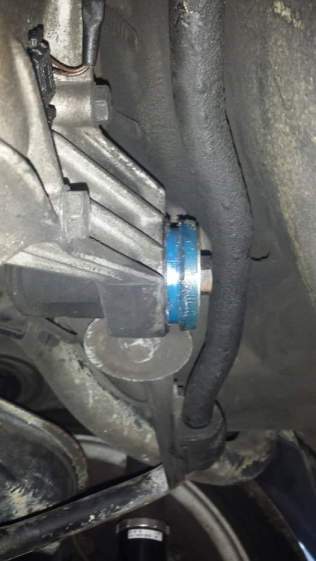
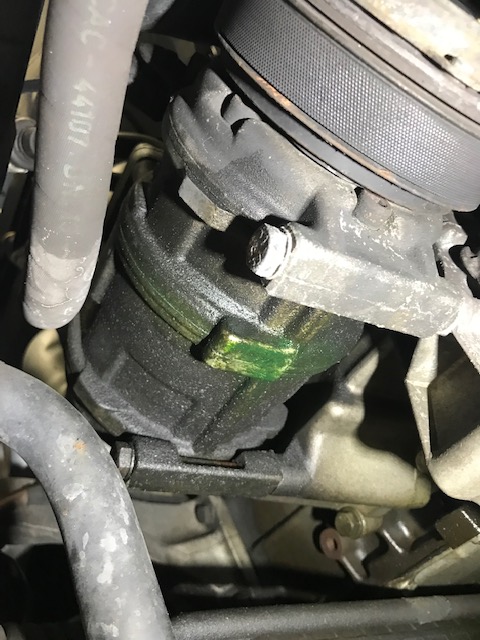
    Got a call from him the next day with the diagnosis:

    -Front diff bolt missing, first few threads damaged. Diff bushings need to be trimmed to fit properly.

    Diff Bolt: $10.99
    Washer: $.50
    Loctite & Brakleen: $6.00
    Total Paid: $248.23


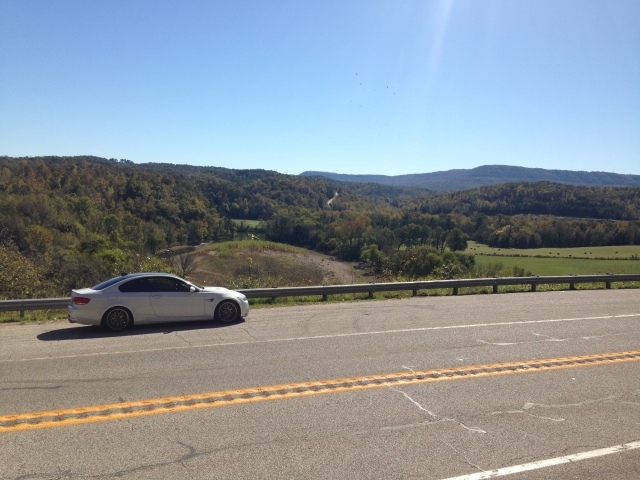
    Car is kind of sad looking in it’s current state, but man does this thing drive good. Got out of town today and stopped in the middle of nowhere. With a couple of updates and changes, this thing would make a great road trip car.


    September 25, 2016

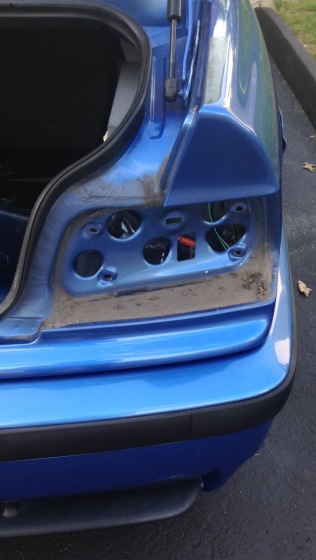
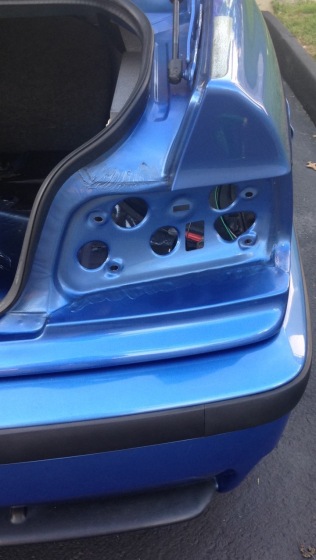
    I have a bad habit of taking things apart, cleaning them, and then putting it back together. You never really know how much dirt gets trapped in random places. Here you can see the before and after of the tail light area. If you do this, make sure you pull that rubber gasket up and clean in there also.


    September 30, 2016

    Random shot from Ikea garage tonight. Estoril Blue looks so good in any light.


    October 25, 2016

    Not E36 related, but M3 related. Took a short weekend trip for our anniversary down to Eureka Springs in Arkansas, a small and historic town nestled in the hills of Northern Arkansas. Our chariot for the weekend was a friends track-prepped E92 M3.


    The recipe on this car is fairly simple, yet so good. APEX ARC8’s wrapped in Dunlop Direzza Star Spec ZII’s, TC Kline coilovers, and upgraded brakes.


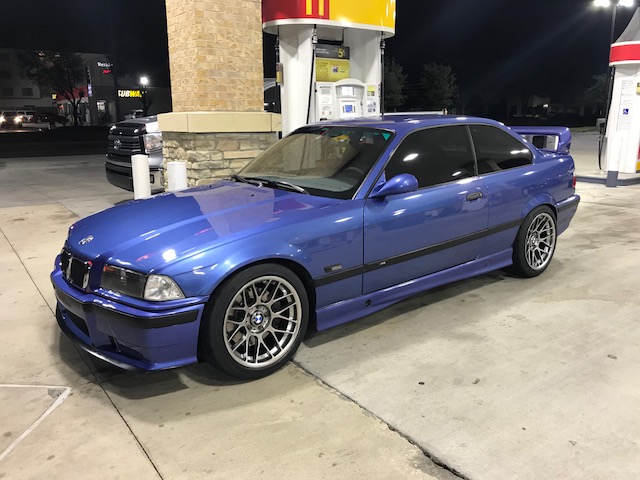
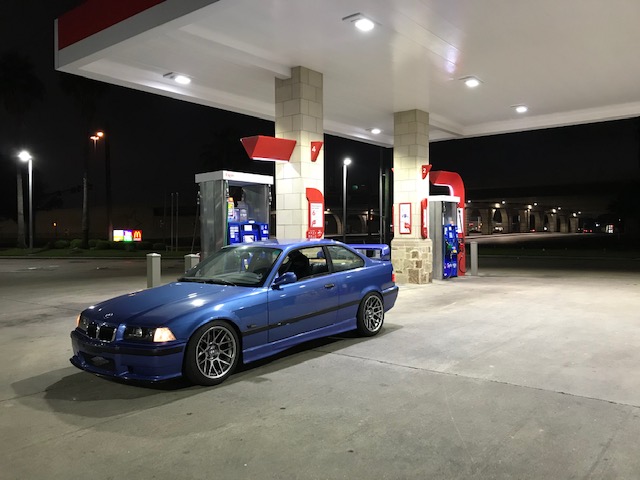
    Fueled up and ready to go bright and early the following morning!


    Eureka Springs and the surrounding areas are very popular with motorcycle riders due to the great curving roads with lots of elevation changes and scenic views. The Pig Trail, otherwise known as Highway 23, was one of the many great routes we took. There are so many different side roads that are equally as good and typically don’t have much traffic. You really can’t go wrong in this area.


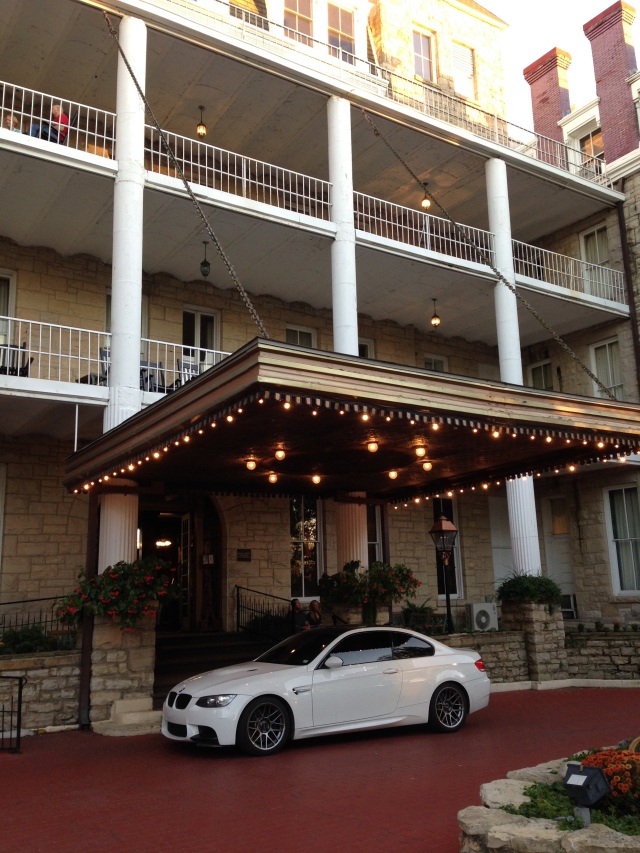
    We had a room booked at the The Crescent Hotel. This place was super cool, built in 1886. If you ever come to this area, I would highly recommend staying here. It’s also reportedly super haunted, but I didn’t see any spookis.


    Let me warn you now, there is zero cell phone signal in the majority of Northwest Arkansas. Not kidding. We got lost…..really lost. Luckily everywhere we went was nice and scenic and we got a couple of good hikes in throughout the weekend.


    Downtown Eureka Springs was a great little area to walk around. Lots of neat little shops and restaurants. The whole area is very active and bustling all day and night.


    Many many miles, hikes, eats, and a couple of selfies, it was time to go home.

    October 29, 2016

    Back to E36 things.
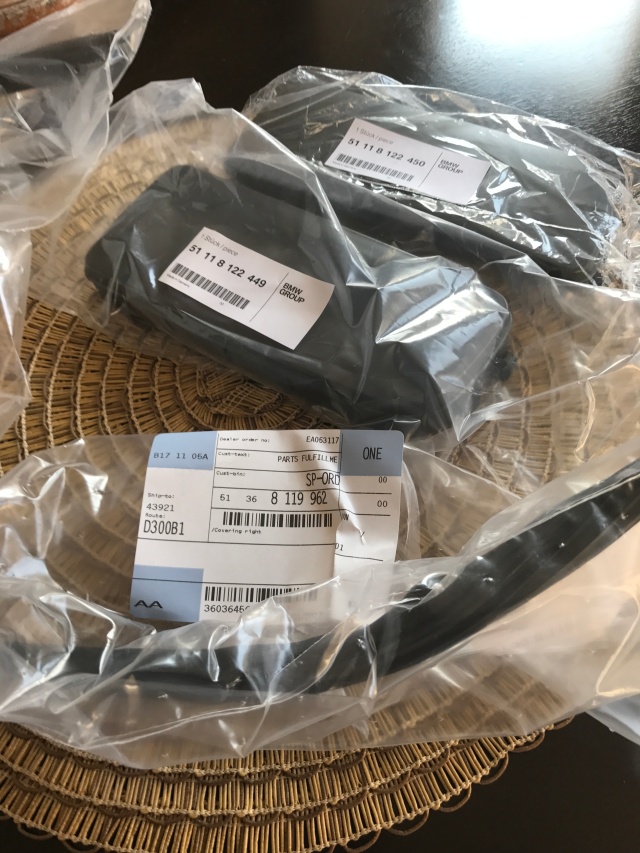
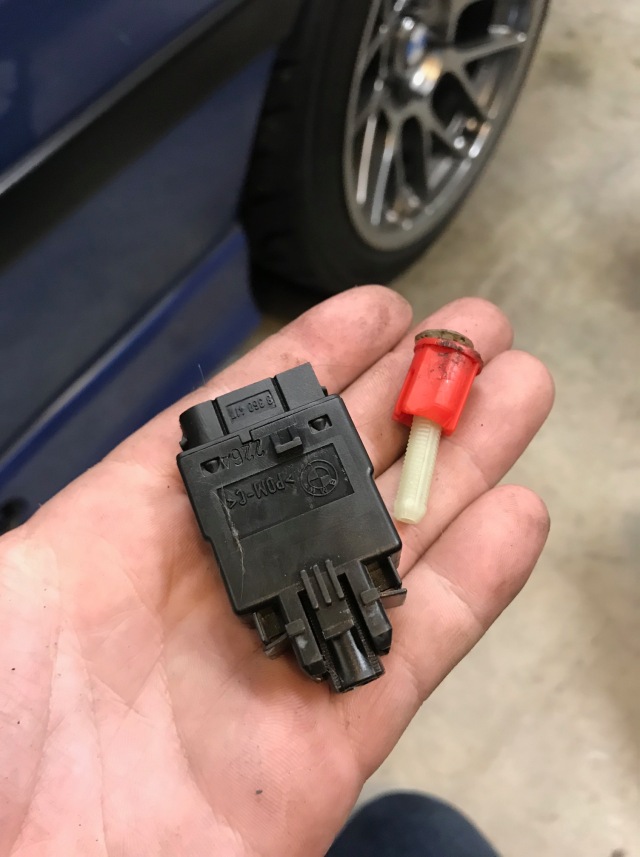
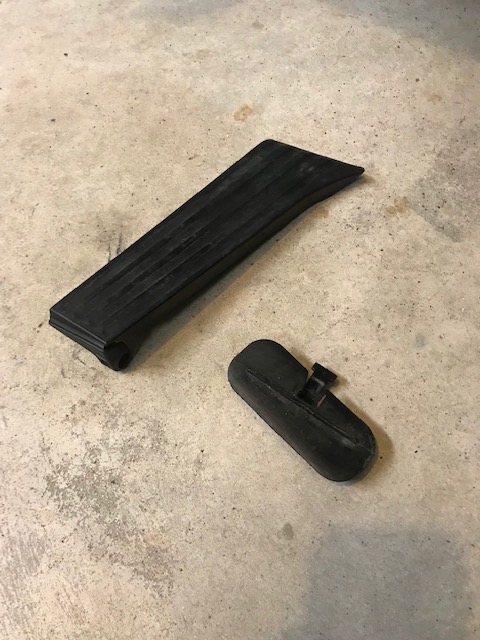
    Gas door not wanting to stay closed? 99.99% chance it’s your spring. Couple of bucks at your local dealer for the part and five minutes of your time. I took videos of the before and after but it won’t let me upload them.


    November 23, 2016

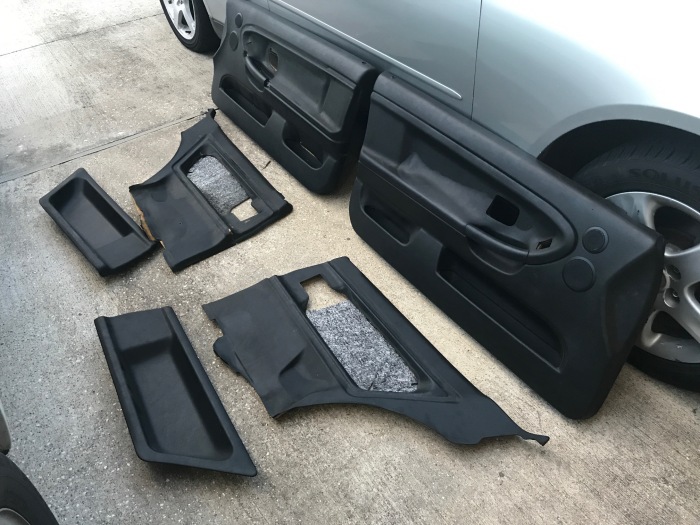
    Since Dove Grey interior doesn’t tend to age well, I’ve decided that I’m going to convert the interior of this car to black. One of the first things that has shown up are the door sills. (Don’t mind the E46 seats here, they’re temporary.)


    As usual, the piece had trapped dirt and moisture underneath for years.


    If you’re looking for new door sill panels make sure you have a couple of extra clips for when you install the new ones. Like most 20 year old BMW clips, they tend to break upon removal. Also, make sure the new pieces you’re buying still has good quality rubber gaskets along the sides. After cleaning up the mess I snapped in the new one.


    March 19, 2017

    Finally got around to installing the new OEM nose panel. Don’t buy those cheap ones you see on eBay or wherever. They’re likely made of plastic, fit poorly, and flex easily making your front end look bad.


    You can really see the damage to the bumper support bar on the driver side here. Luckily there is no damage to the bumper shock. It’s like the backed into the car, and then pulled it out when they pulled away. *eyeroll*

    March 26, 2017

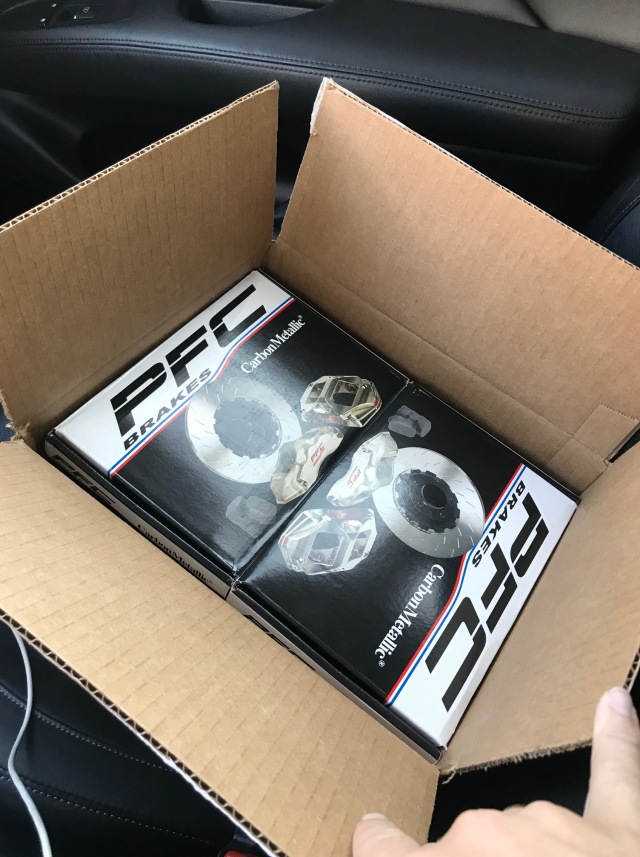
    Bunch of life has gotten in the way of progress on this and with a big change coming soon (see boxes below), it’s been on the back burner.

    After pulling the front bumper support off I found the bracket that holds the bumper shock to the support bar to have been pulled out and mangled.


    Ordered a new one online and met up with a local to get a used OEM support bar. Don’t buy the cheap ones online, they’re made of FRP/Plastic and will definitely not hold up in the event of an accident. Steel or nothing.


    Girlfriend got me a new front bumper from ECS Tuning for my birthday! For a replica, the quality is actually pretty good and seems pretty durable. Picked up all new stainless steel hardware from the local Home Depot and went to work!


    It also fits pretty good too! Yay, finally looking like a car again. Now to get it all painted.


    March 29, 2017

    E36 corner/turn signal housings are pretty poorly designed. I think I’ve lost three already.

    And every time it brings the turn signal socket with it. 😐 y tho


    April 3, 2017

    As mentioned before, a major life change has been looming in the background. A couple of months ago I was offered a fantastic opportunity in Houston. After weeks and weeks of deliberation, I made the decision to leave my family, friends and hometown, take a leap of faith and make the move. With the M3 strapped to a trailer and all of our belongings loaded into a box truck, we set off for our newest adventure.
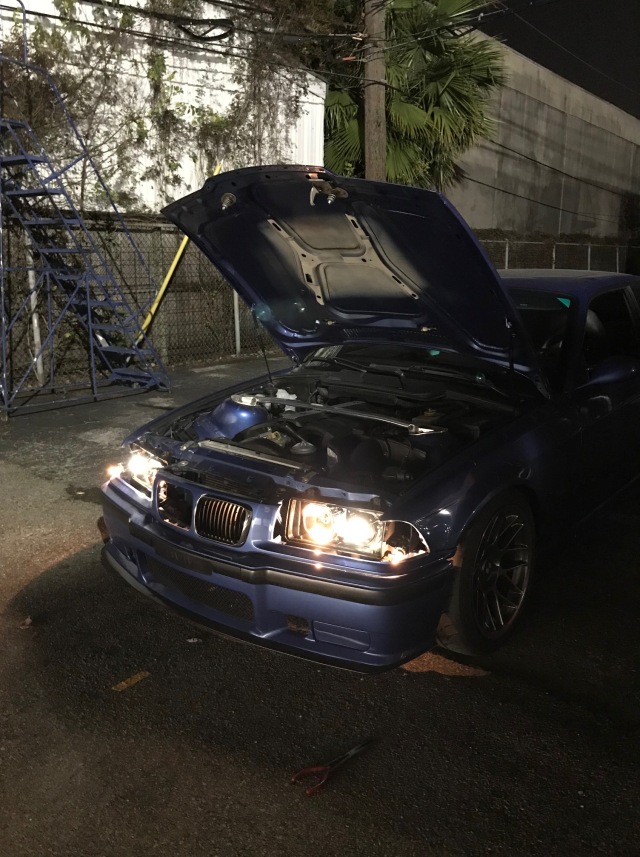


    April 5, 2017

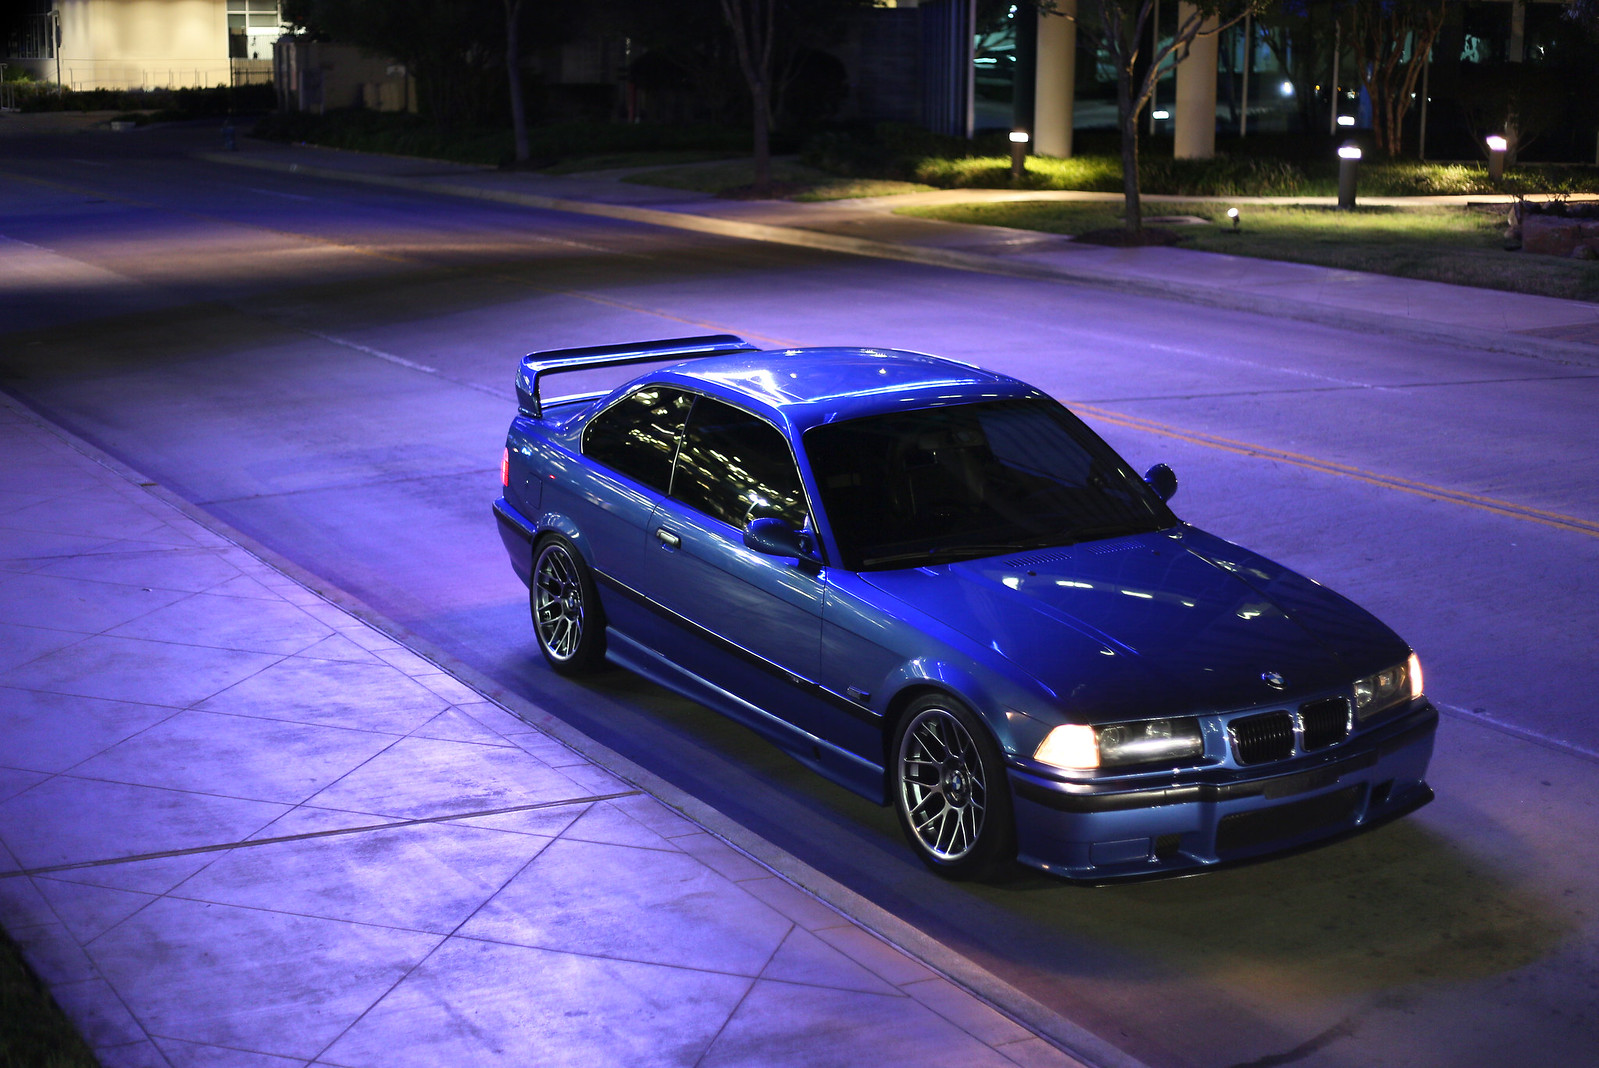
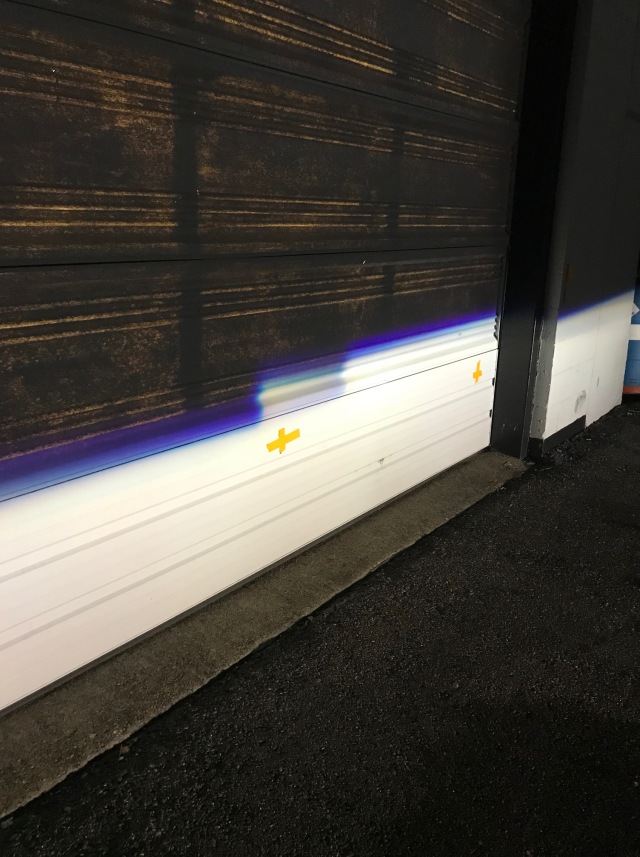
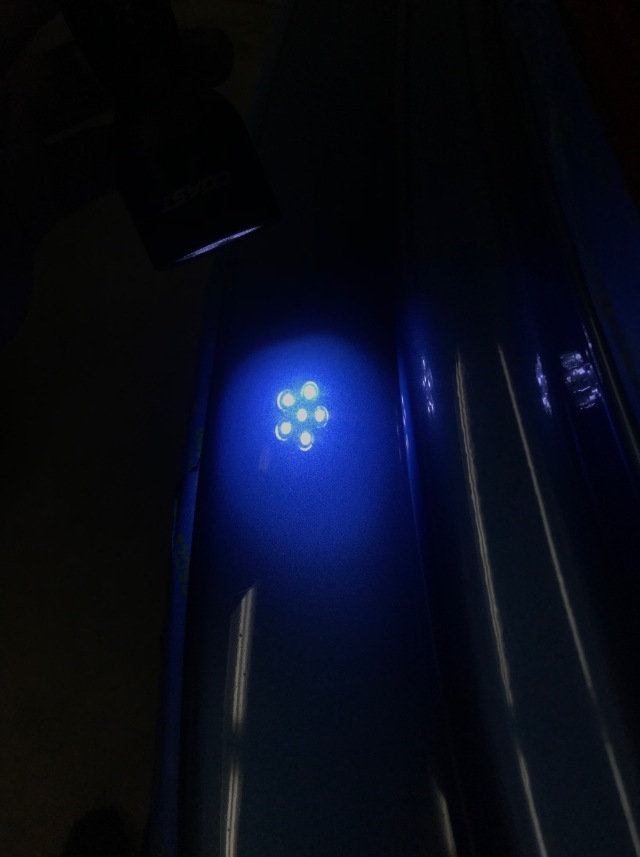
    After settling in a bit and unboxing our stuff, we decided to go out for a evening drive to explore our new surrounds. Gotta say, Houston is very photogenic. May need to dust off my DSLR and take some real photos.


    There’s a big park right outside of downtown that has a huge field and great views of downtown. Even at almost 11 PM there were dozens of people walking, biking, and hanging out. Not used to this big city stuff.


    These three photos are from a little area not far from our house. Everything is lit up blue so it makes for a cool environment. Once I get new wheels and tires, paint, and make a few adjustments, I will come back for more “good” photos.
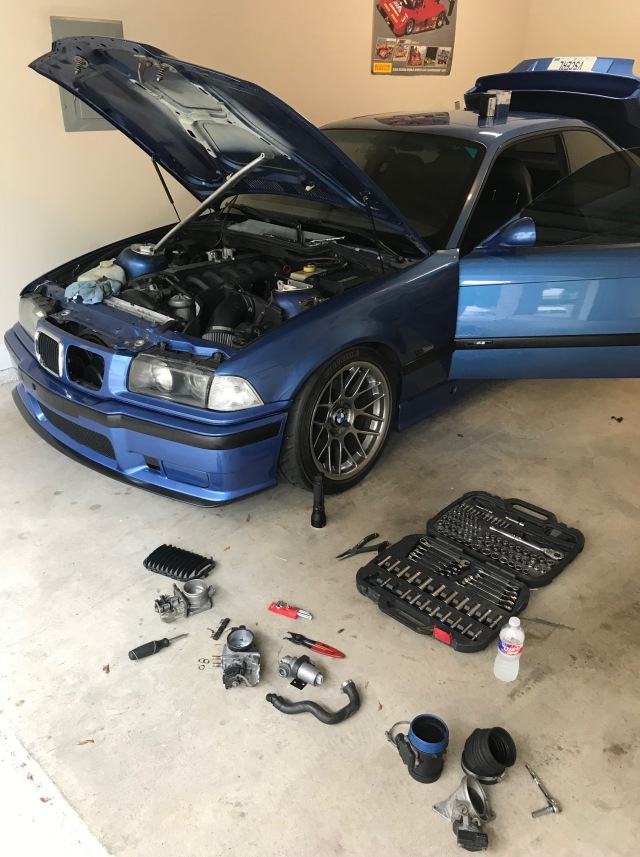


    May 17, 2017

    Finally got around to getting the garage set up. All that is left to do is mount the pegboard to the wall to hang some tools. The garage is a two-car tandem, so while it’s slightly on the narrow side, there’s plenty of room to actually get stuff done and not be claustrophobic. Also finally got the new license plate on.


    May 20, 2017

    Had some free time to put in a couple hours into the M3 this weekend. Finally broke out the claybar and detailing supplies. The car has been sitting outside until the recent move, so it was long overdue.


    For 21 year old OEM paint that has been neglected and NO buffing, it cleaned up pretty nice. It does has it’s flaws that will need correction, but not bad overall for a day’s work.


    July 18, 2017

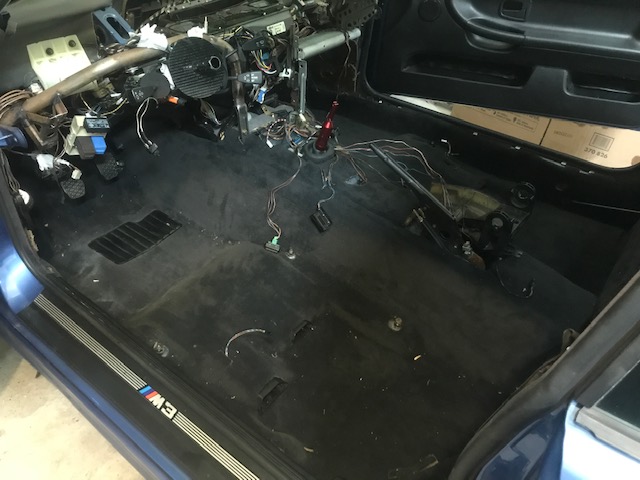
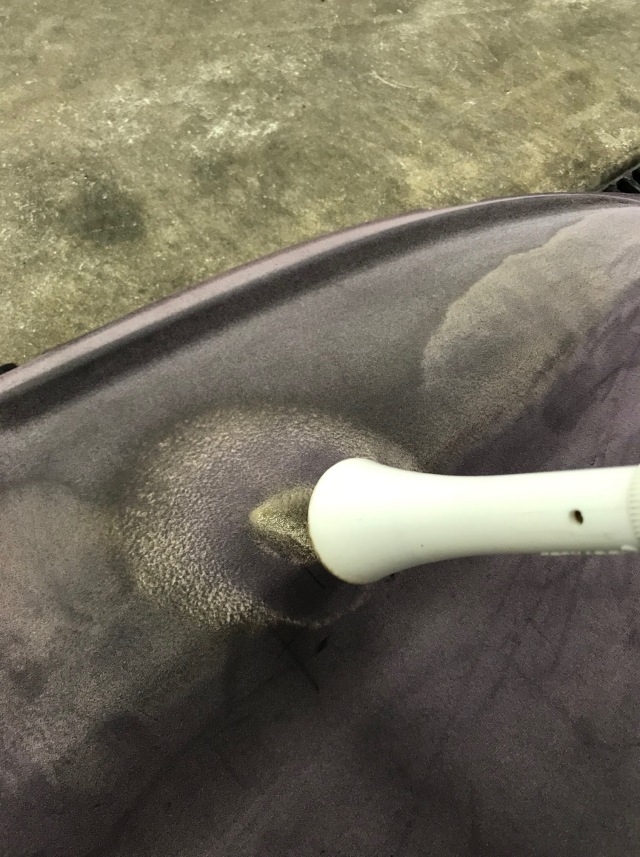
    Started collecting parts to swap the interior from Dove Gray to black. Luckily a full carpet and dashboard showed up for sale locally, so I didn’t have to pay for shipping these big items.


    They were pretty dirty so I brought them to work to do a thorough cleaning done. (y)


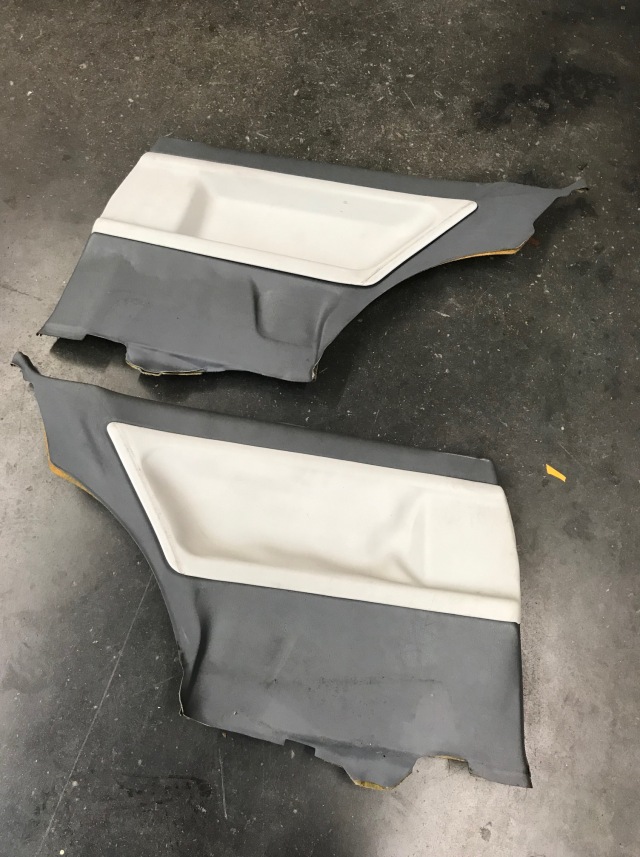
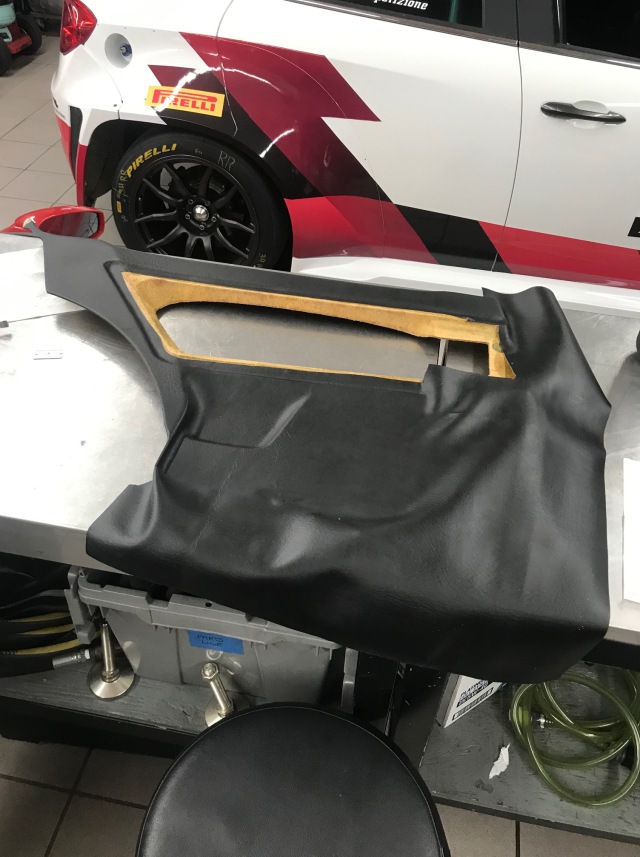
    Got a set of black door panels off of Bf.C for cheap as they have the dreaded adhesive separation. Figured for the price I can try to re-wrap them in a leather-like vinyl.


    August 28, 2017

    Finally got around to peeling this ugly shit off. Without a proper heat gun or eraser wheel, it was a real pain in the ass to heat up with a torch and pick each tiny piece off. Surprisingly, there wasn’t much of an outline underneath.


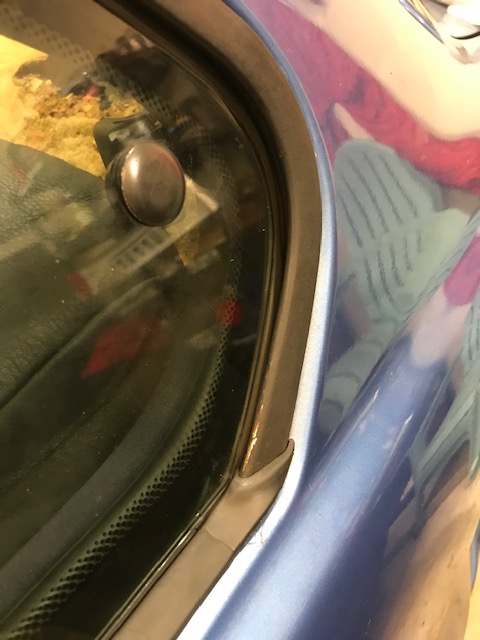
    The cracked gaskets along the vent windows have been bugging me for quite some time now, so I ordered up the parts, pulled the interior apart, took the window out and got to work.


    As usual, everything was dirty and needed to be cleaned up before re-installation.


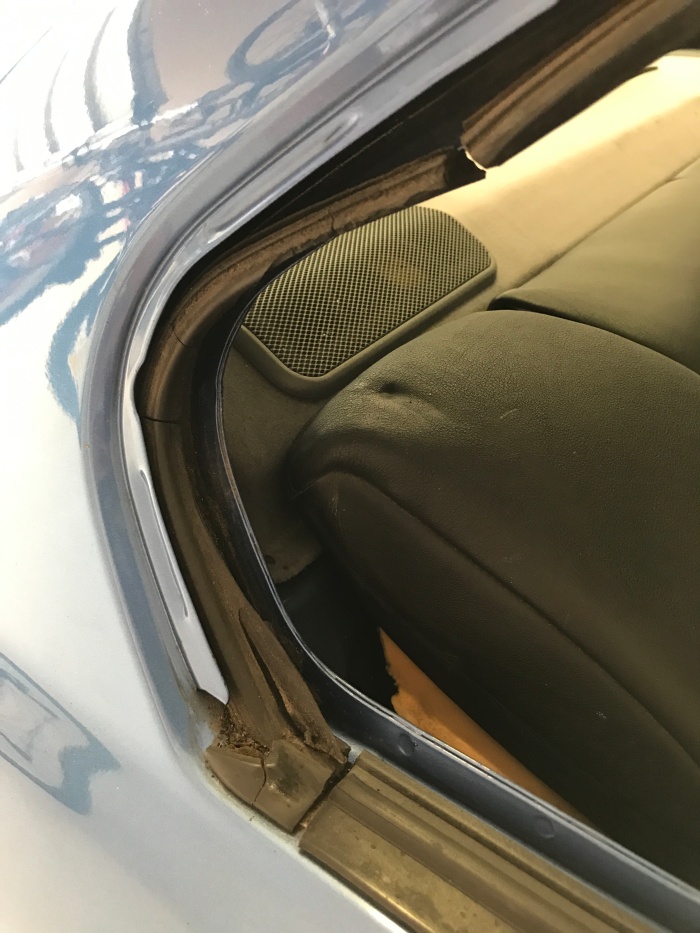
    Here you can see that the old gasket has literally crumbled into many little pieces. The new OEM pieces are only about $40 a piece and aren’t too difficult to install. Just be careful pulling the metal trim along the window down. Mine was stubborn and when it finally broke loose it kinked near the front. Now it has waves in it and I need a new one for it to be perfect.


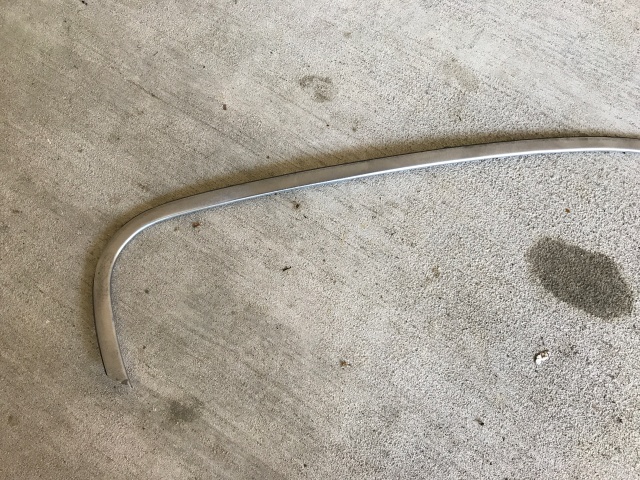
    Still, sanded it down in the meantime as the factory coating has withered away and corrosion was showing through.


    One side down. One to go.

    August 31, 2017

    Before we relocated to Houston I had read that it was very prone to flooding. Naturally, before we signed the lease on our place I checked out a flood map and deemed our area was very unlikely to flood.

    I was right, but not by much. Granted no one really predicted what would come with such a torrential storm. Less than a mile north of us was flooded as far as the eye could see, as pictured here:


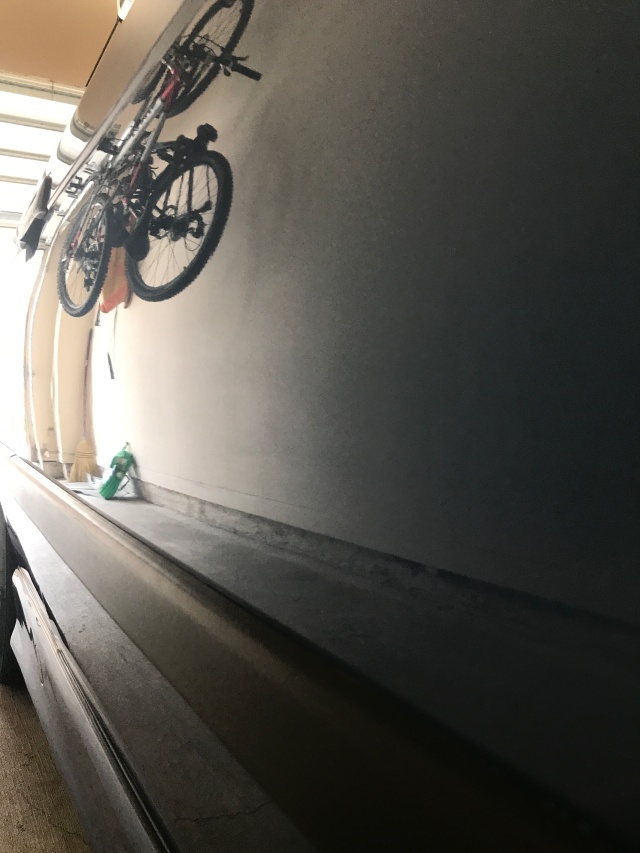
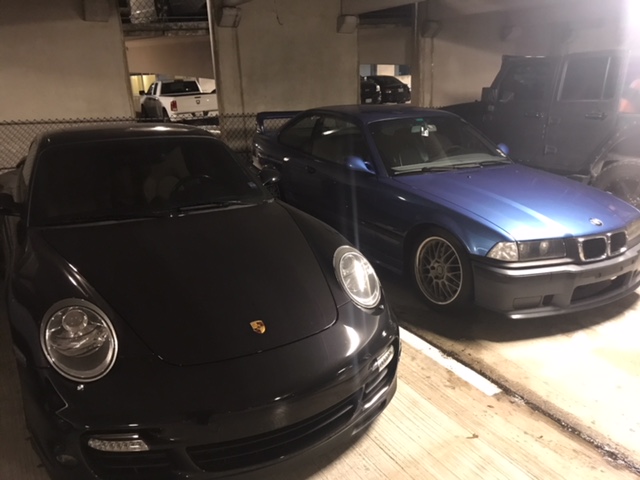
    Although I was confident our place wasn’t going to flood I moved the M3 to a friend’s high-rise for a few days. He was nice enough to send me a photo of it tucked away, safe and dry.


    September 4, 2017

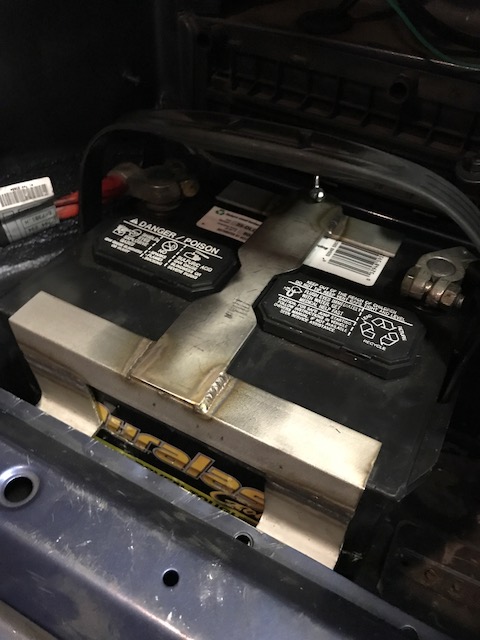
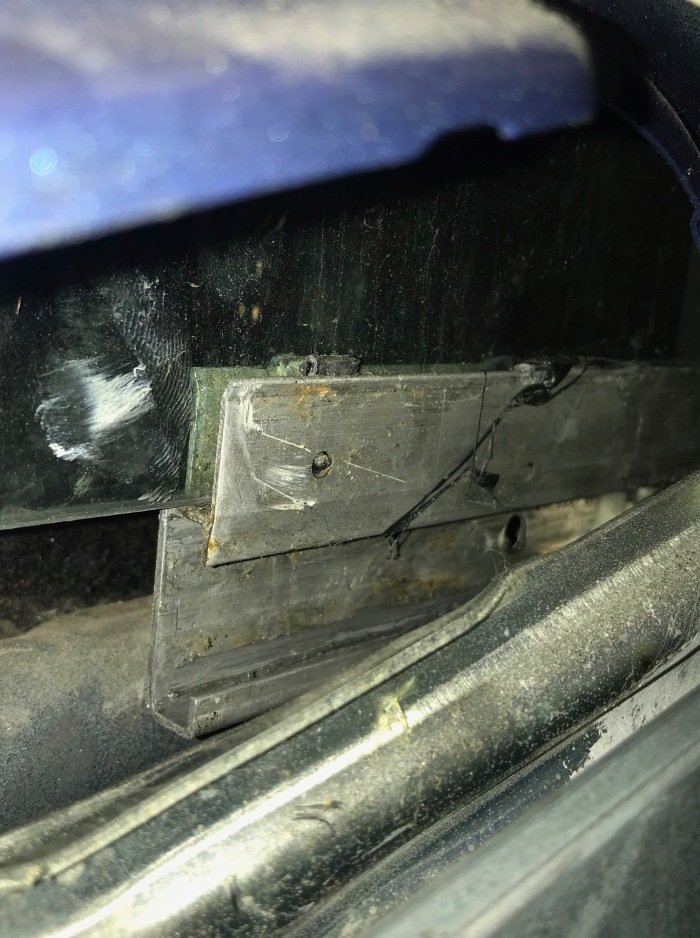
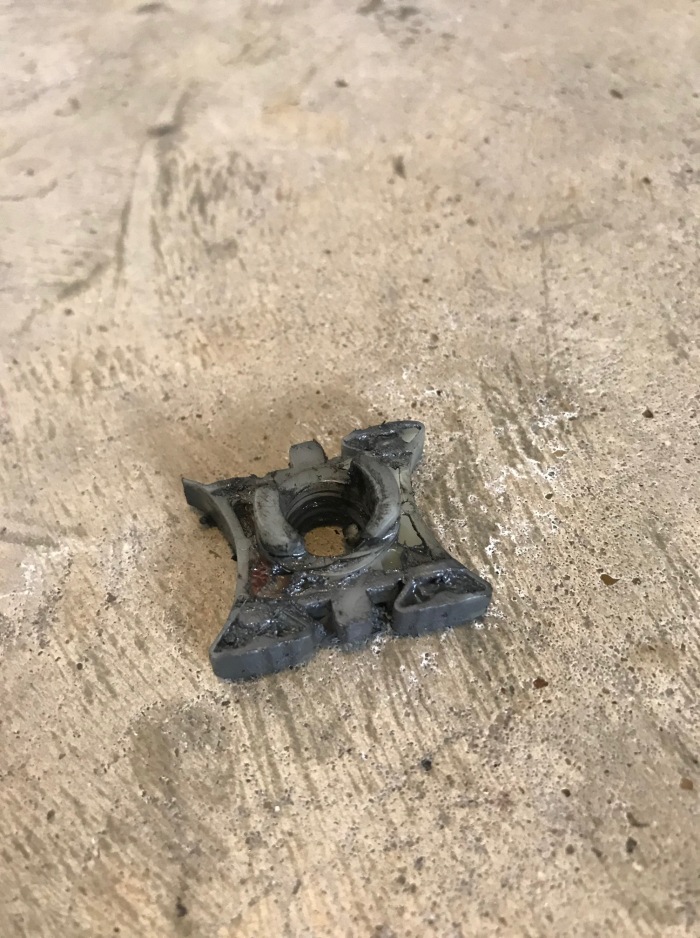
    A long put-off project has been tackling the battery tie down. The E36 comes with a pretty dumb design that only really fits factory sized batteries. Basically you sit the battery in the tray and slide a triangle-shaped peice of metal up against it and tighten it down. There are a couple of companies that offer a more sturdy option, but they are $150 and up. So basically this thing has been moving around, slightly, for a while and needed to be addressed.


    Luckily for me I have a very skilled fabricator friend who whipped up a custom piece for me in about an hour and a half. Super sturdy & clever design, with it tucking under the trunk frame rail and tying into a traditional threaded bolt on the other side.


    October 30, 2017


    Finally got the front bumper and nose panel painted and installed XPEL clear bra at the same time. Still need to find a hood that is in good shape that doesn’t have creases in it like this one does. Maybe an OEM style carbon fiber one?

    Also snagged an AFE intake for the car. They seem to be the best short-ram intake for the car that come with a nice little heat shield to help keep the radiator hose away from the filter. Doubled up on that and added some extra heat shielding to keep IAT’s down during these Texas summers.


    The new intake sounds great. Wayyyyy better than the generic setup that was on there before.


    November 11, 2017


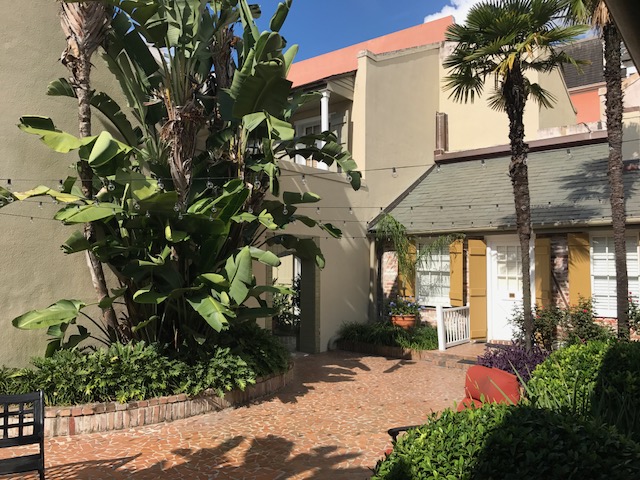
    The Warden and myself have never been to New Orleans so we decided to take a little weekend trip to see the sights and, of course, eat the food. I had been planning to take the M3 for a while and I’m glad we did. The car ran flawlessly with the A/C on all the way there and back without skipping a beat.

    We stopped at Avery Island on the way, which is a beautiful little getaway area.


    We got into New Orleans right about the time the sun was going down. There is a bridge that runs north of town that is 24 miles long, nothing but water for as far as the eye can see, was pretty cool!


    Got to the hotel, parked the M3, and took a look around our supposedly haunted hotel. Haunted or not, this place was great.


    December 1, 2017

    Put the car on the lift yesterday to find the transmission mounts are torn and the factory heat shielding on the trans tunnel had separated and been rubbing on the guibo for quite some time. Yikes.


    December 8, 2017

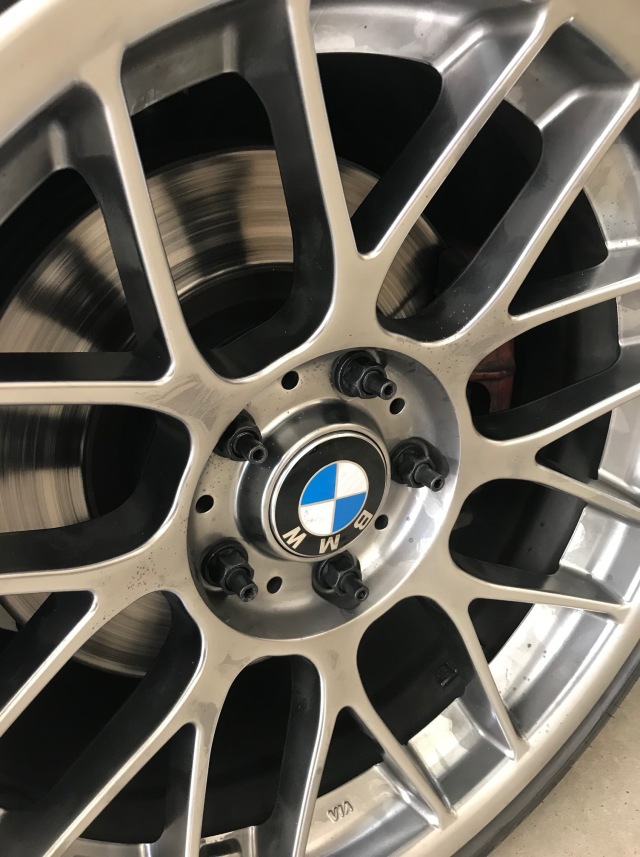
    After searching for 17×9 SSR Type C’s in 5×120 and the right offset, I’ve given up and joined the bandwagon. They’re popular for a reason, I suppose, lightweight, perfect fit, timeless look. I decided to run 17×9.5’s all around. Even if they’re slightly tougher to fit than the 17×9’s, I’d rather have the extra width if I ever want to grow into bigger tires. Ordered 245/40/17 Direzza ZII’s to go with them.


    December 15, 2017

    Finally got the ARC-8’s installed. Need to lower it a little bit all the way around but cannot lower the front until the stud kit comes in and adding spacers to the front. Any lower in the front than it currently is and the tire will rub the spring perch.


    I’ve driven on these tires plenty of times before but I remember again tonight why I chose them. SUPER GRIPPYYYYYYYYYYŸ.

    January 29, 2018

    Finally had some time to lower the rear to the height I want. Took the car out of town a bit to hit the only twisty road that I know of within a reasonable distance. Need to take a trip up to Austin to drive some real roads.


    February 24, 2018


    March 2, 2018

    After taking nearly three weeks to deliver due to APEX moving warehouses, I finally received the stud kit I ordered. I ordered the 90mm kit because I will be running a 12mm spacer up front. Turns out the 90’s are way longer than I’ll need, so I’m exchanging them for the 75’s.


    March 31, 2018


    April 30, 2018


    ^ E36 owners nightmare ^

    Was doing a top speed run in Mexico the other night and when I went to roll up the window half of it dropped down into the door. *eyeroll*

    After removing the door panel for the millionth time, it seems that the two bottom brackets separated from the glass. Supposedly this is a rare problem and after researching and asking around I was told to buy all new glass as these are glued on from the factory.


    Instead of doing that I got some super epoxy, mixed it up, lathered it in there and let it sit. While I was in there I also replaced one of the end brackets as you can see the threads were stripped here:


    For further insurance so that I didn’t have this problem again and to remove the possibility of removing the door panel and damaging clips/brackets any more, I replaced and re-greased the sliders as well. These are cheap so if you have your door panel off make sure to check and replace these.


    May 6, 2018

    Finally found a full day to dedicate to wrenching on the car and installing the APEX stud kit. I’ve been looking forward to getting this done so I can add the spacers and lower the front.

    Before:


    After:


    Had new sway bar end links laying around so while I was adjusting ride height I threw these on as well.


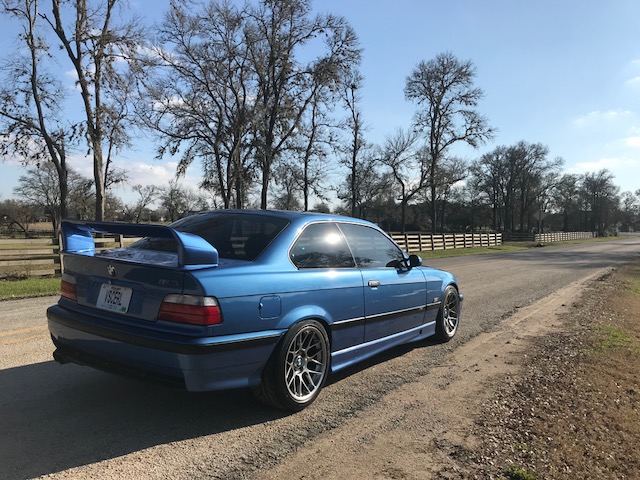
    Here is the final height I settled on. It will likely settle a little bit lower after I put some miles on the car. This seems to be a pretty safe height so that it won’t rub under any heavy loads.


    Finally. Happy with the end result!

    May 20, 2018

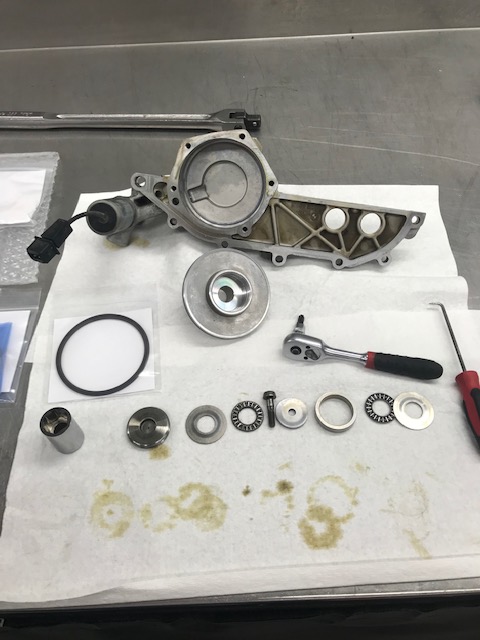
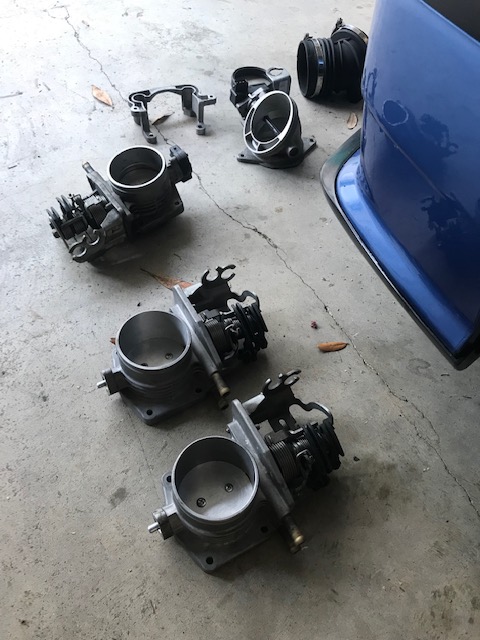
    Ended up having some free time to start throwing the parts I recently bought on the car. Since this doesn’t need a tune or any other supporting mods I started with the Riot Racing throttle body. This is a factory throttle body that was sent out and bored from the factory 63.8mm to 68mm.


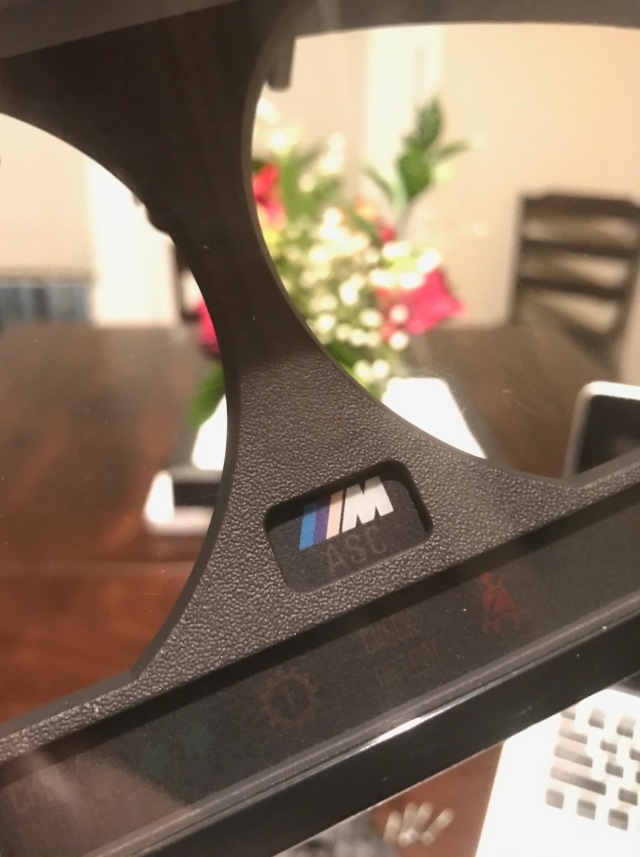
    These cars came with a really dumb traction control system in that the car essentially has two throttle bodies. The one pictured above, with the butterfly open, is for the tractional control system. The butterfly is open 100% of the time, however whenever the car sense any sort of traction loss it shuts this baffle, preventing any airflow. As you can see this doesn’t exactly create a smooth intake tract.


    For the time being until I install my Bimmerworld ASC delete boot with the upgraded MAF and injectors I simply removed the plate entirely. It’s very easy to do and helps clean up the intake tract for maximum airflow. That being said, I think this will throw the ASC light up on the gauge cluster when it self checks. The traction control system is junk anyways and it’s likely you never intentionally use it. I intend to just remove the bulb in the cluster at a later date.


    Like most things that are rubber on the E36, the throttle cable bushings almost completely disintegrated upon removal. If you are taking your throttle apart for any reason I would highly highly recommend replacing these bushings. Unfortunately it doesn’t seem that these rubber bushings are sold separately and instead sold as one piece with a whole new cable, so I opted for some CNC’d pieces from Garagistic. Super easy install, just thread on and lock it into place with a snap ring.


    I installed the throttle body with the old rubber bushings and the throttle response with the new TB and the ACS butterfly removed was night and day. The butt dyno also seemed to yield a couple of extra ponies as well, definitely a good upgrade for the money. Once I added the CNC’d bushing it was even more crisp. So crisp it’s hard to imagine what it was like before as I thought the response was already pretty good. Anyways, these bushing replacements were about $35 or so for both throttle and cruise control and they are a must have.


    After reinstalling everything and putting some miles on the car testing the new throttle body I noticed that the initial 1-5% of throttle seemed to stick a little bit. It was intermittent and seemed to get worse whenever I would do hard throttle open/close pulls. After a couple of hours and failed diagnoses, my friend finally noticed the problem. The new throttle plate provided by Riot Racing to fit the new 68mm bore was *slightly* too big. When the throttle would snap shut the edges of the valve would contact the housing itself, as seen in the pictures above. The way we adjusted it was to adjust the manual stop on the throttle body for the idle. We nudged it forward just barely so that it fully closes just very very very slightly higher than how it was set. We reinstalled and now it’s perfect!

    As I said before, this is one of the best modifications you can make on a NA E36. I felt more response and more power than I expected and couldn’t be happier.

    June 1, 2018


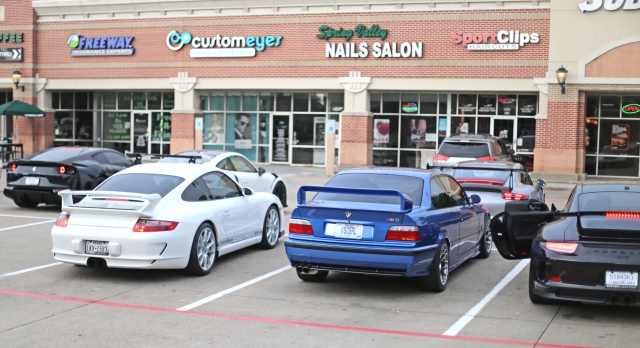
    Quick snap from someone at a car meet last weekend.

    July 17th, 2018

    Anddddd that brings me up to date for the most part. I still have lots to do, just matter of finding the time and energy to do so. I have a stack of parts waiting to go in currently;

    -M50 Manifold w/ New Modified Sensor from BW and M50manifold.com kit
    -24lb injectors
    -Bimmerworld ASC Delete Boot
    -Porsche 809 MAF
    -Conforti Tune (may not use this though if anyone is interested in it)
    -Rogue Transmission Mounts
    -ECS Shifter Rebuild Kit
    -New Z3M Radiator w/ new OEM hoses, Expansion Tank & Level Sender
    -80*C Thermostat and 80/88 Fan Switch
    -FDM with SPAL 16" High Performance Puller (Hope it'll fit in the factory shroud offset)
    -New O2 Sensors
    -Other odds and ends.

    Maybe this weekend I can get started on the cooling system overhaul. The car already has the aluminum thermo housing and Stewart water pump.

    August 14th, 2018


    Nothing much new as of now. Car is about 90% done with the cooling system overhaul:


    -Z3MS54 radiator
    -Upper, lower and heater core return hoses
    -80/88C Temp Switch
    -80* thermostat
    -Expansion Tank
    -Coolant level sensor
    -Fan delete / Highest CFM 16" Spal puller

    I was concerned about fitting this fan in the factory shroud while clearing the water pump nut. Some had said that it would NOT fit without offsetting it and losing the factory shroud, some said it would. I ended up biting the bullet and I'm glad I did. Pushed all the way to the driver side it fits, snugly, within the factory shroud with plenty of room between the fan motor and the water pump nut.


    Looking at the level sensor was pretty gross. Glad I'm flushing all of this out and putting all new everything in.


    Small hiccup, I somehow got the wrong temp switch. Turns out this one is OBD1.... luckily JB at BimmerWorld is great and sent out the OBD2 asap.


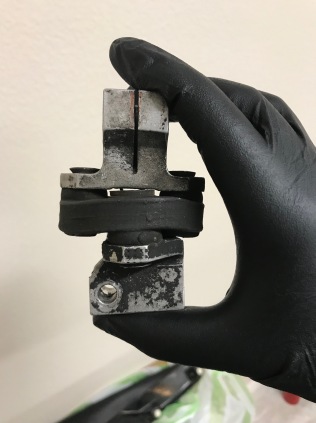
    While the car was up in the air I went ahead and pulled the transmission mount out of the car and the driver side mount practically crumbled apart. Yikes.


    Wonder how long this UUC mount has been in there....


    New Rogue mounts in. Although I've read mixed reviews about the enforer caps, I decided to put them back on. A little NVH never hurt anyone.


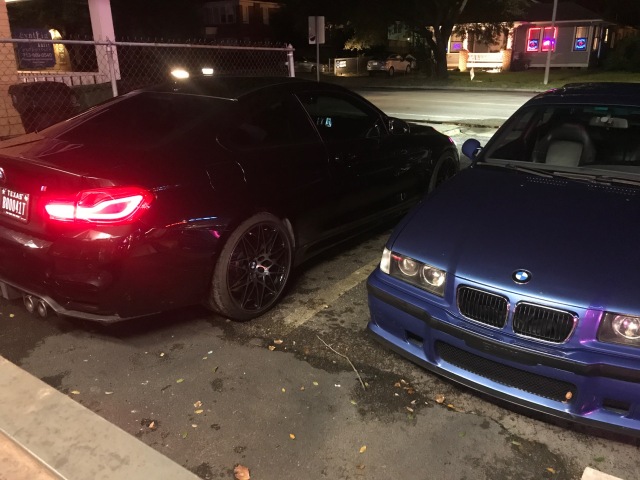
    The car has been parked behind work while I wait for some time to work on it. Looks like I've made some new friends...


    All that's left is the wiring, I'm doing the fan wiring the traditional way, into the temp switch, but running a backup "switch" to the factory foglight button. Looking forward to getting this all wrapped up and hopefully to the track soon to start shaking the car down.

    September 24th, 2018

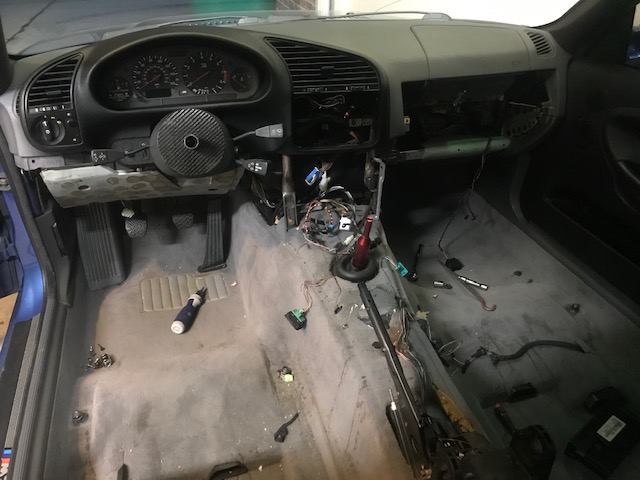
    I finally got to get the car back on the road after nearly two months of downtime between the cooling system and a shifter bushing rebuild from hell.

    After getting the wiring all wrapped up for the Spal fan, bleeding the system twice, and making sure the whole system was back to 100% I decided the next thing to tackle was something that has been in my parts pile since February. I had gotten the Shifter Rebuild kit assembled by ECS Tuning to try and clean up some of the play in the shifter, specifically when it was in gear.

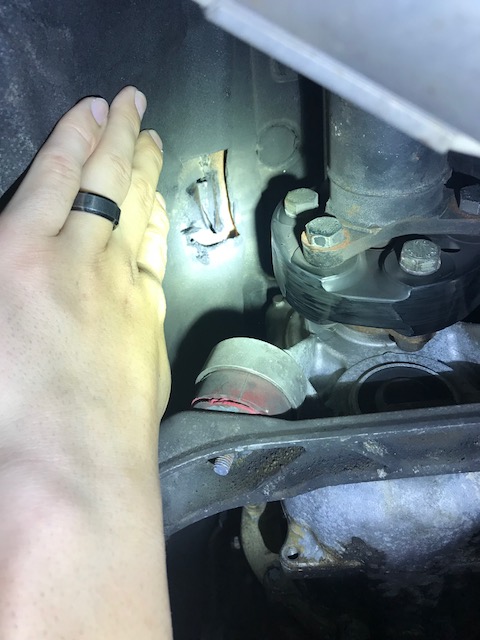
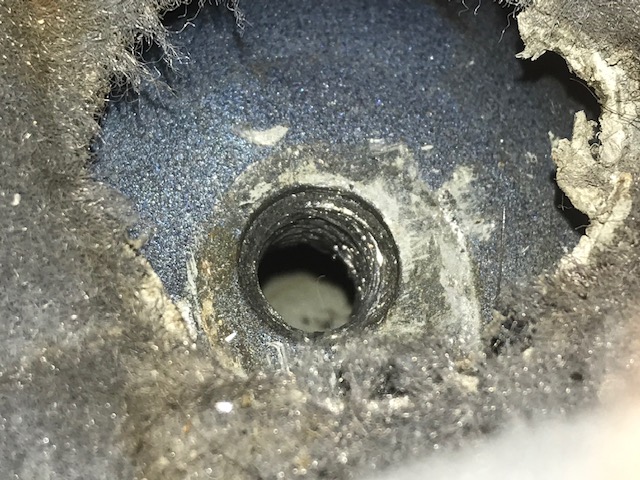
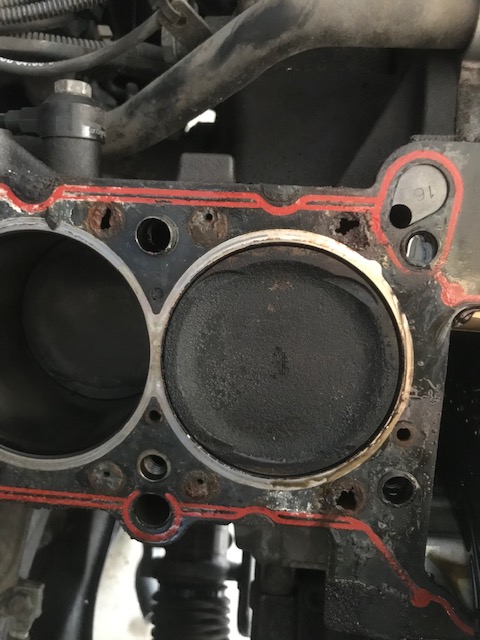
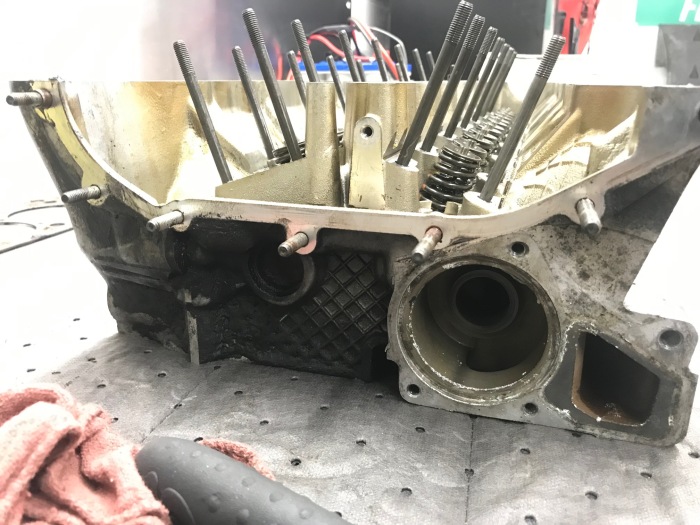
    In order to access the shifter assembly the exhaust needs to be dropped and the transmission/driveshaft lowered to give you some space to work. Well, this was the first hiccup in a series of “I hate this car” hiccups. As usual for a 90’s car that has lived through some harsh winters, almost ALL of the bolts from the headers to the midpipe snapped off. Okay, that was to be expected. What WASN’T expected was to find that someone had done some AWFUL welding on the header previously, effectively making it impossible to hammer the old studs out. See below.


    Gross. It got worse as it was flipped over and saw what the inside of the flange looked like.


    Crrrrriiiiiiiinnnnnnnnnge. At first I thought “Eh, I’ll just find another OEM one” because quality aftermarket replacements are too much money for what they’re worth, in my opinion. I put up a couple of threads on local groups and Bf.C thinking I’d have one by the end of the day. WRONG. Turns out the OEM S52 manifolds are what SPEC E46 guys run so they’re apparently in high demand. Luckily for me, my co-worker who made my battery tie down broke this apart, cleaned up the slag and re-welded it cleanly and perfect.


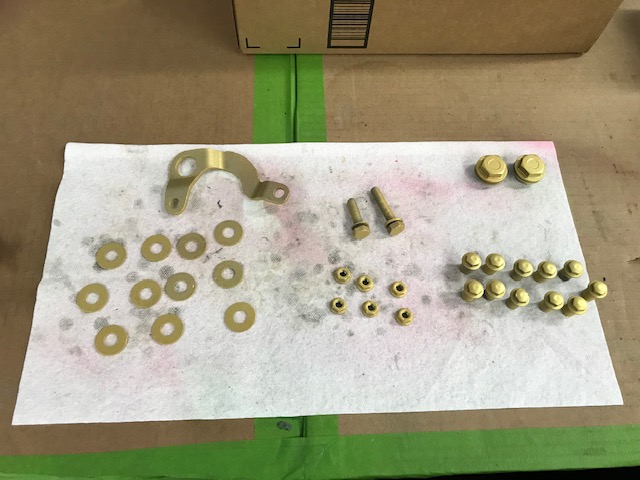
    Another unplanned $100 or so and a couple days of waiting I ended up with BW’s kit with all new exhaust studs, bolts and gaskets.

    Okay, manifolds are back on with new o2 sensors, replacing the bushings and pins, we encounter the next headache. All of the replacements went in fine except one, the rear carrier bushing was circular and the kit form ECS had oval ones. After a bunch of researching I finally figured out what short shift kit the car had in it when I bought it, an old Auto Solutions kit. Turns out these kits are so old, presumably, that they used the round bushings used in the E30 and before, as almost all E36’s used the oval shaped bushings. So another $25 and couple days of waiting, I got the derlin oval bushings for the E30 from Garagistic.

    Last piece of the puzzle, they went in fine and the car is finally back on the road. The kit really cleaned up the notchy-ness of the shifter, I’d definitely recommend the kit to anyone who has slop in theirs. The only thing that was a bit different was that the shifter feels “pushed back” towards the rear a bit more. Before my shift boot would get taught going up into 5th, but now it’s loose there and taught going down into 4th. It feels like 3rd gear is just a bit higher of where neutral used to be. Oh well, just have to reacclimatize to it’s position.


    Next object to tackle is to track down some up/down/side play in the steering wheel, likely the main bearings in the upper column, and to replace the tie rods, front lower control arm bushings and the steering guibo. For now, just enjoying having it back on the road and one step closer to being track ready!


    November 6, 2018

    Nothing exciting as of lately...

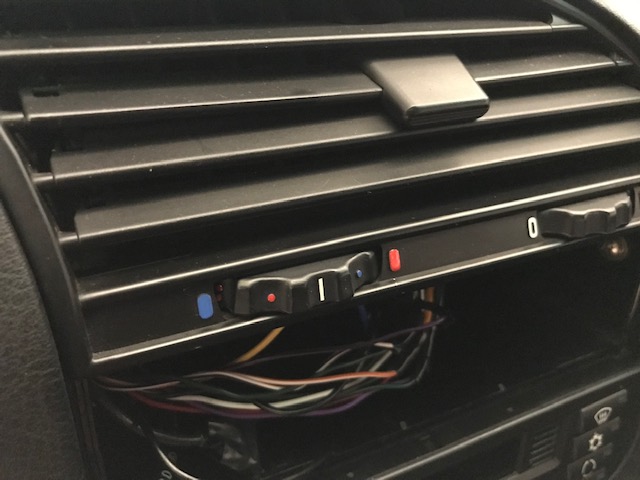
    After driving the car around for a full year without any sort of radio/audio, I ended up purchasing a new Pioneer head unit. I picked the DEH-S6010BS over the standard CD43 for two main reasons; 1. The backlighting color can be chosen from some 20,000 colors so I knew I could match the OEM lighting pretty good 2. Bluetooth streaming/Spotify control.


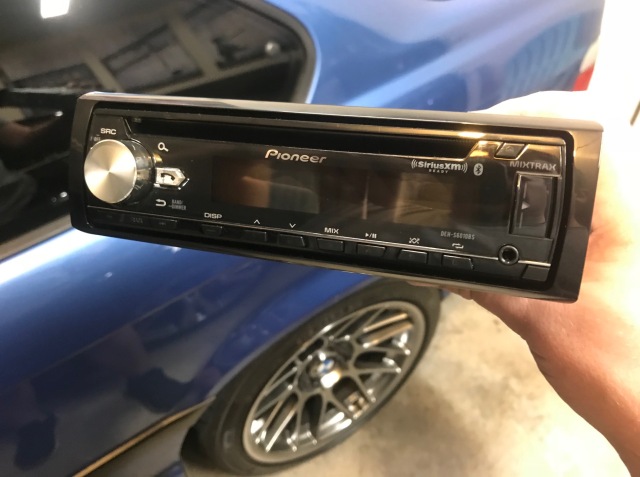
    Now obviously it’s not period correct by any means, but if I can dull down some of the trim and paint the volume knob black, it will be tolerable. So I started with sanding the gloss black surround trim with 2000 grit, here’s what it looked like to start with;


    After a couple of passes:


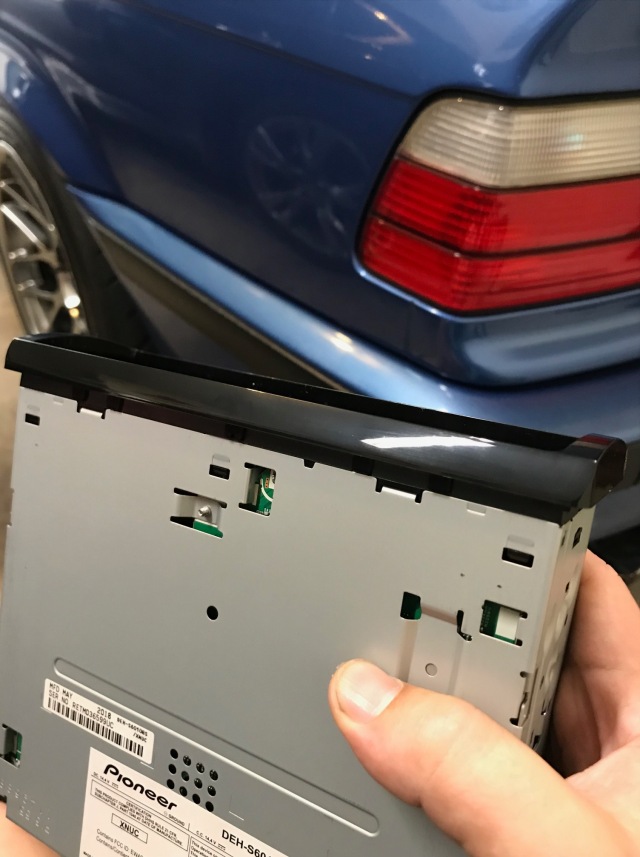
    Not bad. After wiring everything up and installing the head unit, everything worked but no audio. Quick Google search yielded that you have to wire the blue wire to blue wire, which is labeled “Steering Wheel Controls” which I figured I didn’t need. After those were connected, all was well.


    Close enough for me, until I paint that volume knob. Now I need to replace all the speakers, the 22 year old Harmon Kardon stuff is JUNK.


    Still chasing down the P0121 that has plagued me ever since installing the Riot Racing 68mm throttle body. I’ve adjusted the manual idle screw probably a half a dozen times now, trying to get it as close to closed as possible without inviting the throttle plate to stick on hard-close or high heat situations. I’ve got it just about perfect now, where it sticks only in the slightest bit, but the P0121 keeps popping up after 20-30 minutes. I think my next step is to order a new TPS and hand it over to my local Indie who has the proper scan tools to get it sorted correctly.

    The IACV got a good cleaning while I was in there, but made no difference.


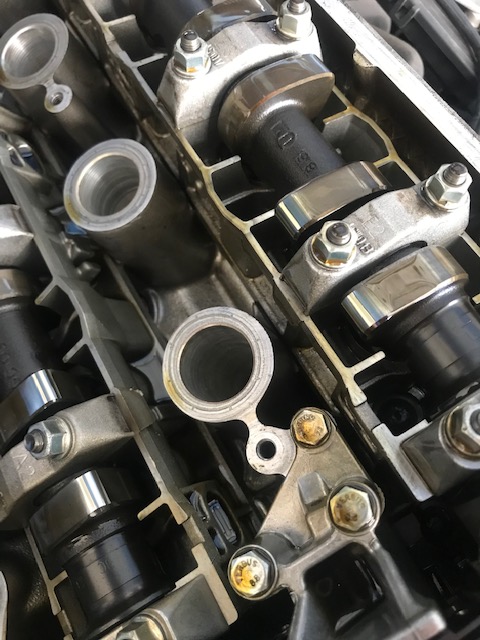
    Also, looks like I’ve started to develop a small oil leak around the front valve cover gasket/Vanos assembly. *sighs*


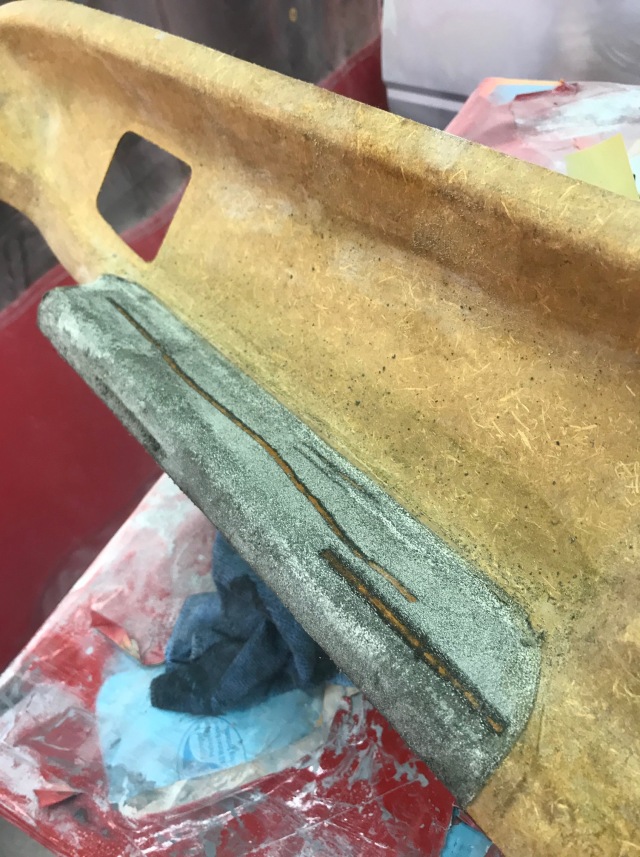
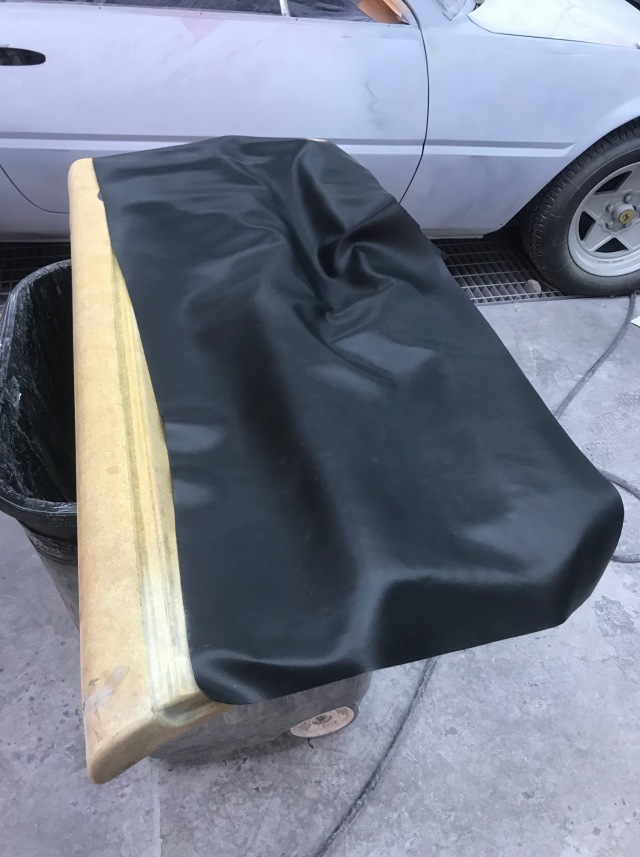
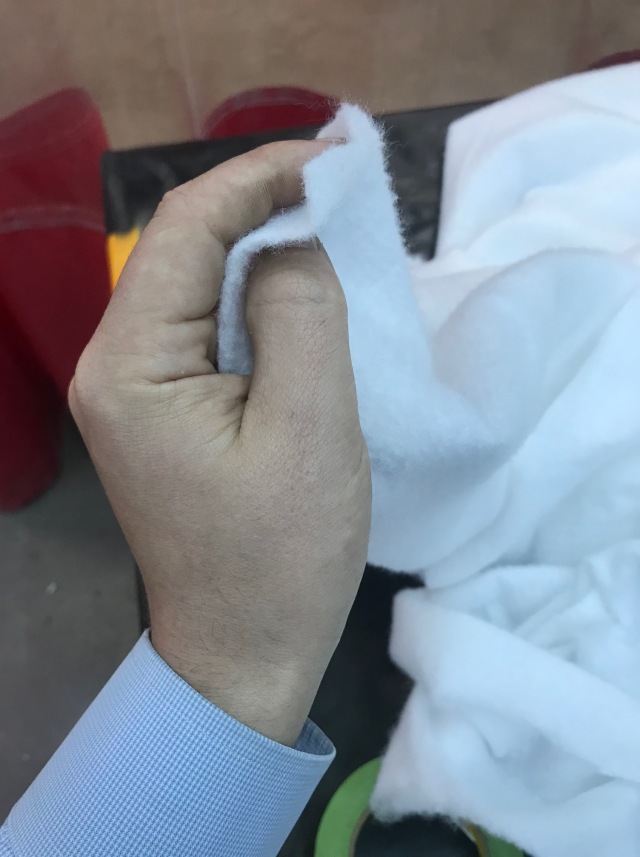
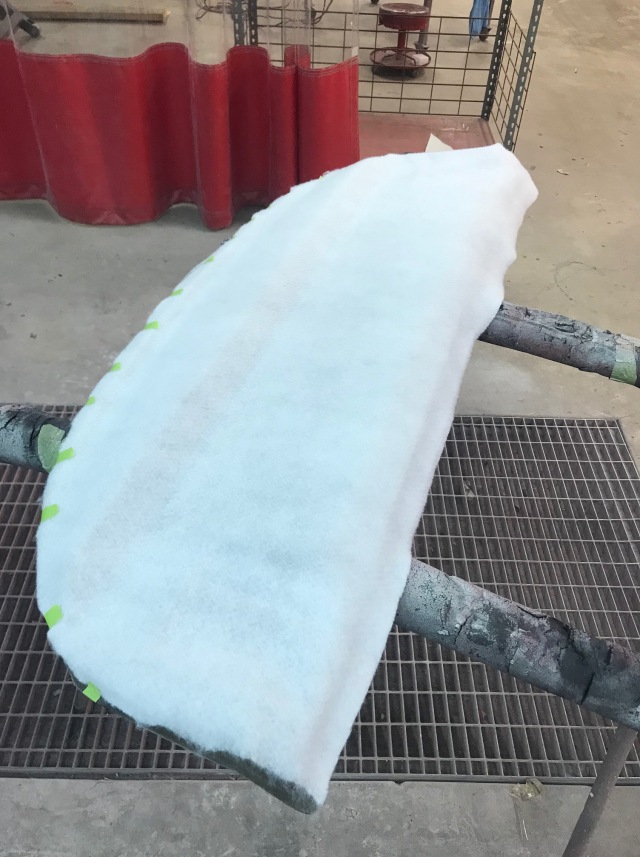
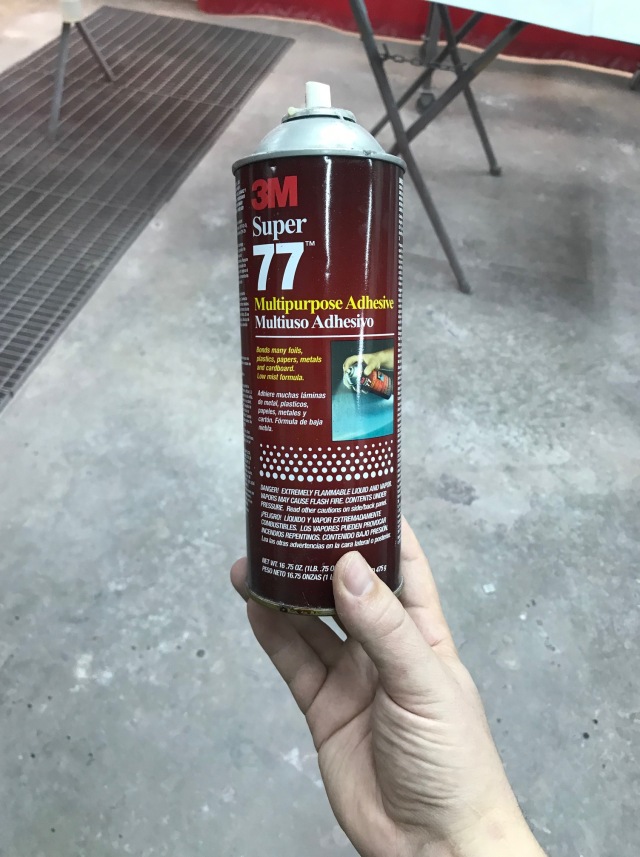
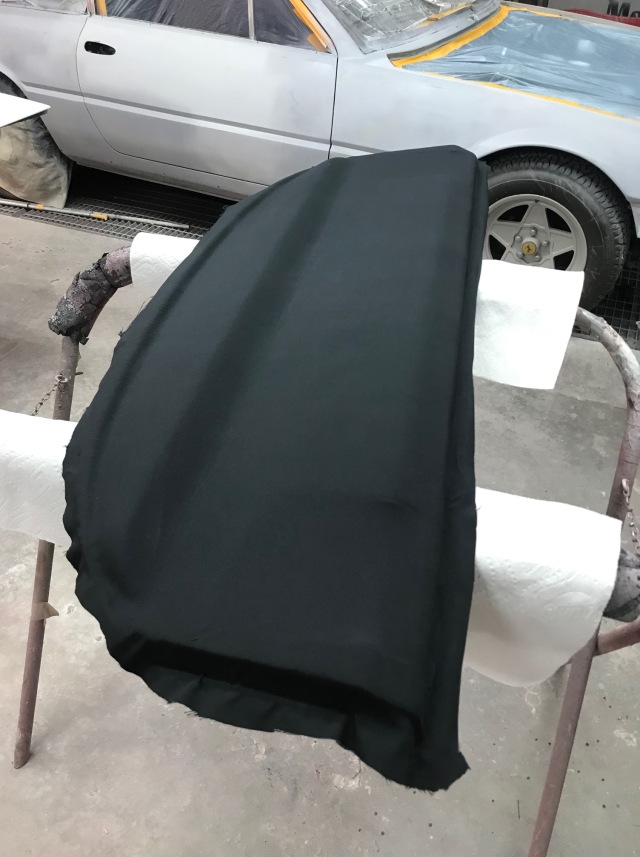
    Spent a little time the other day working on another project for the car; sanding down and prepping my spare door cards for new material. My last attempt at this did not go so well, but this time I’m prepping them properly and will be installing the new material with a heat gun and more patience.

    Last edited by Mike0032; 12-06-2021, 03:45 PM.
    Past: '99 Hellrot/Dove M3 | '97 S14 1JZ | '06 Triumph Daytona 675 | '01 330I M-Tech I '99 Silvia S15 | Current: '96 Estoril/Black M3


    Instagram

    #2
    12/24/18

    Got some goodies in the other day;

    -IACV hose
    -OEM Steering guibo
    -New Lemforder tie rods
    -Brake pedal circuit switch
    -All new bearings/clips for the upper steering column


    The steering in my car feels pretty connected and not a ton of slop, but in my never ending pursuit to keep this car freshened up and lively, I figured I'd replace this.


    I went back and forth A LOT between this and the solid E34 coupler. I've heard a lot of great reviews from people using the E34 piece but after much consideration I decided another full solid bushing may not be best for the road conditions here.

    The factory rubber bushing I removed had some visible twist to it but was still pretty solid. Someone had replaced it before because there were alignment markings on the splines, so no clue how old this one is.


    Old ones out, new ones in! Onto the alignment rack for a quick setting check. While it was on the lift I put new transmission fluid in and checked out the condition of the brakes, as I run a pretty aggressive track pad year round. They sure have taken a toll on these rotors! Life on these is getting pretty low, so that'll be added to the upcoming list.


    Weather in Houston has been great this Autumn/Winter. I'm thankful I can wear gym shorts in December and eat my lunch outside. Best view in the house!


    Here's a random E30 I saw at a show the other day. EhhhhhHhhHhhhHhhhhhhhhh....


    1/5/2019

    Sunny and 65 in December, I’ll take it.


    I had mentioned the old steering guibo in the last post, about how it was “firm but twisted” Here you can see how twisted it really was. Surprisingly, after installing this it took a lot of the play in my steering column out, so no need for the new bearings/clips as of now, maybe when I swap to a new steering wheel.


    Adjusted the manual idle screw on the throttle body one last time, still getting TPS codes. Changed the IACV hose while it was apart.


    Also did the brake pedal travel sensor as I kept getting intermittent “Brake Light Circuit Failure” codes on the OBC, yet all the lights still functioned. As mentioned in the comments on many of the write ups by guys who did this, it helps tremendously to have the car running as the brakes are aided and you can push the pedal down much further with less effort. Still a pain in the ass, nonetheless.


    Noticed some cracks on the bolts that hold the trunk latch in place, NICE!


    We’ll just cover those up with this piece….


    Five minutes later….


    Took the car to another outside dinner and bumped into a friend there with a beautiful F82.


    Think I’ll be ordering the head gasket parts soon, I’ve put it off long enough now.

    2/6/2019

    The weather has been really nice this winter so I decided to de-clutter my garage a bit and that meant I had to get started on a job I've been putting off for quite a while now; ridding the interior of everything that is Dove.


    I've had the black door panels and Vaders in for quite a while now and the time has come to finish the rest. The seats came out with a breeze, revealing one of the mounting holes was a bit trashed.


    I ran a chaser through there to clean up the threads and all seems fine for now. The whole center console followed, also with ease. Lots of dirt and some apparent spilled coffee from some point in this cars 23 years of life.


    One of the last pieces keeping the dash in was the center vent and that dreaded bowden cable to control the cool/hot air. A quick Google search showed how it was routed and where to unclip it at.


    It honestly wasn't that bad, just traced the blue cable down to the box, unclipped the yellow part from the mount and the end of the cable from the adjuster itself. With the lower foot vent unclipped it was pretty easy to reach both.


    With that and all the other vents, bolts, and clips out of the way, the dash was free to wiggle out. It was a balance of angling and pulling it up and over the switches on the steering column. With the dash out and all the wires hanging everywhere, it was daunting to look at. Realistically though it was pretty self explanatory and not the mess of a job I had told myself it would be.


    Now that all of that was out of the way it was time to pull the carpet out. All went well except for the gas pedal. Again, a 23 year old piece of plastic that had been abused and dirty for quite some time, I honestly wasn't too surprised when it split in half trying to wiggle up from the base. Luckily a brand new one from BMW is only $30 or so. If you're doing this job, it's not a bad piece to proactively order, it helps clean up the interior a bit too.


    Hopefully you're not like me and have friends to help you with this. It is NOT light and takes some fan-dangling to get it out. It's tough on your back to be hunched over inside the car trying to pull this one big U-shaped piece towards the back of the car.


    After 30 minutes or so it was finally out and ready for the new black carpet to go in. It's cool to see all the working parts hidden underneath the carpet and dashboard.


    Installation is just the reverse of the removal. I started from the back and worked each side up into their respective spots. It takes time, so be patient. It doesn't just slip on like a glove.


    I didn't plan on removing the whole heating/cooling assembly so I trimmed the carpet around that area. I drilled holes in the new and old carpet and stitched the two pieces together around the trans tunnel.


    Everything all back in place! I've got a new arm rest pad from BMW but I'm still missing the rear armrest assembly covers in black. I'm still trying to decide what colors/patterns to do on the e-brake and shift boots. I'm leaning away from doing the traditional ///M color stitching and maybe doing something with a simple blue stitch to match the paint.


    The red paint on the center vent has been faded for who knows how long, so now seemed like a good time to fix that.


    I used just a regular enamel paint that I use on my models and a thin paint brush.


    While I was in there I replaced the cabin air filter, and boy was it overdue. I removed a small forest from in there. Air flow out of the vents is much better now too. Glad I did this after the new carpet was in....


    Replacing a filter as dirty as this is strangely satisfying.


    Before putting the lower side of the drivers dash together I decided to replace the clutch pedal bushings with some oil-impregnated bronze bushings.


    My clutch pedal is pretty far angled to the left side of the car so I hoped this would help clean that up. It did a little bit, but not much. Some people mentioned using a washer to shim it over and straighten it out but I'm not sure how, I've got no more room on the pin for a spacer and the clip.


    I've heard great things about the Mason Engineering pedal, but with the head gasket repair coming up and a braking system that is overdue for an overhaul, it'll have to wait.

    All said it done, the job wasn't that bad. I did it for two or three hours a night after work and had most of it done this past Sunday. I'm glad it's finally wrapped up, but now I'm just itching to replace the Vaders with proper seats and upgrade the steering wheel while I'm at it. Also debating doing a half cage but we will see!

    2/23/2019

    I've always hated rattles, creaks and groans in the interior of cars. Hate hate hate them. So after putting the black interior in, I wanted to take some extra steps to keep the interior as "fresh" as possible. One of the things that has always bugged me is that putting ANY pressure on the center console resulted in a super annoying creaking sound. The video below gives you an idea of what I'm talking about, but the microphone on my iPhone makes it sound much louder than it actually was.


    Went to Home Depot and picked up a bag of adhesive backed felt circles, these are about $3.


    This required a lot of trial and error, but I eventually found the sweet spot for placement of these. Probably overkill on the drop in cupholder/ashtray piece but with the added width it actually made the whole assembly feel way more sturdy.


    Another crucial point is where the whole bottom piece meets the center shift surround piece. I had to trim the little pieces down to be very thin, but once they're sandwiched in you cannot seem them and they don't bow the piece out either, making it look misaligned. I only needed one on the driver side and two on the passenger side.


    Again, the microphone picks up way more noise than there actually is, this piece is pretty much dead silent now in person. See video below.


    The Racing Dynamics strut tower bar has been bugging me for some time now, so I decided to take it apart, sand down the pitting and hand polish it. As you can see below, it was definitely aged.


    Vinyl removed and DA sanded with 180 and 220 cleaned it up pretty nicely.


    I went up the scale to 400 and 800 on the DA, then switched to wet sanding by hand with 1000 all the way up to 2500. Then hand polished with Never Dull.


    Now just need to replace the Racing Dynamics sticker and put some sort of sealant on it.

    Also spent some more time on the door panels today getting the incredibly gross old padding/adhesive on the armrest pieces. This was gumming up even 80 grit pads so it had to be soaked with solvent and scraped off with a putty knife, again a time consuming procedure.


    Found a couple more hairline cracks that will be filled with epoxy and sanded smooth.


    The main door panels are just about ready to wrap with the new material. I tried to mock them up with a heat gun and some patience, but I'm not sure if I'm going to be able to pull these off in one piece. I may need to lay a piece inside the map pockets first then figure out a way to seam the big overall piece into them.


    Past: '99 Hellrot/Dove M3 | '97 S14 1JZ | '06 Triumph Daytona 675 | '01 330I M-Tech I '99 Silvia S15 | Current: '96 Estoril/Black M3


    Instagram

    Comment


      #3
      3/5/2019

      Wrapping up some work I’ve been doing to the gauge cluster. Since the ASC system was deleted the light was on in the cluster. Rather than wiring up a bypass trick I killed two birds with one stone: remove the bulb and replace the faded logo with a new one.


      Old faded logo:


      Replacement logo font looks good. The middle color on the stripe isn’t as purple as I think it should be, but it’s fine.


      Set down into the recess


      And all back together. Rather than spend the time and money to have a local decal shop fab up a non-translucent sticker overlay, these little emblems were about $9 for a set.


      While I was in there, I decided to address the airbag light as I don’t intend to have a factory steering wheel back in the car anytime soon. Rather than pluck the bulb and have it still dimly lit by the backup passage, I left that all in tact and put some electrical tape on both sides.


      All done, thrilled to not have XMAS tree dash anymore. Next I’ll have to address the failing adhesive and dim points around 80mph and 4,000 RPM’s.


      4/2/2019

      Another part of the black interior swap was to get the rear deck changed over. Rather than track down, buy, and pay for shipping on a “black” rear deck that had already faded to purple, I decided to try and make my own. My grey one had some deep scratches in it and even some small pieces of broken glass stuck into it from when it was broken into years ago. The old grey fabric was pretty stubborn to get off at first. After I soaked the whole piece in some solvent it started to come off a bit easier, but still less than friendly.


      It took some time at Michael’s to find a black fabric that had the same texture as the factory looking fabric, but I eventually found some. Considering how thin the fabric was I picked up some cotton backing to lay down first to help hide any imperfections and give it a little bit of padding. If I were to do this over again, I probably would have found some thin foam as it’d probably be easier to work with.


      I used some strong 3M adhesive on the leading edge, nearest the rear seat, as this portion is hidden under the cover. I used this because I needed a good anchor to pull the fabric tight when spreading it over over the entire piece.


      Base fabric all laid down and trimmed. Note the yellow on the leading edge, that adhesive is potent stuff and will bleed through into the black fabric, so use it sparingly and let it dry completely before adding the black fabric.


      The next day after it was all dry I started laying down the thin black fabric. I started at the leading edge and worked outwards towards the edges. I used a plastic squeegee and a fabric glue I also picked up at Michael’s. You’ll need something that dries clear and doesn’t go on so heavy that you’ll see it through the fabric.


      It’s a bit time consuming and can be easy to mess up, so if you’re trying this, take your time. After it was all laid down it was time to trim and glue the excess to the underside of the shelf.


      Again, rather than trying to find unbroken speaker grilles in black I just had these painted black. Half of the foam had already blown out.


      A little glossier than I would have hoped, but it’ll be fine for now.


      All finished!


      Also threw the new OEM center arm rest in.

      5/16/19

      Over the past year or so I’ve had the looming suspicion of a leaking head gasket, as the last oil report from Blackstone showed an increased level of Sodium and Potassium, up even more from the small trace from the year prior. While I didn’t see any milky substance in the oil or on the oil cap yet, I noticed the cooling system was pressurizing far more than normal. A full 24 hours after driving, opening the cap on the expansion tank would let out a light hiss and the fluid level would rise. Not ideal.

      While driving the car to dinner at the end of January and checking the fluid level the following day I noticed the pressure, even just a short and easy drive, had increased drastically. Popping open the oil cap revealed a confirmation of what I had been trying to put in the back of mind.


      Gross, but such is life of anyone with an E36, really. I went ahead and ordered all of the gaskets, seals, and washers that will be coming apart during the rebuild. As many have warned against the FEBI gasket, I went ahead with the Elring variant. Also noticed a small weep from the rear differential last time it was on the lift so I also sprung for some Redline 75w140 and two new drain plugs.


      While it is all apart I figured it was a good time to replace all of the cooling system and heater hoses that weren’t addressed with last summers overhaul, as well as miscellaneous vacuum lines, upper chain tensioner, knock sensors, etc and convert from the unfavorable expansion tank to the proper Euro setup.


      I’ve never done a head gasket job before but after reading numerous walk throughs and feeling ambitious I decided to go ahead and begin the teardown. Free time is often limited so I told myself I’d take it slow and work on it when everything else is caught up and energy isn’t depleted.

      Pulling the valve cover off revealed that the top end was exceptionally clean, especially considering the mileage on the car. I noticed some notches in the cam gears and timing chain so someone was in here at some point.


      Fortunately everything came apart very smooth and didn’t run into any real issues. With the head off I finally got a good look at the gasket. Those water jacket passages are disgusting! I didn’t immediately see any obvious signs of a breach so I assumed my over-pressurization issue was the result of a small crack somewhere.


      With the head off and on the bench it was time to get it into the washer.


      Off to the machine shop she goes! Next up was to begin prepping the block for the new gasket. Nothing but Brakleen, WD40, a brillo pad, some razors and a whole lot of elbow grease. This was a very tiring and time consuming process as I didn’t want to use any power tools and potentially create a low spot on the block or any other damage.


      I’d say I spent at least thirty minutes per piston, likely more. Once that was done I checked the surface with a straight edge. So far so good.


      Another thing on the list of “While-It’s Apart” was the Beisan Systems Vanos rebuild. Their step by step directions with pictures made this a totally brainless procedure. It was fun to take this apart and study, clean, and put back together.


      I was back and forth out of town two separate weeks out of the month so when I eventually settled back in I went and picked up the head from the machine shop. To my surprise the pressure test came back just fine, no cracks! After looking over the old head gasket with him he pointed out exactly where my breach was, a small one on cylinder 1. Let’s hope he’s right!

      Another surprise was that he said I had 6 bent valves. What? The car was running pretty damn good when I took it all apart! I suppose my definition of “bent” is different from a guy who works in .00010’s of an inch every day. He even went so far as to put them in a drill press and spin them and sure enough, you could see a bit of variation in them. Six new valves, valve guides, new seals for all of them and a full valve job should do the trick.


      Another thing he mentioned was that he barely had to deck the bottom at all as it had warped only a minor bit. Good news! Wrapped this up with all new exhaust manifold hardware once I had it back on the bench.


      I’ve got no real interest in doing headers at this point as I can’t justify spending the money on them only to have to change the mid-pipe, then deal with emissions issues and extra noise and extra expenses and all of that for a nominal increase in power. For now it’s just not worth it to me, maybe down the road when I’m chasing more power. In the meantime in my continued efforts to clean this car up a bit I decided to sandblast and coat these in a high temp silver. Here’s what I started with:


      After a quick sandblast:


      And after a few coats of the high-temp paint. Not really interested in shelling out big bucks for the ceramic coating on factory headers, so this will do for now. We’ll check back after some miles to see how they look then.


      My friend had a roll of header wrap laying at the shop and figured it’d be a good opportunity to wrap these in an effort to keep temps as low as possible, Texas summer heat is real. It was a great learning experience but after reading a bit more online later that night we decided it was best to remove them. Reading one horror story of an oil drip onto the fabric like material which then led to a fire is enough for me to steer clear. It’s a shame because I did quite like the way it looked after it was done.


      Over Easter weekend I was able to button up a few more things and install the new ARP head studs.


      As of now the cylinder head has been lowered down onto the block with the new gasket and is ready to be torqued down. I started the tear down a little over a month ago but haven’t really driven the car since January, so I’m starting to get excited now that the finish line is in sight. I’ve got a few other things I need to do while the intake manifold is still off so that will come soon enough!

      Moving on with the head gasket job and cleaning things up I decided to throw all the valve cover and Vanos hardware in the parts washer, then tumbler, then coat them in a zinc like coating.


      Next I torqued down the head onto the ARP studs and proceeded to do the cam trays, lifters, then the cams themselves.


      It was all pretty easy to put back together. Once the cams were torqued down and the gears installed it was time to throw the Vanos on, which actually went on first try. With everything timed and then tied together I rotated the crank two full rotations and luckily enough the TDC mark on the crank matched up with the 45* angles on cylinder 1 cam lobes and the dots on the backs of the cams. Success!


      Valve cover back on with the fresh hardware and the new M50 manifold installed as well. All the vacuum lines converted to their respective spots, double and triple checked. Almost time to crank!

      As mentioned earlier in the post I decided I wanted to do away with the fail prone factory expansion tank. Although mine was only a year old they’re a pain in the ass to bleed properly and by using the Euro reservoir mounted up near the firewall I can build a proper shroud for the Z3M radiator. After looking up the required euro parts for the conversion it’s evident that using the euro hardline requires manually bending it, adapters to attach it to the water pump outlet, the deletion of the throttle body coolant lines, and just overall numerous headaches to make it work. The US E36 uses a long rubber hose from the bottom of the expansion tank to the water pump pipe, so it shouldn’t be an issue to run a long rubber line the opposite direction behind the head and up towards the reservoir.


      Since I’m retaining the factory hardline that comes out of the back of the water pump I needed a smooth 90* bend coming out of the hardline and turn back towards the firewall and behind the head. I found this line on Amazon for about $15 that fit the bill.


      I trimmed an inch or two of the leading portion to try and keep it as reasonably far from the brake lines. In order to try and keep as much heat out of the brake fluid I got a piece of thermal wrap and ziptied it over the hose in that area.


      It’s difficult to see here but this shows the same hose running between the head and the firewall. I wrapped this part in the same thermal wrap to help abate any excessive rubbing.


      And here it comes up in the passenger corner up the engine bay and meets the reservoir. Much easier than buying the expensive Euro parts and modifying them to fit properly.

      After that was done I mounted the radiator, filled it with fluid, and double checked all of the work at least five times. I went to bed and ran through the whole head gasket repair in my head one last time to try and mentally confirm everything on the checklist. Tomorrow we’re going to *hopefully* fire it up.

      The next morning I reconnected the battery, sat down in the drivers seat and very nervously turned the key. It fired right up! It stumbled around at idle for about ten seconds and then idled silky smooth. Tremendous weight off my shoulders.

      I’ve still got to wrap up a few loose ends by mounting the Euro reservoir properly and on my new gauge cluster setup which is to come in a following post. But for now, it’s good that this is just about ready to be back on the road!
      Past: '99 Hellrot/Dove M3 | '97 S14 1JZ | '06 Triumph Daytona 675 | '01 330I M-Tech I '99 Silvia S15 | Current: '96 Estoril/Black M3


      Instagram

      Comment


        #4
        6/3/2019

        Over my years I’ve grown to genuinely hate the smell of coolant. It’s like PTSD for me, a stark reminder of all the times my RB/1JZ S14 would blow coolant lines, the time my old E36 M3 blew the upper radiator hose halfway to Florida, or even when my water pump gave up at 230,000 miles on my old G35, none of these are my fondest memories.

        Being that summers in Texas are VERY hot and I don’t want to have to do another head gasket job anytime soon, I decided it was best to rely on something other than dummy gauge in the cluster. The water temp needle is buffered to something of the tune of 180-240, so by the time the needle even starts to move towards the hot side it’s already far past “tolerable” temperatures.

        Keeping with the theme of functional yet OEM+ styling, I wasn’t left with many options aside from the traditional VDO setup in the slot under the OBC. These look great for what they are, but are far from your line of sight while on track. I wanted something I could glance at without losing my focus and line of sight for more than half a second.

        A-pillar gauges? No, this isn’t a SRT-4 Neon. Steering column mounts? Functional, but not really a good look in an otherwise OEM looking car.

        I got the idea to order a traditional 2-1/16″ water temperature gauge with a digital readout, take it apart and use the LCD screen and mount that somewhere in the gauge cluster. After reading a couple of endeavors from people taking apart AEM gauges and finding a big circuit board that is unable to be disassembled, that idea was out.

        After another few hours of research I found a company that builds compact digital readout gauges. After exchanging a few e-mails with them I had the option of a single water temperature gauge or a dual setup with water and oil temperatures. I sourced a junk cluster locally and started making paper templates using the measurements supplied by the company.


        My first idea was to use the dual gauge setup in the lower portion of the cluster, where all the warning lights are. Unfortunately the overall PCB board was too tall and even with trimming part of the cluster it wasn’t going to work.


        I honestly could not care less for the MPG gauge, so I figured that would be the next spot I could try. Another strike, too wide overall.


        Ultimately I gave in to the reality that I wasn’t going to be able to fit the dual function gauge anywhere, so I mocked up the single function gauge where the MPG gauge was. Looks like this could work!


        Looked like plenty of room, so I went ahead and placed the order for the single display water temperature gauge.


        Here it is! It’s got a nice little water temperature icon that lights up as well. It should be mentioned that it was ordered in BMW amber backlighting, so it should match pretty well.


        The kit comes with a matte finish tinted PVC type of plastic. The plan is to cut that out to the same shape as the opening for the MPG gauge and glue it in place with a strong but reversible adhesive.


        Template drawn out, now to trim to fit.


        Here’s a rough outline of the trim piece without the protective film overlay. I spent close to an hour fine tuning this piece to almost “snap in” to place where it’ll sit.


        Rough template dropped in to place with the protective film still on. A few more adjustments to this and it was good to go.


        Wiring for the display was fished through an unused bulb hole. You may notice the rough trimming done to the channels for the warning lights. These were eventually ground flush and clean and then the tops were sealed from excess light using electrical tape.


        I attached the display directly to the backside of the gauge face support. A copious amount of hot glue was used, but made sure to keep away from the gears of the gauges themselves.


        Also added some compression foam to the backside to help support the assembly as the hot glue didn’t want to stick all that well to the gauge face support. It seemed like there was some sort of slick coating all over the plastics.


        All sandwiched together and tested power with a battery. Success!


        Full gauge cluster reassembled. Now to wire the rest of it in the engine bay and through the firewall. Luckily I have the S52 head that has an unused port in the cylinder head between the throttle body coolant barb and the factory water temperature probe, so that’s where I placed the sender. No drilled and tapped thermostat housing or chopped up radiator hoses here.


        All wrapped up and super thrilled with the final product. The font and color look identical to the odometer. Could not be happier, checked the boxes for OEM styling and a highly visible readout in a great location.


        I need to get around to fixing the failed adhesive creating the dark spots, but I’ll save that for a later date. For now, I’m just going to enjoy having this project finally wrapped up.

        6/19/2019

        Got out to the local track about two weeks ago, finally. The car did really well in the first three sessions, but developed a decent sized power steering leak so I called it a day.


        Went with two friends, the one in the F80 had purchased the car only the night before, what a way to get to know your new car. The F82 has quite a bit of power modifications, supposedly around 500 whp, but only lowering springs in the suspension department. Both of them would take me for a walk in the straights but the agility of the E36 made it easy to catch up in the corners.


        Having been my first time at the track in years, first time in this particular car, and first time ever at this track, I'm pretty happy with being in the 1:50's consistently all morning, with one 1:49.4 before the power steering leak. I hope to break into the 1:48's at my next visit, likely next month, but the 200-treadwear Direzza's may say otherwise.


        8/18/19

        Nothing too exciting as of lately, with average temperatures around 105 and very humid I don’t find myself too motivated to be in the garage messing with things. A few minor updates, so I’ll blitz through them;


        Made a friend in our neighborhood, she liked my car.


        Got some PDR done, still lots to do.


        Was immortalized on Google street view, I’m unreasonably stoked on that.


        Last I was under the car I noticed my A/C compressor was on it’s way out.


        No thanks, it’s too hot for that shit. New unit from FCP Euro and evaporator to go with it.


        Lost yet ANOTHER kidney on the highway. Looks nice.


        Really wish these weren’t $50 a piece.


        After the last track day I found two things, first of which was leaky power steering lines. New reservoir and lines from FCP Euro, replaced with the in-line restrictor, and cut the fitting off of the trombone and replaced it with a worm gear clamp.


        The second was my torn front control arm bushings. I spent far too much time debating on whether 95A would be too stiff for the horrid roads in Houston and if I should stick with factory rubber. 100’s of conflicting reviews later I settled with the AKG polyurethanes. Glad I did, I don’t notice any of the ill effects from what other people say and the steering feels far more planted mid corner. Turn in response was improved marginally.


        Still going back and forth with Riot Racing on the P0121 (throttle position sensor) code some 10 months later. They refurbished my unit and sent me another they had in stock. One had severe throttle plate sticking, the other had to be adjusted and is still triggering the code. Pretty frustrating but Todd has been very helpful.


        Drove the car to lunch the one day it wasn’t 100* out. Sat outside. It was nice.


        Finally replaced that nasty windshield trim piece. Took me nearly an hour to get the driver side windshield wiper arm free.


        Lots of cleaning was needed prior to reassembly, as usual.


        Drove the car to a local Cars & Coffee style meet. Still way too hot outside.


        Last but not least, I took the car back to the track and ran it the opposite way. I had more fun running it backwards in this counter-clockwise configuration because the hard braking “u-turns” were a bit more challenging to nail. My best lap last time was 1:49.48, this time it was a 1:48.49. We only had four 30 minute sessions and going into the last session I was hellbent on getting into the 1:47’s. Unfortunately my fuel pump disagreed with that. Per usual with the factory E36 system I was getting bad starvation issues around the carousel since I only had about 1/4 tank left. I’ll add a secondary pump to the never ending list of things to address.

        During the last track day in similar scorching temperatures I was reaching water temperatures of nearly 220* after 5 or 6 laps and I would have to back off and let the car cool down before getting back into it. I decided to pull off the factory pusher fan to really force as much unobstructed air through the radiator, the SPAL puller was enough to cool it down at low speeds. I don’t think the car got above 214* the entire day, no cool downs needed. Still a little higher than what I would like, but I have something in the works to help assist with that.

        8/31/2019

        Following CWest's advice and took something nice-ish for a drive somewhere nice for some fish tacos and shrimp nachos.


        Took the car down to the beach and jumped into the Gulf of Mexico.


        9/21/2019

        Fresh oil in today, anxiously awaiting the analysis back form Blackstone. Also picked up a full-frame DSLR I've had my eye on for a while.

        IMG_9369 by MIke Ellington, on Flickr
        IMG_9374 by MIke Ellington, on Flickr
        IMG_9376 by MIke Ellington, on Flickr


        IMG_9421-2 by Mikellington, on Flickr

        10/20/2019

        Not much of an update in terms of the ongoing "build" but took some good photos over the last few weeks, still getting the new camera dialed in.


        IMG_9480 by Mike Ellington, on Flickr
        IMG_9489 by Mike Ellington, on Flickr
        IMG_9496 by Mike Ellington, on Flickr
        IMG_9501 by Mike Ellington, on Flickr
        IMG_9538 by Mike Ellington, on Flickr

        Met up with some friends on a Sunday morning, felt very outclassed. 997.1 GT3, 991.1 GT3, three 991.2 GT3RS's, a GT4 and a 812 Superfast.


        Something I've been wanting to do for a long time, a proper projector retrofit. The light output using generic HID's and the standard DJ Auto/Depo projectors is horrid, so I'm stoked to have finally picked up a proper retrofit kit from a semi-local board member. Assembly is pretty straight forward, but probably won't get them into the car for another couple of weeks.
        -Brand new glass DEPO housings with the TRS FX-R projectors
        - Phillips DS2 Philips 85122 (4300K) low beam HID bulbs, Osram Nightbreaker H1 bulbs in the high beams. XB35 ballasts.
        -Internal wiring modified for the sun-at-night QUAD high beam (standard halogen high beam bulb illuminates with the internal Bi-Xenon projector)


        Picked up some PFC 08's the other day, still haven't ordered the caliper rebuilds bits or the rotors yet, but the expensive part is out of the way. I flipped the tires yesterday after work and the lip on these rotors is pretty......comforting.


        During the last oil change I sandblasted and coated the oil filter cap, was looking a little grungy next to the other refinished parts. Looking forward to getting rid of the factory fan shroud soon.


        Lastly, after about three weeks of the oil sample being lost in the mail on it's way to Blackstone, it arrived and I got some very relieving results. This year's oil was a 5W40 but after the last two track days getting some fairly aggressive lifter tick coming off track, I'm dumped some 10W60 in this time to see how she likes it.

        Past: '99 Hellrot/Dove M3 | '97 S14 1JZ | '06 Triumph Daytona 675 | '01 330I M-Tech I '99 Silvia S15 | Current: '96 Estoril/Black M3


        Instagram

        Comment


          #5
          12/21/2019

          Another bit of a hiatus from the M3 with no major updates. Took a trip home for a friends wedding, finishing up some big projects at work, and after years of dreaming, spent two weeks in Japan. Absolutely fantastic place, I hope to live there before I die. Here’s one photo from the trip of the R33 GTR I put about 700 miles on.


          Now that I’ve settled back into the routine and gotten (most of) the holiday shopping down, I’ve been updating a few things on the M3 that have been on the back burner, starting with the headlight retrofit. I dropped off the inner lenses with a glass company and they said they had a 50/50 shot of making it work or completely destroying them trying, I like these odds.


          Once assembled I started to notice that their cut on one of the lenses was way off center. In the photo above you can see the trace of the original circle in the middle of the lens. It was obviously cut a bit low and left justified. This of course started a butterfly effect…


          As you can see the projector itself was way off centered, triggering a bit of an OCD meltdown. Taking the headlight back apart I found that the projector itself was rested against the headlight bowl housing itself, rendering it impossible to physically move the projector down and re-centered.


          With the help of my buddy again, he trimmed the bowl and moved the projector down to where it needed to be.


          And thennnnnnn testing. Testing testing testing, probably two hours of testing. There are a number of ways to align these, as out of the box they were very low. There are the two shanks that move the entire bowl housing up and down and left and right, but with this retrofit added the effect of making sure the projector was aligned right without the high beam bowl being too high, and then again with the whole headlight angle/height screws that locate the headlights themselves to the chassis. There are a lot of moving parts to getting the cutoff perfectly horizontal with the ground, the hot spots wh ere they need to be, and just generally aligned to where they need to be without blinding everyone going the opposite way.


          Look at that cut-off! I think all said and done we wrapped up after roughly 4 hours of back and forth, which is probably why I didn’t get a final photo of it all reassembled and aimed.

          But I will, soon. After driving with these for a few nights the past week I can surely say this is one of the best things I’ve done to the car. The factory halogens are decent for what they are, the DJ Auto/Depo’s factory projectors throw light every which way, and I’ve never used the factory ellipsoids so I can’t make a comment about them. It’s so nice having a nice, bright, crisp and clean headlight in the car, especially for when I’ll be in the back country where I couldn’t see a deer if it was in the road 30 yards in front of me. Overall the kit can add up in price, but it’s definitely worth the money to anyone considering it.


          I spent a Saturday disassembling the brakes, cleaning, sandblasting, and rebuilding the rear calipers with new seals. I kept the factory guide pins instead of the bronze ones, as I don’t have any pad taper and don’t want to have to remove them to inspect and clean regularly. I was excited to get rid of the red paint someone did before for some super exciting matte black. I planned to both the front and the rear but ran out of time and only rebuilt the rears. The fronts will have to be done soon.


          Wasn’t certain if the rotors I ordered had corrosion protection on the vanes or hubs, so lemme hit em with some high temp black real quick.


          Just in time for these long overdue rotors.


          Threw these on the fronts just to get an idea of caliper temps, but maxed them out while bedding in the new PFC08’s, DOH! I’ll throw a new one on before my track day this weekend. Side note, PFC08’s are super noisy, it’s almost comical. Far more noisy around town than the Hawk Blues that came off of the car.


          Speaking of track day this weekend, I threw the car on the corner balancer to check the alignment. All good, just some small adjustments to the front toe and the car is good to go. I’ve had an intermittent ABS light and after hooking it up to a computer that reads ABS codes, seems to be a intermittent power fault, likely a loose ground somewhere. Other than having to adjust for driving ABS/non ABS, I’m thinking the car is good for high 1:47’s this weekend with a bit more confidence and fresh brakes.


          I’ll wrap this post up with some important maintenance. I’ve had this badge replacement for over a year, guess it’s time to put it on.

          2/11/2020

          The last track day was mildly successful, getting myself a high 1:47 on some tired Direzza Star Spec 2's, but flat spotting one of them in the process ending the day early. I think I'm going to give the RE71's a shot next. Still haven’t done too much with the car, although I’m 50-70% done with about four separate projects for it. Those updates will come once I’m closer to wrapping them up.

          However, I did get some new seats for the car, but haven’t mounted them yet. Not sure how much I’ll like the bright red against the blue, but we’ll see. They’ll serve the purpose they’re needed for, saving weight and holding me in place on track days, then back to the Vaders afterwards.


          Got some fresh OEM floor mats, very exciting.


          I think the door panels that I’ve been intermittently working on for the last year are finally ready for me to try and adhere new vinyl to. I still think the map pockets are going to need to be sewn in separately, as I don’t think even a good vacuum bag will hold up the test of time. More on this when I finally make a decision.


          And lastly, I had some free time on a Saturday and felt like burying my head a bit. The car lives in the garage and is washed after nearly every other drive, so it didn’t need much, however I put it on the lift and started doing some paint correction. The process may be mind numbing to some, but it’s therapeutic to me.


          The rear bumper was the worst, the top edge was very hazy.


          And after:


          I ended up spending about 7 hours doing the entire passenger side and the rear bumper. I’ve still got the entire driver side, trunklid, roof, and a second pass on the hood to finish. However she was looking good as the sun went down at the end of the day.


          Took the car to C&C the following morning and snapped a quick pic.

          IMG_2062 by Mike Ellington, on Flickr

          I'm thinking about removing the tint and going back to the fishbowl, with a 70% Ceramic to help keep out as much heat and harmful UV as I can. Still unsure.

          3/7/2020

          I've been thinking lately about how awful some of the drivers in Houston tend to be, which reminded me that I don't have a formal third brake light since my car came with the OEM wing with integrated brake light. Not wanting to give anyone any more reason to rear end me in traffic, or to fail tech at an out of town event, I decided to pick up another rear deck lid that has the factory third brake light.


          As usual, the deck had faded to a nice shade of purple, so a re-dye is in store after a thorough cleaning.


          It doesn't smell like smoke, but this looks like nicotine stains. WOOF.


          Quick polish on the brake light itself.


          Probably a good ten coats of black fabric dye down, almost there. Unfortunately the fabric in the center is matted down past the point of repair. I wonder how it would look if it were flocked?


          Grabbed a spare set of rear door panels to practice on before I tackle the front door panels in my reupholstering project.


          Stripped of their material.


          Prepping to sand all the dirt, grime and glue off.


          Sanded down and finished with a 180 grit to smooth out the surface but still have a rough surface for the adhesive to bite in to.


          Same procedure for the backside as the fabric will wrap around and be glued down.


          Mocking up the new fabric and working from the bottom up.


          Halfway there. I'm using a high temperature heat resistant yellow contact cement and brushing it on rather than spraying it on. It's very time consuming as you have to do multiple coats, letting each coat set and tack up before adhering the two materials together. The adhesive is very strong so once the two are together its very difficult to pull the them apart without damaging or wrinkling the vinyl.


          The end result, which took about three hours. The grain in the vinyl isn't an exact match to the original, but it's damn close and it'd be hard to tell a difference without having two panels side by side. The feel and sheen is a direct match, however.


          Backside of the panel. A little trimming may be done after the glue has set for a day or two. Overall I'm pretty happy with the result and feel comfortable finally tackling the front door panels, hopefully in one piece instead of separate map pocket pieces.


          After that, I spent two hours removing the tint from the car while it's not visciously hot outside. Once I'm done with the rear deck lid and it's reinstalled I will re-tint the car in a 70% (Clear) ceramic that will help cut down on heat and UV inside the car. I wasn't sure I was going to like the fishbowl, but I think the car looks much more proper this way.

          Lastly, celebrated 3/6 day by driving the car to work, dinner, and a little night cruise. I sure do love this thing.

          36day by Mike Ellington, on Flickr

          36day2 by Mike Ellington, on Flickr
          Past: '99 Hellrot/Dove M3 | '97 S14 1JZ | '06 Triumph Daytona 675 | '01 330I M-Tech I '99 Silvia S15 | Current: '96 Estoril/Black M3


          Instagram

          Comment


            #6
            Great read. I think you have improved/tweaked every component on this car - future plans?

            Comment


              #7
              Such a nice build, I would love one of those temp gauges in my car

              Comment


                #8
                Originally posted by mjweimer View Post
                Great read. I think you have improved/tweaked every component on this car - future plans?
                Thank you. I was just talking with the ball & chain about how in another year or two all of the major mechanicals will be nearly brand new, as I put less than 3,000 miles on the car annually.

                My plans for the car are starting to lean more towards track prep but I still intend to keep this car pretty mild mannered for the street and true to it's roots. I've got a roll-bar project and rear seat delete project in the works, hopefully wrapping up sooner than later. I have yet to finish my proper radiator shroud and ducting for the SPAL fan, I haven't started diagnosis on my intermittent ABS fault, and I'm getting some "clanking" from the differential/u-joint in the driveshaft, so I've got plenty to do, just a matter of finding time. I don't have any intent to sell this car so I'm taking my time and enjoying the long processes.

                Originally posted by T3amfish View Post
                Such a nice build, I would love one of those temp gauges in my car
                Thank you. Drop me a PM and we can square one away for you.
                Past: '99 Hellrot/Dove M3 | '97 S14 1JZ | '06 Triumph Daytona 675 | '01 330I M-Tech I '99 Silvia S15 | Current: '96 Estoril/Black M3


                Instagram

                Comment


                  #9
                  I enjoyed this read very much and I like your OCD attention to realistic fixes via DIY. I too have grown up on the forums and this is my first post on the new M3F revival. I'll tell you something- you're making me want to get back into another E36/E46 M3 to take from zero to hero. If only I could find the time to work on my current S54 E30 M3 and document the progress made through the years in similar fashion as you- no better time than the current. Again, thanks for sharing and be well.

                  Comment


                    #10
                    Originally posted by KashM3 View Post
                    I enjoyed this read very much and I like your OCD attention to realistic fixes via DIY. I too have grown up on the forums and this is my first post on the new M3F revival. I'll tell you something- you're making me want to get back into another E36/E46 M3 to take from zero to hero. If only I could find the time to work on my current S54 E30 M3 and document the progress made through the years in similar fashion as you- no better time than the current. Again, thanks for sharing and be well.
                    Glad you enjoyed it. Get started on that E30 journal, I'm sure we'd all love the content.

                    Still nothing major to report, things are moving a bit in slow motion right now.

                    I started the door panel project at least a year ago and partially convinced myself, before I even started, that I wouldn't be able to do the map pockets in one piece, it just wasn't going to happen. The stretch was going to be too much for the grain of the fabric to look right and too much for even the strongest adhesives to hold up over time. I continued to put it on the back burner, not having a solid plan on how to tackle it in one piece.
                    Having gained some confidence after reupholstering my rear door panels I decided to give the fronts a shot with some high-temp contact cement, a heat gun, and some patience. I started by picking up a bag of sand that I could pour into smaller bags and use as "moldable" weights to fit down into the pockets and hold the fabric against the fiberboard overnight.


                    Using the same method as I did on the rear door panels, I lathered both the door panel and the back of the fabric in multiple coats of the contact cement. I heated the fabric up and started working the fabric in little by little, starting from below the smaller door pocket to establish my baseline of where the fabric should lay.


                    And the final product after sitting overnight.


                    This might work for some people, but it doesn't work for me. Between the excessive heat trying to make the fabric more malleable and working it down little by little, it created these wrinkles in the material. Having confirmed my doubts of being able to rectify my door panels in a proper one-piece format that could pass as OEM to most, I must say I'm pretty bummed out. I spent about two hours on just this one pocket, I'm not sure there is another method that I could have tried to achieve a different result.

                    However I am not ready to give up on this project. I've made some templates of the door panel with separate pieces of fabric that will be sewn into the pockets using a black stitching, hopefully predominantly hidden along the edges of the pocket itself, which will eliminate a lot of the tension in the fabric leading to failure. I've turned them over to our local upholsterer to run through his sewing machine and will update when I get them back and get started on them. I've got a positive outlook that it may be a tolerable solution that lasts long term.

                    Having some time at home due to the quarantine I got a couple of little tasks done while still being a bit lazy. First up was to finish up dyeing the rear shelf, wire in the third brake light, and then install the rear shelf. Fortunately the proceeding rounds of fabric dye hid the matted area so I'm happy with it.


                    I've had the rear vent window lower seals on my list for quite a while, along with the plan to repair my ambient temperature sensor and replace the headlight positioning knobs that have long cracked and looked like ass.


                    As usual it was filthy in there and the original seal crumbled into a hundred pieces upon removal. Now I've got to touch up the little exposed part of metal on that metal trim piece as well.

                    I replaced the illumination bulb for the headlight switch. Originally I got a generic bulb from the local store but it turns out even 5 watts is too much for this and it melted the inner plastic, forcing me to find another switch assembly to rob the plastic from. Turns out the BMW bulb is a very specific .36 watts. $8 for one tiny bulb!


                    I've had the idea of labeling the fog light switch to be used for a manual override of my SPAL radiator fan. I had some spare stickers at the shop so I threw it together to see how it looked.


                    Unfortunately it's just slightly too big, but I don't think I hate the text being there.


                    I've had a very slight cut/miss between 6,000-7,000 RPMs but no CEL's or otherwise warnings. Decided to pull the plugs, check condition of them and the coil boots, and re-torque. About two years ago I had a strange misfire at idle that came out of nowhere and it turned out to be one or two of my spark plugs had loosened over time. Luckily all looked well and after re-torque I didn't notice any missing up top, maybe one was just slightly loose.


                    I was content with the overall performance of the aftermarket head unit I had; it was simple, it streamed music via Bluetooth, and I could adjust the color from 20,000 options to match the factory BMW amber, and I even went so far as to paint the volume knob black and sand down the gloss black portions to a matte finish, but at the end of the day it still looked out of place. So I grabbed a C43 radio that was in great shape and ordered a Bluetooth retrofit.


                    This kit provides the ability to stream the music wirelessly, which was my main requirement. It also has the ability to connect via an AUX port or USB cable. I plan to install the black box underneath the center arm rest trim and run the USB port up underneath there to connect my phone and charge it when need be. It should be well hidden when I'm all wrapped up with it. With everything wired up and re-installed, I'm happy with the outcome. A much better look with the same features I had before, I should have done this the first time.


                    I picked up a pair of amber corners, but I can't decide which I like better. I have clear sides and tails as well, so if I did amber I would have to do the rest as well. Maybe I'm just bored.


                    I took old girl to the park the other day for some isolation and social distancing but outside the four walls of my house.


                    And lastly, taking full advantage of the completely desolate roads which is an extreme rarity here. A 1:00 AM blast around our local highways and downtown, it was very peaceful to rip around without anyone else around. As much as I miss being able to socialize and eat dinner in a restaurant, I wouldn't mind the evenings staying like this for a bit.


                    Past: '99 Hellrot/Dove M3 | '97 S14 1JZ | '06 Triumph Daytona 675 | '01 330I M-Tech I '99 Silvia S15 | Current: '96 Estoril/Black M3


                    Instagram

                    Comment


                      #11
                      Great thread to read and an excellent project. Awesome to see how far your car has come especially as mine started a little worse for wear too.

                      I’m currently doing the grey to black interior swap too, and hoping to banish as many creaks and rattles as possible.

                      I also vote all amber!

                      Euro Techno Violet E36 M3 Project

                      Comment


                        #12
                        Originally posted by MattDearPhoto View Post
                        Great thread to read and an excellent project. Awesome to see how far your car has come especially as mine started a little worse for wear too.

                        I’m currently doing the grey to black interior swap too, and hoping to banish as many creaks and rattles as possible.

                        I also vote all amber!
                        Thanks! The felts pads are good but friction tape works better as it's thinner. Best of luck!

                        Took the car out late the other night, took advantage of the deserted streets.

                        IMG_2824 copy2 by Mike Ellington, on Flickr
                        IMG_2812 by Mike Ellington, on Flickr
                        IMG_2815 by Mike Ellington, on Flickr
                        ​​​​​​​IMG_2833 by Mike Ellington, on Flickr
                        Past: '99 Hellrot/Dove M3 | '97 S14 1JZ | '06 Triumph Daytona 675 | '01 330I M-Tech I '99 Silvia S15 | Current: '96 Estoril/Black M3


                        Instagram

                        Comment


                          #13
                          Lovely car, you've done such a great job!

                          Current:

                          1997 BMW M3 - Boston Green/Modena
                          2003 BMW M3 · Coupe · 6MT - Alpine White/M-Texture Alcantara

                          Comment


                            #14
                            Wow those city shots look incredible

                            Comment


                              #15
                              Originally posted by Mike0032 View Post

                              Thanks! The felts pads are good but friction tape works better as it's thinner. Best of luck!
                              I’ve been using a combination of fabric loom tape and neoprene sheets depending on whether I just want to stop two contact points from making noise or pad something out a little to make it push against a little and be stiffer.

                              Looking forward to that first drive but I know there’s still gonna be a few!

                              Euro Techno Violet E36 M3 Project

                              Comment

                              Working...
                              X