Couldn't find all of this info in one place so I thought it would be a good idea to get everything together and easier to find for future owners.
The Evolve MSS HAS install video is a very good guide and should be your starting point, they did however missed a few things like torque specs and tools required which I will cover below:
Evolve MSS HAS Install Video:
Tools required:
Instructions:
Start by lifting the car, if working on jack stands you'll want to get the car up as high as possible. Take the wheels off, then choose what end you want to start on, or you can do each corner at a time if working on the ground but that will probably be a bit harder / tedious. An alignment is highly recommended / required shortly after install, after a few days of driving or before any long distance drives.
Disclaimer:
If you are at all uncomfortable or inexperienced working on projects yourself (especially projects involving dangerous tools), please reconsider doing the job yourself. It is very possible on any DIY to damage your property, create a hazardous condition, or harm or even kill yourself or others. Myself nor this forum would be responsible for any damage as a result, procedure at your own risk
Front:
Rear:
*I choose to remove the shock bolt/nut and the camber strut/bolt, Evolve removed the inner control arm bolt/nut and left the camber bolt/nut on. I think that approach is a little harder to get the arm lined up when reinstalling, but you can choose whichever method you prefer.
Torque References
If anyone has anything to add or any suggestions I can update this post, if anyone has any additional pictures they may find helpful please let me know as I can add those too, I didn't have enough pictures for every step but includes the ones I did have.
AST Springs shortly after install (not yet settled).

The Evolve MSS HAS install video is a very good guide and should be your starting point, they did however missed a few things like torque specs and tools required which I will cover below:
Evolve MSS HAS Install Video:

Tools required:
- 18mm 12pt strut socket - I suggest a socket like this so you can torque the top strut nut correctly
- https://amzn.to/3phVWhh - 10mm crow foot / offset box wrench - This makes hold the strut shaft in place when torqueing to spec easier
- https://amzn.to/3HYhC9n - 10mm wrench or socket + 9mm wrench
- 16mm wrench and t30 torq
- 18mm socket + wrench
- 21mm socket + wrench
Instructions:
Start by lifting the car, if working on jack stands you'll want to get the car up as high as possible. Take the wheels off, then choose what end you want to start on, or you can do each corner at a time if working on the ground but that will probably be a bit harder / tedious. An alignment is highly recommended / required shortly after install, after a few days of driving or before any long distance drives.
Disclaimer:
If you are at all uncomfortable or inexperienced working on projects yourself (especially projects involving dangerous tools), please reconsider doing the job yourself. It is very possible on any DIY to damage your property, create a hazardous condition, or harm or even kill yourself or others. Myself nor this forum would be responsible for any damage as a result, procedure at your own risk
Front:
- Place a jack or stand under the front control arm to support the knuckle, jack it up or lower the car onto it to compress that corner
- Remove either end of the front sway bar link with a 16mm wrench + t30 torq.
- Disconnect the height adjuster arm (LF/Driver side only) with a 10mm socket or wrench
- Remove all wires (abs sensor, brake pad sensor, EDC strut wire) and brake line from there mounting attachments. Make note of how they are routed.
- Under the hood, remove the plastic covers covering the strut and disconnect the EDC connector.
- Remove the 18mm nut holding the strut to the upper mount. (Can use an impact to remove, or use the strut socket and offset box wrench if you don't have one. )
- Slowly and carefully lower the front knuckle or raise the body (if working on a lift) while holding or supporting the strut assembly (useful to have a helper here). You want to lower it as much as possible or until it stops.
- Slowly and carefully swing the strut assembly out of the fender, I like to hold the top of the strut to make sure it doesn't contact the fender
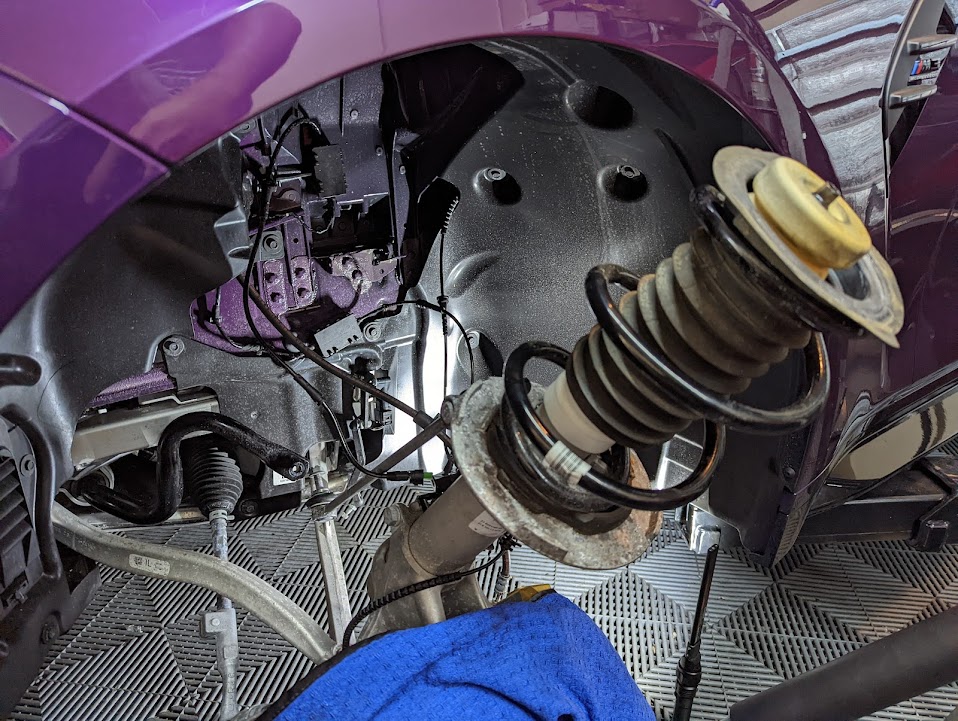
- Now you can replace the spring by removing the rubber boot, and bump stop, place the new spring onto the strut, lining up the end position with the mark the previous spring made, put the rubber boot and bump stop back in.
- Check and confirm the orientation of the spring, for AST springs you'll see it the top and bottom are different sizes, the correct orientation is with the AST markings upside down like this:
***Bonus note and warning*** If you see these plastic bump stops remove them, they are shipping bump stops that should have been removed during the PDI and cause the car to sit higher and ride poorly.

- Once you have the lowering spring and everything back in, carefully swing the strut assembly back under the car. Support the knuckle by the control arm, slowly compress the strut while lining up the top and ensure the strut shaft is centered and goes through the strut mount and comes out on top.
- Put the 18mm nut back on, you can choose to torque it now or just snug it up and torque it to spec when the wheels are back on the ground.
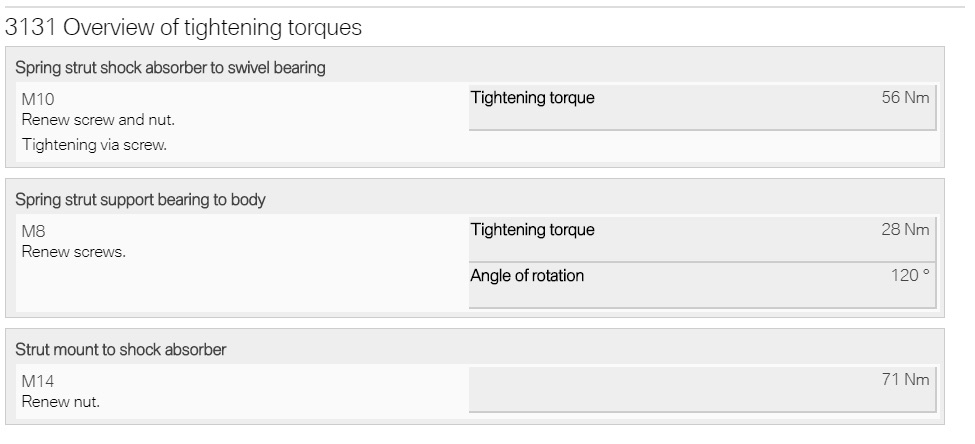
- Torque spec of the top strut nut is 71nm / 52 ft lbs. Use the 18mm strut socket and 10mm offset box wrench for this with a torque wrench.

- Re-attach the sway bar end link and all wires, edc connector, height adjuster and brake line that were moved.
- Reconnect the EDC connector under the hood and put all plastics back in place.
- Put the wheel back on.
- Front is done, grab a beer.
Rear:
*I choose to remove the shock bolt/nut and the camber strut/bolt, Evolve removed the inner control arm bolt/nut and left the camber bolt/nut on. I think that approach is a little harder to get the arm lined up when reinstalling, but you can choose whichever method you prefer.
- On the LR/Driver's rear, detach the height sensor arm from the lower control/camber arm. 10mm and 9mm wrench

- Support the lower control arm to compress the assembly.
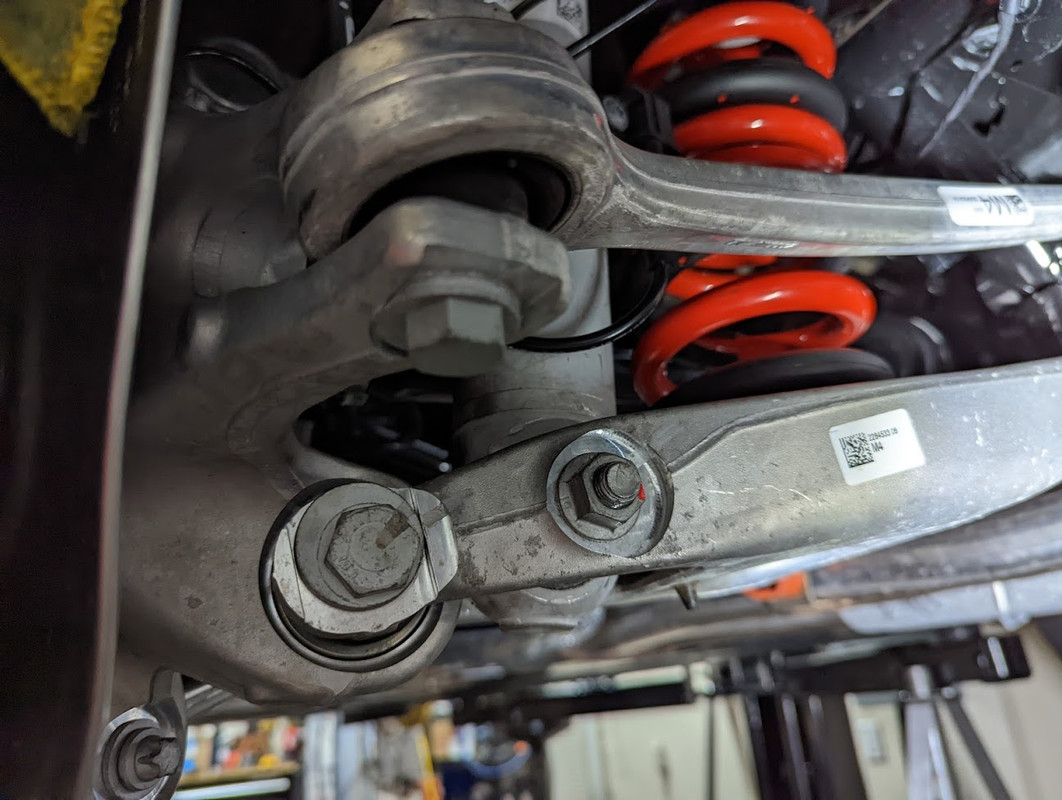
- I like to mark the camber adjusting bolt so that it can be place back close to that location so that the alignment isn't too far off so you can drive the car to the alignment shop. The white marks are a little hard to see here
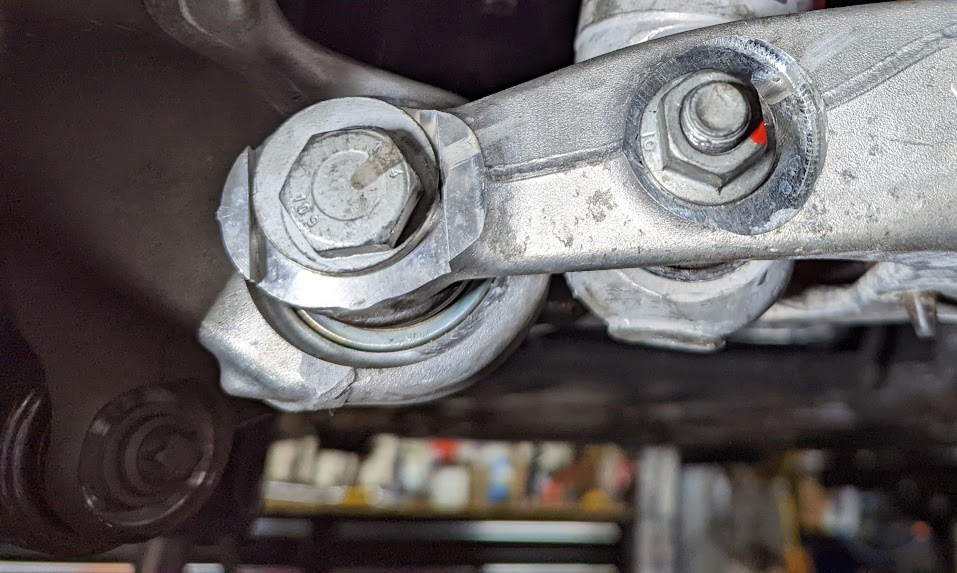
- Remove shock nut and bolt using 18mm socket + wrench
- Remove camber and bolt using 21mm socket + wrench
- Lower control arm and remove spring
- Place the rubber pads on the new spring, line up the old positions and re-insert spring.
- Line up the control arm and support it to compress the assembly. Carefully make sure the camber bolt hole lines up, this can be a bit tricky, using a pry bar to move it into place can help.
- with the assembly compressed to simulate ride height, torque the bolts/nut to spec.
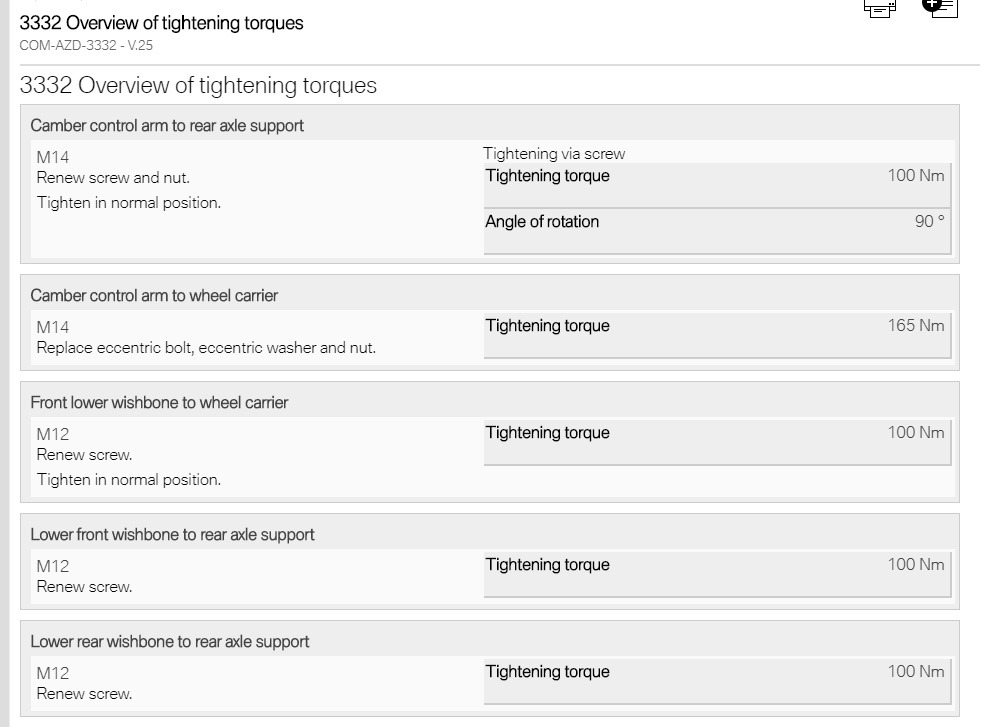
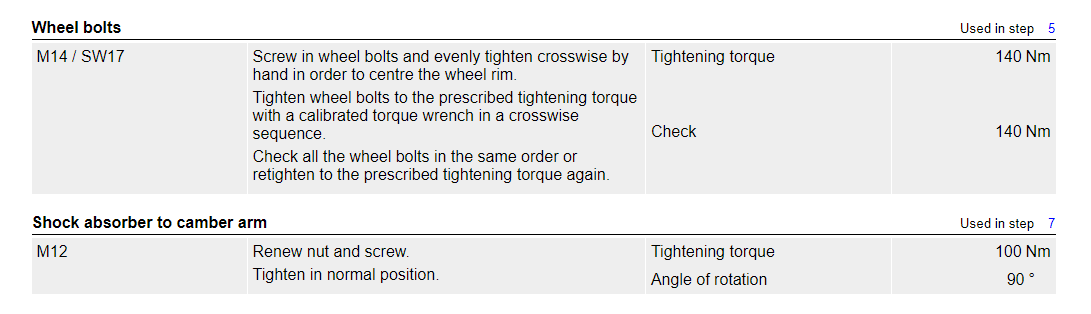
- Torque shock bolt to 100nm / 74 ft lb + 90 degree
- Torque camber adjusting bolt to 165nm / 121 ft lb
- Re-attach height sensor arm
Torque References
- Front Strut top nut: 71nm / 52 ft lbs
- Rear Shock lower bolt/nut: 100nm / 74 ft lbs + 90 degree
- Rear Camber adjusting bolt/unt: 165nm / 121 ft lbs
- Wheel lugs: 140nm to 103 ft lbs
If anyone has anything to add or any suggestions I can update this post, if anyone has any additional pictures they may find helpful please let me know as I can add those too, I didn't have enough pictures for every step but includes the ones I did have.
AST Springs shortly after install (not yet settled).
Comment