I finally got around to installing the CF panel! There a GB going around so it's a good time to get it done and provide some instructions.
From the E9X to the F8X generation there was an increase in torsional rigidity. Both are very rigid, but I’ve been jealous the F8X is a 20% stiffer!
Looking at data, the E9X is 33000Nm/deg and the F8X is 40000Nm/deg
In some cars like the previous gen M5, BMW did not offer a folding rear seat, with the goal of increasing the car’s rigidity.
My track E90 has fold down rear seats like every E9X, although the rear seats are removed in its current config.
Audi uses a CF panel to increase torsional rigidity by a whopping 33% in its A8... what about doing that on the E9X?
Enter Slonik’s CF reinforcement panel!
.jpg?width=1920&height=1080&fit=bounds)
.jpg?width=1920&height=1080&fit=bounds)
.jpg?width=1920&height=1080&fit=bounds)
Specs:
-Vacuum infusion with post-curing
-Base options – oem look plain wave, small or large size twill wave (the latter was my choice). Any other options on request at time of order
-Can be installed behind oem seats if desired, no need to rip up your interior or irreversibly turn your car into a track-only machine
-Installs with structural epoxy, which can be removed with a heat gun
-Has a sweet ///M in the panel so no one is confused about who builds your grocery getter
-Weight below 4lb (1.7kg)
-Thick enough - about 2.5millimeters of pure carbon layers.
LIST of materials needed for install:
180 grit sand paper. I use the foam block style.
Alcohol and microfiber cloths (having a source of water handy helps)
BMW SF-7888 (K-3) structural glue and applicator gun. This is the same glue I used for the CF roof install (https://www.m3post.com/forums/showthread.php?t=1792840) a few weeks ago, and the same glue BMW recommends for installing CF onto steel panels in their cars.
Locking pliers, 1/4", x4
Rubber gloves
Tyvek full body suit (Home Depot) and N95 mask for sanding CF
Steps:
First fit the wall with no glue to see more or less where it goes
Use masking tape to seal off the area around the wall where glue does not go. This is not strictly necessary but will make cleanup a lot easier. Protip: use more masking tape than I did, especially in the bottom... that glue drips everywhere! :S
Use masking tape to seal the wall on both sides. Anywhere you don’t want glue should be taped up
Sand CF mating surface while wearing special suit and mask
Sand car’s mating surface. Clean CF and car's mating surfaces with alcohol
Heat up the BMW K3 glue. I used really hot water for 30 min.
Stage 1 -put glue on the sides, bottom, top of the car’s mating surface
-put glue on the wall, only bottom and half of the side
-put locking pliers on top both sides and something on the bottom to hold the wall tightly
Stage 2: -from the trunk, apply glue to all the perimeter, push it in with your fingers (with a glove on)
Clean Up: remove the masking tape and plastic sheeting from both sides. Be careful not to get epoxy on random surfaces. Change your gloves often.
Like everything Slon Workshop/Slonik makes, this is a real piece of art
.jpg?width=1920&height=1080&fit=bounds)
.jpg?width=1920&height=1080&fit=bounds)
.jpg?width=1920&height=1080&fit=bounds)
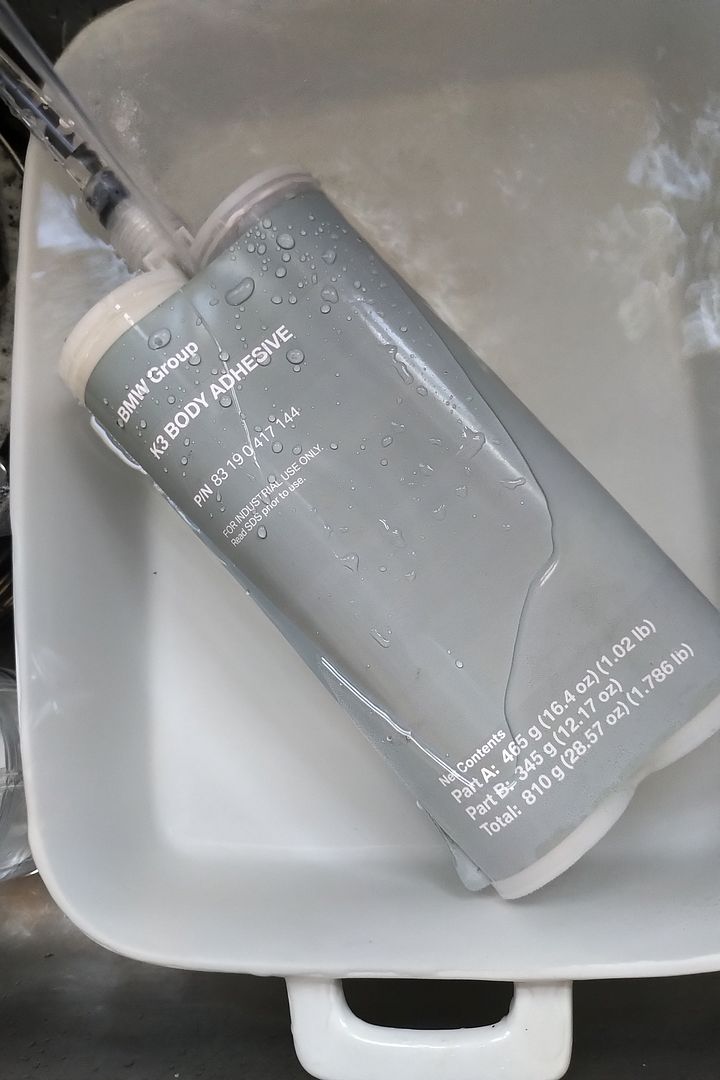
Here's a pic of the BMW epoxy that is used. K-3
We start by taping up both sides of the wall. We don't want any rogue epoxy getting on the CF
.jpg?width=1920&height=1080&fit=bounds)
.jpg?width=1920&height=1080&fit=bounds)
.jpg?width=1920&height=1080&fit=bounds)
We test fit it just to make sure we understand where it goes. Also, while it's in place we mask up both sides of the car so the epoxy doesn't overflow and mess everything up later. This takes a while but I think it's the easiest solution. Again, use more masking tape than I did in the bottom area!
.jpg?width=1920&height=1080&fit=bounds)
.jpg?width=1920&height=1080&fit=bounds)
Remove the reinforcement wall from the car and look at the mating surfaces
.JPG?width=1920&height=1080&fit=bounds)
Get a 180 grit sandpaper block and rough up the part of the car where the glue goes. The objective is to roughen it up, not sand all the paint off, so take it easy. When finished, get a microfiber cloth and alcohol to clean up the surfaces and ensure they are clean
Now you have to do the same thing to the CF reinforcement wall. Sanding CF is nasty business, so we put on the Tyvek full body suit we got at home depot, goggles and an N95 respirator, then start sanding the panel's mating surfaces. After sanding we clean the surfaces with alcohol.
Remove the Tyvek suit and throw it away, then change your gloves
Now get the epoxy that's been heating up for 30 min, put it into the applicator gun and start applying it. We need to apply it both to the car and also to the CF panel. The CF panel's side and bottom get glue and then the car gets glue as well.
Note we are not double-gluing. There are parts in the wall perpendicular to each other, same as the car. We put a glue bead on the car's surfaces and then another glue bead on the wall's bottom and side which are angled differently.
Once you apply epoxy you're on the clock. Figure you have 20 minutes of set time to work, after that it gets dicey.
Once you put the wall against the body and the glue starts doing its thing, we apply some locking pliers/clips to the top surface to hold the wall in place, then I used a piece of wood going from the front seats to the wall to apply pressure
.JPG?width=1920&height=1080&fit=bounds)
.JPG?width=1920&height=1080&fit=bounds)
.JPG?width=1920&height=1080&fit=bounds)
.JPG?width=1920&height=1080&fit=bounds)
After this step you need to go to the back side of the wall: in through the trunk and apply a second stage of glue to make sure all the voids are filled in. I put extra glue all over and then used a glove to press it into a more or less clean bead with my finger. You do this on the bottom, both sides and the top through the trunk
After that it's cleanup time! You want to remove the masking tape from the car and from the reinforcement wall. Be careful because the tape is messy, this will require you to change gloves many times. Eventually you finish!
.jpg?width=1920&height=1080&fit=bounds)
.JPG?width=1920&height=1080&fit=bounds)
.JPG?width=1920&height=1080&fit=bounds)
.JPG?width=1920&height=1080&fit=bounds)
.JPG?width=1920&height=1080&fit=bounds)
.JPG?width=1920&height=1080&fit=bounds)
Finally, I left it to dry for a few days without moving the car
More info:
Idea of this rear wall was born after watching on e46 torsional rigidity figures:
E46 Sedan (w/o folding seats) 18000
E46 Sedan (w folding seats) 13000
E46 Touring (w folding seats) 14000
E46 Coupe (w folding seats) 12500
E46 Cabrio 10500
What do we need to see here? Comparing two sedans' torsional rigidity – the difference between two chassis is limited to the steel wall behind the rear seats! 38% increase of torsional rigidity with only one chassis element difference!
Another interesting fact is that e46 coupes and even e46 m3s don’t have chassis options without folding seats (with the factory wall). Same for the next generation e9x chassis – bmw didn’t offer “w/o folding seats” option at all, so all versions have a hole instead of a wall.
Second comparison of the two chassis, which has a difference in the roofs – one has steel installed with spot welding, second one – glued with structural glue carbon fiber roof panel.
E46 M3 18500
E46 M3 CSL 18750
These are the factory figures, and BMW shows us that a carbon fiber panel installed with the structural glue give us even more stiffness than spot welded steel.
So the idea was to make the a unique product, inspired on the factory engineered chassis solution.
It’s important to note the main idea of this product was to get noticeable improvements in torsional rigidity of the body and at the same time, make a street compatible solution without transforming it into a track only car.
This is why the stiffness wall was designed to be compatible with the rear seats.
In the end, our beloved cars had a great chassis in their time, but time moves on. This is like an anti-ageing upgrade to stay competitive vs more current generations' cars.
From the E9X to the F8X generation there was an increase in torsional rigidity. Both are very rigid, but I’ve been jealous the F8X is a 20% stiffer!
Looking at data, the E9X is 33000Nm/deg and the F8X is 40000Nm/deg
In some cars like the previous gen M5, BMW did not offer a folding rear seat, with the goal of increasing the car’s rigidity.
My track E90 has fold down rear seats like every E9X, although the rear seats are removed in its current config.
Audi uses a CF panel to increase torsional rigidity by a whopping 33% in its A8... what about doing that on the E9X?
Enter Slonik’s CF reinforcement panel!
Specs:
-Vacuum infusion with post-curing
-Base options – oem look plain wave, small or large size twill wave (the latter was my choice). Any other options on request at time of order
-Can be installed behind oem seats if desired, no need to rip up your interior or irreversibly turn your car into a track-only machine
-Installs with structural epoxy, which can be removed with a heat gun
-Has a sweet ///M in the panel so no one is confused about who builds your grocery getter
-Weight below 4lb (1.7kg)
-Thick enough - about 2.5millimeters of pure carbon layers.
LIST of materials needed for install:
180 grit sand paper. I use the foam block style.
Alcohol and microfiber cloths (having a source of water handy helps)
BMW SF-7888 (K-3) structural glue and applicator gun. This is the same glue I used for the CF roof install (https://www.m3post.com/forums/showthread.php?t=1792840) a few weeks ago, and the same glue BMW recommends for installing CF onto steel panels in their cars.
Locking pliers, 1/4", x4
Rubber gloves
Tyvek full body suit (Home Depot) and N95 mask for sanding CF
Steps:
First fit the wall with no glue to see more or less where it goes
Use masking tape to seal off the area around the wall where glue does not go. This is not strictly necessary but will make cleanup a lot easier. Protip: use more masking tape than I did, especially in the bottom... that glue drips everywhere! :S
Use masking tape to seal the wall on both sides. Anywhere you don’t want glue should be taped up
Sand CF mating surface while wearing special suit and mask
Sand car’s mating surface. Clean CF and car's mating surfaces with alcohol
Heat up the BMW K3 glue. I used really hot water for 30 min.
Stage 1 -put glue on the sides, bottom, top of the car’s mating surface
-put glue on the wall, only bottom and half of the side
-put locking pliers on top both sides and something on the bottom to hold the wall tightly
Stage 2: -from the trunk, apply glue to all the perimeter, push it in with your fingers (with a glove on)
Clean Up: remove the masking tape and plastic sheeting from both sides. Be careful not to get epoxy on random surfaces. Change your gloves often.
Like everything Slon Workshop/Slonik makes, this is a real piece of art
Here's a pic of the BMW epoxy that is used. K-3
We start by taping up both sides of the wall. We don't want any rogue epoxy getting on the CF
We test fit it just to make sure we understand where it goes. Also, while it's in place we mask up both sides of the car so the epoxy doesn't overflow and mess everything up later. This takes a while but I think it's the easiest solution. Again, use more masking tape than I did in the bottom area!
Remove the reinforcement wall from the car and look at the mating surfaces
Get a 180 grit sandpaper block and rough up the part of the car where the glue goes. The objective is to roughen it up, not sand all the paint off, so take it easy. When finished, get a microfiber cloth and alcohol to clean up the surfaces and ensure they are clean
Now you have to do the same thing to the CF reinforcement wall. Sanding CF is nasty business, so we put on the Tyvek full body suit we got at home depot, goggles and an N95 respirator, then start sanding the panel's mating surfaces. After sanding we clean the surfaces with alcohol.
Remove the Tyvek suit and throw it away, then change your gloves
Now get the epoxy that's been heating up for 30 min, put it into the applicator gun and start applying it. We need to apply it both to the car and also to the CF panel. The CF panel's side and bottom get glue and then the car gets glue as well.
Note we are not double-gluing. There are parts in the wall perpendicular to each other, same as the car. We put a glue bead on the car's surfaces and then another glue bead on the wall's bottom and side which are angled differently.
Once you apply epoxy you're on the clock. Figure you have 20 minutes of set time to work, after that it gets dicey.
Once you put the wall against the body and the glue starts doing its thing, we apply some locking pliers/clips to the top surface to hold the wall in place, then I used a piece of wood going from the front seats to the wall to apply pressure
After this step you need to go to the back side of the wall: in through the trunk and apply a second stage of glue to make sure all the voids are filled in. I put extra glue all over and then used a glove to press it into a more or less clean bead with my finger. You do this on the bottom, both sides and the top through the trunk
After that it's cleanup time! You want to remove the masking tape from the car and from the reinforcement wall. Be careful because the tape is messy, this will require you to change gloves many times. Eventually you finish!
Finally, I left it to dry for a few days without moving the car
More info:
Idea of this rear wall was born after watching on e46 torsional rigidity figures:
E46 Sedan (w/o folding seats) 18000
E46 Sedan (w folding seats) 13000
E46 Touring (w folding seats) 14000
E46 Coupe (w folding seats) 12500
E46 Cabrio 10500
What do we need to see here? Comparing two sedans' torsional rigidity – the difference between two chassis is limited to the steel wall behind the rear seats! 38% increase of torsional rigidity with only one chassis element difference!
Another interesting fact is that e46 coupes and even e46 m3s don’t have chassis options without folding seats (with the factory wall). Same for the next generation e9x chassis – bmw didn’t offer “w/o folding seats” option at all, so all versions have a hole instead of a wall.
Second comparison of the two chassis, which has a difference in the roofs – one has steel installed with spot welding, second one – glued with structural glue carbon fiber roof panel.
E46 M3 18500
E46 M3 CSL 18750
These are the factory figures, and BMW shows us that a carbon fiber panel installed with the structural glue give us even more stiffness than spot welded steel.
So the idea was to make the a unique product, inspired on the factory engineered chassis solution.
It’s important to note the main idea of this product was to get noticeable improvements in torsional rigidity of the body and at the same time, make a street compatible solution without transforming it into a track only car.
This is why the stiffness wall was designed to be compatible with the rear seats.
In the end, our beloved cars had a great chassis in their time, but time moves on. This is like an anti-ageing upgrade to stay competitive vs more current generations' cars.

Comment