-
Looks like the Euro bumper also isn't supposed to have the tabs based on ECS' pics. I guess whoever manufactures these for BMW forgot to shave themoff.
-
@mods can we get that bumper break down post stickied? This gold info looking at doing the same thing soon.Leave a comment:
-
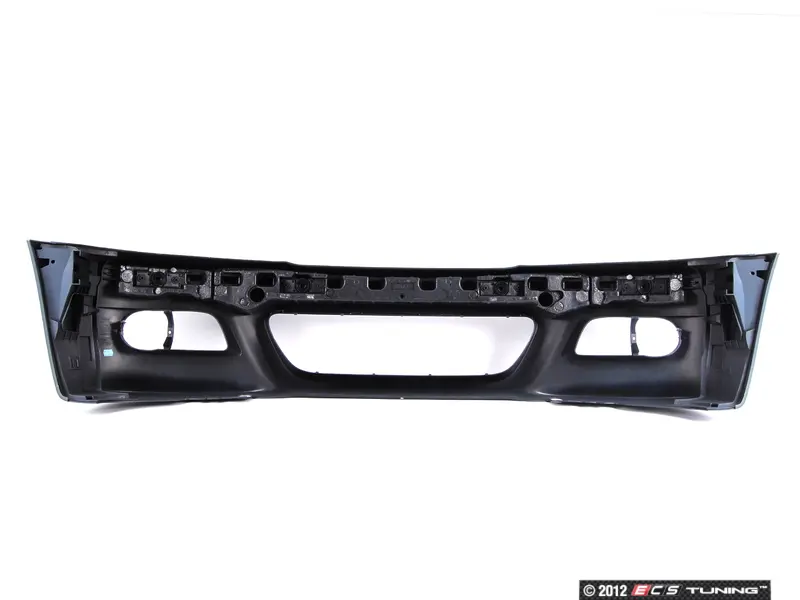
For what it's worth and given this is a problem I will have to solve, here are pics I took of my US Spec bumper (Front bumper part #: 51117894990). The bumper is original to the car.
The tabs appear to have been shaved off from the factory. I'm not sure how much of the tabs you removed, but these were shaved off completely. All 4 of them look like this.
Leave a comment:
-
Got it that makes sense and as usual, I was over complicating things in my grey matter. Didn't even think the actual foam would be in the way for some reason... because logic.Originally posted by nextelbuddy View Post
Beautiful - thanks for that.Originally posted by nextelbuddy View Post
It looks a lot better than it did.Originally posted by nextelbuddy View Post
Lastly... did you grease those ball and sockets? Hard to tell in one of the pics.Leave a comment:
-
This is exactly how my OE Euro bumper behaves on a carbon Kevlar support. Drivers side is perfect, passenger is about 3/8 inch too far forward. It’s been like that since I bought the car seven years ago. Had the bumper off earlier this year to delete the aux fan and it wasn’t obvious to me how to make it fit better.Originally posted by nextelbuddy View Post
Maybe I’ll revisit this year … not sure it bothers me enough to mess with it more though unless I’m already in there for something.Leave a comment:
-
Yes they are the karbonious ones. They are a very good product and well built, but the double sticky tape that comes already installed on them doesn't really stick that well. I cleaned the bumper surface with isopropyl alcohol dried. It used the heat gun but still even holding the splitters and place. As soon as I let go the tape would start to give. So I ended up pulling off all of their tape and using some of my own 3M black double sticky tape. Some of that 30 lb tape you get from home Depot. It worked a little bit better. There's still a few places that aren't 100% adhered that annoys me and I test fit so many times to try to get the perfect fitment.Originally posted by antknee View Post
Sent from my Pixel 6 Pro using Tapatalk
Leave a comment:
-
So counter syncing the little plate that has the female ball socket won't really do much on its own because you still have the actual foam piece that sits in the recess of the Kevlar support. And in my case, my bumper is fully recessed into the Kevlar support. I was actually able to use my finger and feel between the Kevlar support bar and the foam insert and there's no space left so it's pushed in all the way. What I did do was tighten down those female ball socket plates because they were a little bit loose so I tightened them down all the way and then I chiseled away some foam from the foam insert on the passenger side and it helped a little bitOriginally posted by Casa de Mesa View Post
Ultimately, I think in my case I'm probably just need to take my Kevlar support bar off one of these days and take it down to a machine shop and have them CNC mill about 7 mm off of the aluminum plate that bolts to the frame rail that will allow the Kevlar support to bring the entire bumper system closer inward thus lining up with the fenders better
For the top foam pieces that you asked about on the killer support bar, I actually used JB 5 minute quick weld to adhere it and then I used some plastic clamps to gently apply pressure for about 20 minutes and then I also took 4 hour JB weld epoxy and went around all of the edges to kind of anchor it a little bit better.
Here is my bumper's final fitment.. I'm happy with the gaps under the headlights and the hood, but I'm still annoyed by the alignment of the bumper to the fenders, especially on the passenger side. It's a little bit worse than the driver side and it's going to bother me. I know it is. But for now it's about the best I can do with at this moment.


Sent from my Pixel 6 Pro using Tapatalk
Leave a comment:
-
Amazing that this info has been lost over the years and attempting to be rediscovered.Leave a comment:
-
Here is an early (March 2000 build) Euro M3:Originally posted by Tbonem3 View Post- Front bumper part #: 51112695241
- Front bumper support: 51118195287 <== Aluminum
Here is a later model (Jan 2006) Euro M3:- Front bumper part #: 51117894989 <== What the OP has
- Front bumper support: 51117893527 <== "Lightweight" or Carbon/Kevlar
Here is a US spec (Sept 2002 - build date of my car):- Front bumper part #: 51117894990
- Front bumper support: 51117893527 <== Same part # as the Euro later model
So in theory, the OP ordered the correct bumper and it should fit.Leave a comment:
-
There is for u.s. bumper afaik. Did europe have the support change like we did?Leave a comment:
-
So presumably there is a Euro bumper cover for aluminum and another for kevlar?Originally posted by Tbonem3 View Post
I will go search RealOEM...Leave a comment:
-
I already posted it above, I think you bought the wrong bumper. Did you check out the 2 part #s?Leave a comment:
-
Try pulling the grill off and really inspecting that area where the tabs are while it slides on. I have this bumper on both of my M3s and they both had that same issue. On my track I cut those tabs off to install a custom grill and suddenly the bumper that never slid on 100% fit perfect! Thats how I first discovered the issue.Last edited by robgill; 12-21-2021, 08:36 AM.Leave a comment:
-
I have a couple questions for you as I'm about to order that exact bumper for my car.
1. If nothing else is interfering with the carrier, and it turns out to be the ball-and-socket interface, is it possible to carefully shave down the mounting point on the backside of the plastic plate that sits on top of the foam support?
This is a HORRIBLE mock-up (pic just below) but essentially, countersink this plate into the foam a bit more. I recognize this could be difficult.
2. Also in the pic just below, did you put grease on the inside of the socket? It seems like you did. And is that a common thing to do?
I ask because when I removed my bumper, the balls stuck in the socket so much so that the plastic support beam that sits behind the foam (in between the foam and the actual external bumper cover) broke when I pulled the bumper forwards to remove it. The plastic support beam is just held in by some plastic welds, which failed. Using grease seems like it could be a great idea to ease future removal, or even while doing the on/off/on/off/etc. process to get the new bumper aligned correctly.
3. What did you use to adhere the foam spacers with? Mine fell off (like these all do) and rather than using doubled-side tape, I was trying to find an adhesive that would stick to the carbon/kevlar bumper but also not eat into or dissolve the foam.
Leave a comment:
-
I do believe the front bumper cover must match the support type. The rear, however is the same bumper cover whether you have alu or kevlar support.Leave a comment:
Leave a comment: