
I tackled the auto dimming mirror w/HomeLink (garage door opener, called UGDO by BMW) retrofit today. I didn't plan to make this a DIY, so sorry for the lack of pictures. I did this on my 04/99 coupe with a sunroof. The wire colors may be different in your car.
You should be able to do this on a car without a sunroof, but I'm not sure how to access the map light wiring harness (required) on a car like that, so you're on your own. I don't have an alarm, so I did not bother looking for the wiring harness with the provision for the alarm LED wire(s).
The part number for the mirror I bought is 51167028444. The part number for the retrofit kit is 51160001231. It's ~$25, and includes the wiring harness, 3 BMW wire taps (I found these useless), and a grommet. The part number for the end caps is 51167133655. It's ~$10 for the pair of covers.
Mirror:

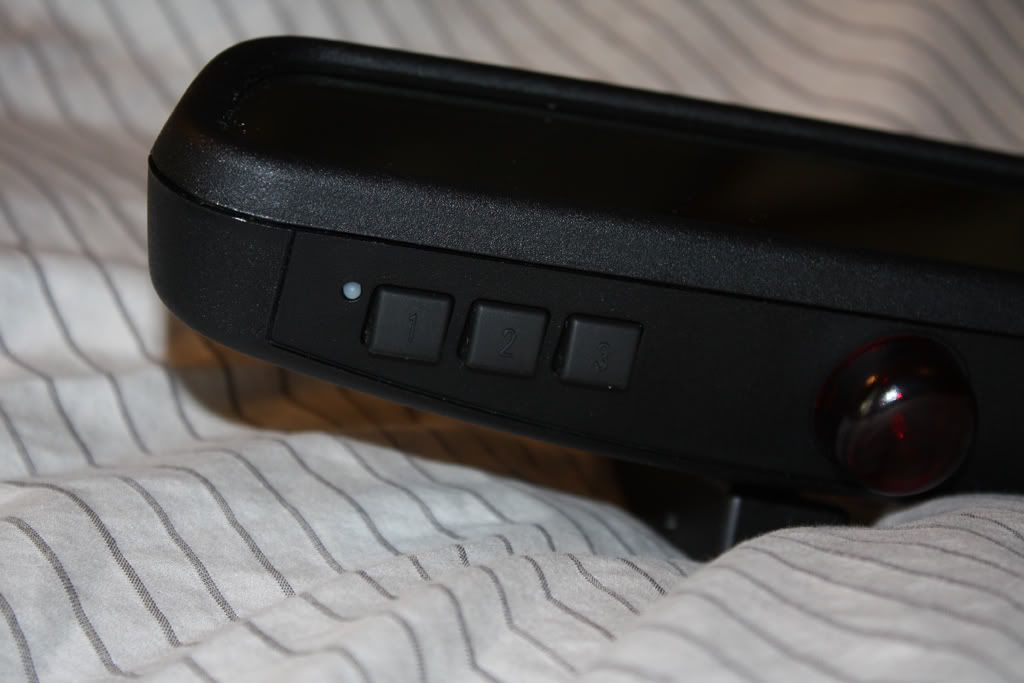
HomeLink buttons:
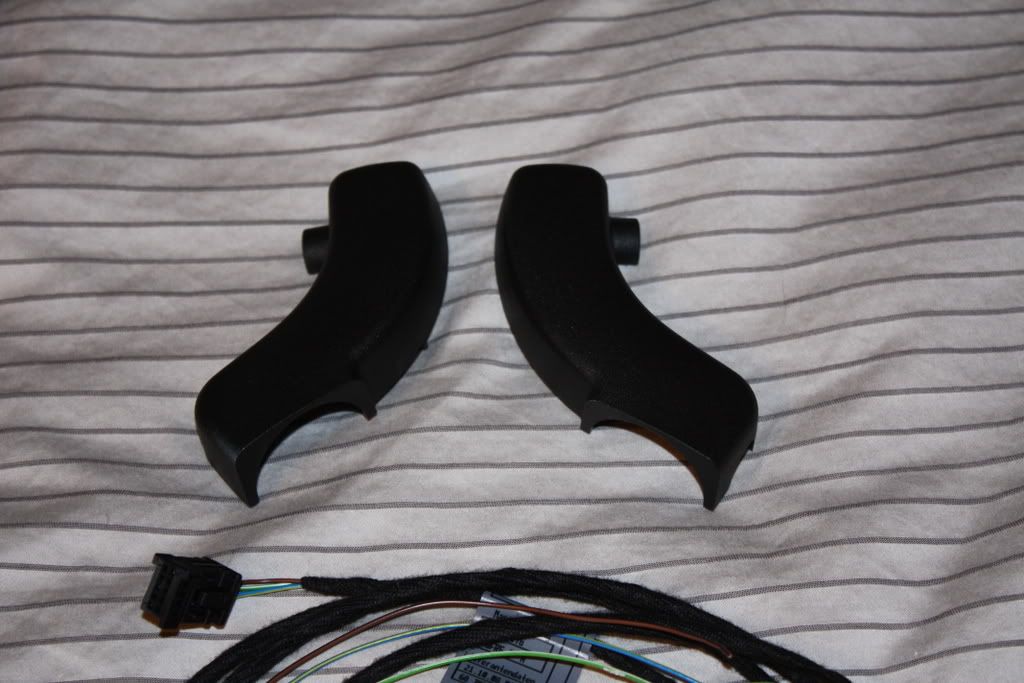
Wiring harness, grommet, and the BMW wire taps that I didn't use:

End caps:
First, remove your existing rear view mirror. Tilt the mirror downwards, and grab the base, where it connects to the windshield. Gently turn it counter-clockwise, until you get to approximately 45 degrees. The entire mirror should now pop off the windshield, easily.
The next step is to remove the sunroof motor cover / panel. It just pries out (gently) from the top with a flat-head screwdriver. Disconnect the sunroof up/down switch.
The next step is to remove the map light assembly. You'll see some black clips at the top of it. Push those, and push the map light assembly down and out. It will fall. Let it dangle.
Then, insert the wires through the provided grommet (small end of the grommet is pointing towards the bare end of the wiring harness), and run the grommet all the way to the mirror connector. Plug the cable into the mirror. Put the end caps in position, put the grommet at the top (making sure it is all snug), and clip on the end caps. This might take a few minutes of fidgeting, but you'll get it eventually.
Now, take the bare wires from the harness, and while pushing down against the trim behind where the map light assembly normally sits, you should be able to feed the wires over it and into the map light assembly/sunroof motor area. Pull the harness all the way through.
Make sure the grommet and end caps are snug, and then, with the base of the mirror at a 45 degree angle to the windshield, push it onto the base cap on the windshield (it should pop on) and then rotate it 45 degrees clockwise to lock it position. It should look OEM at this point.
Now, back to the map light assembly. It is connected with a wiring harness, which you will need to find and remove. It's clipped on, to the left of the sunroof. Take it off, pull it towards you, and disconnect the map light assembly from the connector.
The map light assembly connector (it's the white connector on the left in this picture):

At this point, you need to locate two crucial wires. One is violet with a white stripe, and one is just plain brown (there is another with a stripe, this is not the correct wire). The VIO/WHT wire is hot with igntion in ON. The BRN wire is for ground. Going from left to right, you should have a Violet/White wire, a Red/White wire, a Red/Black wire, a Brown wire, and a Brown/Red wire. The 1st and the 4th wires are the ones you are going to need to cut and/or splice into.
You may want to cut off most of the wiring harness at this point (you only need 6-12 inches of slack at most), and peel/cut back the BMW black tape. Splice the brown wire from the dangling mirror harness into the brown wire on this harness. Splice the green/white wire (homelink/autodim power) from the mirror harness into the violet/white wire. If you want to hook up the autodim-cancel when the car is in reverse, run the blue/yellow wire down the a-pillar to a reverse light indicator source. I didn't bother with this, because I'm lazy.
Reconnect the map light assembly to the harness, tuck it back into position, and reinstall the map light assembly. Plug the harness for the sunroof open/close switch back in, and insert the sunroof trim panel back on. It's not easy (I had to do some major bending/fidgeting to get it back on).
The HomeLink and autodim should now be operational. They should only function with the ignition in ON. To program the HomeLink, first, hold down the 1 and 3 button until the orange LED flashes quickly and constantly. Let go of the buttons. Get your garage door opener, and hold down the button on the mirror that you want to program. The LED should turn on and stay on (or it might turn off, I'm not sure). Either way, keep holding down the button. Then, press and hold your garage door opener button. After 3-4 seconds, the LED should begin to flash quickly. Let go of all the buttons. Your HomeLink should open/close the door, now. Rinse and repeat for the other side.
Finished product:


You should be able to do this on a car without a sunroof, but I'm not sure how to access the map light wiring harness (required) on a car like that, so you're on your own. I don't have an alarm, so I did not bother looking for the wiring harness with the provision for the alarm LED wire(s).
The part number for the mirror I bought is 51167028444. The part number for the retrofit kit is 51160001231. It's ~$25, and includes the wiring harness, 3 BMW wire taps (I found these useless), and a grommet. The part number for the end caps is 51167133655. It's ~$10 for the pair of covers.
Mirror:
HomeLink buttons:
Wiring harness, grommet, and the BMW wire taps that I didn't use:
End caps:
First, remove your existing rear view mirror. Tilt the mirror downwards, and grab the base, where it connects to the windshield. Gently turn it counter-clockwise, until you get to approximately 45 degrees. The entire mirror should now pop off the windshield, easily.
The next step is to remove the sunroof motor cover / panel. It just pries out (gently) from the top with a flat-head screwdriver. Disconnect the sunroof up/down switch.
The next step is to remove the map light assembly. You'll see some black clips at the top of it. Push those, and push the map light assembly down and out. It will fall. Let it dangle.
Then, insert the wires through the provided grommet (small end of the grommet is pointing towards the bare end of the wiring harness), and run the grommet all the way to the mirror connector. Plug the cable into the mirror. Put the end caps in position, put the grommet at the top (making sure it is all snug), and clip on the end caps. This might take a few minutes of fidgeting, but you'll get it eventually.
Now, take the bare wires from the harness, and while pushing down against the trim behind where the map light assembly normally sits, you should be able to feed the wires over it and into the map light assembly/sunroof motor area. Pull the harness all the way through.
Make sure the grommet and end caps are snug, and then, with the base of the mirror at a 45 degree angle to the windshield, push it onto the base cap on the windshield (it should pop on) and then rotate it 45 degrees clockwise to lock it position. It should look OEM at this point.
Now, back to the map light assembly. It is connected with a wiring harness, which you will need to find and remove. It's clipped on, to the left of the sunroof. Take it off, pull it towards you, and disconnect the map light assembly from the connector.
The map light assembly connector (it's the white connector on the left in this picture):
At this point, you need to locate two crucial wires. One is violet with a white stripe, and one is just plain brown (there is another with a stripe, this is not the correct wire). The VIO/WHT wire is hot with igntion in ON. The BRN wire is for ground. Going from left to right, you should have a Violet/White wire, a Red/White wire, a Red/Black wire, a Brown wire, and a Brown/Red wire. The 1st and the 4th wires are the ones you are going to need to cut and/or splice into.
You may want to cut off most of the wiring harness at this point (you only need 6-12 inches of slack at most), and peel/cut back the BMW black tape. Splice the brown wire from the dangling mirror harness into the brown wire on this harness. Splice the green/white wire (homelink/autodim power) from the mirror harness into the violet/white wire. If you want to hook up the autodim-cancel when the car is in reverse, run the blue/yellow wire down the a-pillar to a reverse light indicator source. I didn't bother with this, because I'm lazy.
Reconnect the map light assembly to the harness, tuck it back into position, and reinstall the map light assembly. Plug the harness for the sunroof open/close switch back in, and insert the sunroof trim panel back on. It's not easy (I had to do some major bending/fidgeting to get it back on).
The HomeLink and autodim should now be operational. They should only function with the ignition in ON. To program the HomeLink, first, hold down the 1 and 3 button until the orange LED flashes quickly and constantly. Let go of the buttons. Get your garage door opener, and hold down the button on the mirror that you want to program. The LED should turn on and stay on (or it might turn off, I'm not sure). Either way, keep holding down the button. Then, press and hold your garage door opener button. After 3-4 seconds, the LED should begin to flash quickly. Let go of all the buttons. Your HomeLink should open/close the door, now. Rinse and repeat for the other side.
Finished product:

Comment