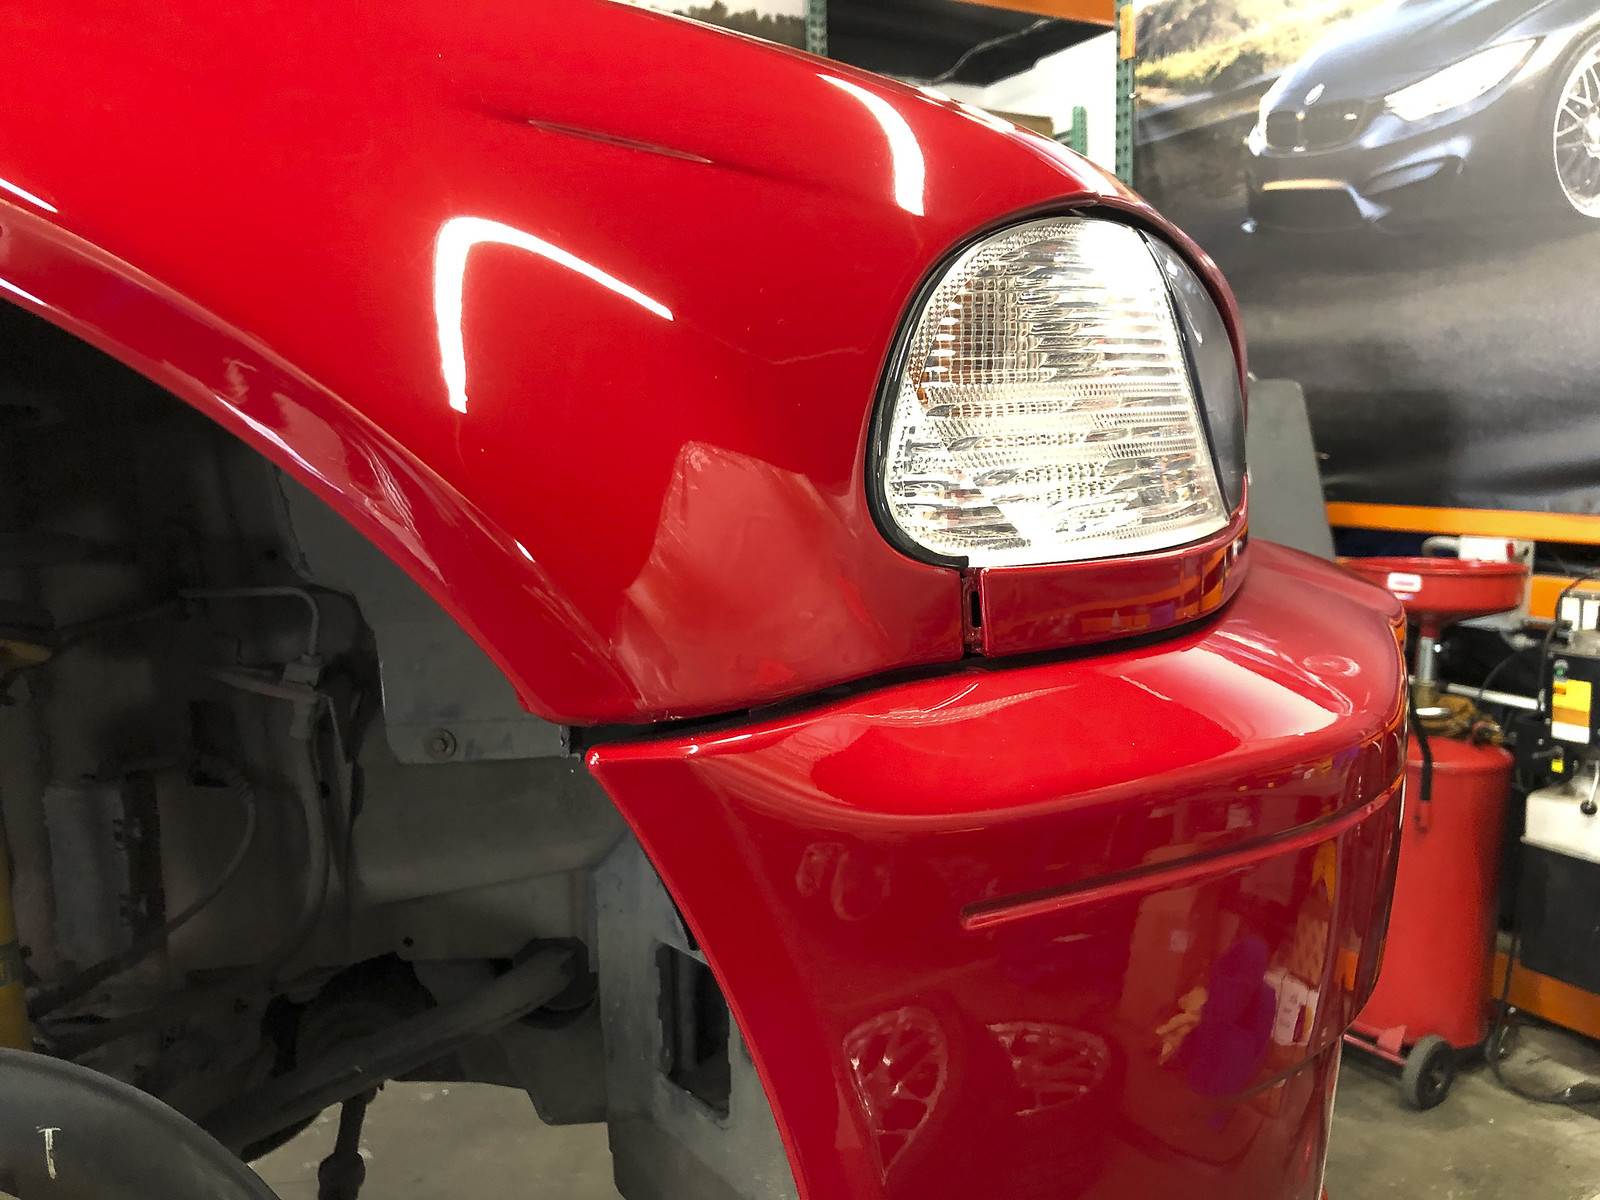
Hey guys, I picked my car up from the body shop yesterday after having been without it since October. Long story short, they got the wrong bumper cover and decided to update my front bumper from early with the metal carrier to late with the kevlar carrier, without asking me first  , and were ultimately not able to get my bumpers (front OR rear) aligned properly. I reached the point of frustration and wasted time and money with the shop that I had to just say fuck it, take the car, and try and finish this on my own and with the help of a friend. Thread with details is here: https://nam3forum.com/forums/forum/m...-having-issues
I have never had the bumpers off of this car before myself so I don't really know what hardware is in there, what commonly wears out, and what other issues may be causing these gaps. I got one suggestion in my other thread so far, so in addition to these for the rear bumper:
Pre 6/2002 is
2 x 51124015053
What clips and fasteners I might need to order before I jump in? I would rather order stuff I don't need and return it than have to do this a couple times. Here are some photos and a walk around video showing each corner.
Note: to avoid confusion these photos and video were NOT taken at the body shop who did the shitty work, I took these at the very excellent and professional wheel/tire/accessories shop Wheel Enhancement.
Video: https://www.flickr.com/photos/155556.../shares/YqK06Q


All said and done, the car does present pretty well and I'm glad to have it back. Just want the panels to fit like factory which I don't think is too much to ask!


 , and were ultimately not able to get my bumpers (front OR rear) aligned properly. I reached the point of frustration and wasted time and money with the shop that I had to just say fuck it, take the car, and try and finish this on my own and with the help of a friend. Thread with details is here: https://nam3forum.com/forums/forum/m...-having-issues
I have never had the bumpers off of this car before myself so I don't really know what hardware is in there, what commonly wears out, and what other issues may be causing these gaps. I got one suggestion in my other thread so far, so in addition to these for the rear bumper:
Pre 6/2002 is
2 x 51124015053
What clips and fasteners I might need to order before I jump in? I would rather order stuff I don't need and return it than have to do this a couple times. Here are some photos and a walk around video showing each corner.
Note: to avoid confusion these photos and video were NOT taken at the body shop who did the shitty work, I took these at the very excellent and professional wheel/tire/accessories shop Wheel Enhancement.
Video: https://www.flickr.com/photos/155556.../shares/YqK06Q


All said and done, the car does present pretty well and I'm glad to have it back. Just want the panels to fit like factory which I don't think is too much to ask!


Comment