Originally posted by Tbonem3
View Post
-
I used G2 caliper paint, so it wasn't a spray-on but paint on with a brush. That was probably half my problem... I do have a bottle of VHT clear which I was going to use over a decal but since it turned out so poorly I'm not really sure what to do now. -
Ok I see. I would advise to let these fully dry/cure, then sand down smooth and re attempt with spray can. As above, I suggest VHT silver caliper paint or VHT aluminum engine enamel. Then your decal. Then I would do VHT engine enamel clear, as VHT caliper clear will not look good in the end with metallic base coats. VHT caliper clear is fine with solid colors like yellow, red, black.
I'm confident of this advice because I've been doing this (caliper painting) pretty non-stop for over a year now.Last edited by Tbonem3; 04-09-2020, 06:18 PM.DD: /// 2011.5 Jerez/bamboo E90 M3 · DCT · Slicktop · Instagram
/// 2004 Silvergrey M3 · Coupe · 6spd · Slicktop · zero options
More info: https://nam3forum.com/forums/forum/m...os-supersprintComment
-
So I have a can of VHT clear, you think I can get away with sanding down the silver G2 paint that's on there, decal, and spray clear over the top? I didn't think about sanding...Originally posted by Tbonem3 View PostComment
-
If you don't have an oven to fully cure them, I wouldn't bother with the clear. Even if you have an oven and cure them properly, I don't think you're going to be too happy with how the vht caliper clear yellows and takes away the sparkle of the silver paint. Vht engine clear will be better, but again, only if you can bake them. At the very least, do light coats and not many.Last edited by Tbonem3; 04-10-2020, 09:44 PM.DD: /// 2011.5 Jerez/bamboo E90 M3 · DCT · Slicktop · Instagram
/// 2004 Silvergrey M3 · Coupe · 6spd · Slicktop · zero options
More info: https://nam3forum.com/forums/forum/m...os-supersprintComment
-
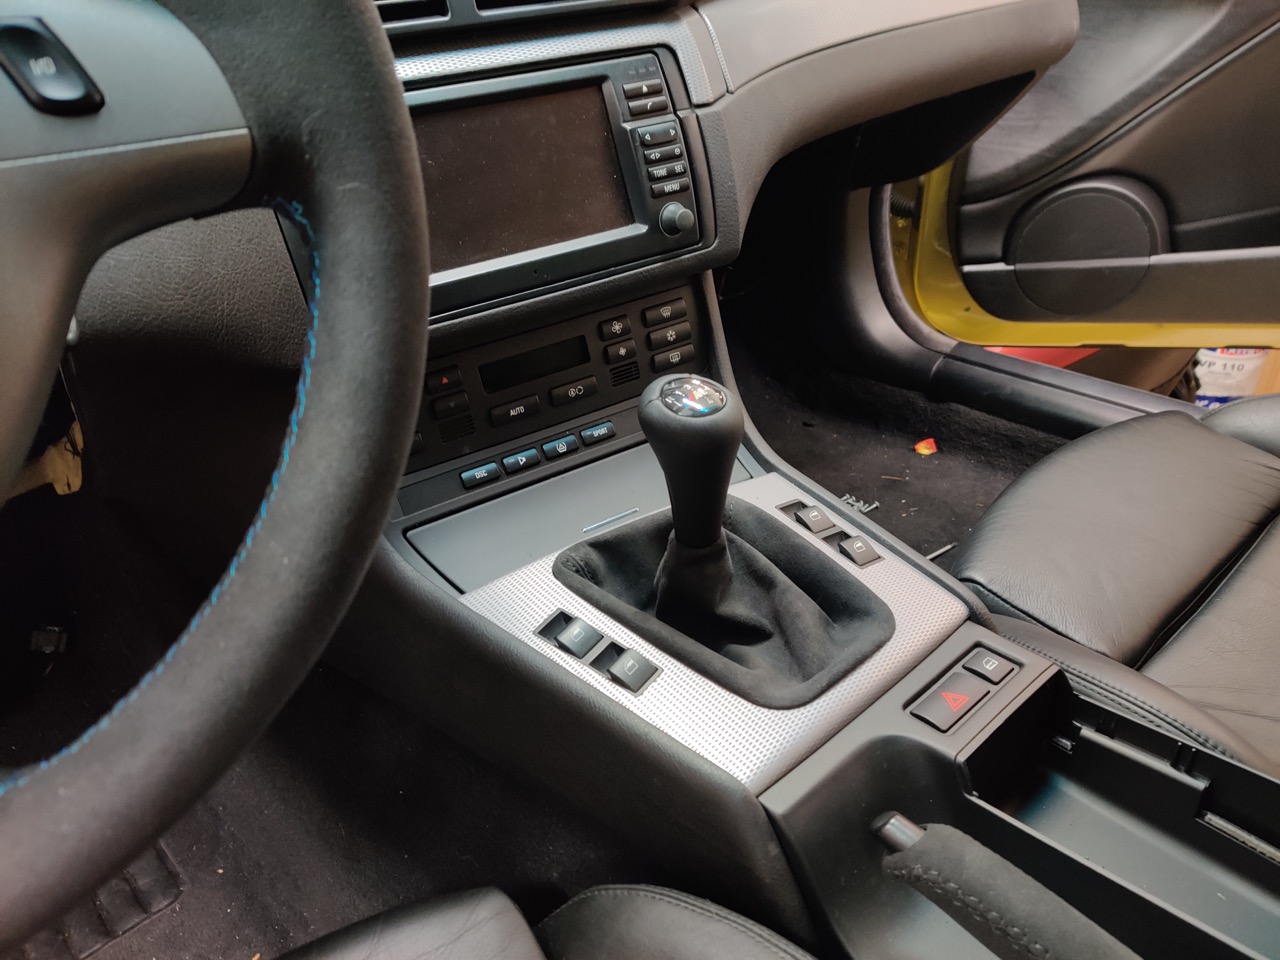
Didn't like the Dinan short shifter, so I pulled it out and bought an e60 shift level from ECS. Perfect size, shifts smooth and isn't notchy like the Dinan. I also installed the Coby Alcantara shifter and ebrake boot.
Great height!

Finally got the subframe in the car!!
First a did oil change in the diff and mounted the diff in the cradle

Up under the car it goes
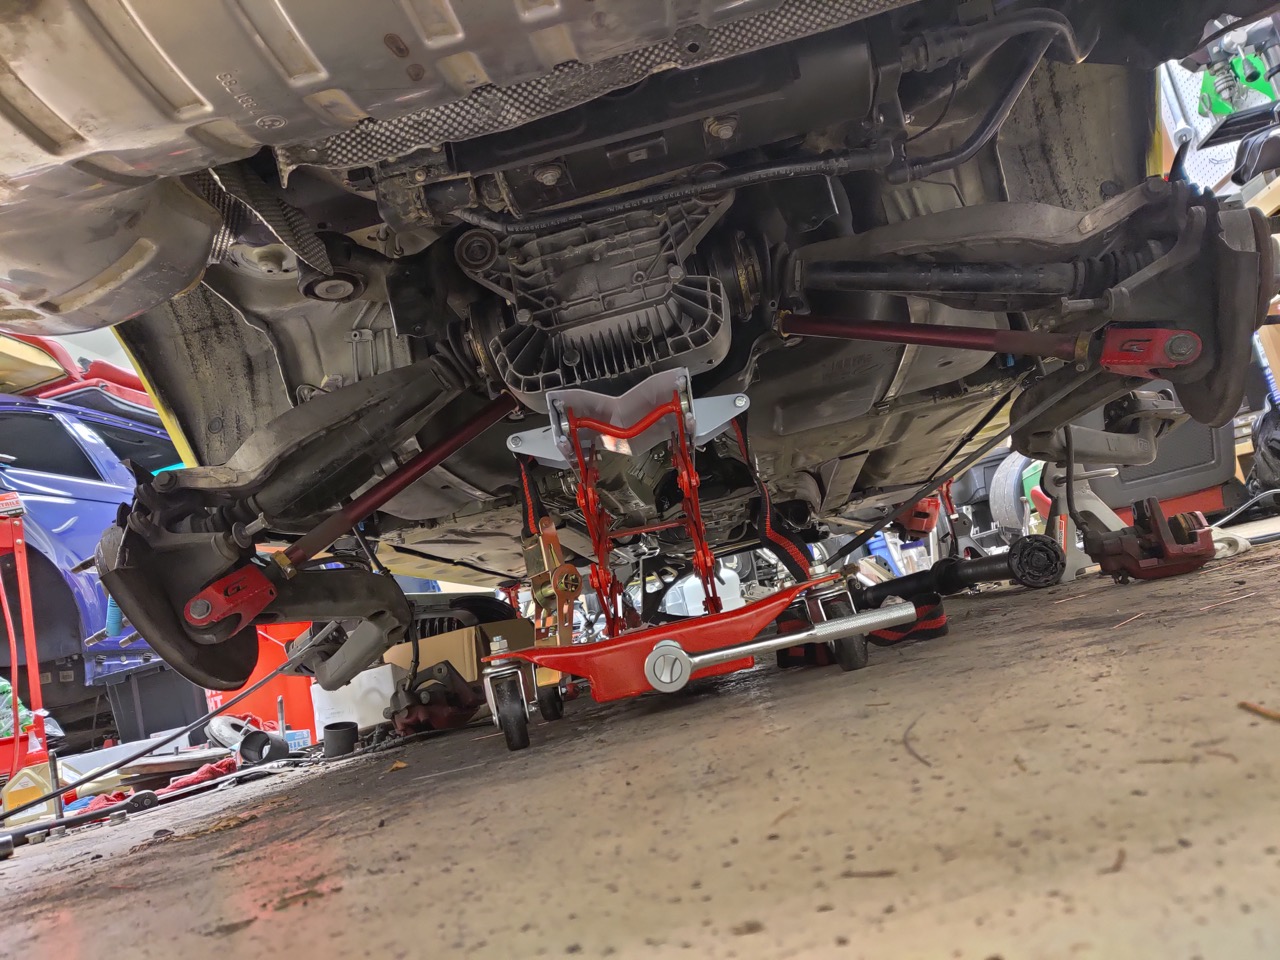
All bolted up!

Next up was the rear suspension

All bolted up with the PureTech coil-over reinforcement plates (primered painted)

Didn't take many pictures of the suspension going on and just rolled straight into doing the rear brakes.
Thanks Tbonem3 for the suggestions and help with the calipers. I got them all finished, I'm not totally sure what I'm going to do in regards to the paint on them yet but for now I'm just going to roll with them.
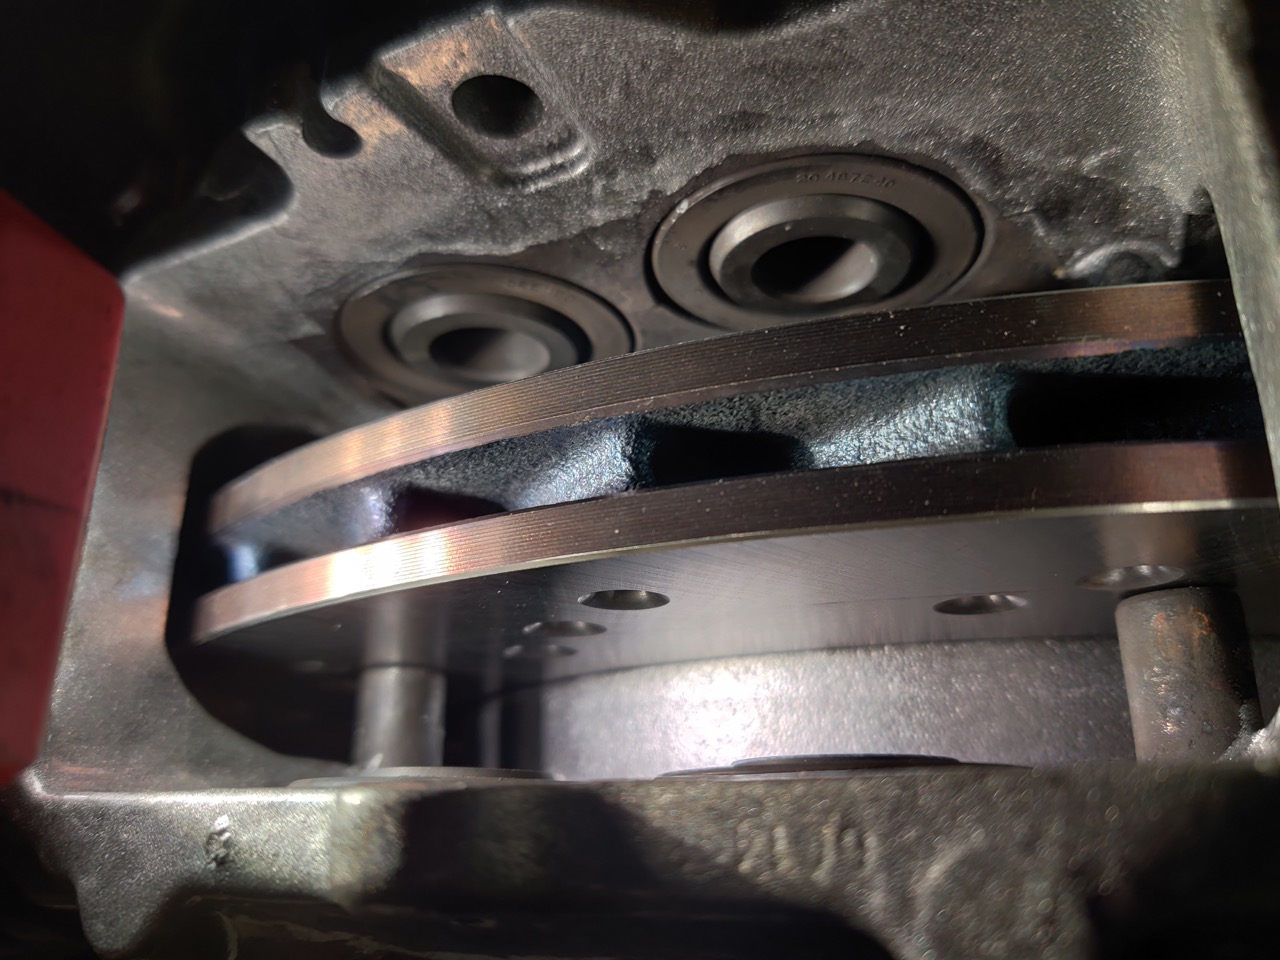
First problem was the dowel pins on the calipers were so long that they were basically rubbing up against the rotors. I used an angle grinder and got that fixed up real quick.
All finished

Up next, the front suspension, front brakes, driveshaft and the exhaust and we'll be on the road againComment
-
Excellent call on no tint. I went that route all around but my rear window was a complete disaster. I ended up scratching the defrost lines and window itself in a few spots so had to replace the whole thing. Fresh factory glass is a beautiful sight however.Comment
-
Yeah, the rear window is a massive pita. I'm not sure if I destroyed the rear defrost lines or not, I guess we'll see. I'm going to do a slicktop conversation at some point so the window will have to come out, I figure I'll deal with it then.Originally posted by Phoenix///M3 View PostComment
-
The car is coming together nicely liam821 👍. I really like the black interior swap as it goes really well with the exterior color.
I did notice that there might be a popped spot weld and seam sealer cracking on the rear drivers side arch where it joins the RACP. It looks to be right behind the shock, but the picture is a bit dark. Redish MS usually stitch weld both rear arches when they perform their RACP repairs.Last edited by Slideways; 04-13-2020, 12:14 PM.Comment
-
Thank you! I didn't really inspect or notice... I'll have a closer look.Originally posted by Slideways View PostComment
-
Good call, you were right it is cracked right there. I didn't even notice it. Doh! I'll have that fixed. Much appreciated.Originally posted by Slideways View PostComment
-
No problem, I wish it were easier to see before you bolted up the subframe, but you could most likely get at it with the damper removed.Originally posted by liam821 View PostComment
-
Excellent build! Makes me want to redo a build thread on mine lol. Would highly recommend getting rid of those stock subframe bushings. They're probably the worst designed thing for this car. Originally when I had reinforcement plates welded in I went OEM because I didn't know better in the early days. Well a few years ago I went solid aluminum in the subframe and pulled the oem ones which only had 40k on them. Believe it or not they already had play in them! Aluminum with oem diff bushings was the best thing I ever did.2003 E46 M3 TiAg/Cinnamon 6MT
2005 E46 330i ZHP Imola/Sand
| Karbonius | Schrick | Supertech | Volk | Recaro | FCM | SuperSprint | Turner | Hyperco | GC | PFC | VAC | OMP | Radium Engineering | MPRacing |
Instagram:@thegenius46m
NorCal DME Programming and Coding ExpertComment
-
Okay, yeah I'll for sure check that out. I have stock bushings in the rear. The RTAB are OE style with the sandwich plates on each side.Originally posted by thegenius46m View Post
You were spot on. Check out the pictures below. I'll have to remove the damper to get it all welded up but that easy enough.Originally posted by Slideways View Post
I'm pointing to the crack

Had a bit of time late one night to work on the car a bit more, got the front suspension and brakes on.
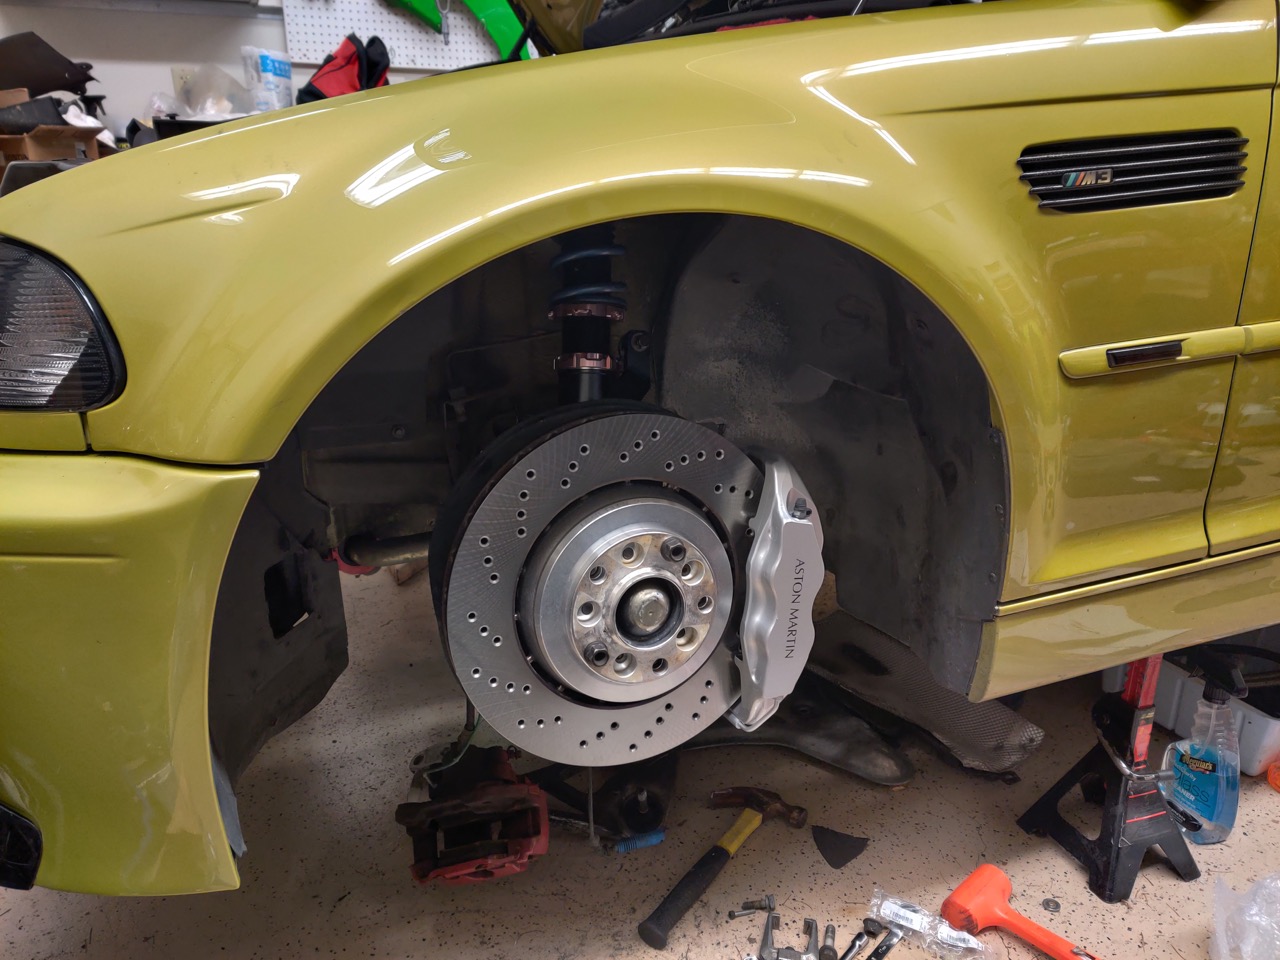
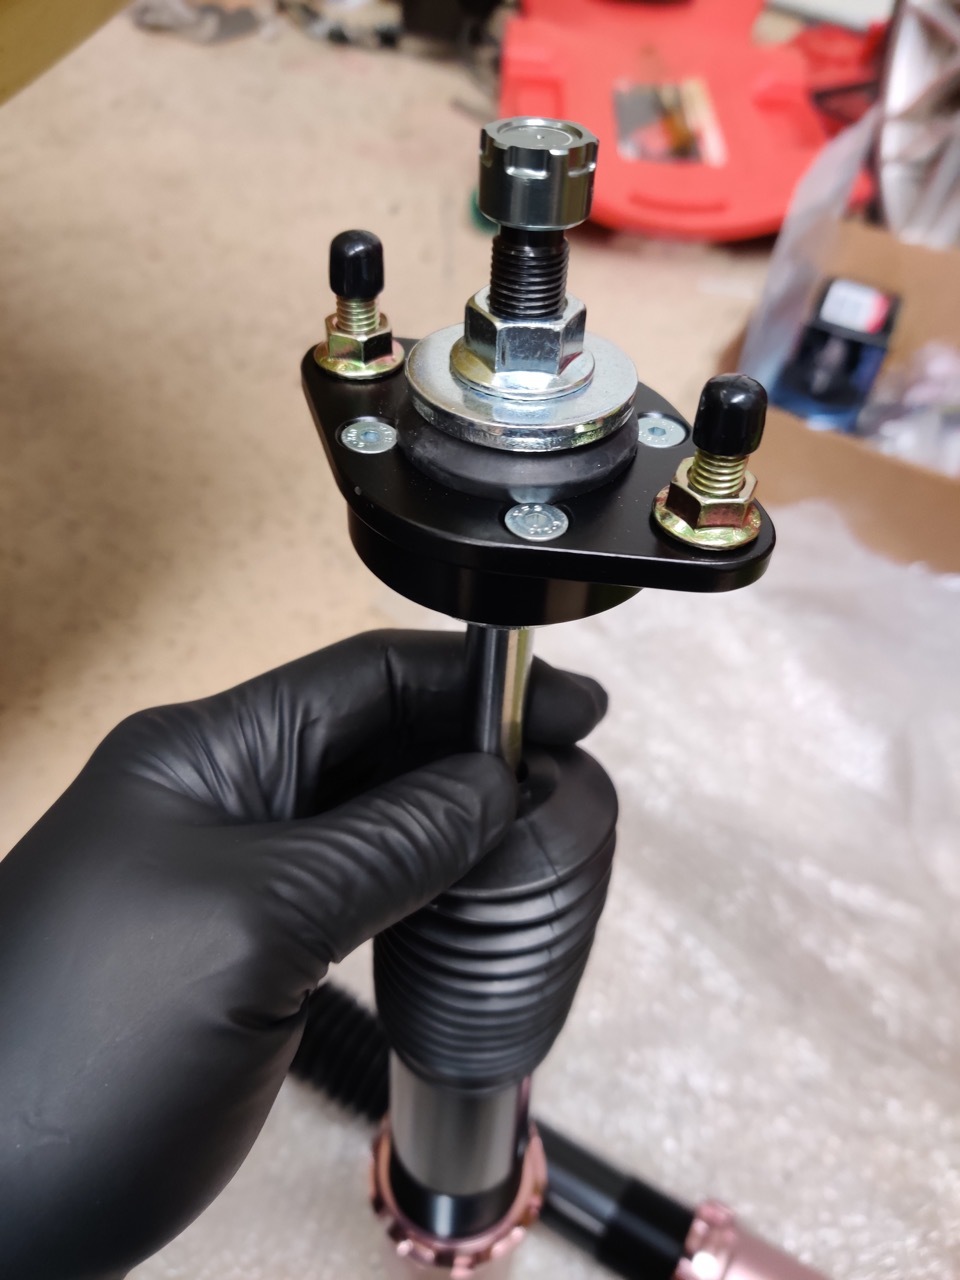
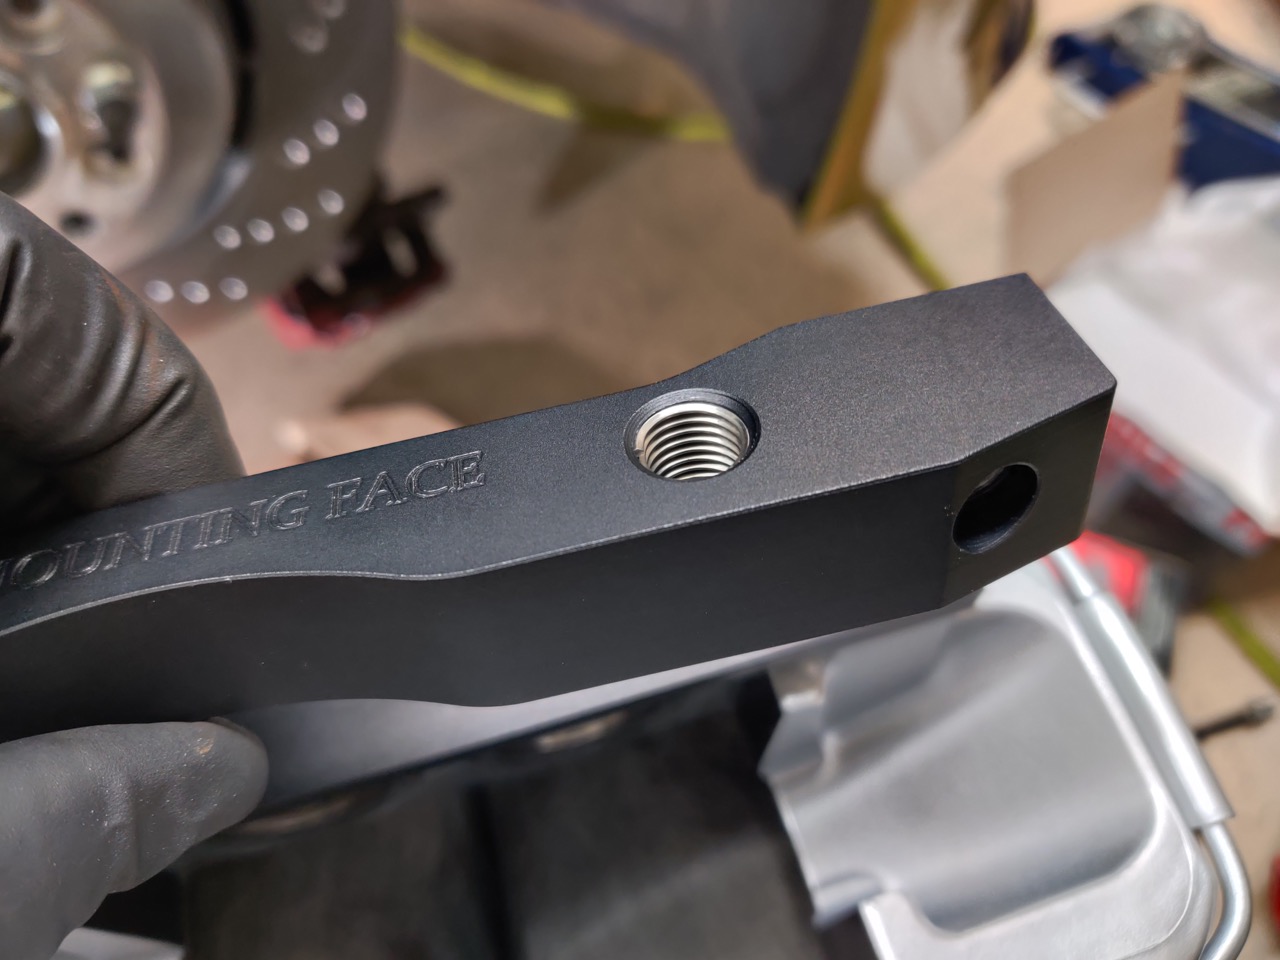
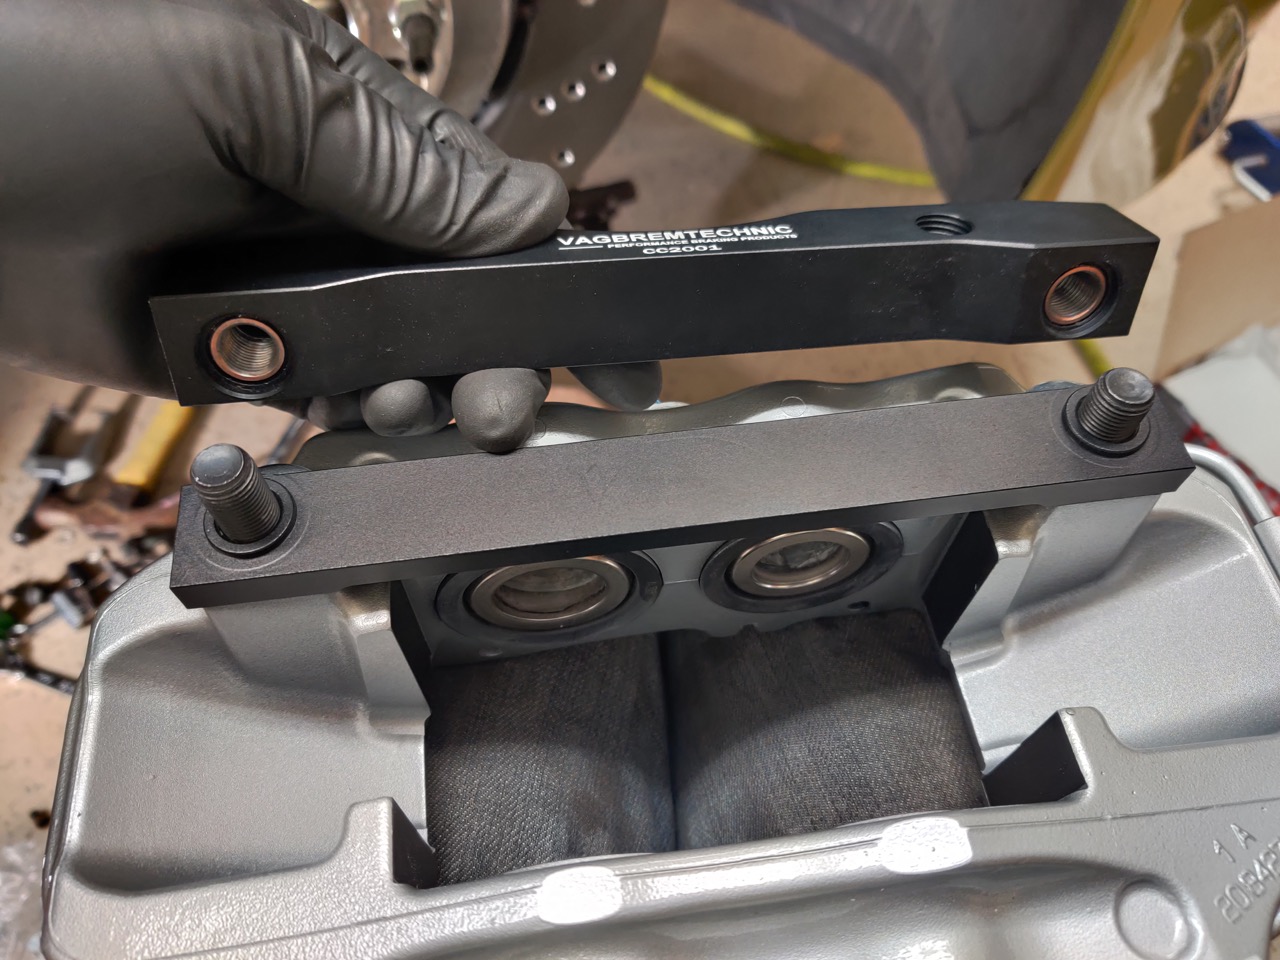
Here are some pictures of the Vagbremtechnic Aston caliper brackets, really high quality

The brackets come with a spacer, so you can use both a standard M3 328mm rotor or 345mm ZCP/CSL style rotor. I'm using the larger ZCP/CSL rotors.
I removed the fake carbon fiber front kidney grills that came with the car and replaced with OE BMW chrome grills
Old - I'll put them up for sale, decently high quality and no broken tabs
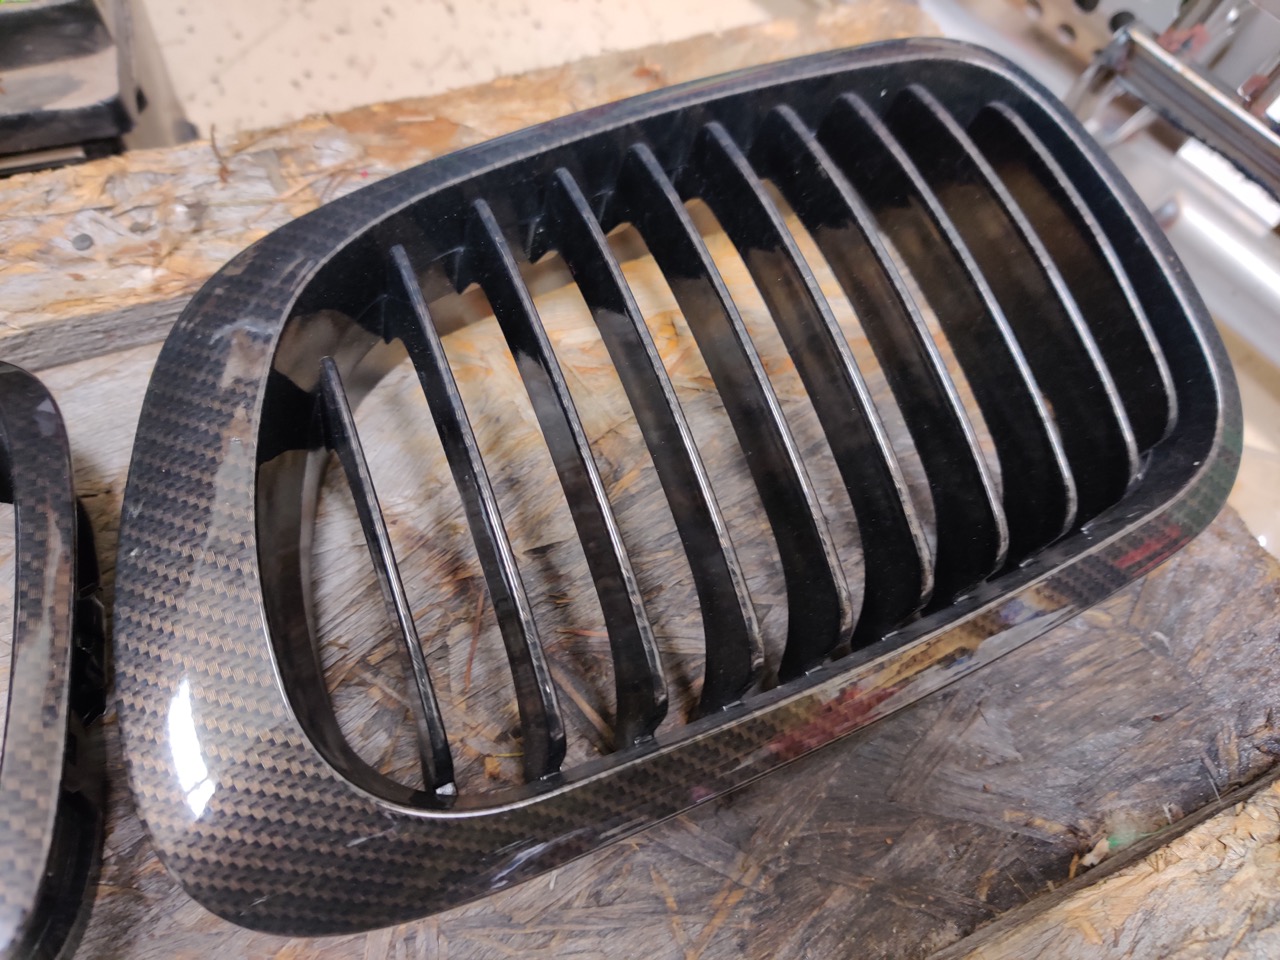
Gotta say, I love the stock OE chrome grills on Phoenix Yellow - ignore the disaster which is my garage


I also replaced the side-vents with stock OE chrome ones

Only thing left to do is put the driveshaft, exhaust, and intake manifold back on. Oh and bleed the brakes. Almost have a moving car!
Comment
-
The Aston brakes look brand new, do you mind sharing where you picked them up? Thinking about doing something similar on mine.Comment
-
They are brand new. I bought them from Scuderia Car Parts USA which is a US importer of Aston, Ferrari, Lamborghini, etc parts. You can get them, brand new, in yellow, red, black, grey, and silver. Mine are silver. They are direct from Aston and include the two brake pad pinch hardware and spring plate.Originally posted by RoyalFlushness View Post
https://www.scuderiacarparts.com/par.../151/659/23823
Make sure to select a right and left caliper. I paid $394/each plus shipping and duties. Came out to about $975. I was going to get them used, but after shipping, I was looking at $600-800 and then would most likely have to replace all the seals and have them repainted. So it was a wash. I'm not sure keen on the Aston Martin logo...I wanted them to say Brembo, but I'll deal with that at a later date. The calipers are also used on the V8 Vantage as well as the DB9, also the Audi TTRS 8J model or RS3 8P model (but you will have to flip the calipers since they are reversed from Audi).
You can also buy them from Vagbremtechnic (the place you buy the brackets from) and they come out to about the same price, although shipping might be a bit more. But they'll do custom colors and logos if you want.
https://www.vagbremtechnic.com/front...lipers-bk0014/
For the money, I think this kit is hard to beat. With new CSL/ZCP rotors & pads (from FCP with a lifetime warranty), you're looking at under $1500 all in. The Aston calipers have the same piston size as the older $4000 Brembo 355mm 4-pot setup for the e46m3 and you don't have to machine the calipers like you do with the Porsche. They also look better, IMHO.
Buildjournal has a nice review here: https://thebuildjournal.com/reviews/...e46-m3-review/Comment

Comment