-
Good find. I don't need it since I already did mine but would love to hear feedback from anyone you buys this.Leave a comment:
-
Leave a comment:
-
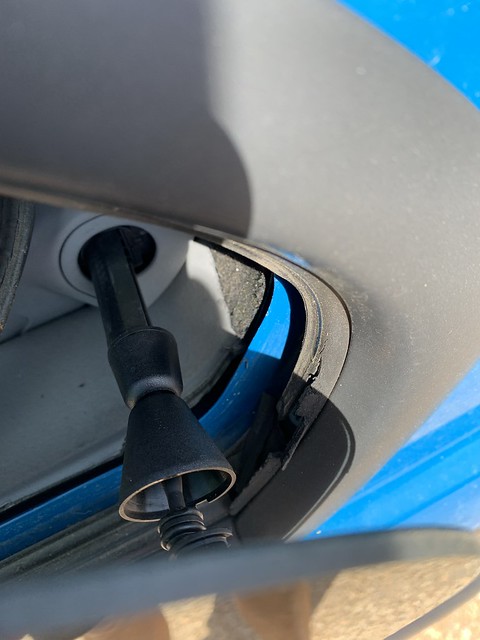
Finally got around to trying the rear side window seal repair (after doing the lower trim more than 2 years ago). Only took about 2.5 hours from start to finish. The most important tools for the job are a 3M adhesive remover and a plastic razor blade to get the old double-side tape off. Planning to do the full passenger side next (Seal and Lower trim). Also, I went with the Ameriseal version from Advance Auto Parts and it was soft enough that I didn't need to use vacuum hose to get the kinks out.


Leave a comment:
-
I have the same issue with my rear window bottom trim runner disintegrating. It’s like $250 for a pair for Yw gloss black trim. BMW needs to up their qualityLeave a comment:
-
BMW can be real assholes sometimes because apparently this same seal for the prior generation E36 is available and sold separately by BMW for like $50 but they decide to screw us on the E46 for no good reason and instead of spending $100 to replace both sides wear item parts only on the finisher(i.e. this damn seal), they want you to spend $1,200 to buy the entire finishers so basically throw away $1,000 for nothing.
E36 Window Seal Example Sold on FCP
🖕 BMWLeave a comment:
-
Im surprised no one has yet fabricated the rubber part to sell separately. Seems like there could be a lot of money to be madeLeave a comment:
-
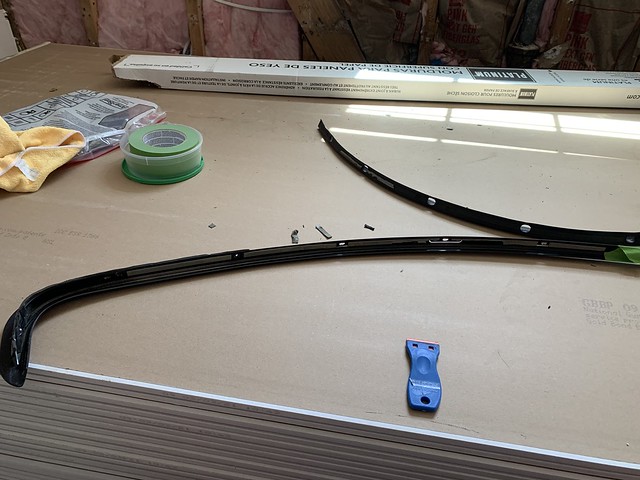
Just did mine with the seal from Summit Racing since my Advance Auto had no idea what the seal was even with the part number and ordering online and no other local stores did either...not sure if they make/stock it anymore or if I just had a bad experience at my local store. Took about 40 minutes one one side and maybe 15 minutes on the other since I knew what I was doing now. It's literaly only a couple steps (I didn't do the lower rear window trim since mine is in perfect share from the car being garage kept). 14 screws to take off the shadow line, rip off the old seal then wipe it clean and get any extra tape out of there. Leave a little extra length on the new seal and stuff it into the channel at the end, stick it down the rest of the way and insert a hose into the end where it curves to prevent kinking (I used some 3mm ID silicone hose had from when I did some vac lines on my old 850R). Cut the exact length at the b pillar before you put it on and then cut the exact length at the end once it's on the car. The only touch part was prying back the seal a bit to get the screws in by the end. That, and making sure to plump the seal up a bit when putting the window channel back on. Done.Leave a comment:
-
I found the ameri seal striping at advanced auto parts(car quest near me) just striped crappy spray paint off my trim that someone else did, sanded adhesion promoter and sprayed with some custom blended 2 part 2k paint to match trim. Painted trim and steering wheel trim. Will see how the striping works when I’m off work tomorrow.Leave a comment:
-
I’m in the middle of removing my shadow trim, going to paint it to better match and re-do the seal after finding this thread. I can’t decide what striping I should get but this looks nice. Hope to see update how it fits! New member here but glad to see it’s active here.Originally posted by 6MTGirl View PostLeave a comment:
-
Post some pics after its installed, will be doing this too on my end.Originally posted by 6MTGirl View PostLeave a comment:

Leave a comment: