Announcement

Collapse
No announcement yet.

Vanos Seal Leak - Rebuild (again) while I'm in there?

Collapse
X
 
  • Filter
  • Time
  • Show
Clear All
new posts

    Vanos Seal Leak - Rebuild (again) while I'm in there?

    Hey folks,

    I noticed a fairly slow leak from the lower seal between the VANOS unit and my engine block, about here:

    Click image for larger version  Name:	image.png Views:	0 Size:	27.7 KB ID:	233630

    You can see this in the image I attached to the thread.​

    So, to fix this, I'm guessing I will have to slightly pull the VANOS unit back from the head, enough to drop the old gasket out and replace it. Any other suggestions to avoid all that work for a little gasket?


    On a maybe related note, the previous owner of my 05 M3 claims to have rebuild the Vanos using Beisan parts. But on a cold start, I hear an idle noise after 4-5 seconds that feels to me like "Vanos Rattle." It quiets down after a couple minutes. Here it is, you can hear it come in at 5 seconds:


    Is this noise a VANOS issue? It doesn't make the typical vanos knock/groan at 3k rpm, only at idle, so perhaps its some other issue like the timing chain tensioner? Or is it typical of the S54 on cold start? The car only has 51k miles...
    Attached Files
    Last edited by Andratch; 09-13-2023, 09:30 PM.

    #2
    Inspect hub tabs and cam bolts. If there is an issue then dig into it more. You can remove the VANOS without affecting timing. Good video here:


    Pro Tip: when installing the new vanos gasket make sure to clean both surfaces. But be careful with abrasives as the aluminum is pretty soft and easy to deform. I use 3M red scotchbrite pad.

    Apply a thin layer of toyota FIPG around the bottom left bolt hole on the head side (the circled area in your photo above)

    Comment


      #3
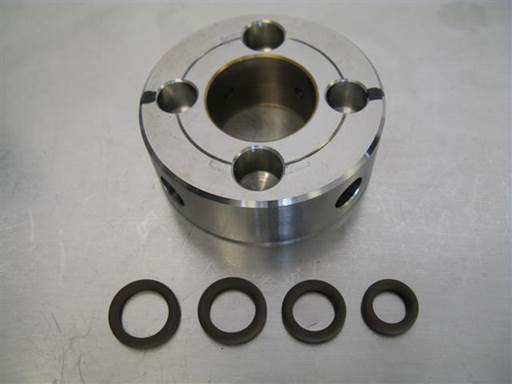
      That noise is completely normal. An easy way to verify that the previous owner did the VANOS work is the look at the VANOS oil pump disc. It should have four holes and marked BS on the face of the disc.

      The VANOS gasket is easy to replace, just follow the BS instructions and clean the surfaces thoroughly before installing the new gasket.

      Comment


        #4
        Originally posted by eacmen View Post
        Inspect hub tabs and cam bolts. If there is an issue then dig into it more. You can remove the VANOS without affecting timing. Good video here:


        Pro Tip: when installing the new vanos gasket make sure to clean both surfaces. But be careful with abrasives as the aluminum is pretty soft and easy to deform. I use 3M red scotchbrite pad.

        Apply a thin layer of toyota FIPG around the bottom left bolt hole on the head side (the circled area in your photo above)

        Just to be clear, since I'm not rebuilding anything just removing to replace a gasket - as long as I use the cam alignment tool and crank pin, the re-installation process is exactly the opposite of the video? Nothing else that needs to be checked or re-aligned?

        Comment


          #5
          Originally posted by Andratch View Post


          Just to be clear, since I'm not rebuilding anything just removing to replace a gasket - as long as I use the cam alignment tool and crank pin, the re-installation process is exactly the opposite of the video? Nothing else that needs to be checked or re-aligned?
          The vanos module can be removed without touching the hub bolts, so nothing is changed on the vanos timing, no need to re-time it.

          Comment


            #6
            Originally posted by Andratch View Post


            Just to be clear, since I'm not rebuilding anything just removing to replace a gasket - as long as I use the cam alignment tool and crank pin, the re-installation process is exactly the opposite of the video? Nothing else that needs to be checked or re-aligned?
            Correct. I think technically you only need the crank pin. The cam bridge tool is just to double check that the timing is good.

            Comment


              #7
              Originally posted by Slideways View Post
              That noise is completely normal. An easy way to verify that the previous owner did the VANOS work is the look at the VANOS oil pump disc. It should have four holes and marked BS on the face of the disc.

              The VANOS gasket is easy to replace, just follow the BS instructions and clean the surfaces thoroughly before installing the new gasket.
              After reading the full Beisan Vanos instruction guide, I am still not a 100% sure about the process if I were to just replace the Vanos Gasket.

              1. remove valve cover ( also remove header side oil return banjo bolt)
              2. loose 5 vano soleniod bolts
              3. clean the mating surface with red scotch
              4. replace solenoid plate o-ring
              5. install vano gasket

              did I miss any critical step?

              Comment


                #8
                Originally posted by y2k_o__o View Post

                After reading the full Beisan Vanos instruction guide, I am still not a 100% sure about the process if I were to just replace the Vanos Gasket.

                1. remove valve cover ( also remove header side oil return banjo bolt)
                2. loose 5 vano soleniod bolts
                3. clean the mating surface with red scotch
                4. replace solenoid plate o-ring
                5. install vano gasket

                did I miss any critical step?
                If you only want to replace the VANOS gasket, you don't need to remove the VANOS solenoid pack. The solenoid pack has access holes in it to get to the bolts for the VANOS unit.

                Comment


                  #9
                  If it ain't broke don't fix it. Seriously. Check for wear on the tabs.

                  Check valve shim clearance?

                  Car bro science suggests to not use scotchbrite in the engine. Orange plastic razor blades and rags with brake clean will do. I also used rtv(hondabond) around that hole.

                  Still use Beisans rebuild guide and skip the parts you don't need. It'll help a lot.

                  Comment


                    #10
                    Originally posted by bavarian3 View Post
                    If it ain't broke don't fix it. Seriously. Check for wear on the tabs.

                    Check valve shim clearance?

                    Car bro science suggests to not use scotchbrite in the engine. Orange plastic razor blades and rags with brake clean will do. I also used rtv(hondabond) around that hole.

                    Still use Beisans rebuild guide and skip the parts you don't need. It'll help a lot.
                    There's oil seeping through that gap, and I don't have the budget to do the full vanos overhaul yet, so in the meantime I'll just fix the oil leak until I am financially stable

                    Comment

                    Working...
                    X