Announcement

Collapse
No announcement yet.

Liam821's e46 324i k24/dct/turbo build

Collapse
X
 
  • Filter
  • Time
  • Show
Clear All
new posts

    #46
    I have had almost no time this week, so many things going on. But I still snuck out into the garage for a few hours here and there.

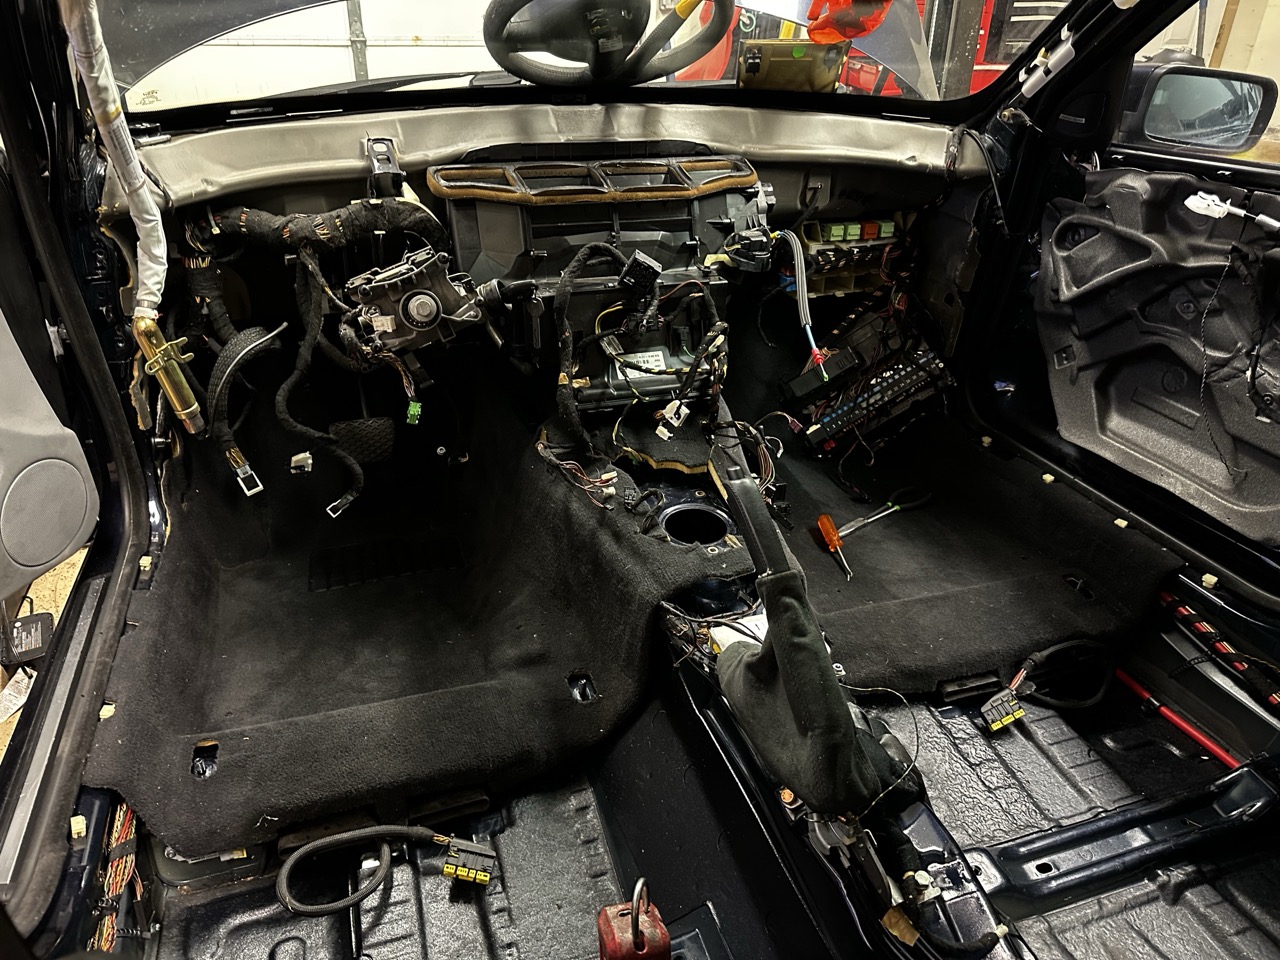
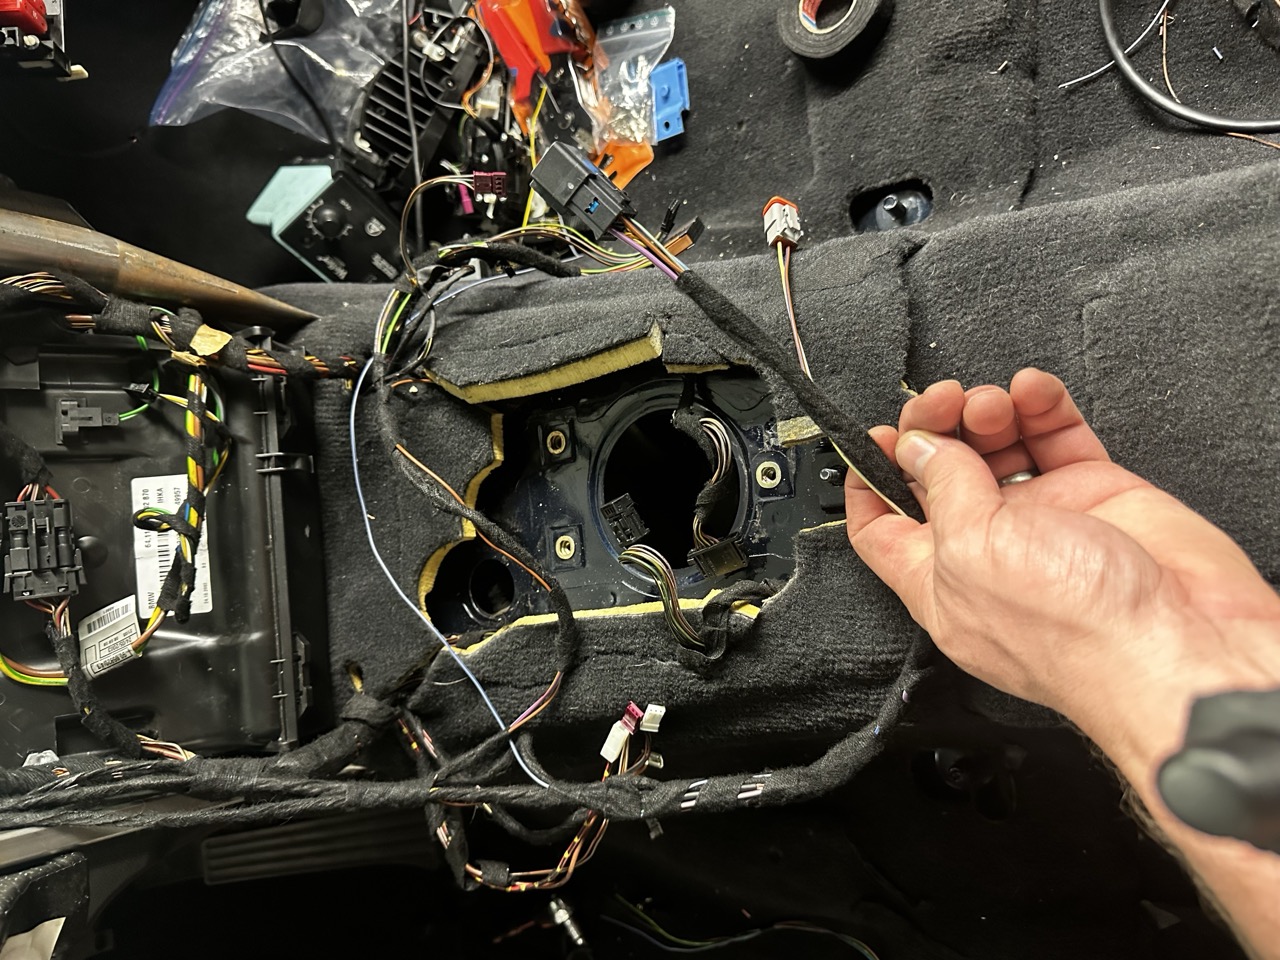
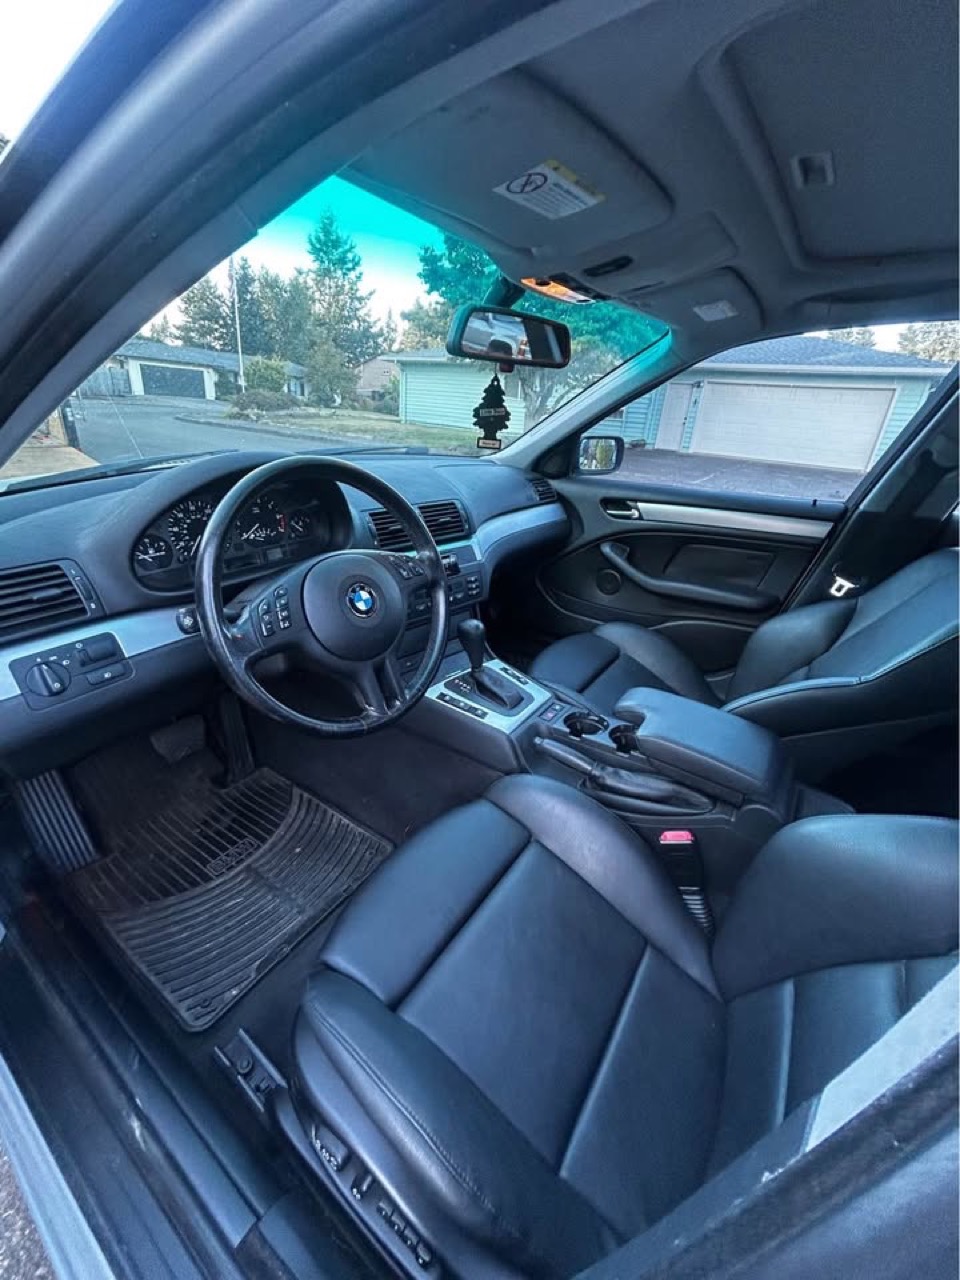
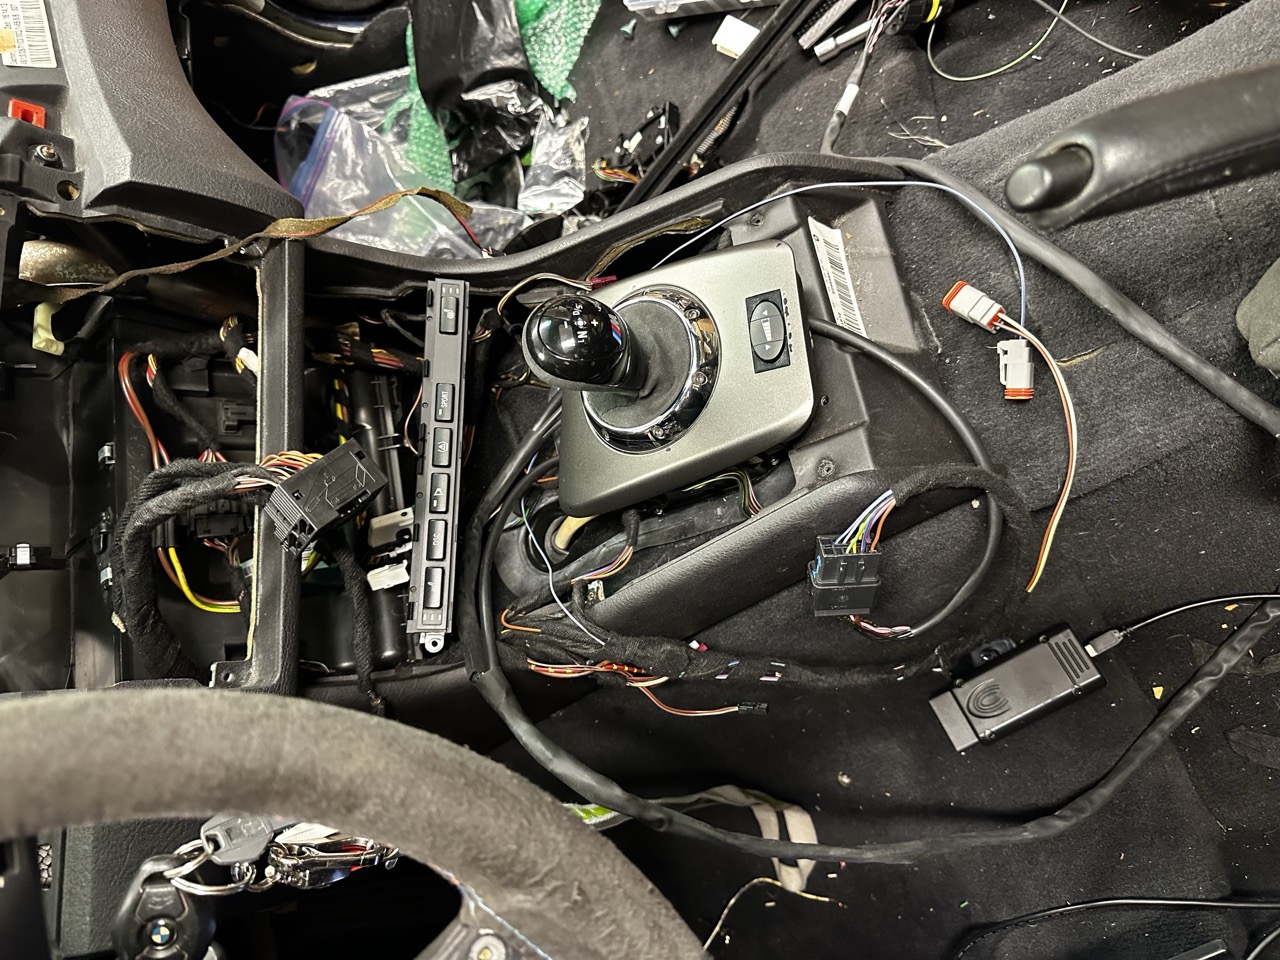
    Clean black carpet going in. Amazing how much better it looks - even without the dash


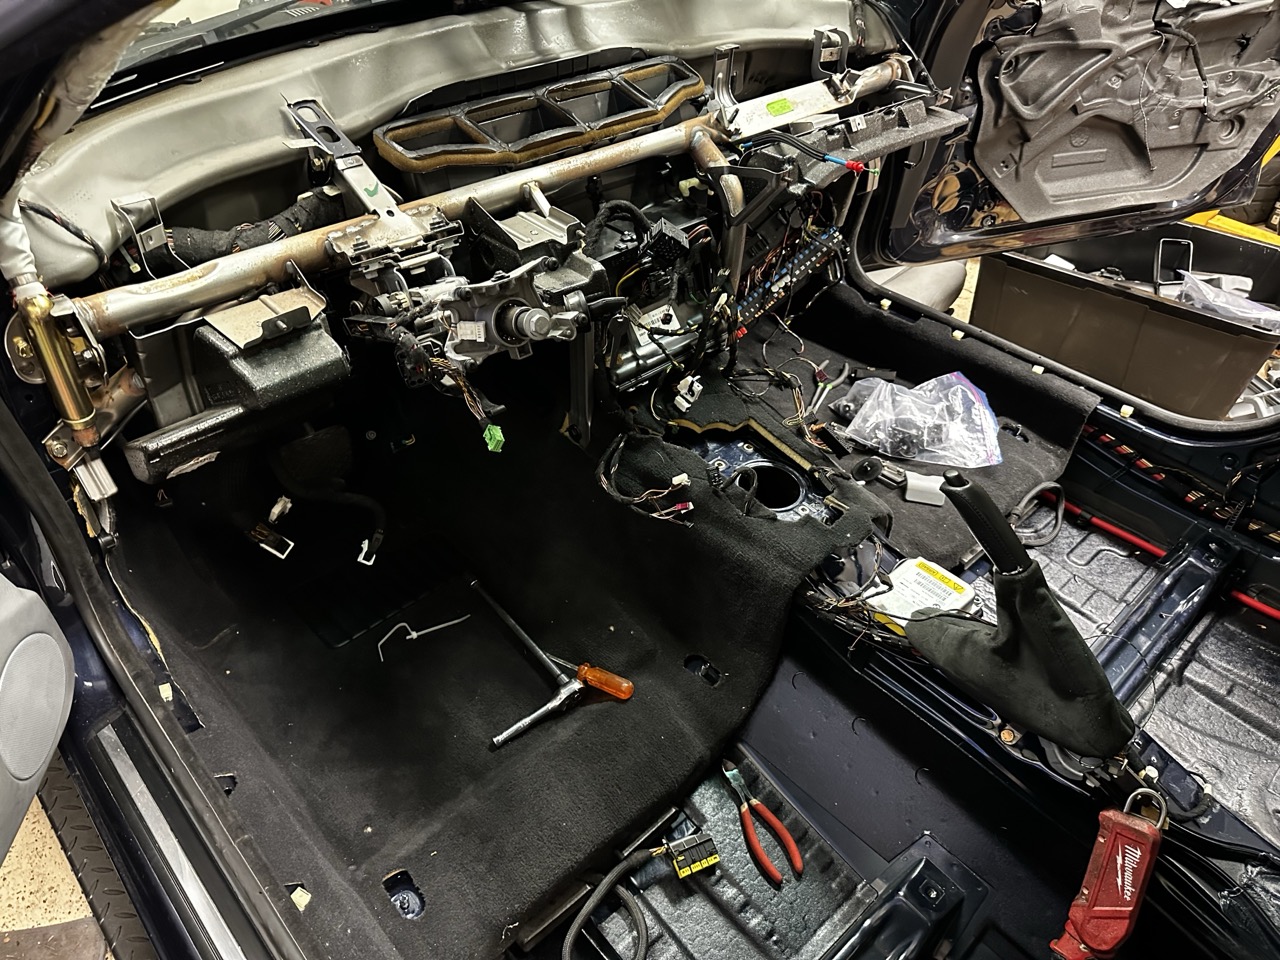
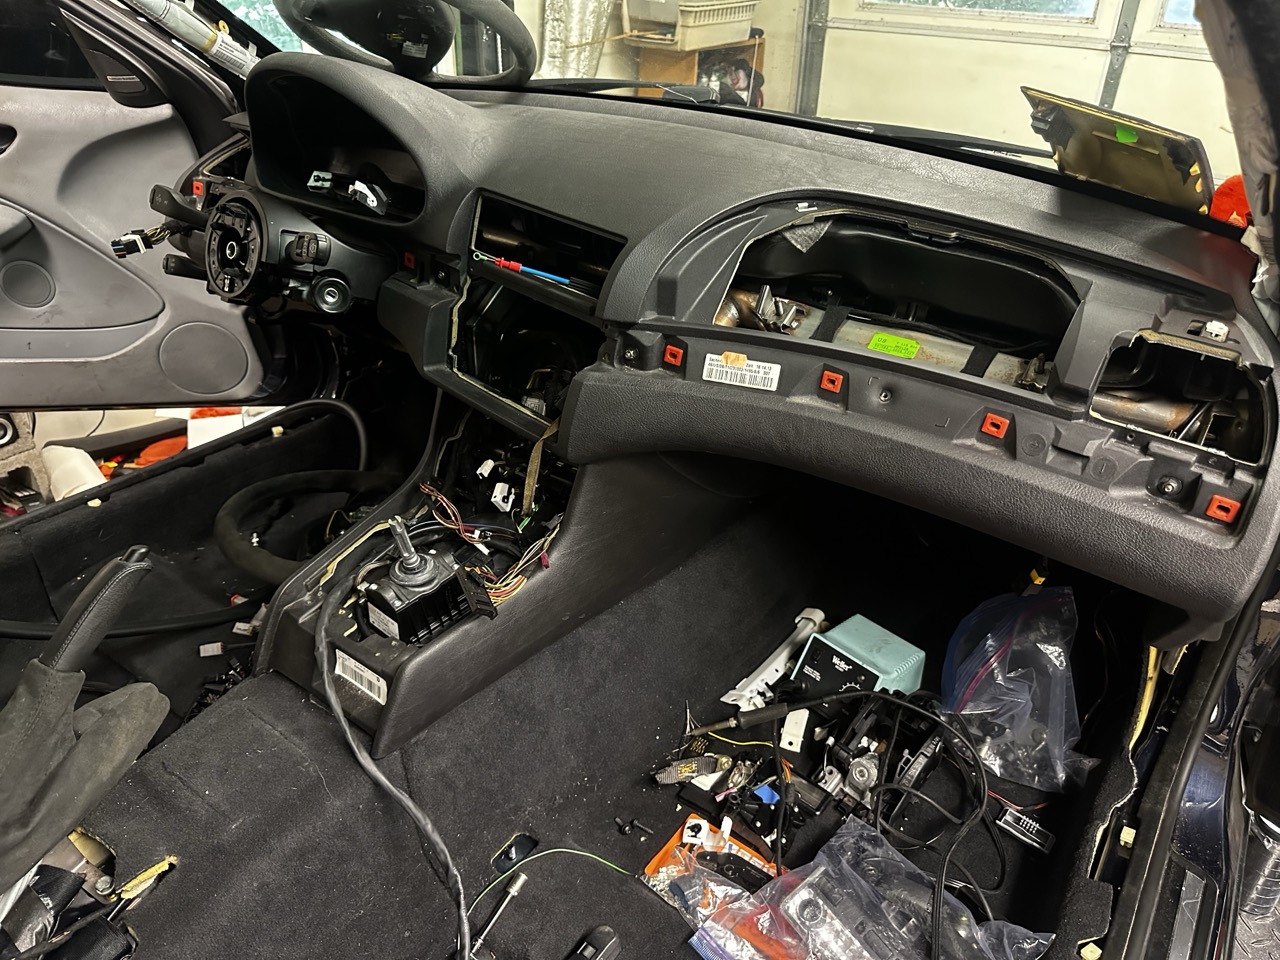
    Dash support bar back in.


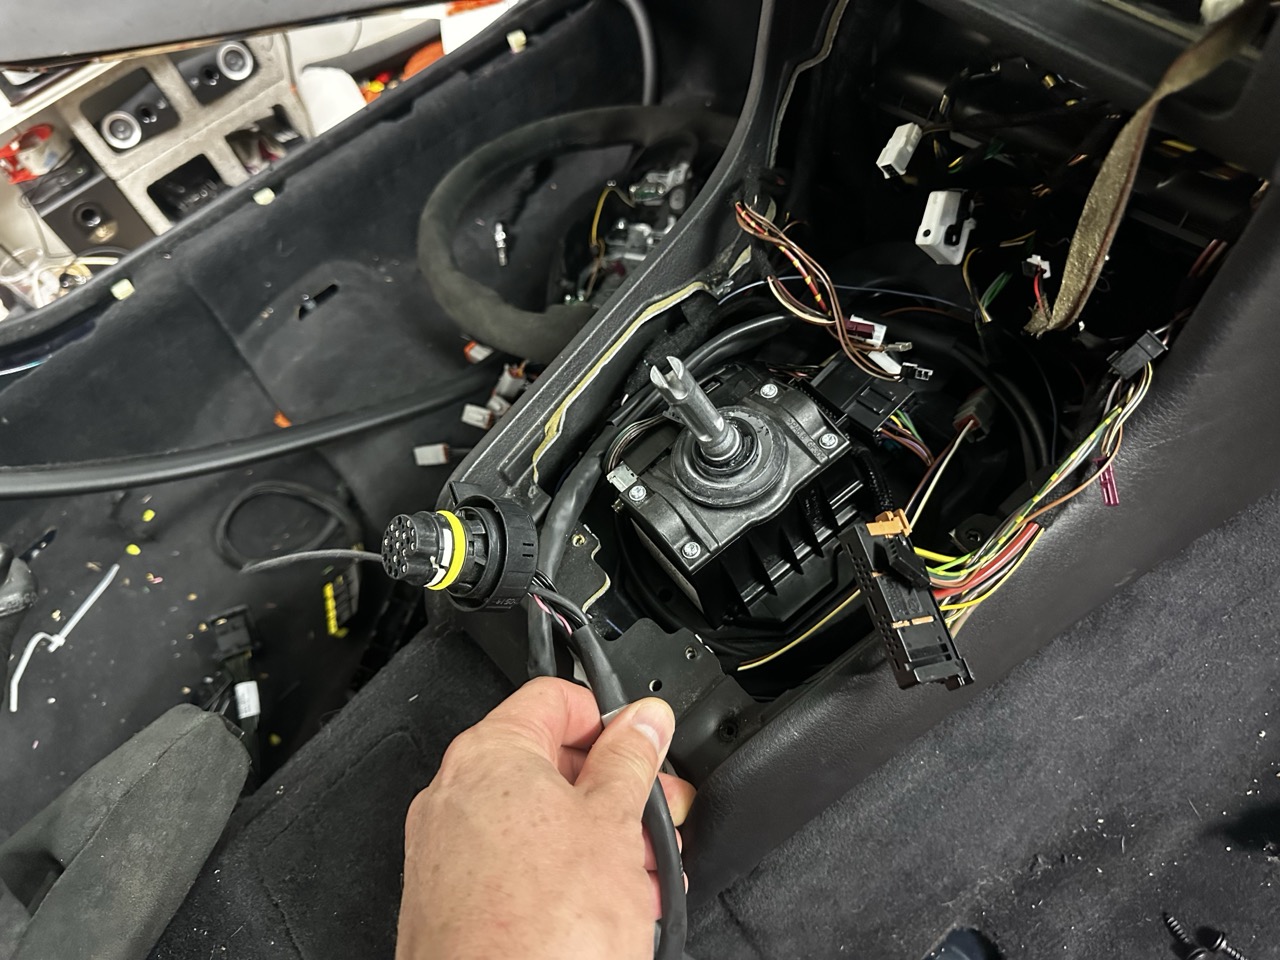
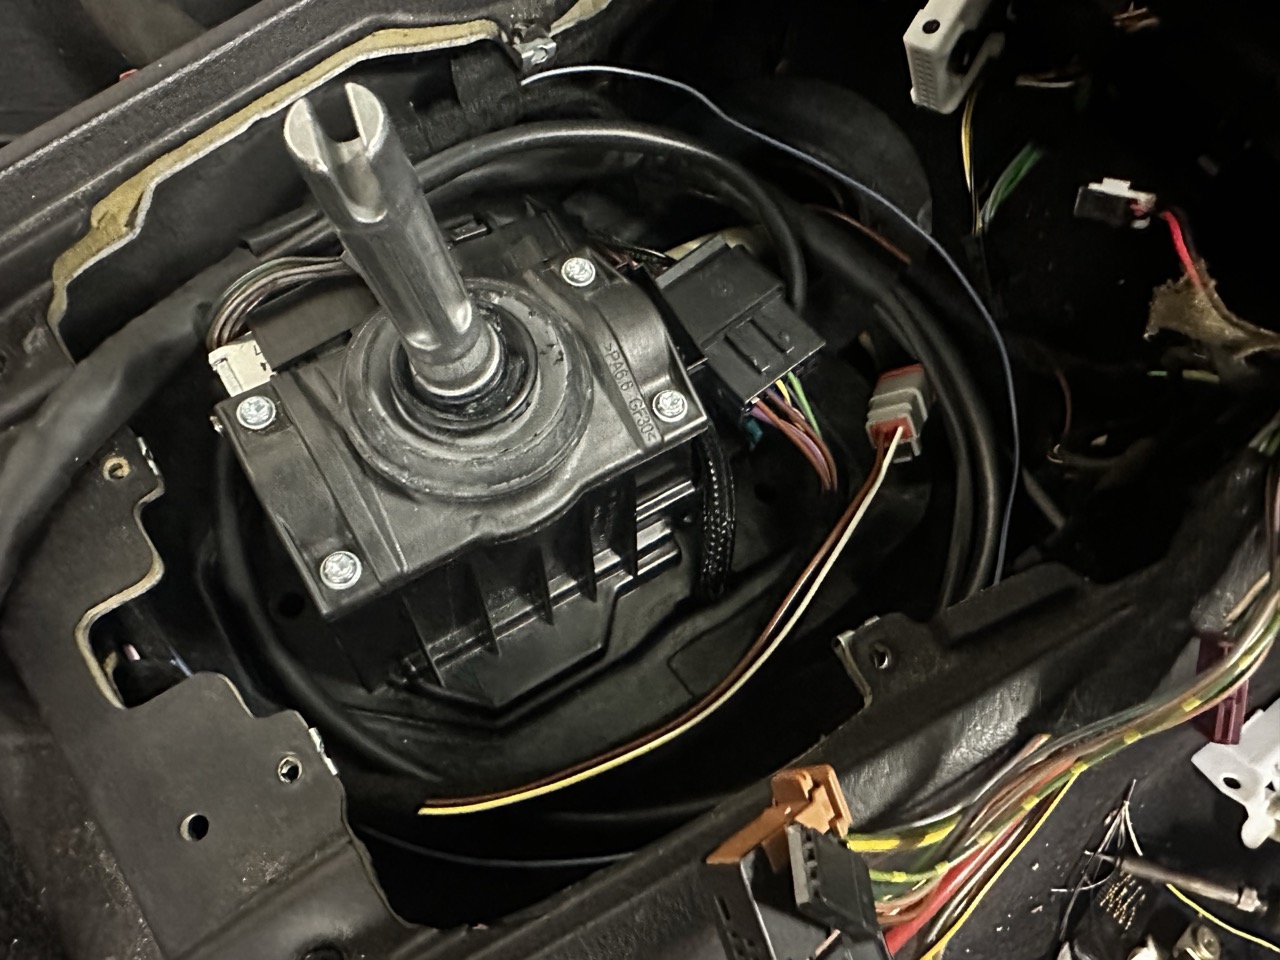
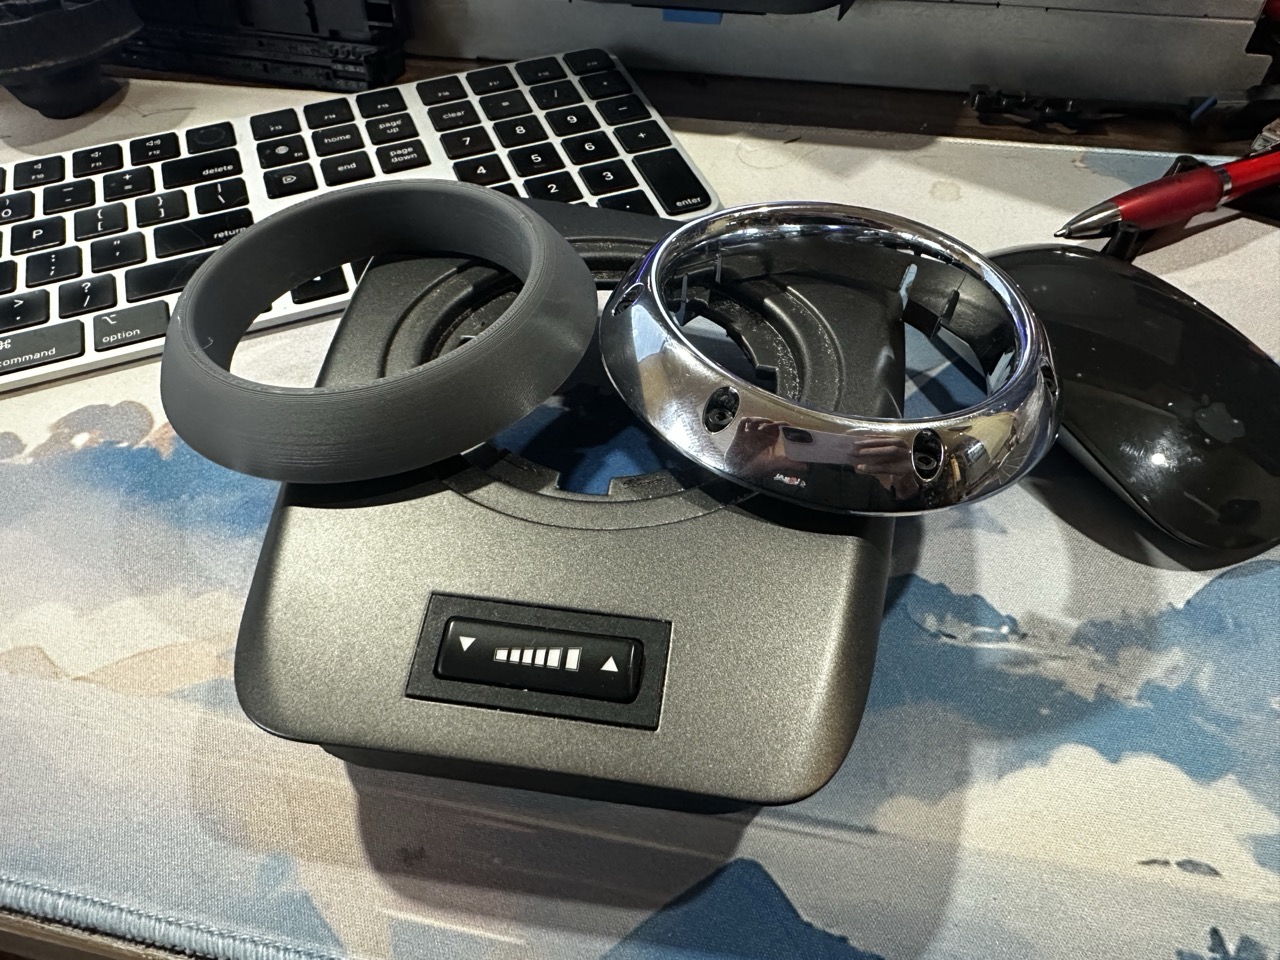
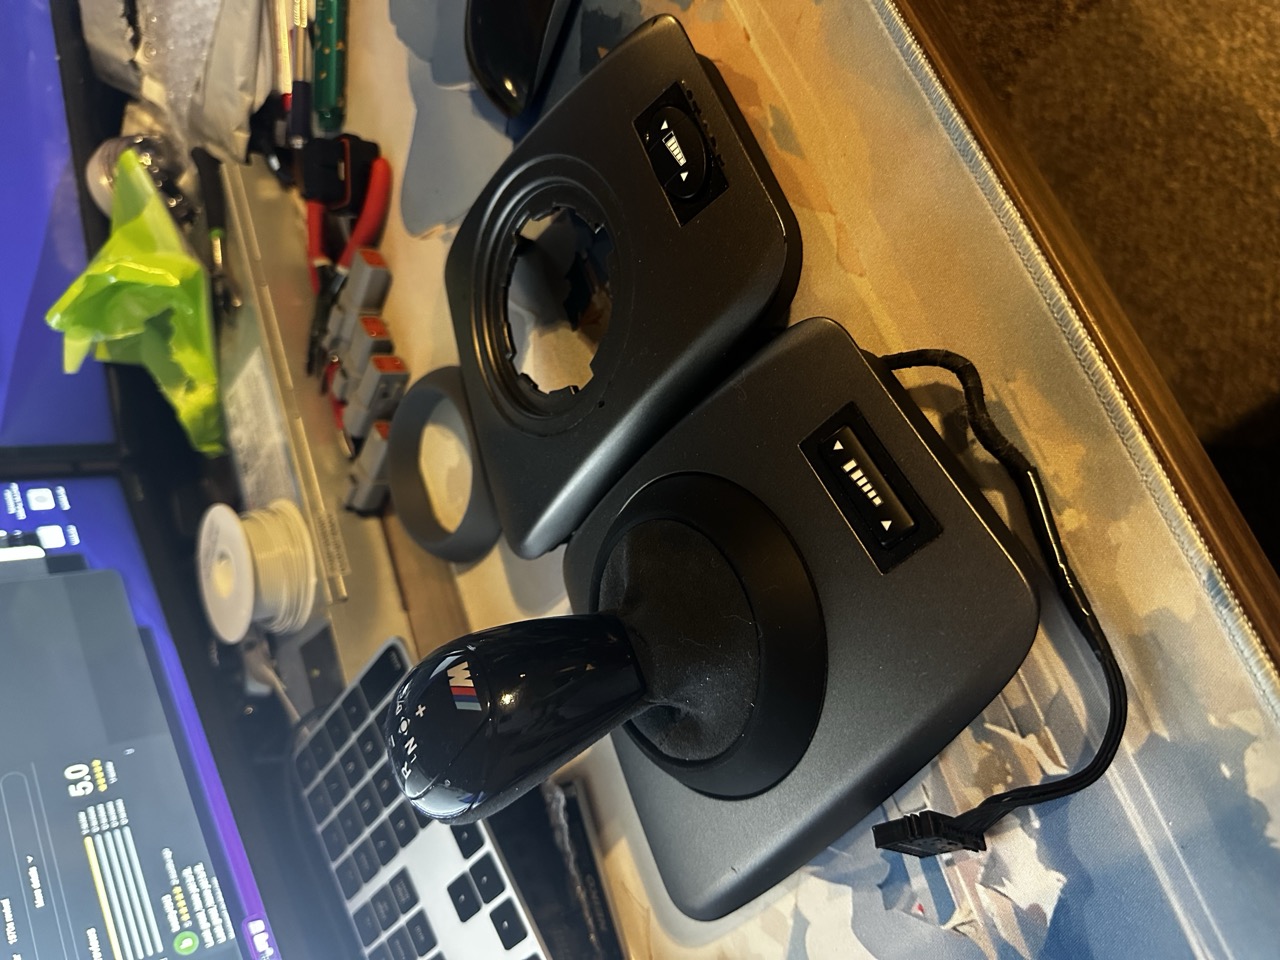
    Replacing the center console buttons with one from an M3. This gets me the TPMS and Sport button.


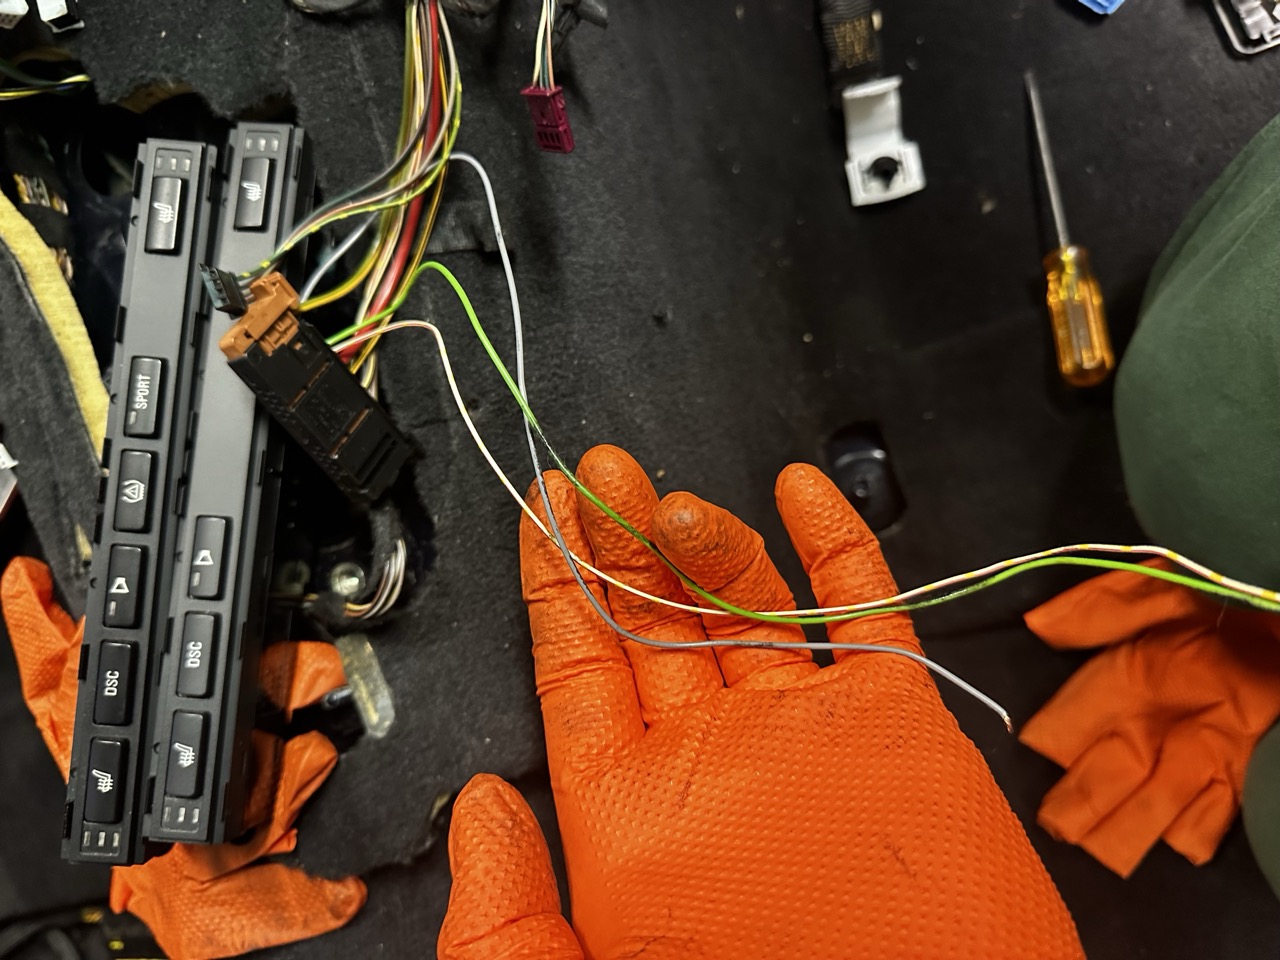
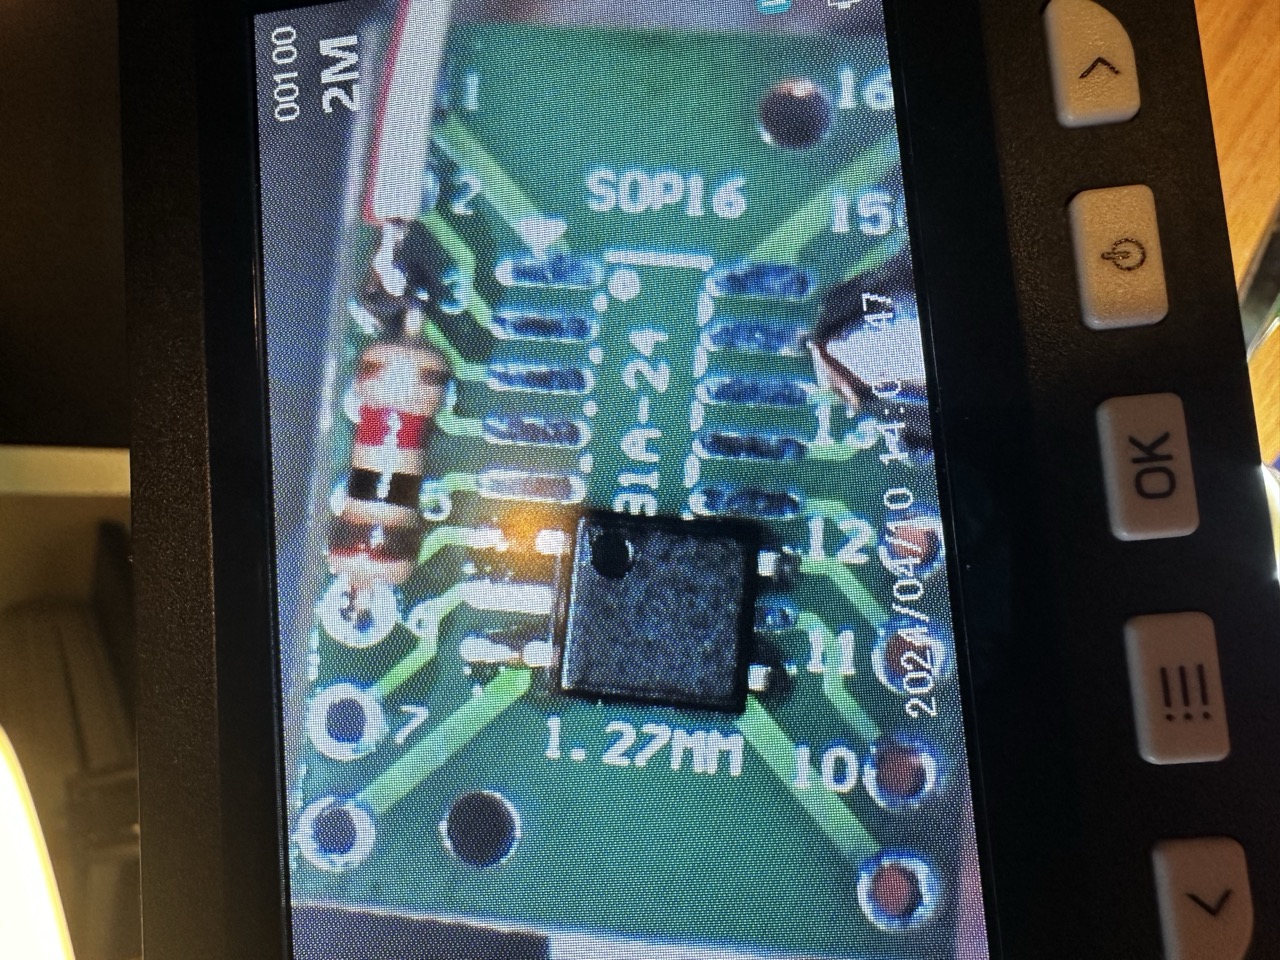
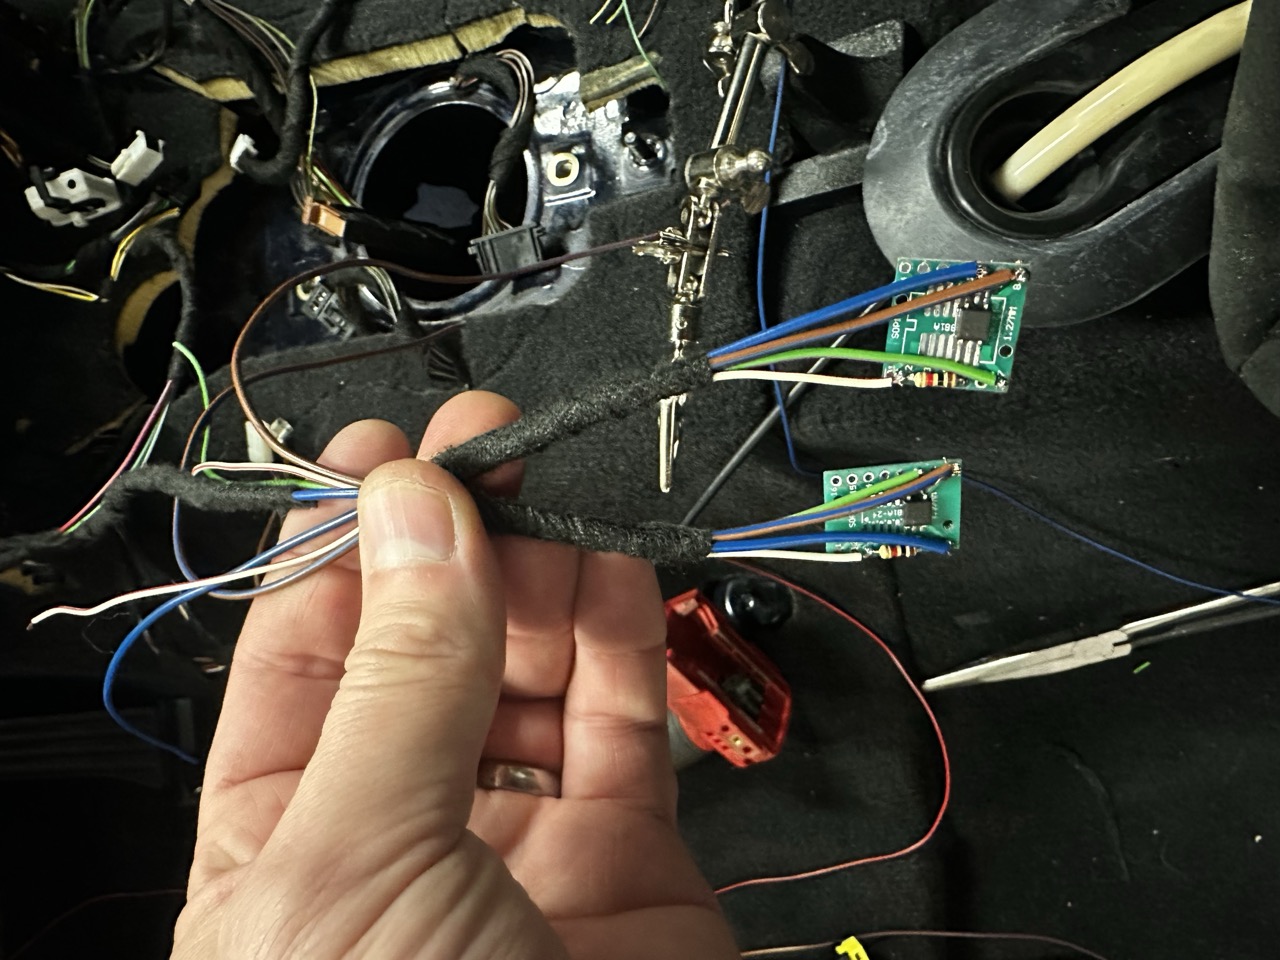
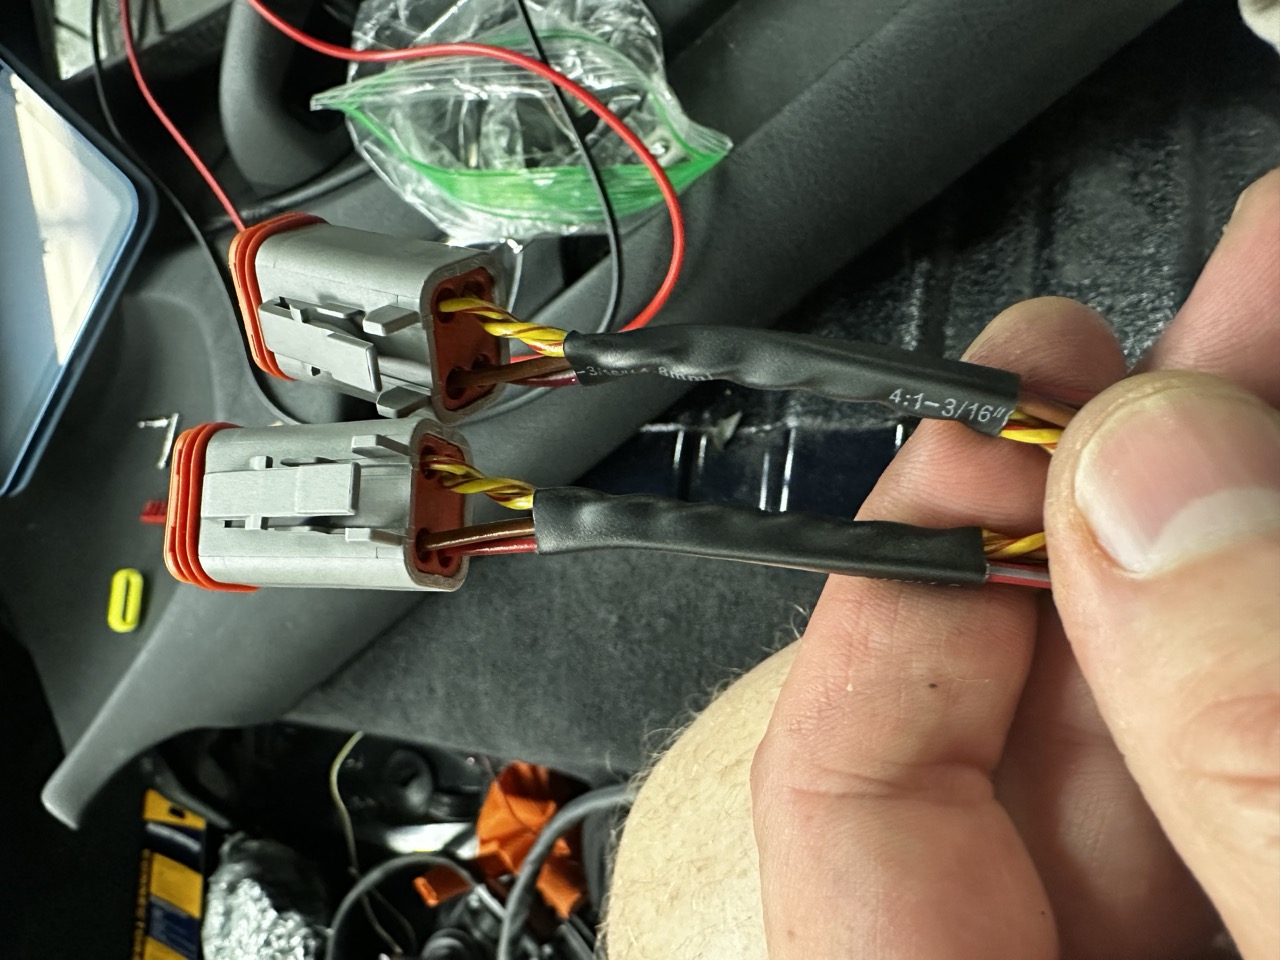
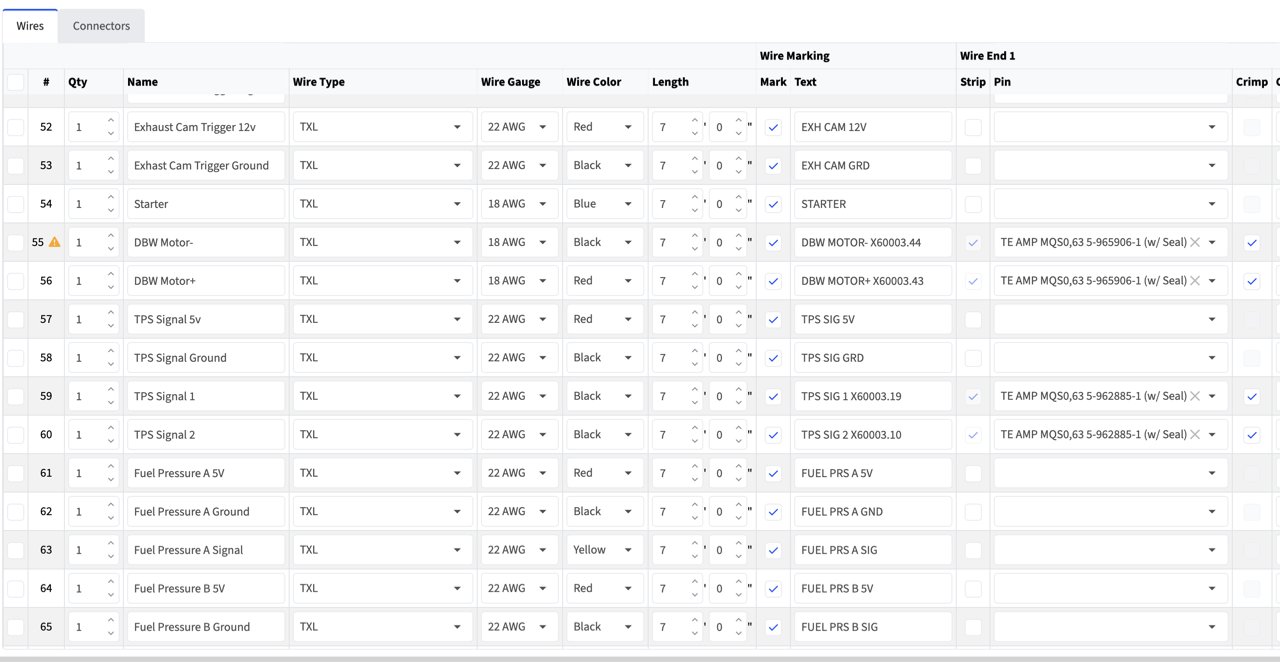
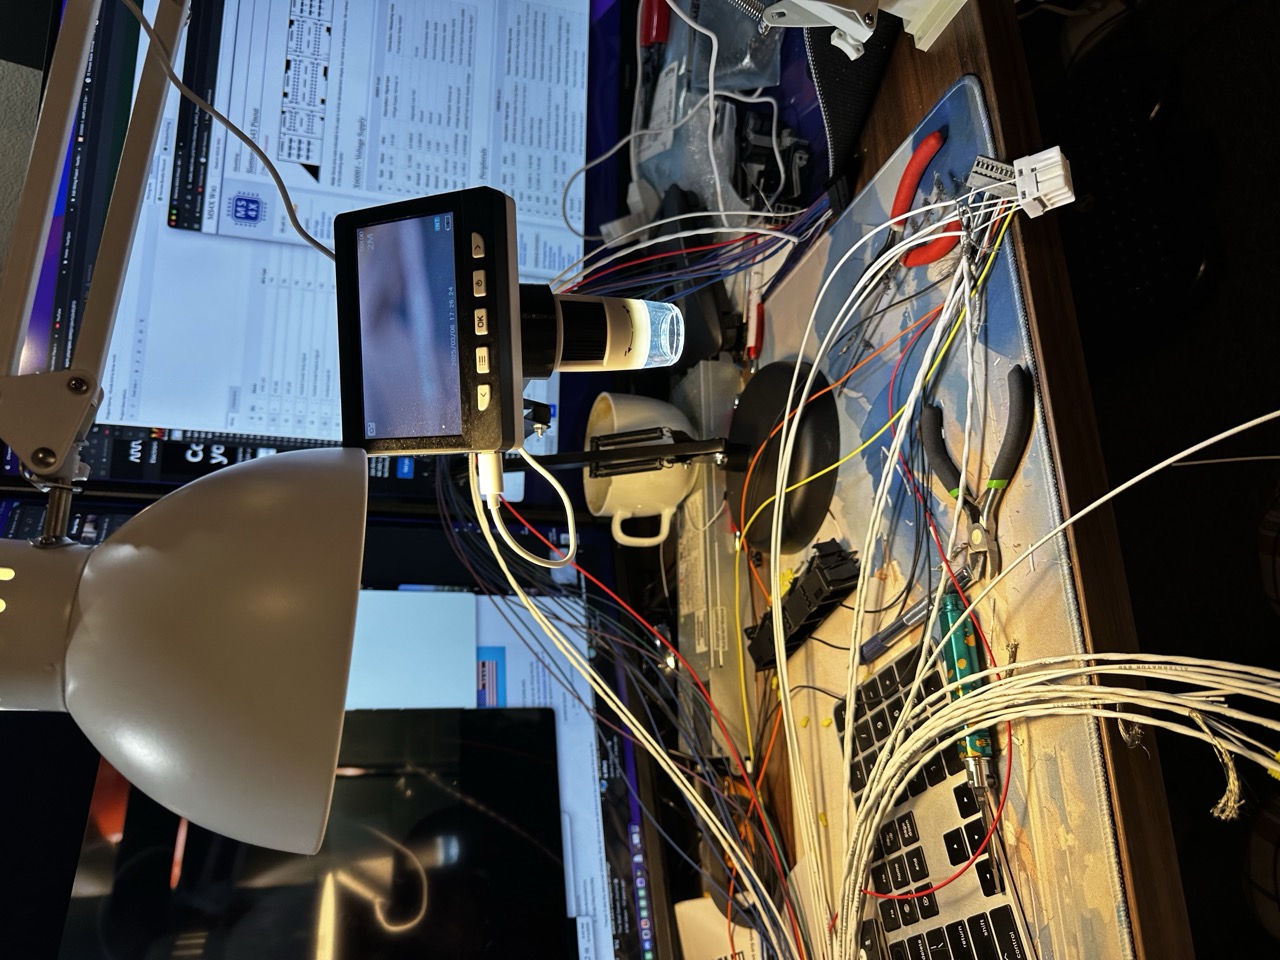
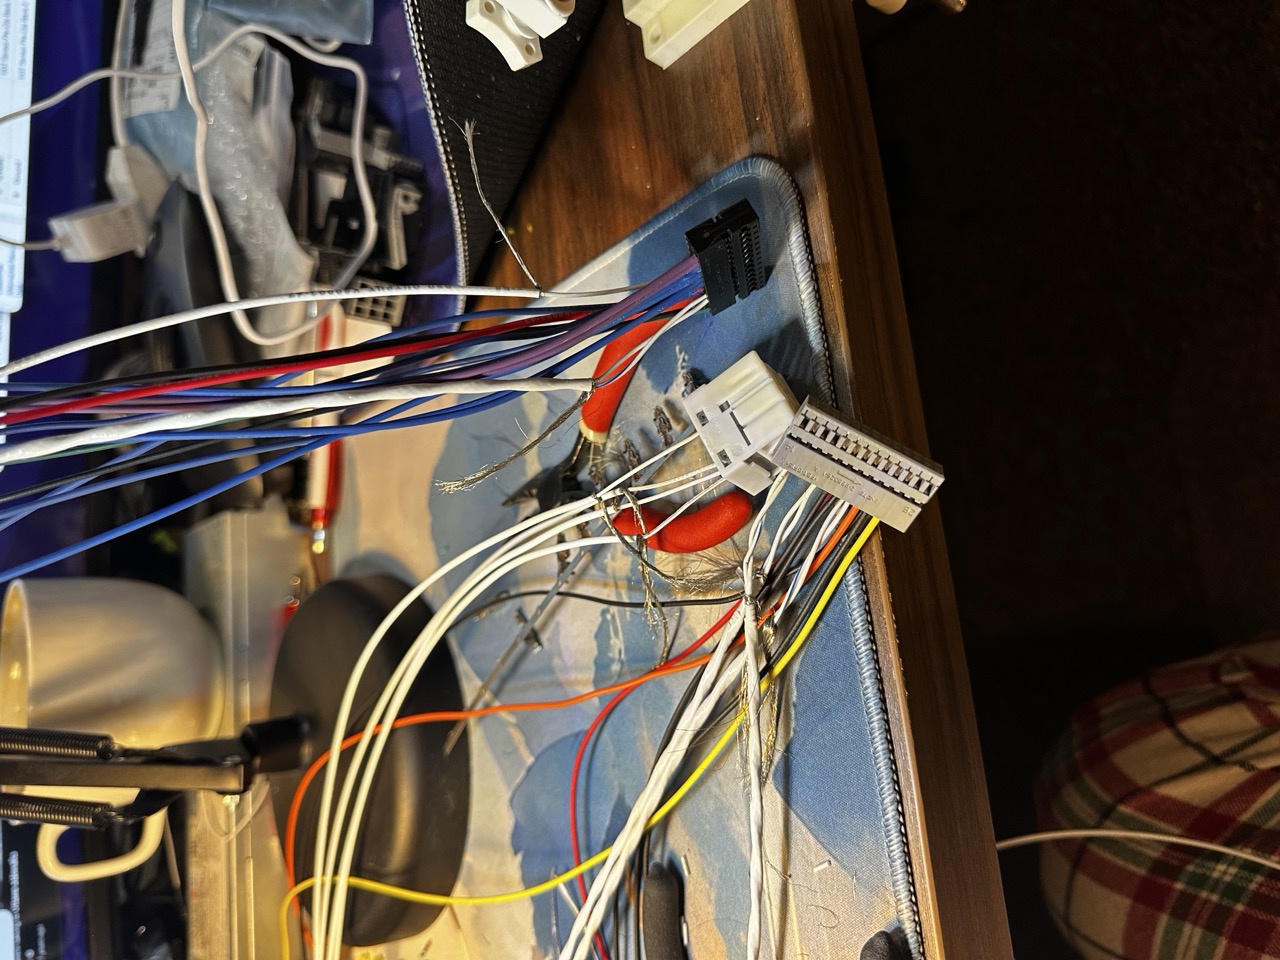
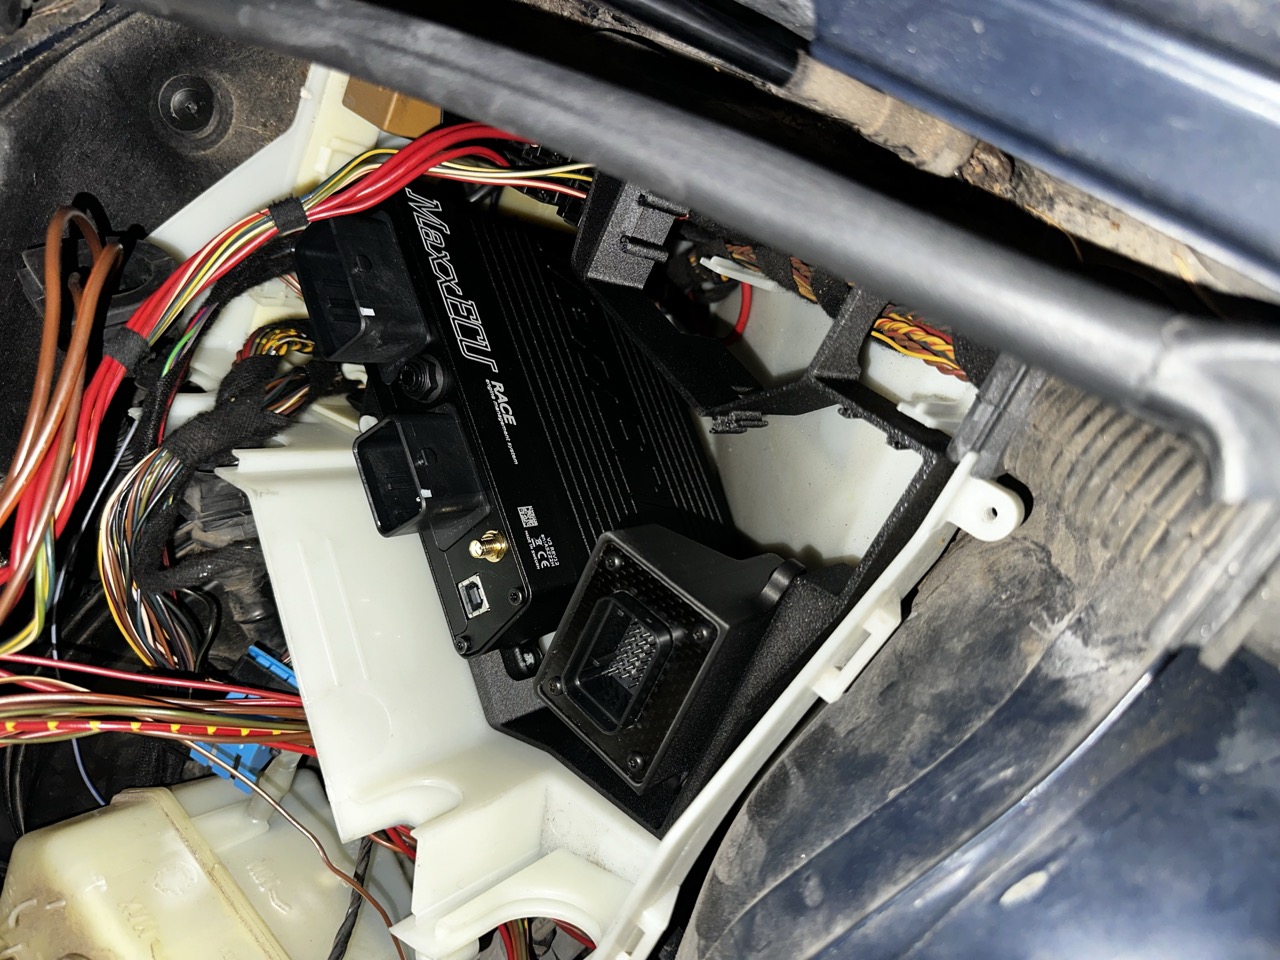
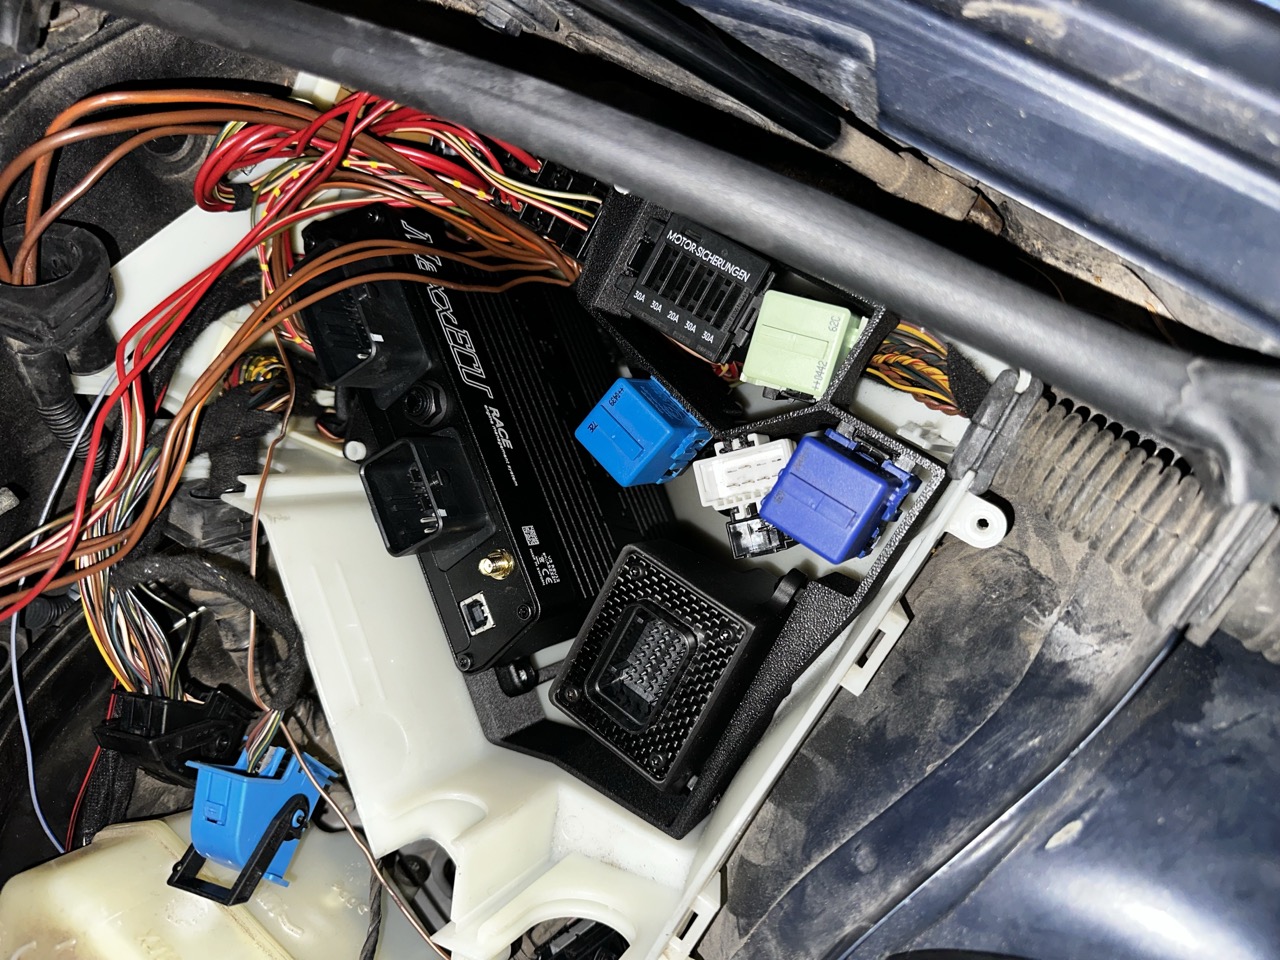
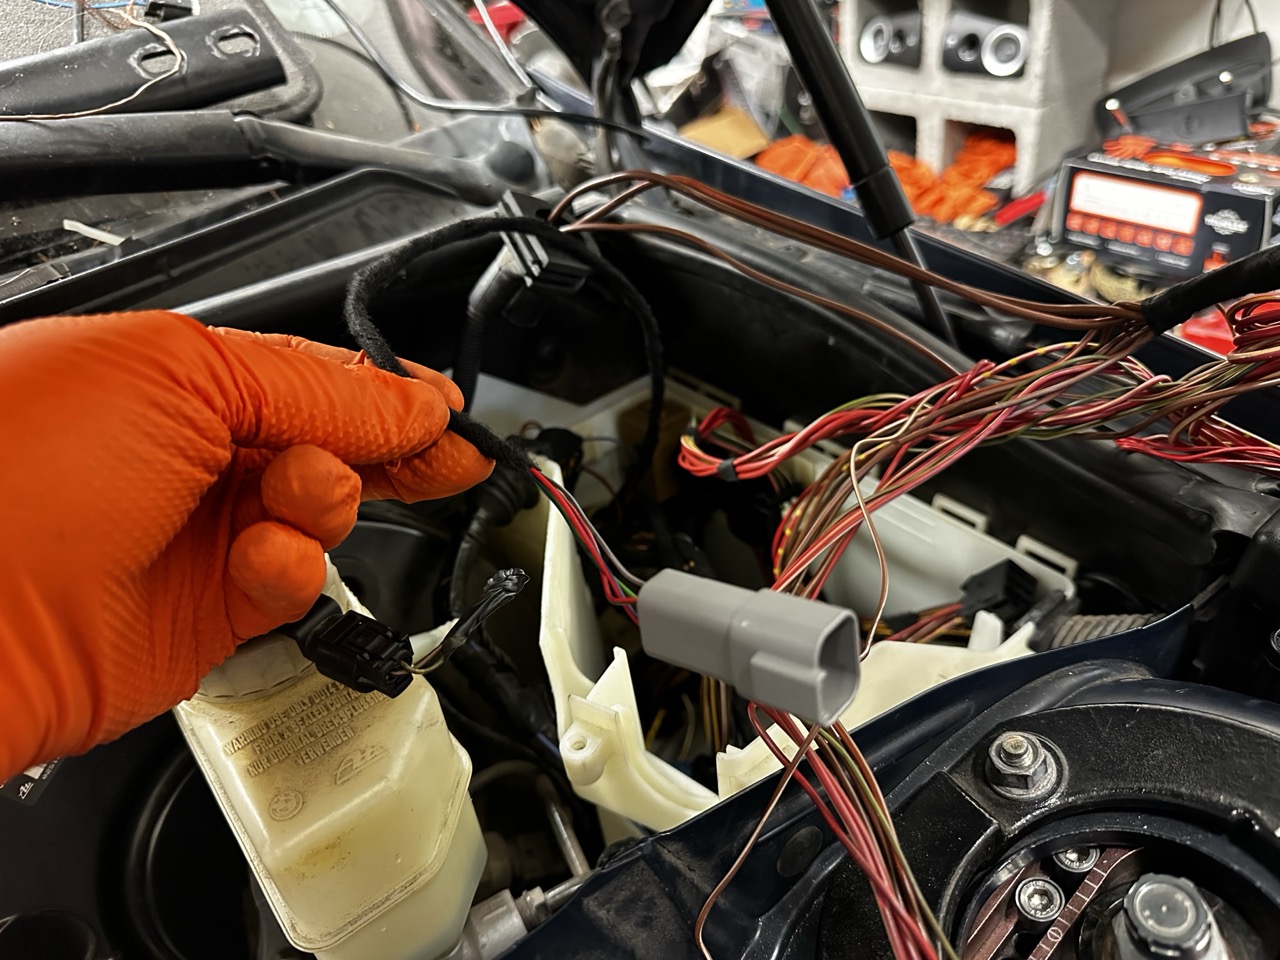
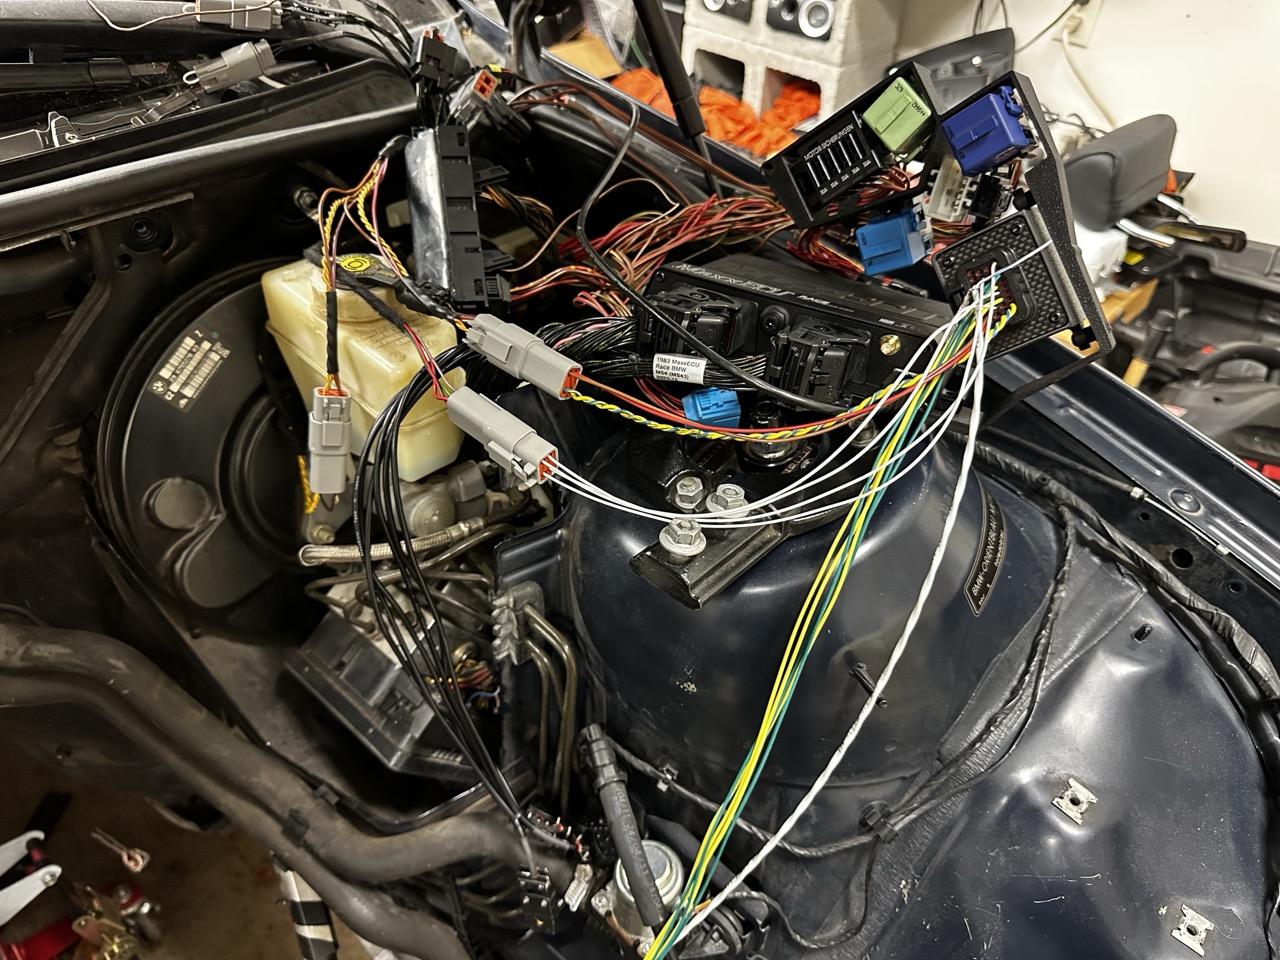
    For those wondering about wiring, there is a great DIY on zhpmafia about wiring in the TPMS. It's a single wire (pin 2 of the control buttons) into the MK60 ABS pump and then some coding. Easy peasy. The sport button has two pins (17 and 18), one is the switch that goes into the DME in an input, and the other is just a low-side ground that lights up the sport LED. Since the stock BMW DME is getting the boot, the sport button is going to be wired into a Canchecked MCE18 input/output canbus expansion module and then will talk over canbus to the Maxxecu - since my Maxxecu race inputs and outputs are at a premium. I'll have the sport button configured to turn the car to max effort (full boost, exhaust cutout open, transmission in drivemode 5 etc) with a single click - "M" mode? haha

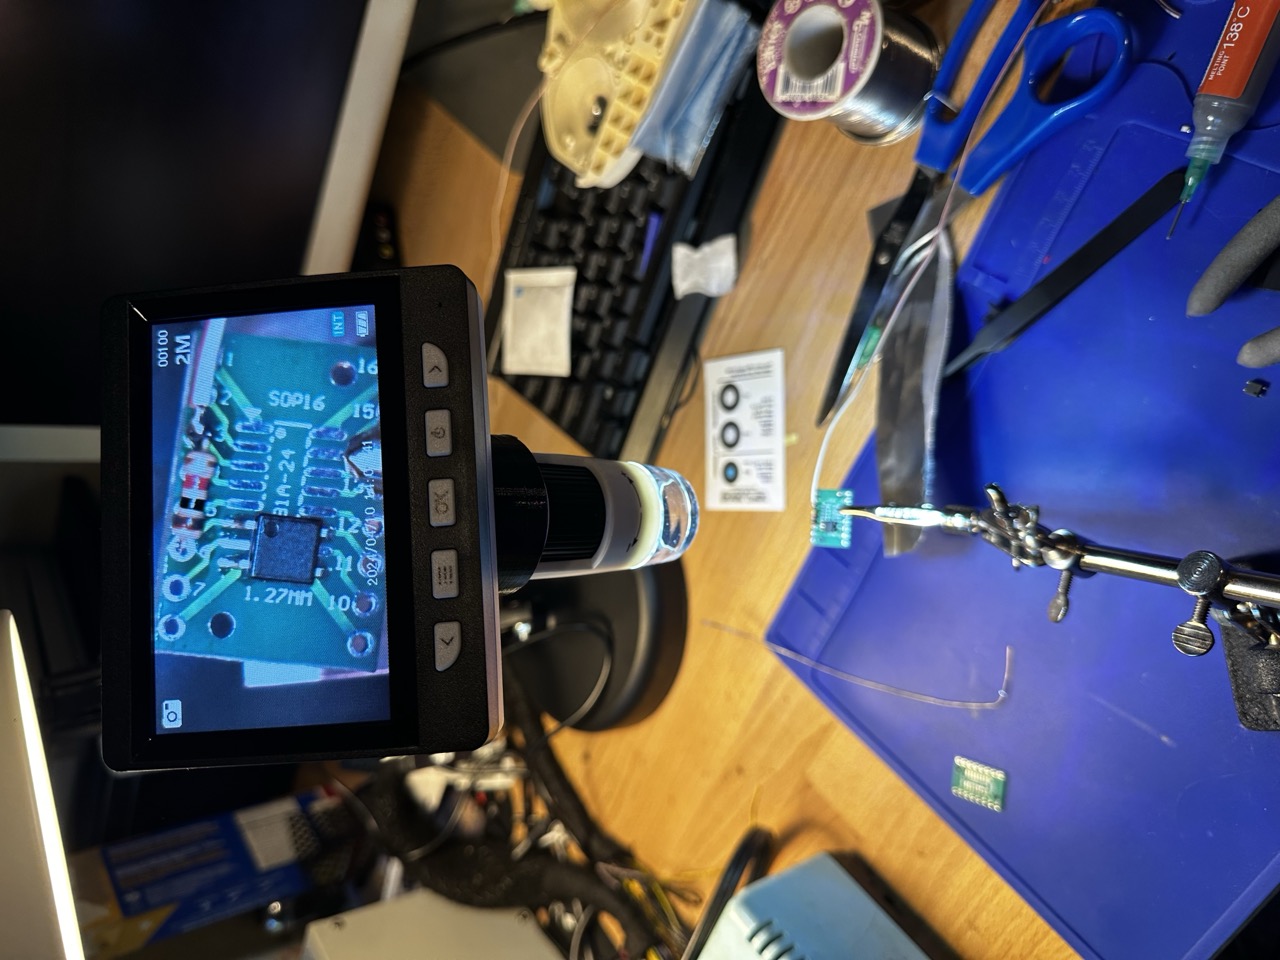
    A few other goodies I wired in as well were the e39 windshield washer button, which will flip through a preset list of boost/power settings. And the most exciting button, the MDM ZCP steering wheel button, is now launch control (if stopped) and the rolling anti-lag (if moving).
    Phoenix Yellow e46m3 Build Thread
    Orient Blue E46 330i ZHP k24/dct/turbo Build Thread

    Comment


      #47
      Small update. I've had no time the last few weeks, too much stuff going on. But I did finish a small project.

      I needed to get the e46 M3 SMG paddle shifters working with the DCT. The SMG cars had a specific clockspring aka "Switch steering column slip ring​" which passes all the steering wheel buttons but adds two more pins for the up and down paddles. Some of the newer BMWs use a single wire but add two difference resistance when pulling up or down so it's a bit more involved. Thankfully, the e46 M3 SMG is simple, each paddle has its own pin that grounds to the steering wheel (chassis) ground. Keep in mind that manual cars (non-m/M3 manuals are the same) clocksprings are different than SMG cars, which adds two more pins for each paddle. So you need to source a SMG clockspring. I thankfully had a spare.

      Now the E92M3 DCT TCU paddles work the same way as the e46, connecting ground triggers an up or down shift. However, it requires the up and down paddle to use it's OWN TCU ground and not chassis ground. So I have two options: I can route the TCU ground through the steering wheel clockspring, or I can use some sort of relay that will connect it's own ground on request.

      I decided not to mess with all the steering wheel wires and use a relay instead. Now I don't want to hear a "click click" of a relay every time I pull a paddle so instead let's use a mosfet instead. A mosfet, or Metal-Oxide-Semiconductor Field-Effect Transistor, is a type of semiconductor device used to amplify or switch electronic signals. It's essentially a voltage-controlled switch, where the voltage applied to the "gate" terminal controls the current flow between the "source" and "drain" terminals. It's basically just a fancy relay. And since it uses transistors, it offers fast switching speed and a longer life then your traditional relay.

      So I went on a search for a mosfet to fit my needs and found that the Panasonic AQY212S will fit the bill. They cost $2/each from digikey.com. You can get them in both DIP (pin mount) AQY212EH or SMD (surface mount) AQY212S style chips. I chose the SMD style chip and use a SMD proto board to mount everything. The wiring is very simple.

      [12V Switched] ----[1kΩ Resistor]-----> Pin 1 (Anode)
      [Paddle Switch] ---------------------------> Pin 2 (Cathode) (to GND_CHASSIS when pressed)

      Shift up/down to TCU --------------------> Pin 3 (Drain)
      TCU_GND ----------------------------------> Pin 4 (Source)

      The resistor on pin 1 limits the current going into the mosfet.

      This is by far some of my best micro soldering I've ever done. This is not my profession, I'm a software engineer, not an electrical engineer.


      Close up using my desk microscope, came in clutch doing the soldering.


      Here are all the wires soldered on and wired into the car harness. I was able to test to verify that it works perfectly. I wired them into ACC 12v power, plugged in the battery, and pulled a paddle to get that satisfying beep of my multimeter! wooo


      I also finished all the wiring I need. Here are the things I've added:

      Center console TPMS & sport buttons. TPMS goes into the MK60 ABS module, sport button is routed into the Maxxecu.
      E39 wiper stalk button is routed into the Maxxecu.
      Paddle shifts which we just talked about
      E92M3 dct shifter 12v ACC power is using the old automatic wiring harness, but with a Deutsch connector
      DCT gear display wired into gauge cluster power/canbus (also using a Deutsch connector)

      And I think that's about it. I didn't have to add/change much of the wiring in the cabin. Everything was Tesa taped together and routed just like factory. Everything looks factory, except for the Deutsch connectors. I thought about sourcing OEM-style TE/AMP connectors but it's a bit of a pain in the ass and nobody is going to see it.

      The last update I have is BMW of NorthWest in Tacoma, WA FINALLY got the slicktop roof panel I ordered. Took 6 weeks to get here from Germany. It was only supposed to take two weeks, I'm assuming all the tariffs and shipping delays caused this delay as well. But I was able to grab it! One of the last left new in the world.

      It came in a huge box which said "glass" with lots of padding inside, uhh is that going to fit in my X5?


      Yep, no problem


      Next steps is getting the dash in and starting the Maxxecu wiring engine bay side. I also need to pull the stock M54 and get the K in the engine bay. Future Liam.
      Phoenix Yellow e46m3 Build Thread
      Orient Blue E46 330i ZHP k24/dct/turbo Build Thread

      Comment


        #48
        Been a minute since I've updated this, so here are the last few months...

        Finished all the wiring on the inside of the car, mainly wiring in the MaxxECU GT150 12-pin DCT "female side" plug so the MaxxECU DCT harness plugs right in. It's not super difficult to wire in. The only thing that is actually wired into the car is the power and ground.

        CAN-H and CAN-L (which gets plugged into the CAN on the Maxx MS43 plug-n-play harness)
        Paddle up/down (see above)
        Ground (wired into the factory ground location next to the passenger seat on the tunnel)
        12v+ (Added the correct fuse (20amp) and wired the power right into the factory fuse box where normally the SMG gets its power, fuse location 22, so dct powers on at the same time the Maxx does)


        Modified the MaxxECU MS43 plug-n-play harness to add two CAN plugs using Deutsch connectors. One for the DCT, one for the CANChecked MCE18 can-bus extension (adds 9 analog inputs, 6 digital inputs, and 3 digital outputs).


        I finally got myself some high-quality Deutsch/AMP/Delphi pin-extration tools. LIFE CHANGING! Depinning and modifying all the BMW connectors is a massive pain, but this tool makes it easy.


        Still a mess in here, but it's looking more and more like a car again


        E92M3 DCT shifter bolts right in! All the wiring is finished in the interior. Will probably leave a lot of the interior as-is until I can fully test everything.


        Pretty cool that everything is plug-n-play.


        On to pulling the boat anchor M54B30. The first time I've ever really looked under the car. I know the previous owner "hit a curb" and it looks like the front wheel took a pretty big hit. Bummer. I wasn't going to run the ZHP wheels, I was planning on selling them, but they're generally worth more when they're round.


        Exhaust was nearly impossible to get off. 20 years and it's probably never been off. With a lot of liquid wrench, I was able to get the bolts off. Thankfully, I don't see any other damage under the car.


        Ugh It's so big (that's what she said).


        Working on a 4-post lift is a bit of a pain, but I made it work. With the car on jackstands on the ramps, and raised up just enough to slide my cherry picker under and was able to pull it out.


        Prying that ratchet strap doesn't break...yikes! (GT World Challenge on in the background there)


        It's free!


        What a mess...


        Sadly, BMW did not win. Engine bay is super dirty


        That badge


        Lucked out and found a 99 323i in fantastic condition in Orient Blue with under 100k miles locally that was being parted out...


        Grabbed the doors to replace mine that have a huge dent, and grabbed another slicktop headliner, so now I have two


        Pulled the car out of the garage and went to town on cleaning the engine bay. Of course I forgot to take a after picture lol


        My daughter and I drove up to Tacoma to pickup a new front windshield for the ZHP. Grab 'em while you can, they all went NLA. JUST barely fit in my iX.


        Started work on the Honda k24a RBB3. The first step was replacing the intake cam sprocket with an RBC 50-degree version.


        I had to pull off the oil pump, we won't be needing that where we're going, and tilted the motor on its side and pulled the pan only to find the motor was full of JDM land oil. What a huge mess! I should have checked to see if it had oil first, I guess. On the plus side, the oil (while dirty) had zero flakes and the pan was super clean. Good sign.


        New RBC sprocket on, timing chain back on and set. You all WISH your S54s were as easy to do a timing chain like the Honda. The bottom sprocket is what the crank angle sensor uses. The intake/exhaust cam angle sensors are on the other side of the motor.


        Okay, I jumped ahead a bit. I just HAD to see what it looks like with the 4Piston billet timing cover, intake manifold, and turbo bits.


        It's a really good-looking engine


        TracTuff billet oil filter relocation/oil cooler plate. Artec RWD K turbo manifold.


        @charlie.moua.doryoku on Instagram did this valve cover for me. Rear PCV port delete, -10an top ORB PCV with baffle, removable baffle plate, finished in Type-R wrinkle red. Hit him up for all your valve cover needs, he does fantastic work.


        BorgWarner EFFR 8374 62mm turbo looks massive!


        Honda glory, B18C5 and the e46's k24a in the same picture?!


        Okay okay, enough gawking, let's get back to work.

        Adamat bellhousing adapter on, torqued, thread locked


        Adamat flywheel torqued and thread locked


        Sprung hub torque harmonic damper to protect the DCT clutch basket. Again, torqued and thread locked. DCT in the background on the right.


        Stupid transmission went on and off like 10 times. I had to grind down part of the bellhousing to clear the Honda k24 starter.


        I knew the engine/trans would fit into the car - we test fit everything in the previous chassis. So I yeeted it back into the car and immediately test-fit the intake and turbo manifold.


        Like a glove


        Plenty of clearance for the hood


        Test fit my 3d printed left-side engine mount. Fits perfect! I do need to modify the plate a little bit, I guessed on the hole placement and I'm about 5mm high - easy fix.


        Pretty cool how well the engine mount fit on the first try. I'll be using factory e46 non-m fluid-filled engine mounts


        Next up, working on the engine harness. I need to swap all the LCA/subframes/arms front and rear over to M3 bits. Design the right side engine mount... it's a long list. More to come!
        Phoenix Yellow e46m3 Build Thread
        Orient Blue E46 330i ZHP k24/dct/turbo Build Thread

        Comment


          #49
          Been a few months... here's the latest.

          A top-down view of the engine in the engine bay. Lots of room for activities


          Finally pulled it out of the garage for the first time to check the new doors from the donor above, donor Orient blue door matches Orient blue car, go figure.


          Getting the door aligned is a pita, and it's still not perfect


          Pulled off the whole ZHP front knuckle, brakes, suspension


          We won't be needing this


          That's better. M3 knuckles, M3 LCA, M3 brakes with Aston calipers, and my FA Muller suspension go on. The e46 non-m and M3 front subframes are identical, so all those parts just swap over.


          You have to use M3 tie rods ends since the M3 LCA's are about 15mm wider vs the non-m.


          With the M3 bits larger front track and an 18x9.5+38 witha. 265, it's pretty tight...


          I think I can make it work, worst comes to worst I can go down to a 8.5" front. There is almost no camber in it right now


          Front stock M3 style 19" style 67s fit perfectly


          I want to believe


          Picked up an e92 335i Pierburg waterpump. The MaxxECU can control it directly via a BSD interface, so I can vary the flowrate based on whatever.


          It's like Christmas in the fall. All new ZHP bumper bits (trim, brackets, hardware etc).


          Did a low-ball bid on this and WON this beauty for $400


          K24a2


          Typical Honda. Put a jump box on it and it started right up. Doesn't even have a check engine light.


          I just want the engine for a core. Head goes off to 4piston for their Pro TSX CNC head package and block off to Ramey Racing for sleeving. Once I get all that together i'll swap motors with what's in the car now. I have another project for that k24...


          Another project I tackled is replacing the leather on my old driver-side Imola red M3 seat (from my blue car on page 1). Since the whole mouse incident destroyed the seat, I tossed the leather and cushions, but I kept the rails/seat base since it was basically new. I found a used set of black leather with cushions on eBay and got it all installed. Heated manual seats! I'm a sucker for the manual rails.


          This last part has been ongoing for awhile, the wiring. So I'm using the plug'n'play MaxxECU MS43 harness, which basically just plugs right into the ZHPs X60001/X60002/X60003/X60004 connectors. But since I'll be Honda 💪 powered, I have to design a custom X60002/X60003 engine harness. So BMW connectors on the ecu side, Honda plugs on the other. Each wire needs to be mapped to the right location. I'm moving a bunch of things around and adding new things. For instance, the k24 has no DISA nor does it have 6 cyl. But I'm going to run 8 injectors (4 for pump gas, 4 for e85) so we'll need to add two more. You get the idea.


          I'm using Yourspec wiring services to do all ECS side pin ends (TE MQS connectors) and custom wires with labels. Once I get all the wiring from them, I'll do the motorsports-style Raychem shrink tubing and pin all the sensor side connectors.


          The next step is having the motor turn over on the starter! sooooooooon
          Attached Files
          Phoenix Yellow e46m3 Build Thread
          Orient Blue E46 330i ZHP k24/dct/turbo Build Thread

          Comment


            #50
            Man, that engine sits really far back! Car is basically mid engined at this point.

            Good stuff!
            2002 Topasblau M3 - Coupe - 6MT - Karbonius CSL Airbox - MSS54HP Conversion - SSV1 - HJS - Mullet Tune - MK60 Swap - ZCP Rack - Nogaros - AutoSolutions - 996 Brembos - Slon - CMP - VinceBar - Koni - Eibach - BlueBus - Journal

            2012 Alpinweiss 128i - Coupe - 6AT - Slicktop - Manual Seats - Daily - Journal

            Comment


              #51
              Been a few months... here's the latest!

              First off, it wouldn't be a new year without buying another e46...

              '01 325i, 102k miles, sports package, auto, MINT interior, typical blown headgasket


              Yeahhhh...that's not fog, that's a blown headgasket


              Really clean interior though


              I'm not sure what I'm going to do with it. It's pretty low on the list of "Things Liam needs to fix". For now it sorta moves under it's own power...future me.


              I pulled the motor (like 6 times) to trim some of the webbing off the e92m3 transmission. It's SO wide it was hitting the trans tunnel. So in and out, cut cut, bash bash, more cutting. Thankfully, it's easy to get in and out and only takes me a few minutes


              cut cut, grind grind


              Big upgrade in my office...got myself a new 3D printer. Bambu H2D. Man, this thing is incredible. Finally I can play around with the bigboy filaments like all the cool kids.


              Finally finished all the motor mounts for the k46. I ended up scrapping my first design and redoing it....4 or 5 times. I wanted something that looked nice, but also strong, and it needed to be sendcutsend'able out of mild-steel. As much as I'd love to do a solid billet aluminum mount...


              Drivers side


              Passenger side


              Here is the finished metal version from Sendcutsend. Needs a bit of cleaning (literally right out of the box). 6.35mm thick mild-steel. $190 shipped to my door, not bad! I need to get them into the garage, clean them off, and then have a buddy tig weld it together for me. (I don't have a welder...)


              All the random Honda, BMW, and Bosch sensor connectors finally came in. I have most of these connectors, but I figured, let's go fancy and start fresh.


              Here are the sensors I ended up using. I tried to stick to Bosch Motorsports sensors, except for the map sensor, where I used a Honeywell sensor. I used a Honeywell because I needed something that screwed into my intake manifold, most of the Bosch air pressure sensors are plastic. Also because Honeywell makes literally every aftermarket pressure sensor out there. Haltech, AEM, etc map sensors are all rebranded Honeywell sensors. I picked mine up for digikey.com, they have a great price on them.
              MAP Sensor Honeywell MIPAN2XX060PAAAX
              Intake Air Temp Bosch 0280130039
              Fuel Pressure Bosch 0261230365
              Oil temp (in the oil pan) Bosch 0280130026
              Oil Pressure/Temp combi sensor in filter housing Bosch 026154401f
              Coolant Pressure/temp combi Bosch 026154401f
              Coolant temp in thermostat housing BMW 11537549476 (e92 335i)
              DCT Oil pressure/temp Bosch 026154401f
              Knock Sensor Bosch 0261231046 (fcpeuro from a Volvo)
              Crankcase pressure Not 100% sure on this, but LowDollar 8990015 (0-15psi)
              Plus, in addition, I'll be using OEM Honda cam/crank sensors, and Nissan R35 GTR ignition coils. Bosch 0280750474/Porsche 74mm DBW throttle body (FCPEuro part, $175!). Dual-fuel setup, I'll be using the factory BMW M3 fuel pumps and filters with Bosch 960cc "pump gas" injectors, the other using Radium "spare-tire" fuel-cell with Bosch 2200cc "e85" injectors. I haven't finalized any of the e85 fuel system yet, I'll deal with that once I start on V2 aka "turn the boost up and make the jam". The stock e46m3 fuel system is enough for 300-400hp, reliable, quiet, and parts are easy to obtain. No reason to change it. The Maxx will blend fuels as some amount of boost comes in, and finally be e85 only for high(er) boost.

              Since my engine wiring harness will be using factory BMW X60001/X60002/X60003/X60004/X60005 connectors, I wanted to get them new and not reused an old 20 year old one. BMW doesn't really sell the connectors, but TE/AMP, the company that made them, sure does. They're also like $0.85 a connector, so you can skip the bmw prices. Getting all the part numbers was a lot harder than I thought it would be, so you're welcome for the 3 people out there that this might actually help.

              DME Connector header: TE 7-967288-1 (this is the actual 5 female MS43/MS45/MSS54 DME connector side. If you wanted to make your own adapter harness, as I did.
              BMW Connector Name TE housing PN Pin block A PN Pin block B PN PIN contact PN
              X60001 1-968307-2 927768-1
              X60002 1-968317-3 2-968318-1 1-968318-1 5-963715-1
              X60003 1-968325-3 2-968326-1 1-968326-1 5-963715-1
              X60004 1-968321-2 2-968322-1 1-968322-1 5-963715-1
              X60005 2-968307-2 927768-1
              Just search for the PN on digikey.com, mouser.com, or wherever you buy your TE/AMP parts from. You can also find schematics, CAD drawings, specs etc at te.com (again, just search for the part number), or both digikey and mouser have them as well. I ordered all this stuff from digikey.com, and it cost me like $40.

              Next up was just the small matter of designing an engine harness, which I did in Excel. Just a lot of time, mapping sensor A to pin Y. Once I had everything I think I need, I translated it all into yourspec.com, which allows you to order custom wiring. They'll do most of the pinning, wire labels, cutting, etc. I ended up having them do one side of the wire, which goes into the TE connectors above, but I'll do the other end pinning into all the sensors since I wasn't sure of the length.

              There are about 100 wires in my engine harness. But here is a screenshot from yourspec's design interface. You can see that the VTEC signal, TXL 22 AWG, blue, goes into X60003 pin 46 which is mapped into GPO 5 in the Maxx. Neat. You can also order shielded Tefzel wire, such as my crank trigger signal wire.


              A few days later and...


              And jumped right into it


              I'm only about 10% done with the harness... I haven't had a chance to work on it much


              Next up was mounting the MaxxECU Race in the e46 DME box. The MaxxECU instructions recommend removing the DME mounting tray and just stuffing everything inside. But I have a 3D scanner, Fusion, and a fancy printer...so let's scan the ECU box and design something.


              Looks pretty good, let's see if the MaxxECU fits. YUP looks good to me!


              Just did a quick test print in PLA to make sure it really fit correctly.


              There was one small little fix I had to do, so I'm glad I did a test print, but overall it fit perfectly


              Final version was printed in Fiberon PA612-CF15 (Nylon filament with 15% carbon fiber)


              What layer lines? How insane is this made in my home office!


              Pushed in some nut inserts


              PERFECT! The other little box is a Canchecked MCE18 canbus sensor extension. I ran out of inputs and outputs on the Maxx along time ago, so I'll be using this and reading values over the BMW P-CAN network.


              And with all the BMW relays clipped into place


              Fun side project, I hate the chrome SMG ring. So literally 10 minutes in Fusion and a 3d print later for testing...


              But I wasn't really feeling gray, so I ended up using Bambu PLA Matte Black printed with a 0.2mm nozzle. Came out pretty good, although I think I'll probably do another pass at it. Also which are you liking better, the e92 drivelogic button (right) or standard e46 SMG drivelogic button (left). hrrmmmm Ignore my messy desk!


              So whats next you ask? I'm continuing to work on the wiring harness. I hopefully will get that done here in the next few weeks. Started work on all the MaxxECU programming as well. If all goes well we can at least power everything up, test sensors, etc. Perhaps even crank the engine. The front timing cover hasn't been sealed, oil pan needs to be modified to clear the steering rack, water pump housing isn't attached. I gotta design an alternator bracket, AC bracket, water pump brackets, Volvo electric power steering pump brackets, do all the AN oil lines... man I have a lot of work to do still.
              Phoenix Yellow e46m3 Build Thread
              Orient Blue E46 330i ZHP k24/dct/turbo Build Thread

              Comment


                #52
                Very cool !

                Comment

                Working...
                X