Announcement

Collapse
No announcement yet.

My 2005 Imola Red M3 6MT Build Journal

Collapse
X
 
  • Filter
  • Time
  • Show
Clear All
new posts

    #31
    Originally posted by MrClutch55 View Post
    you got a great tutor right in front of you. i watched so many of his diys.


    I really appreciate it! I couldn’t have done what I gave so far without a ton of help from M3F, NAM3FORUM, and other sources online. Hopefully it’s helpful to watch my thought process in restoring this car!
    2005 ///M3 6MT Coupe Imola/M-Texture


    Build Thread

    Instagram

    Comment


      #32

      VANOS continued. I was planning on replacing the upper chain guide no matter what, I was able to confirm my decision exposing it. Pretty typical failure, would definitely recommend the upgrade no matter what shape yours is in. Seems like it isn’t a question of if, but when.


      New upper chain guide installed and exhaust cam gear put back on.


      This one hurt. As I was putting VANOS back onto the car, I came across my first failure. The bottom 3 bolts are supposed to be torqued to 7ft-lbs or 10N-M. Unfortunately I read “10ft-lbs” and decided to use my torque wrench which could at a minimum provide 10ft-lbs. First two bolts went great, they both caused the torque wrench to click. Bolt number three decided it wanted to have some fun and kept spinning. What I thought was the feeling of the bend in the metal VANOS gasket flattening turned out to be the bolt stretching. I was pleasantly greeted with a small pop and a free spinning bolt head. Great. Luckily for me, there are no threads on the VANOS itself, only in the head of the motor. I was hoping the threads snapped high enough that I could pull the VANOS unit and have the thread sticking out. Boy was I lucky.


      The failure happened at 6pm on a Friday, so I had no choice but to wait until the next morning to source a replacement locally before ordering online and paying $7-10 in shipping for a $3 bolt. First dealership said they needed to special order, which would require me buying the whole box of 10 (no thanks). Second dealership had four in stock so I headed over and was back to my car, still hoping to enjoy a Saturday afternoon cruise if everything else went smooth. I didn’t notice until after I was installing the new bolt that BMW changed the design of the bolt head. Rather than a 5mm hex, it was now a torx. This bugs me a little, but I will hopefully never have to see this bolt again. This time, everything went smoothly.


      It was incredibly windy so I had to close the garage door and worked in some less than ideal lighting for the valve adjustment. Using the BMW feeler gauges, I was pleasantly surprised to find all 24 valves to be within tolerance. I double checked timing again after the required rotations during the valve adjustment and timing was still perfect. Time to seal it back up and go for the first start.


      Started right up, no codes, no weird issues. Slight oil burn smell, I figured I would take the car up to temperature and go for a drive to test for any issues. Motor felt great all the way to redline and VANOS appeared to be working as before. Oil burn mostly went away after this drive as I expected. I thought it was from some of the oil that dripped from the oil drain and onto the headers. I cleaned up and went out for a 30 mile drive after to burn off the remaining. I feel accomplished for completing this. I was definitely nervous going in as I have never opened an engine up before, let alone tear pieces apart. Thankfully this community has provided a large amount of resources to not only this project, but almost every aspect of the vehicle. Thank you to the community for the help!
      2005 ///M3 6MT Coupe Imola/M-Texture


      Build Thread

      Instagram

      Comment


        #33
        Awesome work man, must feel great. I took care of my vanos as the first thing and glad I got it out of the way. What's next?

        Current:

        1997 BMW M3 - Boston Green/Modena
        2003 BMW M3 · Coupe · 6MT - Alpine White/M-Texture Alcantara

        Comment


          #34
          Waiting on center support bearing to come in. Was supposed to be here yesterday but Fedex decided it wanted to hold it I guess. Once that is in, drop the drive shaft. Guibo, CSB, shifter bushing refresh. Put the fan and fan shroud back on, drop it off Friday for a full detail to remove all swirls. She's going to look nearly brand new after all of this. Planning on doing rod bearings in the fall. I happened to drop one of the new crush washers for the oil drain. While I was fishing it out off of the front sub frame support plate, I glanced at the passenger side motor mount and it was a little tired and ugly. So I will plan on getting those done at the same time. Honestly should do a whole front suspension refresh while I am there but I will see where the budget is at.

          But for now... I plan to drive and enjoy it this summer. Have a couple trips planned for the Tail of the Dragon pending COVID, and maybe some other cruises with my friends around central Ohio.

          2005 ///M3 6MT Coupe Imola/M-Texture


          Build Thread

          Instagram

          Comment


            #35

            My last planned maintenance for the spring is due. I have had some of the parts sitting in the back of my garage for a couple months and they finally get to be put on. Back in M3F, I talked to Tyler/ Tbonem3 about what he decided was “the best shifter feel for under $100.” This included the E21 transmission mounts I had previously completed. The rest of it was rebuilding the shifter with new bushings.

            First up was an eBay special: Delrin Shifter Carrier Bushings. I purchased them here. Next was a new Shifter Bearing (Top Ring) and lastly was a new Selector Rod Joint.

            Disassembly wasn’t too bad since I had the driveshaft and guibo off the car and out of the way. I also removed the 4 bolts that held the transmission brace into place to allow the transmission to drop a little more. Keep in mind I still haven’t put the fan or fan shroud back into the car after VANOS, so I had some extra room up front for the engine to pivot into. The part I had the post time struggling with was removing the retaining ring on the old selector rod joint, and even that didn’t take too long.


            I cleaned up all of the components to remove 100k miles of road grime and lubricant and began replacing parts. I wish I had a picture comparing my old selector rod joint to my new one. The foam padding on the inside of the joint had almost all disintegrated on the old part. Putting the pin in the new one took a little bit of time since the foam was required to be compressed before the holes lined up. I did put the rubber boot around the shift arm back into its hole after the picture was taken.


            With the guibo off, I decided it would be a good time to replace the CSB. Upon inspecting it while I was under the vehicle, it didn’t really have any signs of wearing down outside of some of the rubber beginning to fail. The bearing sounded quiet. However, I had the part already and I don’t see myself with the driveshaft partially removed anytime soon, so I removed it totally. Breaking loose the 18mm bolt that connects the two sides of the shaft was a bit of a challenge. The screwdriver that I wanted to use was too flexible and failed to provide the leverage I needed. I went to the hardware store and picked up the thinnest pry bar I could find. Luckily this worked and the nut broke free. With the original CSB free I gave it another inspection. Now I could really hear how crunchy the bearings were and it made me happy to know a fresh new replacement was going in. Putting the shafts back together was pretty easy after I was able to start threading the 18mm bolt again. Yes, I did mark the drive shaft to ensure it was weighted correctly and yes I used a blue thread locker on the 18mm bolt.

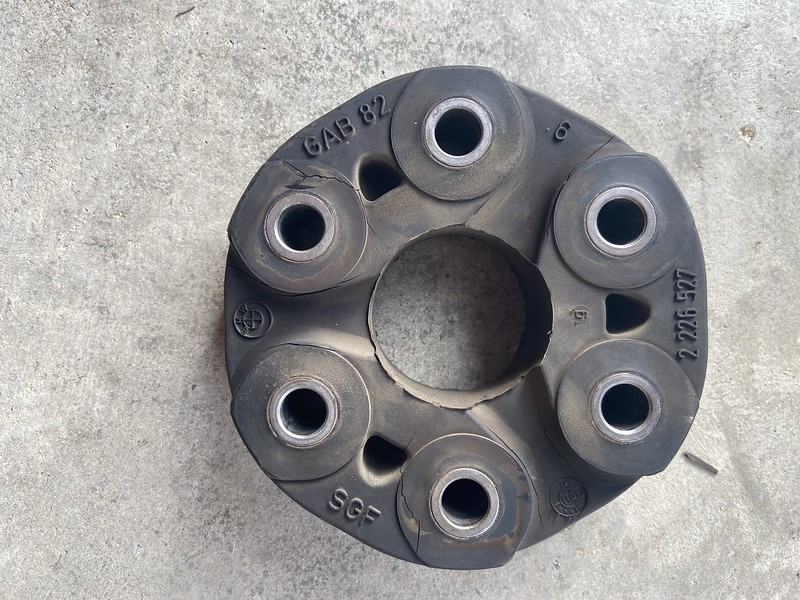
            Here is a picture of my old guibo. All things considered it really isn’t in too bad of shape which reinforces my idea that the prior owner didn’t beat on the car too much. I think I may have missed circling a few of the cracks, but I highlighted some of them.


            For the replacement piece, I went with the OE supplier. It made me chuckle to see this pretty obvious example of it being the same part as OEM, but with the BMW logo and part number shaved off.


            New hardware accompanied the guibo and I opted to use some blue thread locker again here although it wasn’t required.


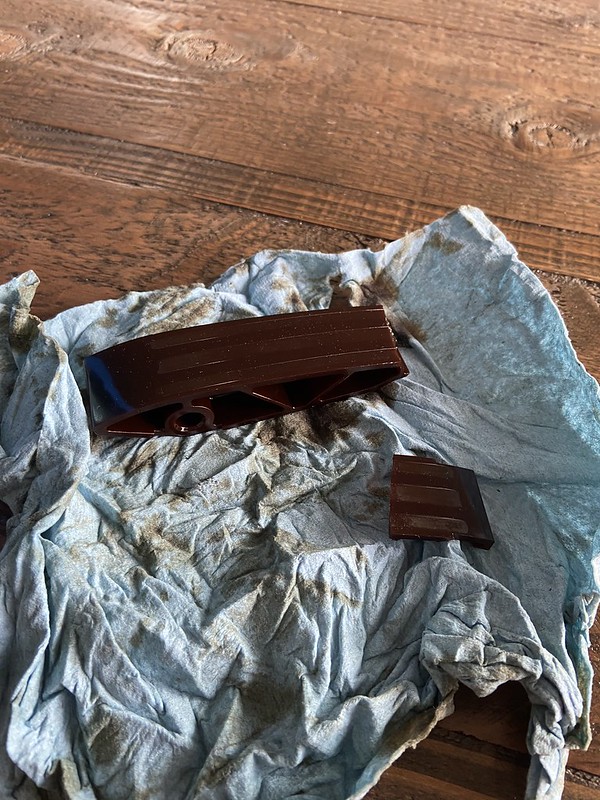
            I cleaned up the heat shields as well. Some bits of dirt and grease didn’t want to come off but most of it did. I need to find a replacement 10mm screw for the attachment point on the right side of the photo. It was missing from before I pulled the shield off.


            Once again I took it out for a drive to test my work. I have a nice little 8 mile loop that has subdivision, main road, and highway. Happy to report there were no sounds or vibrations from the driveshaft. The really amazing thing was the shifter feel. It is night and day better than before I did the refresh. Thank you Tyler for the recommendation.
            Last edited by Inizes; 04-15-2020, 03:46 AM.
            2005 ///M3 6MT Coupe Imola/M-Texture


            Build Thread

            Instagram

            Comment


              #36

              With small businesses hurting, and my inability to clean up the paint completely to my liking, I decided to send my car to a local detailer. They provided a 50/50 video, but I am not sure how well embedding a video would work so I added two screenshots below.


              Here it is finished up from a one stage correction. You may notice that prior to dropping off I removed the front bumper reflectors and the front hood emblem. I planned to switch to clear reflectors and the front emblem was pretty rough.


              This was taken before I fixed the rock chips.


              After I picked the car up, I had a short (10 mile) drive back to my garage. Here I coated the car in CQuartz UK Ceramic Coating. I also installed a new engine cover emblem (mine was in rough shape), new OEM chrome kidney grills, the clear side markers, and a new front hood emblem.


              I am thrilled with the results. This car has come so far since December. I love that I was able to retain the OEM factory paint rather than a full respray.
              2005 ///M3 6MT Coupe Imola/M-Texture


              Build Thread

              Instagram

              Comment


                #37
                Originally posted by Inizes View Post
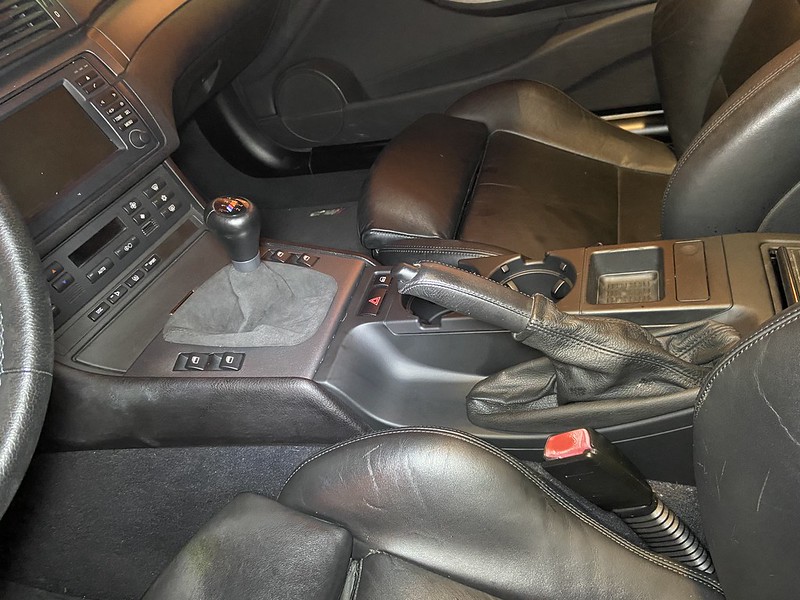
                Onto the interior!

                Looks brand new! I picked up a new set of cup holders as well. I opted for this over the euro tray because my girlfriend likes some sort of livability if we take a long weekend road trip to the Tail of the Dragon or something.


                How did you refresh the center console? Or is it a new piece?

                Comment


                  #38
                  Originally posted by eml View Post

                  How did you refresh the center console? Or is it a new piece?
                  All a brand new piece.
                  2005 ///M3 6MT Coupe Imola/M-Texture


                  Build Thread

                  Instagram

                  Comment


                    #39
                    Epic, thank you for the write up, I am enjoying your build journal

                    Comment


                      #40
                      Originally posted by cbean View Post
                      Epic, thank you for the write up, I am enjoying your build journal
                      I appreciate it! Updates soon!
                      2005 ///M3 6MT Coupe Imola/M-Texture


                      Build Thread

                      Instagram

                      Comment


                        #41
                        Looks great man. Hopefully I'll run into you on the dragon one day. Though I'm a bit more local.

                        I was also extremely nervous to go through the VANOS lockdown and valve adjustment as a new owner but thankfully all went well. I had a live M3F to look at plus Beisan's DIY instructions handy as well. The most important part I can remember is giving yourself plenty of time in case you miss something or snap a bolt as you did. There's nothing worse than feeling rushed and making mistakes.
                        2002 M3 Coupe | 1988 320i Touring

                        Comment


                          #42
                          Originally posted by Albino09 View Post
                          Looks great man. Hopefully I'll run into you on the dragon one day. Though I'm a bit more local.

                          I was also extremely nervous to go through the VANOS lockdown and valve adjustment as a new owner but thankfully all went well. I had a live M3F to look at plus Beisan's DIY instructions handy as well. The most important part I can remember is giving yourself plenty of time in case you miss something or snap a bolt as you did. There's nothing worse than feeling rushed and making mistakes.
                          Thankfully this is a second car for me so I did my
                          vanos over the course of a week, so time was in my favor for sure. Towards the end I was getting anxious/excited so snapping the bolt was a major bummer.

                          I have time off work scheduled for August 6-9 to be at the tail. Sounds like TN is already open (if they closed at all?). Assuming things open up more and my Air BnB doesn’t cancel, I’ll be there. I’ve never been to Nashville but have a few friends from college who live there.
                          2005 ///M3 6MT Coupe Imola/M-Texture


                          Build Thread

                          Instagram

                          Comment


                            #43
                            Originally posted by Inizes View Post

                            I have time off work scheduled for August 6-9 to be at the tail. Sounds like TN is already open (if they closed at all?). Assuming things open up more and my Air BnB doesn’t cancel, I’ll be there. I’ve never been to Nashville but have a few friends from college who live there.
                            Nashville closed before the state did, and remains so even though the state reopened last week. The only issue with the dragon was that the county in NC in which it resides had closed road traffic last month. Hopefully they've since reopened.
                            2002 M3 Coupe | 1988 320i Touring

                            Comment


                              #44
                              Originally posted by Albino09 View Post

                              Nashville closed before the state did, and remains so even though the state reopened last week. The only issue with the dragon was that the county in NC in which it resides had closed road traffic last month. Hopefully they've since reopened.
                              I think I saw they reopened. 129 itself was closed somewhere East of the dragon itself. I’m pretty sure The Hub and other Robbinsville locations closed, but the road itself was always open (at least according to Killboy).
                              2005 ///M3 6MT Coupe Imola/M-Texture


                              Build Thread

                              Instagram

                              Comment


                                #45
                                Checking back in to this thread has only increased my desire for an Imola E46M. Car looks great.
                                Past: '99 Hellrot/Dove M3 | '97 S14 1JZ | '06 Triumph Daytona 675 | '01 330I M-Tech I '99 Silvia S15 | Current: '96 Estoril/Black M3


                                Instagram

                                Comment

                                Working...
                                X