Originally posted by TosM3
View Post
Announcement
Collapse
No announcement yet.
My 2005 Imola Red M3 6MT Build Journal
Collapse
X
-
Yup, just ping me when you ready.Originally posted by Inizes View Post
Thanks! I might be reaching out soon to get my steering wheel trim refinished (if you're still going it)
BMW / E46M Interior & Trim Restoration.
https://nam3forum.com/forums/forum/c...ch-restoration
Comment
-
Originally posted by TosM3 View Post
thanks i will go to FCP Euro i will look for the part number There is an issue with the E46s where the rubbers tend to crack over time. This appears both below the rear side windows and in the corner of the side finisher trim. BMW does not sell only the rubber for the side finisher trim, but you can buy each side piece as one whole part (trim and rubber). Part # 51717003935
I wrote up everything with part numbers here. Hope this helps.
Comment
-
thanks!Originally posted by Inizes View Post
 There is an issue with the E46s where the rubbers tend to crack over time. This appears both below the rear side windows and in the corner of the side finisher trim. BMW does not sell only the rubber for the side finisher trim, but you can buy each side piece as one whole part (trim and rubber). Part # 51717003935
I wrote up everything with part numbers here. Hope this helps.
I found it
- Likes 1
Comment
-
Hey thanks.I appreciate it. I think bimmerfan08 said it best (I think it was him) that the hard part about these cars (engineering) is already done! Everything now to maintain them is just taking them apart and putting them back together. The community is great and has a ton of DIY information and is super supportive of it. Currently working on a few projects and will be updating the journal once they’re done.Originally posted by MrClutch55 View Postwow great diy information here.
Comment
-
Onto the next rounds of projects. With COVID sending the world into a lock down, it seemed like a good time to spend some more major time on maintenance. First up was replacing my lower bumper trim. It was going gray and a new one really wasn’t that expensive. After taking the old one out and hitting it with some 303 Aerospace they almost looked the same lol, oh well.


The next thing I have done was a little more major. I am still mid-way through it, but it is going rather smoothly so far. I have never taken off the valve cover for this car nor seen any pictures of it. The previous owner said VANO had not been addressed but when the last valve adjustment happened the mechanics reported it was fine. I ordered almost everything from Beisan as well as new cam bolts from Lang Racing. Time for me to open it up and see for myself what I am working with.

Initial impressions are really good. Everything was very clean (no sludge), definitely taken care of correctly. I took a deeper look at my exhaust hub tabs, and thankfully they were both together as well. I shot the old owner some pictures and a thank you for not breaking them. He seemed to enjoy them.

I removed the clutch fan and shroud. Somehow I ended up dropping both out of the bottom of the car rather than pulling them out the top. I guess whatever works! Then off came the solenoid, sealing plate, and the VANOS unit itself.


I moved from my garage up to my apartment to replace all of the seals, put in the new oil pump disk, cleaned up the solenoid plate (on my patio), and began reassembly. The O-ring that sits inside of the cylinder was probably the most frustrated I was during the process. It took me nearly 45 minutes to get it so sit in there. The oil pump disk was a bit annoying as well trying to get all of the springs compressed and seated in the bearing all at one time.


The whole process once I was up in my apartment took me nearly 3.5 hours. Not terrible for a first timer. Definitely room to improve with the oil pump disk and the cylinder o-ring.
Next on my plate is the upper chain guide, Lang Racing cam bolts, the anti-rattle kit, and a valve adjustment. After the motor is back together and before I put the fan back on, I will replace the driveshaft flex joint and rebuild the shift linkage with new bushings.Last edited by Inizes; 04-07-2020, 04:52 AM.
- Likes 1
Comment
-
Nice clean build well done👍, Looking to do the same to my rear shelf, how is the finish on Tulip color shot ? I heard some of dyes leave crusty finish, looking for best solution to do this with, thanks in advance for feedback.Originally posted by Inizes View PostOnto the interior!
First up was addressing the cracking air bag stickers. For some reason these really bugged me on my first drive. Removed both and used a precision screw driver, oxyclean stain remover, and a warm damp towel to remove the stickers and glue.


Next, I moved onto a small tear on the driver’s seat. It wasn’t terribly long, but the seat was separating from the bolster. I grabbed some extra tough black thread and a set of curved needles from the local hobby store and set to work.
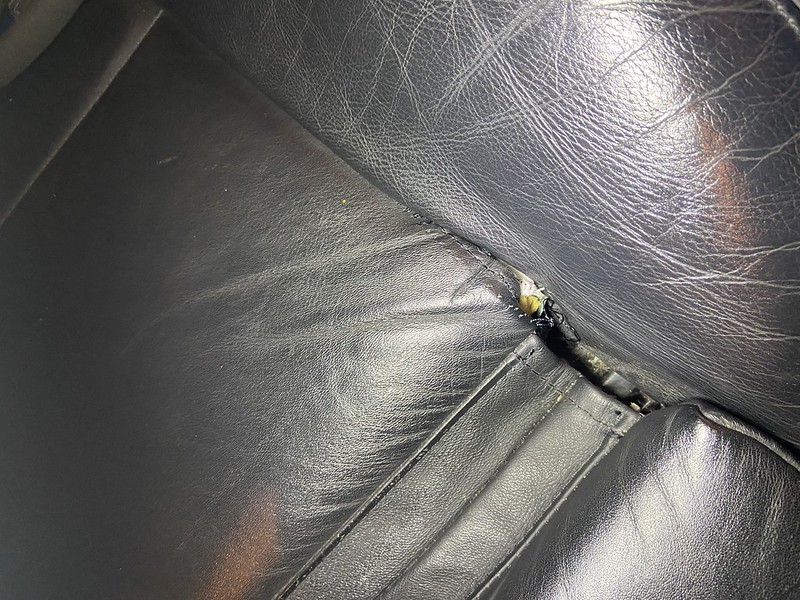


It isn’t perfect, but I feel like it was a decent attempt. It is hard to notice unless you’re looking for it.
Onto the center console. The old one had seen some abuse. The arm rest was starting to crack. The shift knob wasn’t illuminating correctly and looked bubbled.

This was a great sight to see lol. I wonder what happened to the original connectors.

I carefully unwrapped the wires and put some heat shrink on the open ends. The new shift knob won’t be wired to illuminate.


Off the center console came! I was a somewhat surprised how much crap makes its way under the console.

Looks brand new! I picked up a new set of cup holders as well. I opted for this over the euro tray because my girlfriend likes some sort of livability if we take a long weekend road trip to the Tail of the Dragon or something.

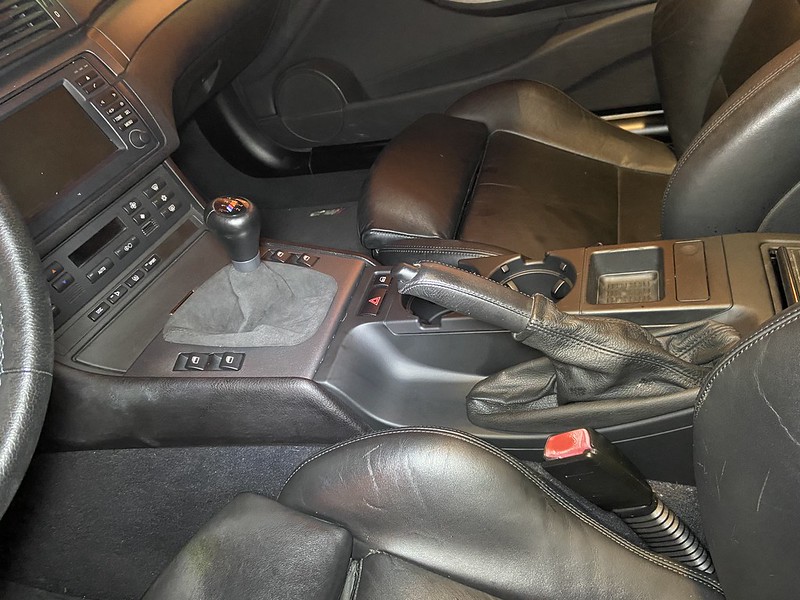

The rear view mirror had suffered the common failure with the AutoDim. I had a friend who was parting out a car give me a mirror from a 2012 BMW X5 with AutoDim, Homelink, and Compass. I couldn’t find any information on if this swap had been done before. To my surprise, it was completely plug and play!

Programming the mirror was pretty easy. I found a thread about it on e46fanatics. I will try to find the link for it again here soon.
The rear parcel shelf had seen better days. Like other parts on the car, the California sun had its way with it so out it came for a refresh.
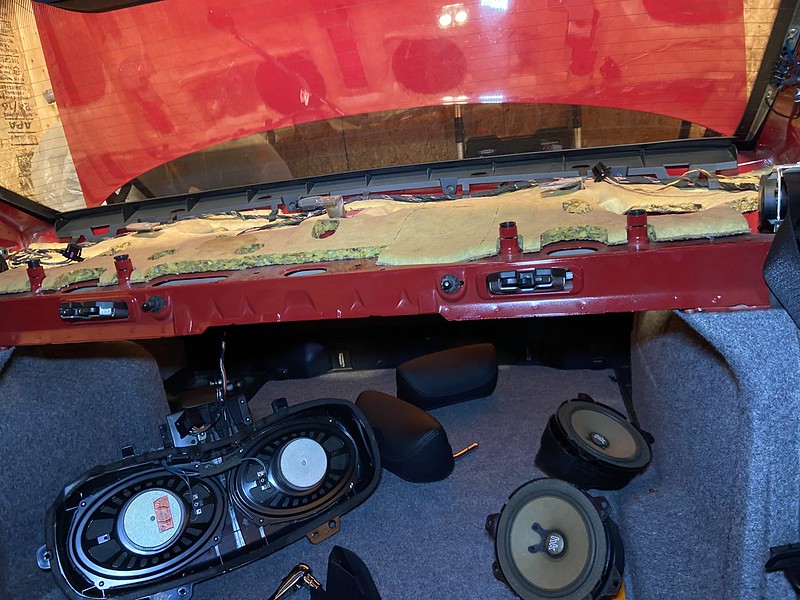
Taking it apart wasn’t easy. Had I know the M3F was going down, I would have taken more photos. If anyone needs help, feel free to message me. I will do my best to walk you through based on what I remember. I used Tulip ColorShot Upholstery Spray as my dye of choice. Once 8 oz. can was enough for 5 coats.

Nothing like a shower paint booth. I should have used more bags to cover for overspray. Cleaning wasn’t that bad though.


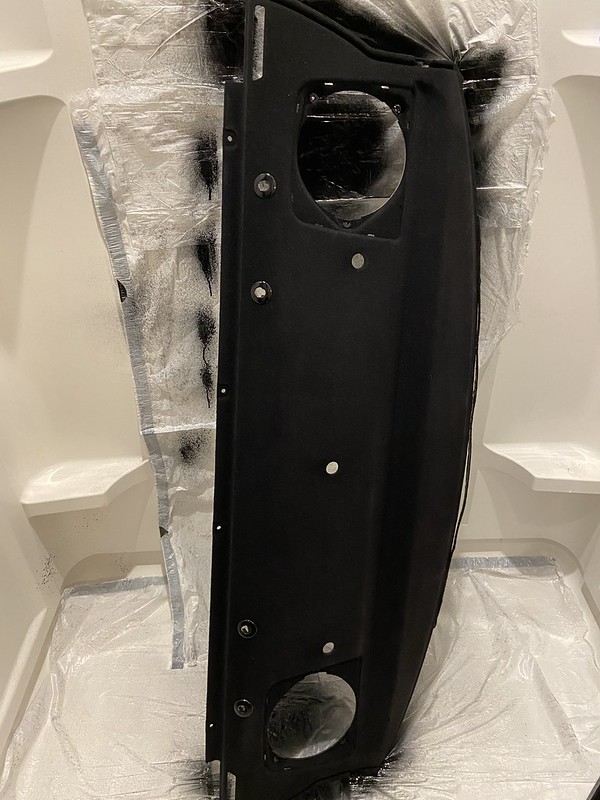
Before and after:
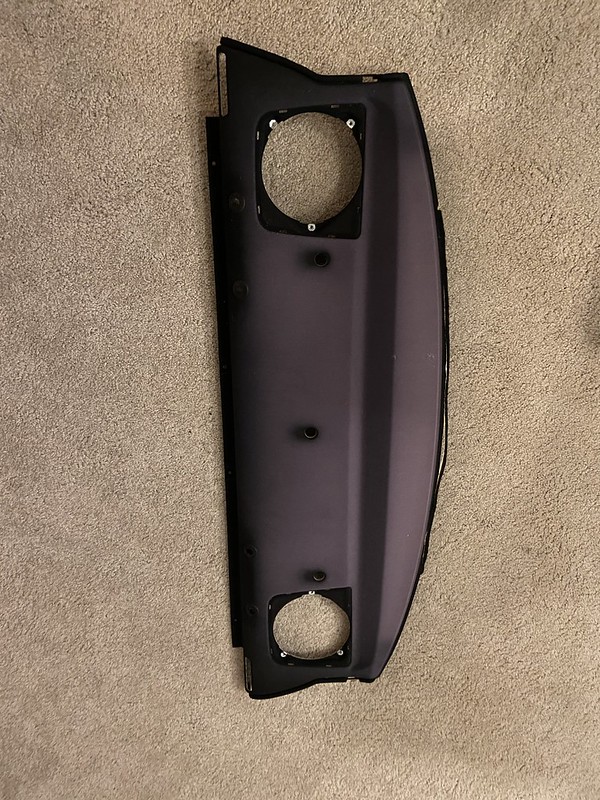

Back installed and looking factory fresh!

Comment
-
Yup! Forgot to mention that I guess. Just decided to go full lockdown and hopefully never have to deal with it again.Originally posted by BMWahba View PostAwesome! are you putting in the s62 diaphragm springs as well?
Comment
-
It was a little crusty to the touch, being honest. I can't say I am ever really back there and that I ever actually touch the rear parcel shelf though. Appearance wise it looks fine.Originally posted by Radekxpl View Post
Nice clean build well done👍, Looking to do the same to my rear shelf, how is the finish on Tulip color shot ? I heard some of dyes leave crusty finish, looking for best solution to do this with, thanks in advance for feedback.Last edited by Inizes; 04-07-2020, 08:39 AM.
Comment
-
Thanks, yes its not something you ever put your hands on, First time I touched rear shelf was just now after 7 years of owning the car, if it looks good than that will satisfy me, thanks againOriginally posted by Inizes View Post
It was a little crusty to the touch, being honest. I can't say I am ever really that I ever really touch the rear parcel shelf though. Appearance wise it looks fine.
- Likes 1
Comment
-
you got a great tutor right in front of you. i watched so many of his diys.
Originally posted by Inizes View PostOnto the next rounds of projects. With COVID sending the world into a lock down, it seemed like a good time to spend some more major time on maintenance. First up was replacing my lower bumper trim. It was going gray and a new one really wasn’t that expensive. After taking the old one out and hitting it with some 303 Aerospace they almost looked the same lol, oh well.


The next thing I have done was a little more major. I am still mid-way through it, but it is going rather smoothly so far. I have never taken off the valve cover for this car nor seen any pictures of it. The previous owner said VANO had not been addressed but when the last valve adjustment happened the mechanics reported it was fine. I ordered almost everything from Beisan as well as new cam bolts from Lang Racing. Time for me to open it up and see for myself what I am working with.

Initial impressions are really good. Everything was very clean (no sludge), definitely taken care of correctly. I took a deeper look at my exhaust hub tabs, and thankfully they were both together as well. I shot the old owner some pictures and a thank you for not breaking them. He seemed to enjoy them.

I removed the clutch fan and shroud. Somehow I ended up dropping both out of the bottom of the car rather than pulling them out the top. I guess whatever works! Then off came the solenoid, sealing plate, and the VANOS unit itself.


I moved from my garage up to my apartment to replace all of the seals, put in the new oil pump disk, cleaned up the solenoid plate (on my patio), and began reassembly. The O-ring that sits inside of the cylinder was probably the most frustrated I was during the process. It took me nearly 45 minutes to get it so sit in there. The oil pump disk was a bit annoying as well trying to get all of the springs compressed and seated in the bearing all at one time.


The whole process once I was up in my apartment took me nearly 3.5 hours. Not terrible for a first timer. Definitely room to improve with the oil pump disk and the cylinder o-ring.
Next on my plate is the upper chain guide, Lang Racing cam bolts, the anti-rattle kit, and a valve adjustment. After the motor is back together and before I put the fan back on, I will replace the driveshaft flex joint and rebuild the shift linkage with new bushings.
Comment


Comment