

Disclaimer:
( Most of the M3Forum links below do not work anymore )
Please read and completely understand the timing procedure.
Engine failures can occur resulting in having to completely rebuild the motor!
Always crank the engine by hand several times before starting to insure there is nothing binding, IE incorrect timing. I assume NO responsibility if damages occur.
There are 3 causes of vanos codes on this engine.
1. Failed solenoid coil pack.
2. Sticking solenoid valve body.
3. Broken oil pump driver tab.
Focus on the catastrophic stuff first.
1- Oil pump disk, as the tabs can breaks at anytime without notice.
2- Intake sprocket sleeve bolts. They usually cause a rattle when they come loose, so you have some warning. But it can be catastrophic, so a preemptive repair is a reasonable approach.
Everything else I think is secondary.
3- Solenoid coil pack. This usually throws a code when it fails. Although I know of two cases where the coil pack was installed without codes and it resolved anomalies.
4- Sticking solenoid valve body. This usually causes codes.
5- Seals repair kit. This starts providing performance improvements after 100k miles.
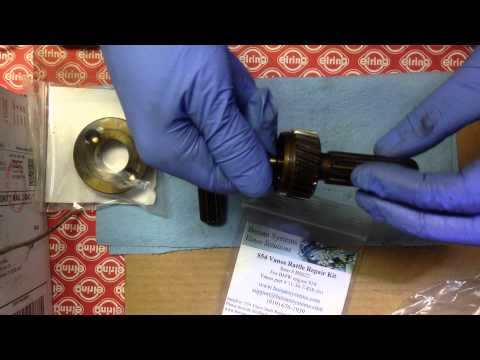
6,7- Rattle repair kit for splined shaft bearings and S62 diaphragm springs. This removes axial play and dampens movements to help quiet down the engine.
TIMING
If you are only performing the repairs in the S54 vanos procedure then you don't disturb the set timing and you reinstall the vanos the same way it was removed. Once the engine is started the DME will adjust the vanos timing at will.
If you are performing any repairs in the S54 vanos rattle procedure then the S54 vanos procedure will instruct you to switch to the S54 vanos rattle procedure once you perform the vanos repairs and do the cleaning.
The rattle procedure documents removing the sprocket components and performing repairs. This disturbs the set timing.
To retime the engine the vanos needs to be reinstalled with the splined shafts. This is covered in the rattle procedure. At the end of installing the vanos on the engine and setting the timing at the end of the rattle procedure you are instructed to continue in the main procedure at the section after installing the vanos mounting bolts.
Once the engine is started the DME will adjust the vanos timing.
SOLENOID COIL PACK
A failed solenoid coil pack is the most common cause. The vanos has a solenoid that is detachable form the vanos. This solenoid is made of two parts, a coil pack and a valve body. The coil pack is the electrical component and the valve body is the mechanical component. The coil pack experiences cracking connector pin solder joints at the PC board. This is caused by PC board vibration. Beisan provides a rebuilt unit with design changes to keep the problem from recurring. It costs $150 plus $150 refundable core charge. It is a very simple repair. The repair and a lot more info is provided in the Beisan S54 solenoid repair procedure,
http://www.beisansystems.com/procedu..._procedure.htm
I suggest you have the fault codes read by an OBDII code reader. You can get this done for free at an Autozone or O'Reilly store. If you get a vanos electrical code, P0010, P1525, P0013, P1531, then the problem is a failed solenoid coil pack. If you don't get an electrical code it can still be a solenoid coil pack failure.
A sticking solenoid valve body is a less common problem. This can be removed and cleaned. The solenoid procedure covers this. We have been having trouble effectively cleaning the valve body. I will update the procedure soon with a more intensive cleaning process.
A broken oil pump driver tab is a somewhat common problem and is a much more involved repair. To assess if the oil pump driver tab is broken the valve cover needs to be removed and the driver tabs inspected. The Beisan S54 vanos and vanos rattle procedures document removing the valve cover and removing and reinstalling the exhaust hub that has the tabs that break.
If you get an electrical P code then you should replace the solenoid coil pack. Otherwise you essentially have two options. You can replace the solenoid coil pack and clean the solenoid valve body, or remove the valve cover and inspect for a broken tab. Most owners elect to replace the solenoid coil pack and clean the solenoid valve body because this is an inexpensive repair and they can easily perform the work themselves.
Helpful Tips:
Broken Tabs= Turbo Toy Hub or Beisan Hub
No Broken Tabs= Beisan Pump Disk
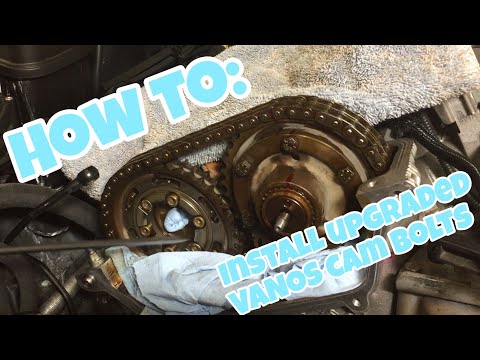
-Highly recommend Lang Racing Cam bolts.
- Add the upper chain tensioner guide, they always break.
- Good idea to do a valve adjustment while everything is open.
- With one broken tab the car sounds and runs fine. You're just on borrowed time.
Most people are unaware they have a broken tab until they open the valve cover.
- The solenoid coil pack solder points will start to come loose, causing intermittent vanos codes.
It's an easy fix to do anytime, but easier while you have the vanos out.
- Make sure you get all the timing tools, and read the Beisan anti rattle DIY, which is the updated BMW TIS. (You can really damage your engine if you mess up here.)
- Make sure the Crank Pin in fully inserted in the flywheel before starting this procedure.
There is a notch on the flywheel the Pin inserts into. Use a mirror to verify the flywheel is in the right location.
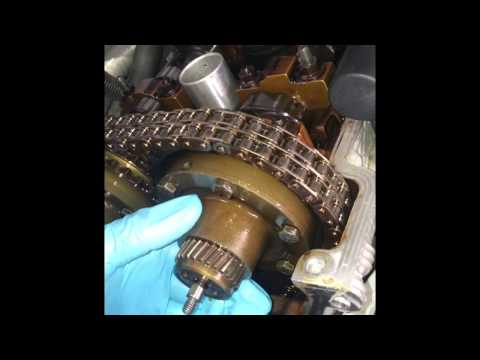
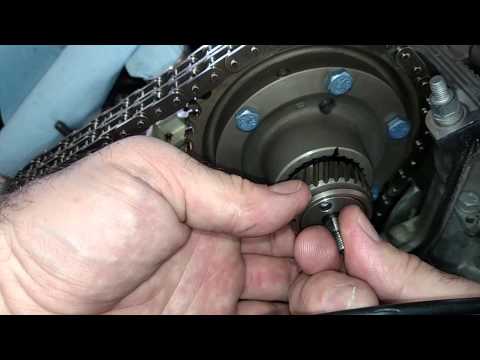
- Splined shaft with longer stud is the exhaust, and the shorter stud is the intake.
( See Pic below)
Q: What is the reason you turn the exhaust cam while removing Vanos?
A: Simply retards the exhaust side so the splined shaft is closet to the vanos, or in the fully retarded position.
This will aid in the removal of the vanos unit from the head.
Q: When doing Beisans seals and disc, could I get away with not having a cam alignment tool, and have done intake cam gear bolts?
It seems as if the cam has no reason to move and the tool is there just as a precaution.
A: Definitely use the tool. You never know if something might move and you won't know until you start the car and it doesn't run right.
Q: Is there a DIY on the chain guide? The chain needs to be removed from the exhaust side sprockets right?
A: Yes- Simply remove the cam bolts and it slides right off. Be careful and put rags underneath do nothing falls down into the engine!
Q: So once the chain is loose how do you prevent it from coming off the bottom crank sprocket?
A: Use a soft clamp to clamp the chain to the intake sprocket. Works great!
Beisan Procedures:
There are three stages to these repairs with corresponding three repair procedures.
S54 Vanos Procedure
http://www.beisansystems.com/procedu..._procedure.htm
S54 Vanos Rattle Procedure
http://www.beisansystems.com/procedu..._procedure.htm
S54 Vanos Solenoid Procedure
http://www.beisansystems.com/procedu..._procedure.htm
Dr. Vanos:
https://drvanos.com/collections/s54-vanos
http://www.drvanos.com/docs/e46m3install.pdf
DIY: Vanos Hub & Bolts
http://www.m3forum.net/m3forum/showthread.php?t=411224
https://forums.m3cutters.co.uk/threa...systems.89437/
DIY: Oil Pan Removal & Engine Mounts
(Incase you drop broken vanos tabs or bolts down into the oil pan)
http://www.m3forum.net/m3forum/showthread.php?t=414678
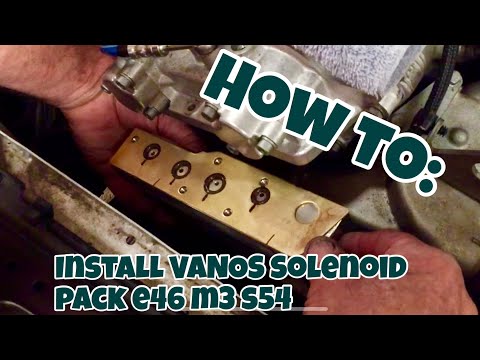
DIY: Replace Vanos Solenoid Pack
http://www.m3forum.net/m3forum/showt...&highlight=DIY
S54 TIMING:
https://www.dropbox.com/s/bu3vqa1aks...ng%20_S54_.pdf
http://www.m3forum.net/m3forum/showp...86&postcount=3
http://www.m3forum.net/m3forum/showt...=490635&page=2
http://www.m3forum.net/m3forum/showt...ght=S54+Timing
http://www.m3forum.net/m3forum/showt...ght=S54+Timing
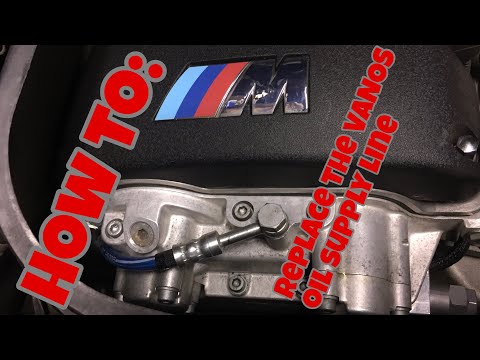
Rogue Engineering S54 Vanos Oil Line- $60
https://www.rogueengineering.com/Rog...ine_p_130.html
Rogue Engineering's S54 Vanos Oil Line is tested to 3000psi. Using our stainless steel braided hose with the proper banjo fittings. This is a direct replacement for the factory line.
(BMW# 11-36-7-837-614, MSRP $103.73).
Hack Engineering S54 Vanos Oil Line- $80
https://www.hackengineering.co.uk/pr...-oil-line-s54/
Among other Vanos issues with the S54, the high pressure oil line between the accumulator and the Vanos unit itself is known to crack through vibration, causing nasty oil leaks and running problems. We devised this line to stop that issue. 1200psi of oil pressure and the vibrations experienced through the engine mean that the standard solid line often splits around the fittings. This line is rated to beyond 7350psi and unlike rival hoses, it carries a lifetime warranty and does not require annual replacement. It is also fitted with heatshielding material and is made here in the UK.
S54 Exhaust Hub
The BMW exhaust hub tabs can break and a replacement hub is needed. BMW only provides the exhaust hub as part of a complete exhaust sprocket components kit, and thus the hub is expensive.
Beisan Systems Hub- $400
https://nam3forum.com/forums/forum/m...t-hub-solution
Beisan Systems has launched an S54 exhaust sprocket hub product. The Beisan exhaust hub is a replica of the BMW exhaust hub, but incorporates a thicker wall and tabs and a black finish instead of a green finish. The Beisan exhaust hub is provided as a separate part and is thus less expensive and a cost effective solution for a replacement exhaust hub. The Beisan exhaust hub tabs are thicker than the BMW hub tabs to improve strength.
The Beisan hub tabs are the same width as the BMW hub tabs. Thus the Beisan hub tabs fit the Beisan oil pump disk with smaller holes.
Turbo Toy Hub- $700
http://www.tt-hub.com
V3 uses a 300m steel which is extremely resistant to fatigue failure and also quite expensive. It's heat treated for further strength gains.
Scott can redial the OEM discs with stock sized holes. You can use the Turbo Toy hub with the Beisan oil pump disk. The Beisan oil pump disk has 4 holes, 2 small holes which would be used with the OEM hub and 2 holes in the regular size that you can use the Turbo Toy hub with.
TOOLS:
BMW Camshaft Alignment Bridge (83-30-0-493-749)
BMW Crankshaft Locking Pin (83-30-0-490-861)
BMW Crankshaft Turning Socket (83-30-0-491-056)
BMW Water Pump Pulley Holder (83-30-0-491-046)
(2) Harbor Freight Craft Magnet Blocks (98406- $1.00)
https://www.harborfreight.com/2-piec...cks-98406.html
Loaner Tools: S54 Timing & Vanos Tools.
http://www.m3forum.net/m3forum/showthread.php?t=484972
(1) OE Camshaft bridge
(1) OE TDC locking pin (crank lock)
(1) Beisan Systems Vanos rattle tools
(2) OE Camshaft locking pins
S54 Timing & Vanos Complete Tool Kit- $180
https://shop.ktcautotools.com/collec...alignment-tool
Beisan Upgrade List:
https://www.dropbox.com/s/mstvpb1aeknmkfw/Karter16's%20Beisan%20Upgrade%20Schedule.xlsx?dl=0
Beisan Systems
http://www.beisansystems.com/products.html
ECSTuning
https://www.ecstuning.com/BMW-E46-M3...Engine/Timing/
ECS S54 Viton Seal Plate Kit- $15
https://www.ecstuning.com/b-ecs-part...012018ecs02~a/
Mfg Part- 012018ECS02
ECS Part- ES#3220374
Vanos Filter:
Order the entire VITON oring kit from Beisan Systems or individual kits are available from ECSTuning.
Filter Change Kit- Level I- $45
https://www.ecstuning.com/b-genuine-...1361401971~kt/
Mfg Part- 11361401971
ECS Part- ES#1892454
Filter Change Kit- Level II- $75
https://www.ecstuning.com/b-genuine-...1367831906~kt/
Mfg Part- 11367831906
ECS Part- ES#1892456
Beisan Systems:
http://www.beisansystems.com/products.html
Vanos Sealing Plate Repair Kit- $10
Vanos Rattle Tool- $20
Vanos Seals Repair Kit- $60
Vanos Rattle Repair Kit- $80
S54 Exhaust Upper Chain Guide- $80
Vanos Solenoid Coil Pack- $150
Vanos Oil Pump Disk- $150
S54 Exhaust Sprocket Hub- $400
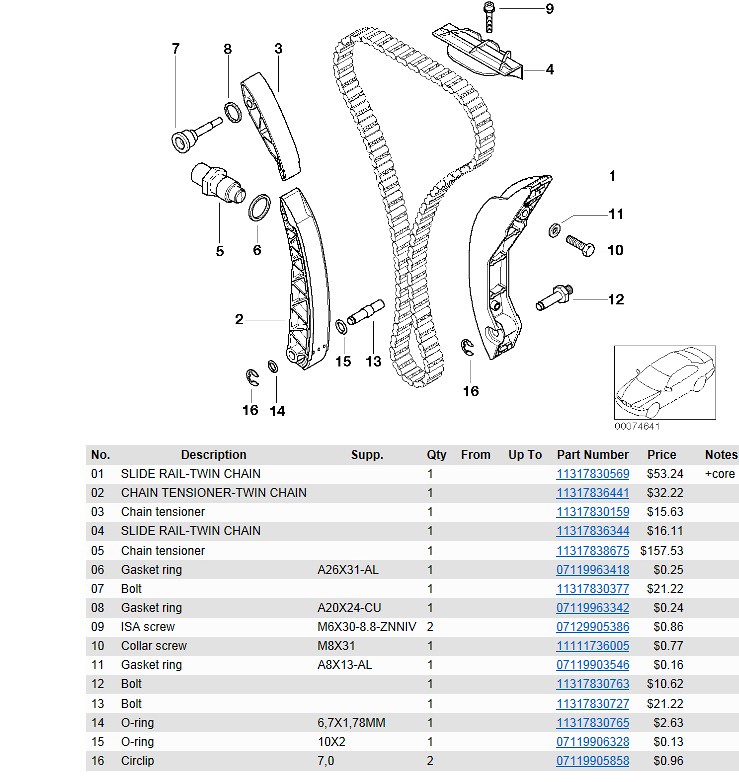
BMW Parts:
(1) Vanos oil filter (11-36-1-401-971)
(1) Vanos cover gasket (11-36-7-831-938)
(1) Exhaust upper chain tensioner guide (11-31-7-830-159)
(1) Chain guide mounting bolt washer (07-11-9-963-342)
(1) Crankshaft chain tensioner washer (07-11-9-963-418)
(1) Valve cover gasket (11-12-7-832-034)
(2) Valve cover stud grommet (11-12-1-437-395)
(2) Oil drain hose banjo bolt crush washer (07-11-9-963-129)
(2) Vanos oil accumulator pipe crush washer (07-11-9-963-072)
(2) S62 Sprocket hub diaphragm spring & pressure plate set (11-36-7-833-218)
(6) Spark plug gasket (11-12-7-831-271)
(12) Updated cam bolts (07-12-9-905-536) or LANG Racing version
(13) Rubber seals (bolts) (11-12-7-830-972)
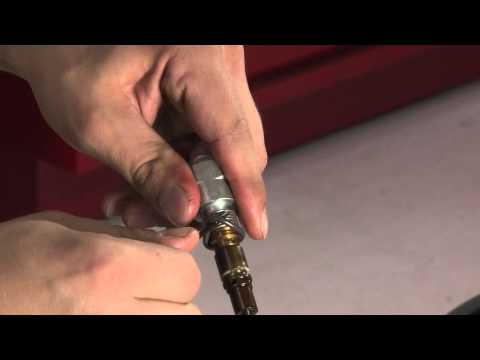

Intake Spline on the Left / Exhaust Spline on the Right
( Exhaust side: Side with the headers. Intake side: Side with the air intake.)
(Notice the shaft length)

Stock S54 Diaphragm Springs have a letter "A".
The S62 springs have a letter "B".

TDC Cam Position


( Exhaust side: Side with the headers. Intake side: Side with the air intake.)
(Notice the shaft length)
Stock S54 Diaphragm Springs have a letter "A".
The S62 springs have a letter "B".
TDC Cam Position
List of all the OE parts you need to bulletproof your Vanos.
The darker Red are parts you'll need every time you adjust your valves.
The lighter Red are the miscellaneous OE parts related to the Vanos rebuild.

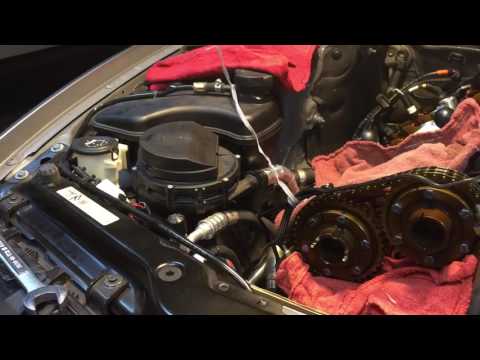
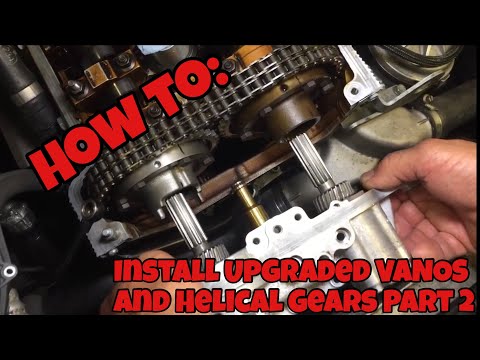
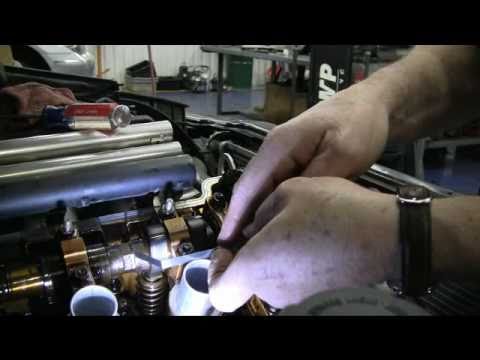
Installing the Vanos and checking timing
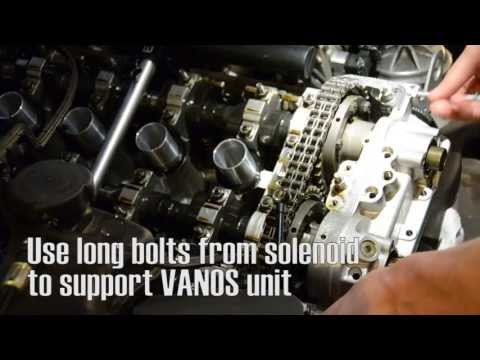
( Starts at 4:00 )
Wrong vs Correct Spline Position
Vanos Valve Body Cleaning
"DIAGNOSTIC SOFTWARE"
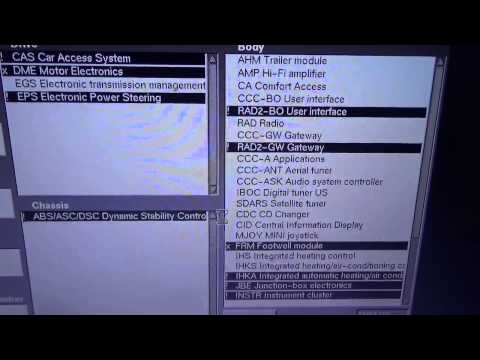

How-to guide: VANOS test/adaption using DIS
https://forums.m3cutters.co.uk/threads/how-to-guide-vanos-test-adaption-using-dis.106289/
Mostly in German but gives you the idea.

Not a E46 M3 but shows the proper steps.

Kaiv: Beisan stuff is a fantastic piece of kit.
100% success in all installs.
( Kevin is located in SD California )


Beisan Upper Chain Guide
"Beisan Solenoid Pack and Seals"

If the tabs are intact, get the Besian re-drilled pump disk
If your exhaust hub is broken get a Beisan Systems or Turbo Toy Hub.
A broken exhaust hub would look like this!
"Broken Tabs"

Beisan Hub
Turbo Toy C300 Hub

Turbo Toy Hub and Lang Racing Bolts


"Chain Tensioner Bolt"
Use the Harbor Freight Socket Adapter, 32mm deep socket and an open end wrench.
( https://www.harborfreight.com/hand-t...aps-67011.html )

Use a soft clamp to hold the chain on the intake sprocket when replacing the Chain Guide. Keeps the chain from falling down into the engine.
Thanks to SliM3 for this detailed Vanos info!
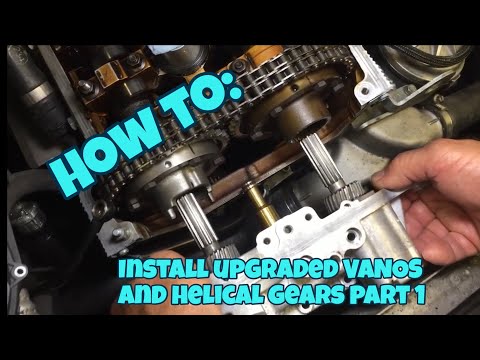
Naturally you have the (7) Crankshaft Sprocket that drives the two (4) Camshaft Sprockets via a (1) Double-row Chain.
The spline hubs and rear retaining rings, when torqued, provide a significant non-slip clamping force around the sprockets to complete the (2) Chain Driven Assembly. Minus the spline shafts, if you were to rotate the crank at this point, the cams would just sit still. The shafts obviously provide that final drive link to the cams (reference view (2)).
The internal (3) Diaphragm Spring Set is designed to buffer the pressure actuation of the VANOS unit. There is a friction coefficient between the teeth of the spline shaft and hubs that must be overcome before the cams will adjust. Until this friction is overcome the pressure exerted from the pistons is basically pushing the hub assemblies into the camshafts, against the diaphragm springs (reference view (2)). Naturally, when this friction is overcome the hubs sort of spring back to their initial position, the spline shafts move freely, and subsequently adjusts the cam angles.
The ultimate goal of the "Timing Procedure" is to pre-load the (3) Diaphragm Spring Set, and to a lesser degree, remove slack from the chain link/sprocket teeth interface. If not done correctly the combination of all the slack (chain, spline teeth lash, diaphragm springs) will lead to cams that will drift out of position due to the pressure exerted by the valve springs, as the assembly is rotated.
In order to accomplish this during installation the VANOS unit is partially installed, with the spline shafts [freely] rotating the unclamped hubs. The purpose of the plastic spacers is to set the initial pre-loading distance between the cylinder head and VANOS mating surfaces. At this point the two adjacent hub bolts are torqued and loosened 1/4 turn to provide a very light hub-to-sprocket clamping force.
As you continue tightening the VANOS unit bolts, you're essentially applying pressure to the diaphragm springs, just as if the pistons and spline shafts were acting against them during normal operations (explained above).
After pre-loading I removed the VANOS unit because I didn't want to use a crows foot attachment to torque the bolts. The additional leverage must be accounted for, and with torques being as low as they are, I wouldn't have been able to accurately go that low on my torque wrench.
Again, if the pre-load procedure is done correctly the cams will end up in the same exact location no matter how many times you turn the engine. Also note that the cams are "locked" into position during rotation because they're essentially wedged between the VANOS unit piston stops and the pressure exerted by the valve springs.
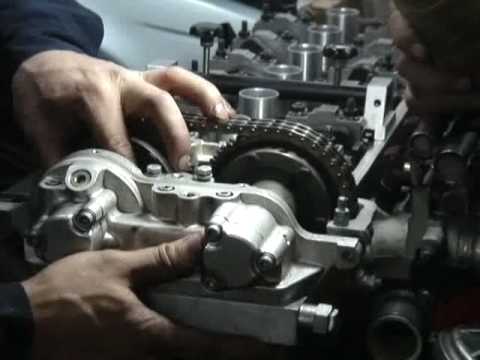
Cam bridge and both pins installed. Spline hub bolts loose, align chain sprocket and spline hubs so shafts engage at first set of teeth. Spline hub holes should face up.

Installed spline shafts to VANOS assembly, used plastic spacers to set pre-load spacing, spline hub bolts loose. Bridge and both pins still installed.
Pre-Loading: Tighten (2) adjacent bolts on each spline hub, loosen 1/4 turn, remove plastic spacers, and tighten VANOS assembly bolts 1/4 turn at a time until fully installed.
At this point I tightened all accessible hub bolts so the spline shafts are locked into place, removed the VANOS assembly, and torqued spline hub bolts to 12 ft-lbs with Loctite. Bridge and pins still installed.
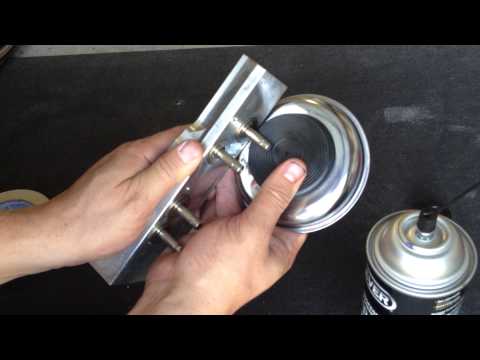
(Picture shows the plastic spacers used for Pre-Loading)

I then rotated engine assembly roughly 15-20 times, set crank at TDC, and verified timing using timing tool. If the cams were properly pre-loaded then the holes should end up in the same exact location. The pin should fall right into the hole with no drag or force, the tool flat on the surface and overhanging on the side being verified.
If the timing tool pin does not go into the holes after rotating engine assembly, repeat the pre-load steps until it does. The slightest misalignment is enough to throw timing off.

Disclaimer:
Please read and completely understand the timing procedure.
Engine failures can occur resulting in having to completely rebuild the motor!
Always crank the engine by hand several times before starting to insure there is nothing binding, IE incorrect timing. I assume NO responsibility if damages occur.


Comment