Announcement

Collapse
No announcement yet.

heinzboehmer's 2002 Topaz 6MT Coupe

Collapse
X
 
  • Filter
  • Time
  • Show
Clear All
new posts

    #31
    Two minor changes today, both shamelessly stolen from Tbonem3's journal.

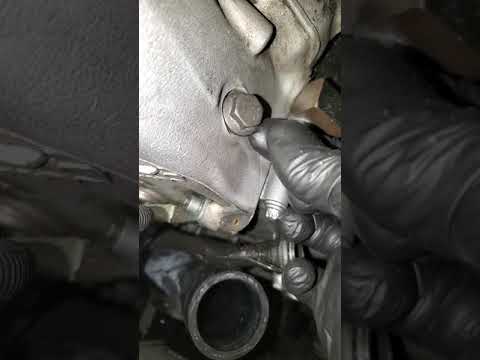
    Engine oil filler cap was leaking slightly, so I replaced it with the early model version.

    Before
    Click image for larger version

Name:	20200702_230615.jpg
Views:	1164
Size:	90.0 KB
ID:	39714

    After
    Click image for larger version

Name:	20200702_230712.jpg
Views:	1133
Size:	87.5 KB
ID:	39715

    Unfortunately the new cap I ordered got slightly scratched during shipping. The damage is minor though so I'll just leave it for now. If it starts bothering me too much I'll just get a new one (for free) from FCP.

    Also, after switching from the stock shifter to an AutoSolutions SSK, shifting started to feel a bit too notchy. Read on some thread that this might be caused by the ZHP knob being too short, so I swapped it out for part number 25117896884. Pretty similar to the stock knob, but weighted and with no boot attached. Shifts felt significantly better when sitting stationary in the garage. We'll see how they feel when actually driving the car.

    Before
    Click image for larger version

Name:	20200702_230853.jpg
Views:	1121
Size:	56.0 KB
ID:	39716

    After
    Click image for larger version

Name:	20200702_231026.jpg
Views:	1100
Size:	53.9 KB
ID:	39717
    2002 Topasblau M3 - Coupe - 6MT - Karbonius CSL Airbox - MSS54HP Conversion - Kassel MAP - SSV1 - HJS - PCS Tune - Beisan - MK60 Swap - ZCP Rack - Nogaros - AutoSolutions - 996 Brembos - Slon - CMP - VinceBar - Koni - Eibach - BlueBus - Journal

    2012 Alpinweiss 128i - Coupe - 6AT - Slicktop - Manual Seats - Daily - Journal

    Comment


      #32
      Some more small things today.

      Installed some VW grocery bag hooks in my trunk to keep things from rolling around in there. Debated about position for a bit, but they ended up in the only place that made sense in my eyes, next to the fold down seat latches:

      Click image for larger version  Name:	20200722_202435.jpg Views:	0 Size:	139.8 KB ID:	44975
      Click image for larger version  Name:	20200722_202321.jpg Views:	0 Size:	78.8 KB ID:	44976

      Just screwed them into the sheet metal with some sheet metal screws. Also filed down the plastic to get them to sit more flush.

      This is how they came from VW:
      Click image for larger version  Name:	20200721_204619.jpg Views:	0 Size:	39.5 KB ID:	44977

      And after filing:
      Click image for larger version  Name:	20200721_204547.jpg Views:	0 Size:	30.4 KB ID:	44978
      Click image for larger version  Name:	20200721_204514.jpg Views:	0 Size:	35.8 KB ID:	44979

      And this is how a bag fits onto the hooks:
      Click image for larger version  Name:	20200722_204131.jpg Views:	0 Size:	142.2 KB ID:	44980
      Also swapped out a couple minor things in the engine bay that had been bugging me.

      Ever since I got the car, the front air duct had been missing two clips (and of the remaining two one was broken).
      Click image for larger version

Name:	20200722_202702.jpg
Views:	1073
Size:	110.8 KB
ID:	44990

      So I swapped those out for four new ones.
      Click image for larger version

Name:	20200722_202954.jpg
Views:	1071
Size:	113.3 KB
ID:	44991
      ​​​​​​
      A while back I had replaced the line that goes from the top radiator hose to the expansion tank, but didn't buy a new hose clamp so I just used one I had laying around.
      Click image for larger version

Name:	20200722_202651.jpg
Views:	1076
Size:	115.8 KB
ID:	44992

      So I swapped it out for the correct part.
      Click image for larger version

Name:	20200722_203413.jpg
Views:	1061
Size:	97.1 KB
ID:	44993
      2002 Topasblau M3 - Coupe - 6MT - Karbonius CSL Airbox - MSS54HP Conversion - Kassel MAP - SSV1 - HJS - PCS Tune - Beisan - MK60 Swap - ZCP Rack - Nogaros - AutoSolutions - 996 Brembos - Slon - CMP - VinceBar - Koni - Eibach - BlueBus - Journal

      2012 Alpinweiss 128i - Coupe - 6AT - Slicktop - Manual Seats - Daily - Journal

      Comment


        #33
        I was messing around with INPA the other day and realized that the passenger occupancy sensor was always reporting the seat as empty. I'm still not sure if an empty seat and a plugged in seat belt will make the airbag go off, but I'd rather not risk someone's life over it. So I coded out the sensor using NCS Expert. This means that now the airbag is set to go off regardless of whether there's someone in the passenger's seat or not. More expensive crashes, less dead passengers.

        After coding out the sensor, I got a light on the dash and a code saying something about that sensor. Turns out the airbag module doesn't like it when it's seeing readings from the sensor but is not expecting them. So I went under the seat to unplug it and found this:

        Click image for larger version

Name:	20200825_103354.jpg
Views:	1039
Size:	137.9 KB
ID:	52295

        The sensor must have failed in the past and someone installed this to get rid of the light. They must have also messed something up because their sketchy homebrew sensor emulator thing was reporting that the seat was empty. Anyway, removed that thing along with the occupancy sensor module and now my car is happy and won't try to kill my passengers.
        2002 Topasblau M3 - Coupe - 6MT - Karbonius CSL Airbox - MSS54HP Conversion - Kassel MAP - SSV1 - HJS - PCS Tune - Beisan - MK60 Swap - ZCP Rack - Nogaros - AutoSolutions - 996 Brembos - Slon - CMP - VinceBar - Koni - Eibach - BlueBus - Journal

        2012 Alpinweiss 128i - Coupe - 6AT - Slicktop - Manual Seats - Daily - Journal

        Comment


          #34
          Ordered an armrest delete center console and long euro tray. However, I completely forgot about the bracket where the back of the new console screws into. Picked up some cheap metal straps (they were $0.01 each lol) and quickly made a temporary bracket. I'll order the real bracket later.

          Click image for larger version  Name:	20200920_210303.jpg Views:	0 Size:	118.9 KB ID:	57704

          What it looks like in the car:
          Click image for larger version  Name:	20200920_210553.jpg Views:	0 Size:	66.8 KB ID:	57705

          With the center console attached:
          Click image for larger version  Name:	20200920_212119.jpg Views:	0 Size:	62.7 KB ID:	57706

          Aaaand of course I mixed up which holes the screws go through. With the way I built the bracket, the ashtray has nowhere to attach to now.
          Click image for larger version  Name:	20200920_212106.jpg Views:	0 Size:	116.0 KB ID:	57707

          Whatever, I just decided to put the screws through both the ashtray and center console for now. I'll fix it when I get the real bracket. Here's what everything looks like now:
          Click image for larger version  Name:	20200923_142812.jpg Views:	0 Size:	87.7 KB ID:	57709
          Click image for larger version  Name:	20200923_142830.jpg Views:	0 Size:	97.0 KB ID:	57710
          Click image for larger version  Name:	20200923_142937.jpg Views:	0 Size:	135.5 KB ID:	57713

          I really like how this looks. Interior cleans up quite a bit without the armrest and no longer do I have to stare at the stupid cupholders that I never used. Only downside is that the brand new parts make the not so brand new parts look a lot worse.

          I am also slowly realizing that I really need to get an actual camera instead of taking pictures with my phone all the time...
          Last edited by heinzboehmer; 09-23-2020, 02:40 PM.
          2002 Topasblau M3 - Coupe - 6MT - Karbonius CSL Airbox - MSS54HP Conversion - Kassel MAP - SSV1 - HJS - PCS Tune - Beisan - MK60 Swap - ZCP Rack - Nogaros - AutoSolutions - 996 Brembos - Slon - CMP - VinceBar - Koni - Eibach - BlueBus - Journal

          2012 Alpinweiss 128i - Coupe - 6AT - Slicktop - Manual Seats - Daily - Journal

          Comment


            #35
            Looks good man!
            Wondering if 330D shifter was off center due to the broken carrier? Planning to do an SMG swap sometime before next summer and was thinking of getting the 330d or the e60 shifter. That’s if I don’t sell my car. (Trying to get something newer)
            06 ZCP SMG | HTE CSL MAP QuaranTune | SL CSL Airbox | Eventuri Scoop | DMG Strut Bar | RE El Diablo | CPI Euro200R | AP Headers | Porsche BBK | ST XTA | TMS 3-Pulleys/F-Sway/Mono FCAB | AKG Trans/diff/Subframe/RTAB | SPL RCA | SGT SCZA Trunk | ACL | Beisan | Redish | AFD E85 |

            Budget CSL MAP Conversion

            Comment


              #36
              Originally posted by COVID-19 View Post
              Looks good man!
              Wondering if 330D shifter was off center due to the broken carrier? Planning to do an SMG swap sometime before next summer and was thinking of getting the 330d or the e60 shifter. That’s if I don’t sell my car. (Trying to get something newer)
              I don't think so. I remember it being like this when I first installed it and the carrier was definitely not broken then.
              2002 Topasblau M3 - Coupe - 6MT - Karbonius CSL Airbox - MSS54HP Conversion - Kassel MAP - SSV1 - HJS - PCS Tune - Beisan - MK60 Swap - ZCP Rack - Nogaros - AutoSolutions - 996 Brembos - Slon - CMP - VinceBar - Koni - Eibach - BlueBus - Journal

              2012 Alpinweiss 128i - Coupe - 6AT - Slicktop - Manual Seats - Daily - Journal

              Comment


                #37
                Changed my water pump out for a genuine BMW. The Geba one I had on there started leaking through the bearing after being on the car for ~15k mi (ridiculous).

                Also used my new Esco jack stands for the first time today. These are significantly better than any other stands I've used before. Definitely worth the money.

                I also discovered this when the water pump was off:


                Stupid bolt was loose again! I don't know if the hole through the head is supposed to be threaded, but mine is:

                Click image for larger version

Name:	20201010_150705.jpg
Views:	933
Size:	203.5 KB
ID:	61293

                The threads on the head don't fit the timing chain guide bolt (a genuine BMW part), so I'm assuming this was done by someone else in the past.

                My theory is that the bolt snagged on those threads and torqued up fine when I first fixed this a couple years ago. Eventually (through heat cycles and having the chain rub on the guide), the bolt got knocked off of the threads in the head and started moving around.

                I also noticed that the bolt would bottom out on the guide before making full contact with the head. Not entirely sure what's going on there, but maybe whoever tapped the head also machined a bit off of the outer surface of the hole? Regardless, I swapped the crush washer for a slightly thicker one, added threadlocker, made sure the bolt didn't snag on the threads in the head, and torqued to spec. With the thicker washer the bolt is now making full contact with the head.

                Annoying, but glad I caught this before it spiralled out of control like last time.
                2002 Topasblau M3 - Coupe - 6MT - Karbonius CSL Airbox - MSS54HP Conversion - Kassel MAP - SSV1 - HJS - PCS Tune - Beisan - MK60 Swap - ZCP Rack - Nogaros - AutoSolutions - 996 Brembos - Slon - CMP - VinceBar - Koni - Eibach - BlueBus - Journal

                2012 Alpinweiss 128i - Coupe - 6AT - Slicktop - Manual Seats - Daily - Journal

                Comment


                  #38
                  Forgot to mention that I also managed to thoroughly spray my right eye with brake cleaner. That sucked.
                  2002 Topasblau M3 - Coupe - 6MT - Karbonius CSL Airbox - MSS54HP Conversion - Kassel MAP - SSV1 - HJS - PCS Tune - Beisan - MK60 Swap - ZCP Rack - Nogaros - AutoSolutions - 996 Brembos - Slon - CMP - VinceBar - Koni - Eibach - BlueBus - Journal

                  2012 Alpinweiss 128i - Coupe - 6AT - Slicktop - Manual Seats - Daily - Journal

                  Comment


                    #39
                    Nice work! Topaz is such a great looking blue.

                    Comment


                      #40
                      Originally posted by 8000RPM View Post
                      Nice work! Topaz is such a great looking blue.
                      Thank you!
                      2002 Topasblau M3 - Coupe - 6MT - Karbonius CSL Airbox - MSS54HP Conversion - Kassel MAP - SSV1 - HJS - PCS Tune - Beisan - MK60 Swap - ZCP Rack - Nogaros - AutoSolutions - 996 Brembos - Slon - CMP - VinceBar - Koni - Eibach - BlueBus - Journal

                      2012 Alpinweiss 128i - Coupe - 6AT - Slicktop - Manual Seats - Daily - Journal

                      Comment


                        #41
                        Big update!

                        About two years ago I did plates on the car and replaced most of the rear suspension bushings. No problems with that, but was still missing topside reinforcement.

                        I've had a Vincebar epoxy kit for almost a year now (along with waaay too many other parts), but didn't really have anywhere to install it. Used to live in an apartment building with a shared garage which disallowed any sort of mechanical work, so that was not an option. Renting a lift would have worked, but would have also been super expensive, as I would have needed it for multiple days. Recently moved to a place with a private garage though, so it was time to get everything on the car.

                        Pic of all the parts that went on the car:

                        Click image for larger version  Name:	20201020_193945~2.jpg Views:	0 Size:	192.2 KB ID:	68047

                        Even though I do have a private garage now, it's not exactly the biggest thing in the world. It's fine lengthwise, but is quite tight on the sides. Regardless, with the car centered widthwise and pushed all the way forward all of this work was doable. Definitely cramped (especially with the suspension stuff), but that's what I get for choosing to live in the city. Here's how I set the car up:

                        Click image for larger version  Name:	20201021_184849.jpg Views:	0 Size:	89.6 KB ID:	68048

                        And with the subframe out:

                        Click image for larger version  Name:	20201023_213522.jpg Views:	0 Size:	98.9 KB ID:	68049

                        Got to work on cutting everything out for the Vincebar. I first drilled up through the subframe mounts with the supplied drill bit. This allowed me to see where the bar would sit and mark out the outline for the cut:

                        Click image for larger version  Name:	20201025_163755.jpg Views:	0 Size:	137.2 KB ID:	68051
                        Click image for larger version  Name:	20201025_170118.jpg Views:	0 Size:	153.0 KB ID:	68052

                        I bought that small battery-powered dremel in hopes that it would help getting into the tighter spaces around the chassis rails. The thing works fine, but it's got this super annoying anti-stall feature where it will stop the motor and require you to turn it off and on if it senses that the tool might stall. Not intrusive when the battery is at 100%, but as soon as it gets a bit low, the tools cuts out constantly. Ended up cutting almost everything out with a cutoff wheel on an angle grinder.

                        I decided to cut rather close to the contour of the bar because I wouldn't have to worry about hitting the sheet metal below/behind the trunk floor. Not sure if this path would work with the simplified Vincebar, but since I've got the stealth version, it worked out fine. Masked everything off (definitely a bit overkill with the cardboard, but I really wanted to avoid messing up my interior) and got to cutting:

                        Click image for larger version  Name:	20201027_181832.jpg Views:	0 Size:	82.5 KB ID:	68053
                        Click image for larger version  Name:	20201029_190341.jpg Views:	0 Size:	198.4 KB ID:	68054
                        Click image for larger version  Name:	20201029_190303.jpg Views:	0 Size:	199.7 KB ID:	68055
                        Click image for larger version  Name:	20201029_190326.jpg Views:	0 Size:	177.3 KB ID:	68056

                        I ended up not following the line I made exactly because I realized that the front didn't need as much clearance as I had originally thought.

                        Dry fitted the bar next. Wasn't entirely sure what to do with the little sheet metal ledge on the rear of the bar (pointing towards the front of the car) and could not find any information or pictures about this anywhere. Reached out to timmo and decided to tuck it in between the two layers of sheet metal on the car. Had to pry up the top layer slightly to get the bar to fit easily, but everything lined up great after that.

                        Click image for larger version  Name:	20201029_190406.jpg Views:	0 Size:	184.9 KB ID:	68057

                        I wrapped a strong Neodymium in a plastic bag (to make clean up easier) and placed it in the path of any chips that were flying off the cutting tools. It helped reduce the mess greatly. Here's what it looked like after all the cutting. Pretty cool that the shavings line up to take the shape of the magnetic field:

                        Click image for larger version  Name:	20201031_151911.jpg Views:	0 Size:	85.7 KB ID:	68058

                        Next were the front mounts. Made myself a little dust cave with a plastic drop cloth because I was paranoid of messing up my interior.

                        Click image for larger version  Name:	20201028_190122.jpg Views:	0 Size:	94.3 KB ID:	68059

                        Drilled up through the mounts to get a guide hole for the hole saw, cut out the hole and filed/dremeled the edges until the gusset cups fit, wire wheeled the sound deadening, ground down the spot welds on the bottom, contoured the plates to the panel with a hammer and drilled all the holes for the rivets. Fortunately found no cracks in the welds, so didn't have to deal with that.

                        Click image for larger version  Name:	20201030_172638.jpg Views:	0 Size:	277.9 KB ID:	68060

                        Click image for larger version  Name:	20201030_172656.jpg Views:	0 Size:	238.9 KB ID:	68061
                        Click image for larger version  Name:	20201030_183254.jpg Views:	0 Size:	245.8 KB ID:	68062
                        Click image for larger version  Name:	20201030_193443.jpg Views:	0 Size:	156.4 KB ID:	68063
                        Click image for larger version  Name:	20201030_181827.jpg Views:	0 Size:	246.8 KB ID:	68064
                        Click image for larger version  Name:	20201030_183147.jpg Views:	0 Size:	199.6 KB ID:	68065
                        Click image for larger version  Name:	20201030_193422.jpg Views:	0 Size:	208.1 KB ID:	68066

                        Next came the epoxy prep. Wire wheeled and scuffed all the surfaces that were being epoxied and then applied some POR-15 metal prep onto them. Decided to epoxy the bottom of the bar to the reinforcement plates (the ones that go above the T shaped welds) right under where the bolts go, so I took off the powder coat and prepped that area as well.

                        Click image for larger version  Name:	20201031_160951.jpg Views:	0 Size:	107.6 KB ID:	68067
                        Click image for larger version  Name:	20201031_161011.jpg Views:	0 Size:	100.0 KB ID:	68068

                        Guess I forgot to take pictures of the rear mount prep, but I basically laid everything in dry, bolted it down and drilled all the rivet holes. Was super careful on the passenger's side chassis rail since there's a fuel line that runs through there. I measured how far I wanted to drill and the put a combination of sockets and nuts around the drill bit to physically stop it from going any further than I wanted it to. As far as rivet placement, the longer ones go towards the rear of the car and the shorter ones go in the holes closer to the front of the car (because of the fuel line). With all the holes drilled and the metal prepped, I applied the epoxy to all the surfaces that needed it.

                        Click image for larger version  Name:	20201031_173315.jpg Views:	0 Size:	132.9 KB ID:	68069
                        Click image for larger version  Name:	20201031_173407.jpg Views:	0 Size:	150.9 KB ID:	68070

                        Thought it wasn't enough so I added a second layer.

                        Click image for larger version  Name:	20201031_173555.jpg Views:	0 Size:	135.7 KB ID:	68071
                        Click image for larger version  Name:	20201031_173636.jpg Views:	0 Size:	131.4 KB ID:	68072

                        Then placed and riveted everything in. Used a regular hand riveter (non-hydraulic) and while some of the bigger rivets were definitely hard to break off, it wasn't that big of a problem.

                        Click image for larger version  Name:	20201031_223904.jpg Views:	0 Size:	155.1 KB ID:	68073
                        Click image for larger version  Name:	20201031_223737.jpg Views:	0 Size:	162.2 KB ID:	68074
                        Click image for larger version  Name:	20201031_223743.jpg Views:	0 Size:	167.5 KB ID:	68075
                        Click image for larger version  Name:	20201031_223813.jpg Views:	0 Size:	130.3 KB ID:	68076

                        Left it curing for about five hours and then went in to crack the bolts loose. Retightened them immediately after, but I just wanted to make sure that they didn't get epoxied as well. Left everything to cure for a couple days while I did everything else I was going to do.

                        I used Araldite 2014 A/B epoxy and applied it at an ambient temp of around 20C. Referred to the adhesive's datasheet to get the curing times, as well as the thickness I should be aiming for with everything riveted in: http://www.adhesivehelp.com/productd...sman-a2014.pdf

                        Left it to cure for about two days before going in and applying a layer of POR-15 on every bit of exposed metal I could see. Still have to work on fabricating the cover for the bar and painting everything to match (including all the scuffed up surfaces on the chassis rails in the trunk and such).

                        Click image for larger version  Name:	20201115_195149.jpg Views:	0 Size:	137.4 KB ID:	68077
                        2002 Topasblau M3 - Coupe - 6MT - Karbonius CSL Airbox - MSS54HP Conversion - Kassel MAP - SSV1 - HJS - PCS Tune - Beisan - MK60 Swap - ZCP Rack - Nogaros - AutoSolutions - 996 Brembos - Slon - CMP - VinceBar - Koni - Eibach - BlueBus - Journal

                        2012 Alpinweiss 128i - Coupe - 6AT - Slicktop - Manual Seats - Daily - Journal

                        Comment


                          #42
                          Took the opportunity to replace/clean up everything I could. Replaced any rusty bolts/nuts I saw and POR-15'd any surface rust on the bigger components (diff, subframe, RTAs, etc).

                          Went with all OE stuff except for CMP solid subframe bushings and monoball RTABs. I also kept the poly bushings in my rear diff cover mostly because I forgot to get a new one. The RTABs were an absolute pain to get in. I could not stop them from snagging on the sides of the arm and going in crooked. Ended up deciding to remove a little material to get them to press in easier. Removed 0.1mm from the diameter fo one and 0.2 mm from the diameter of the other and they pressed in without issues.

                          I can now proudly say I've replaced every single bushing on this car myself (some more than once).

                          Also installed Koni yellows and all new hardware on all four corners. Just went on RealOEM and ordered everything in the diagram. The only thing I haven't replaced is the springs. Still debating on whether I want to lower the car moderately (Dinan springs probably) or simple get camber arms to get the rear camber to go to what I want. My car will only go into my garage backwards or else it will scrape. Even backwards the front is only 35mm from the street (again totally my fault for living in the city lol).

                          Click image for larger version  Name:	20201116_184616.jpg Views:	0 Size:	106.0 KB ID:	68089

                          Have to do some math and some thinking before I decide what I want to do with the ride height of the car.

                          Also finally fixed my front diff mount issue permanently (I hope).

                          When I did plates on my car, I stripped the front diff bolt putting it back in the car (I like to tell myself it was already loose and was rattling around so it wasn't really my fault). Bought a timesert kit and fixed it that way. Worked fine for a while but the inserts would keep backing out. I'd be changing them once every six months or so.

                          The mount in the diff was absolutely destroyed. The front bolt was almost hand tight when I got it out of the diff:

                          Click image for larger version  Name:	20201102_192625.jpg Views:	0 Size:	139.8 KB ID:	68095

                          Not sure if I messed up the timesert install (quite likely since I did everything without a drill press) or if the insert just wasn't strong enough and gave up.

                          The old destroyed hole measured in at 17mm at its widest point, so the smallest bolt I could get in there was an M20. Decided on an M20x2.5 which makes the stock bolt look like a toy lol:

                          Click image for larger version  Name:	20201106_180012.jpg Views:	0 Size:	224.8 KB ID:	68096

                          ​​​​​​Drilled and tapped the diff and bought a new diff bushing to drill for the M20 bolt:

                          Click image for larger version  Name:	20201107_181428.jpg Views:	0 Size:	107.3 KB ID:	68097
                          Click image for larger version  Name:	20201107_181342.jpg Views:	0 Size:	93.5 KB ID:	68098
                          Click image for larger version  Name:	20201107_181601.jpg Views:	0 Size:	70.3 KB ID:	68099
                          Torqued the bolt to 285 Nm (that sucked) to achieve the same clamping force as the original bolt. Hoping this fix lasts forever.

                          Also got my happybuyitnow 1x1 CSL replica diffuser in the mail while in the middle of all this so I installed that as well. Packaging was a bit lacking (especially considering it came from Taiwan), but luckily it arrived perfect.

                          Click image for larger version  Name:	20201028_162227.jpg Views:	0 Size:	115.3 KB ID:	68090
                          Click image for larger version  Name:	original_ef2fa923-dc8b-4bcc-9f89-b6e422c822d7_20201028_162724.jpg Views:	0 Size:	110.0 KB ID:	68091

                          Weave definitely isn't perfect, but I'm extremely pleased with how it looks. Even more so considering I paid ~$300 painted and shipped. Fitment was also great. Still have to mess around with the metal tabs a bit to have it sit more flush at the top, but that's definitely an install error and not a manufacturing one.

                          And here's the car after three and a half weeks of being up on stands. Took it out for some gas right after finishing everything since the gas station was only a couple blocks away. Absolutely disgusting (except for the brand new diffuser) and with positive camber (I didn't even try to get the alignment correct lol) in the rear, but it's back on the road!

                          Click image for larger version  Name:	20201115_222035.jpg Views:	0 Size:	128.2 KB ID:	68092
                          Click image for larger version  Name:	20201115_222023.jpg Views:	0 Size:	122.4 KB ID:	68093

                          Next up is an alignment and a wash, then I can do a thorough shakedown of all the new stuff in the canyons.
                          Last edited by heinzboehmer; 11-17-2020, 01:03 PM.
                          2002 Topasblau M3 - Coupe - 6MT - Karbonius CSL Airbox - MSS54HP Conversion - Kassel MAP - SSV1 - HJS - PCS Tune - Beisan - MK60 Swap - ZCP Rack - Nogaros - AutoSolutions - 996 Brembos - Slon - CMP - VinceBar - Koni - Eibach - BlueBus - Journal

                          2012 Alpinweiss 128i - Coupe - 6AT - Slicktop - Manual Seats - Daily - Journal

                          Comment


                            #43
                            Nice work, especially in such a small garage - must be a pretty fun time finding a place to put parts and find tools! Also good call with all the protection you've used, the magnet is smart as well - everytime I look up at my headliner or look through my windshield under glare, I see all the small craters formed by the sparks.

                            Comment


                              #44
                              Originally posted by timmo View Post
                              Nice work, especially in such a small garage - must be a pretty fun time finding a place to put parts and find tools! Also good call with all the protection you've used, the magnet is smart as well - everytime I look up at my headliner or look through my windshield under glare, I see all the small craters formed by the sparks.
                              Fortunately the garage has a room in the back where I was able to fit a workbench, but yeah it's tight!
                              2002 Topasblau M3 - Coupe - 6MT - Karbonius CSL Airbox - MSS54HP Conversion - Kassel MAP - SSV1 - HJS - PCS Tune - Beisan - MK60 Swap - ZCP Rack - Nogaros - AutoSolutions - 996 Brembos - Slon - CMP - VinceBar - Koni - Eibach - BlueBus - Journal

                              2012 Alpinweiss 128i - Coupe - 6AT - Slicktop - Manual Seats - Daily - Journal

                              Comment


                                #45
                                Amazing work, that's the next step for my car too but with the simplified version. I also installed Koni yellows on my car a couple days ago along with all new front bushings and it feels amazing, I'm sure yours will be even more amazing with every bushing being new and a rock solid racp.

                                Comment

                                Working...
                                X