Announcement

Collapse
No announcement yet.

Karter16's Silbergrau E46 M3 Journal

Collapse
X
 
  • Filter
  • Time
  • Show
Clear All
new posts

    #46
    Well with a wife recovering from a major surgery and two small children I haven't had a lot of time to get down to the car, but I did manage to grab a couple of hours today while the smaller of the tiny humans napped.

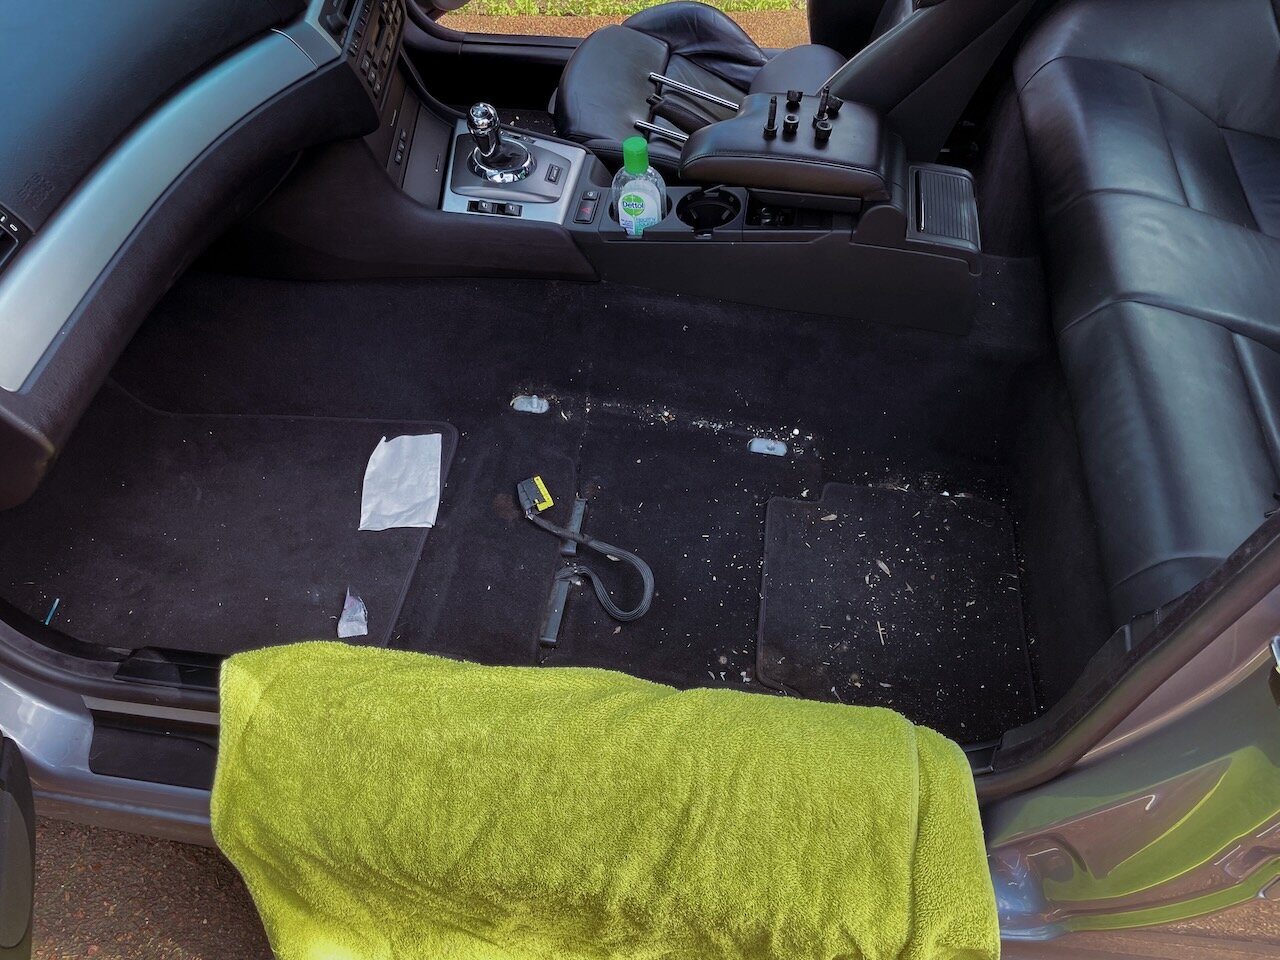
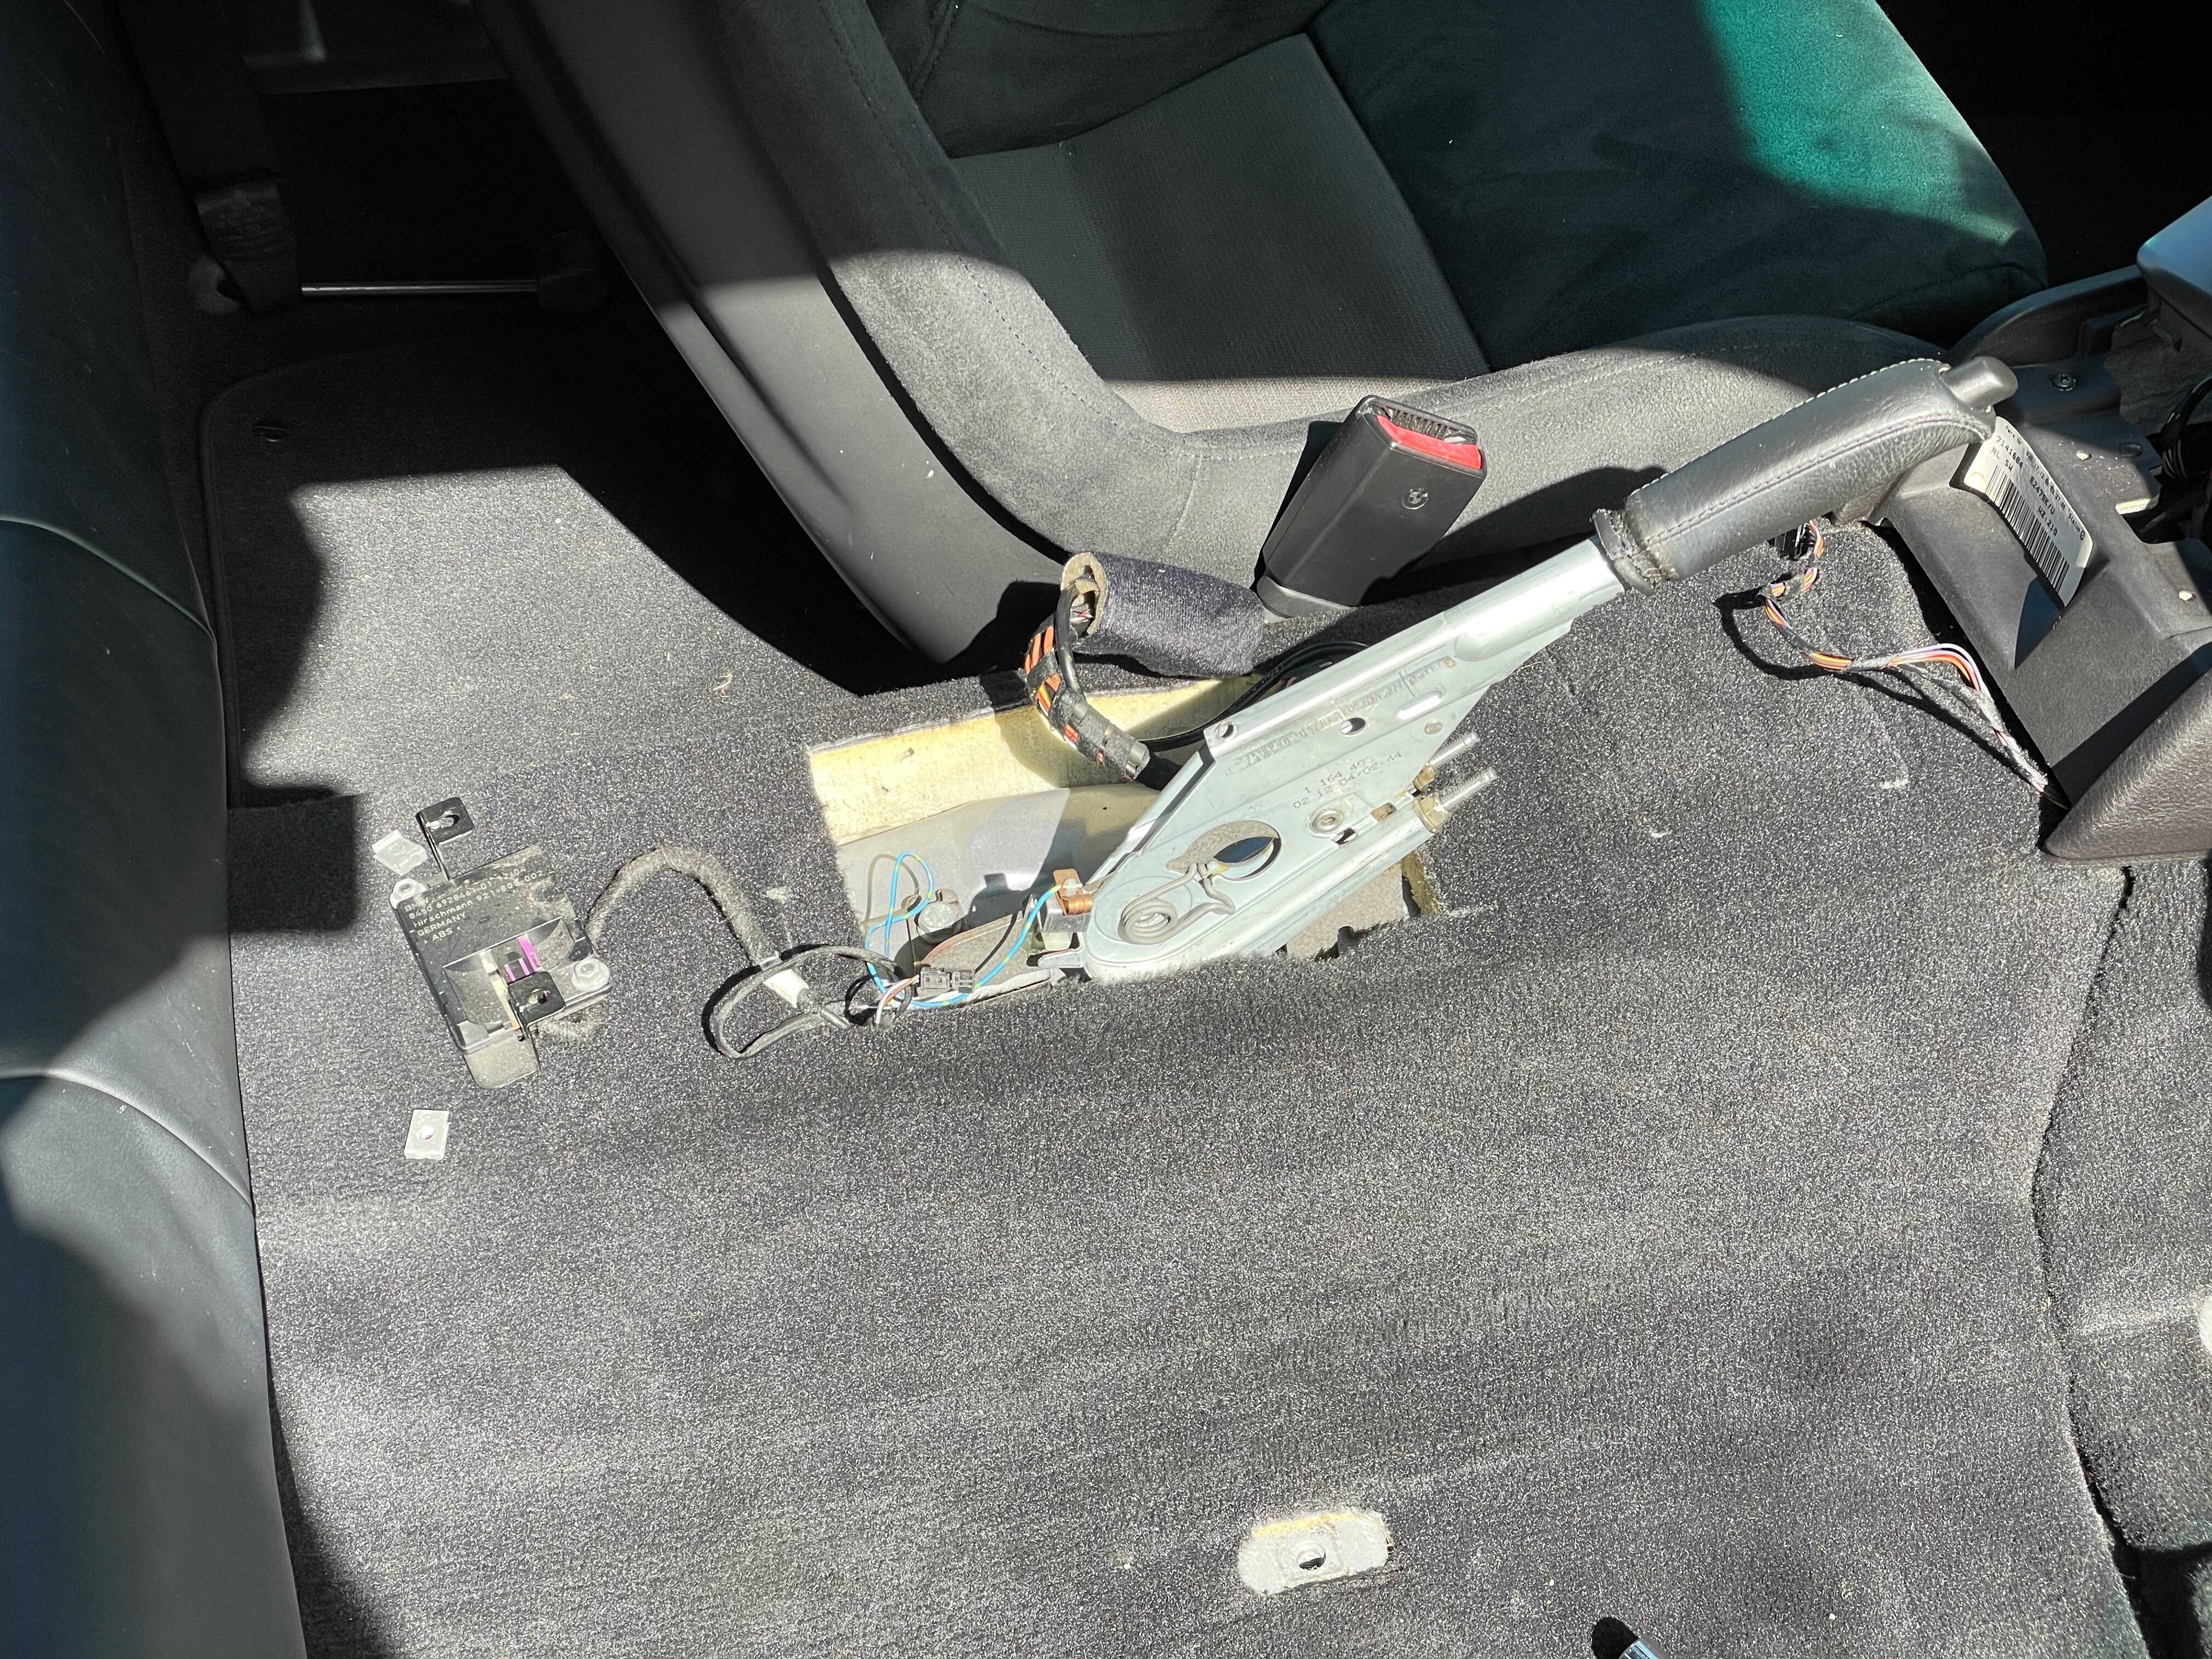
    The sports seats were out in no time (surprisingly easier to manhandle out than various forum posts had led me to believe, they're not THAT heavy and unwieldy), and sadly plainly showing how long it is since I properly cleaned the interior πŸ™ˆ

    IMG_7106.thumb.jpeg.37542400629bb96c8f2ab49771235318.jpeg


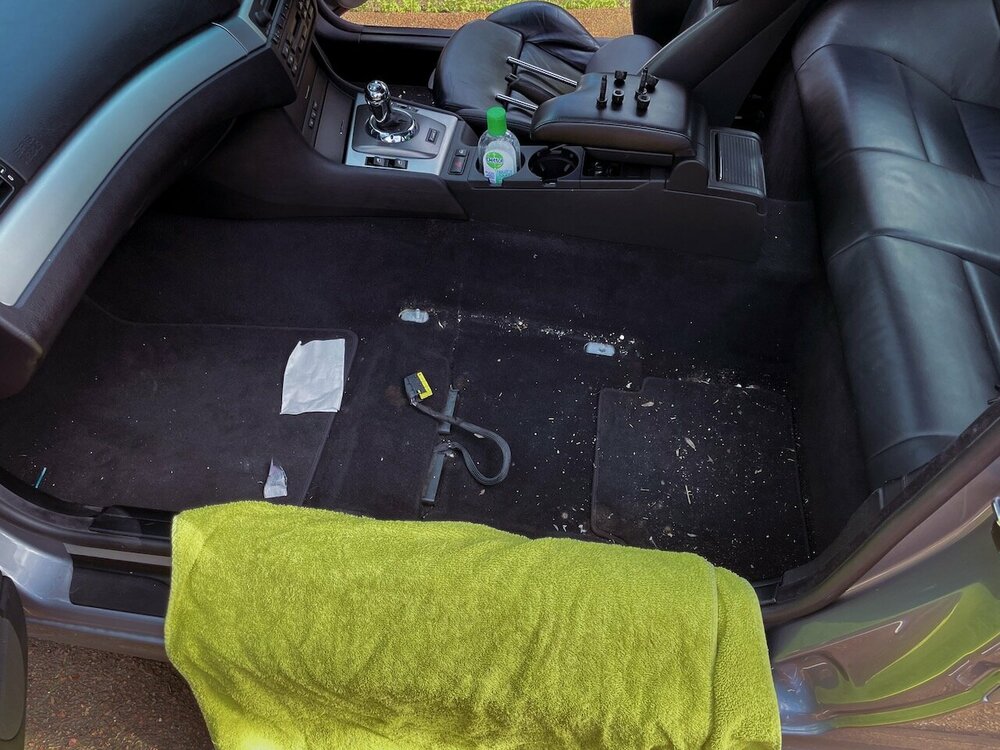
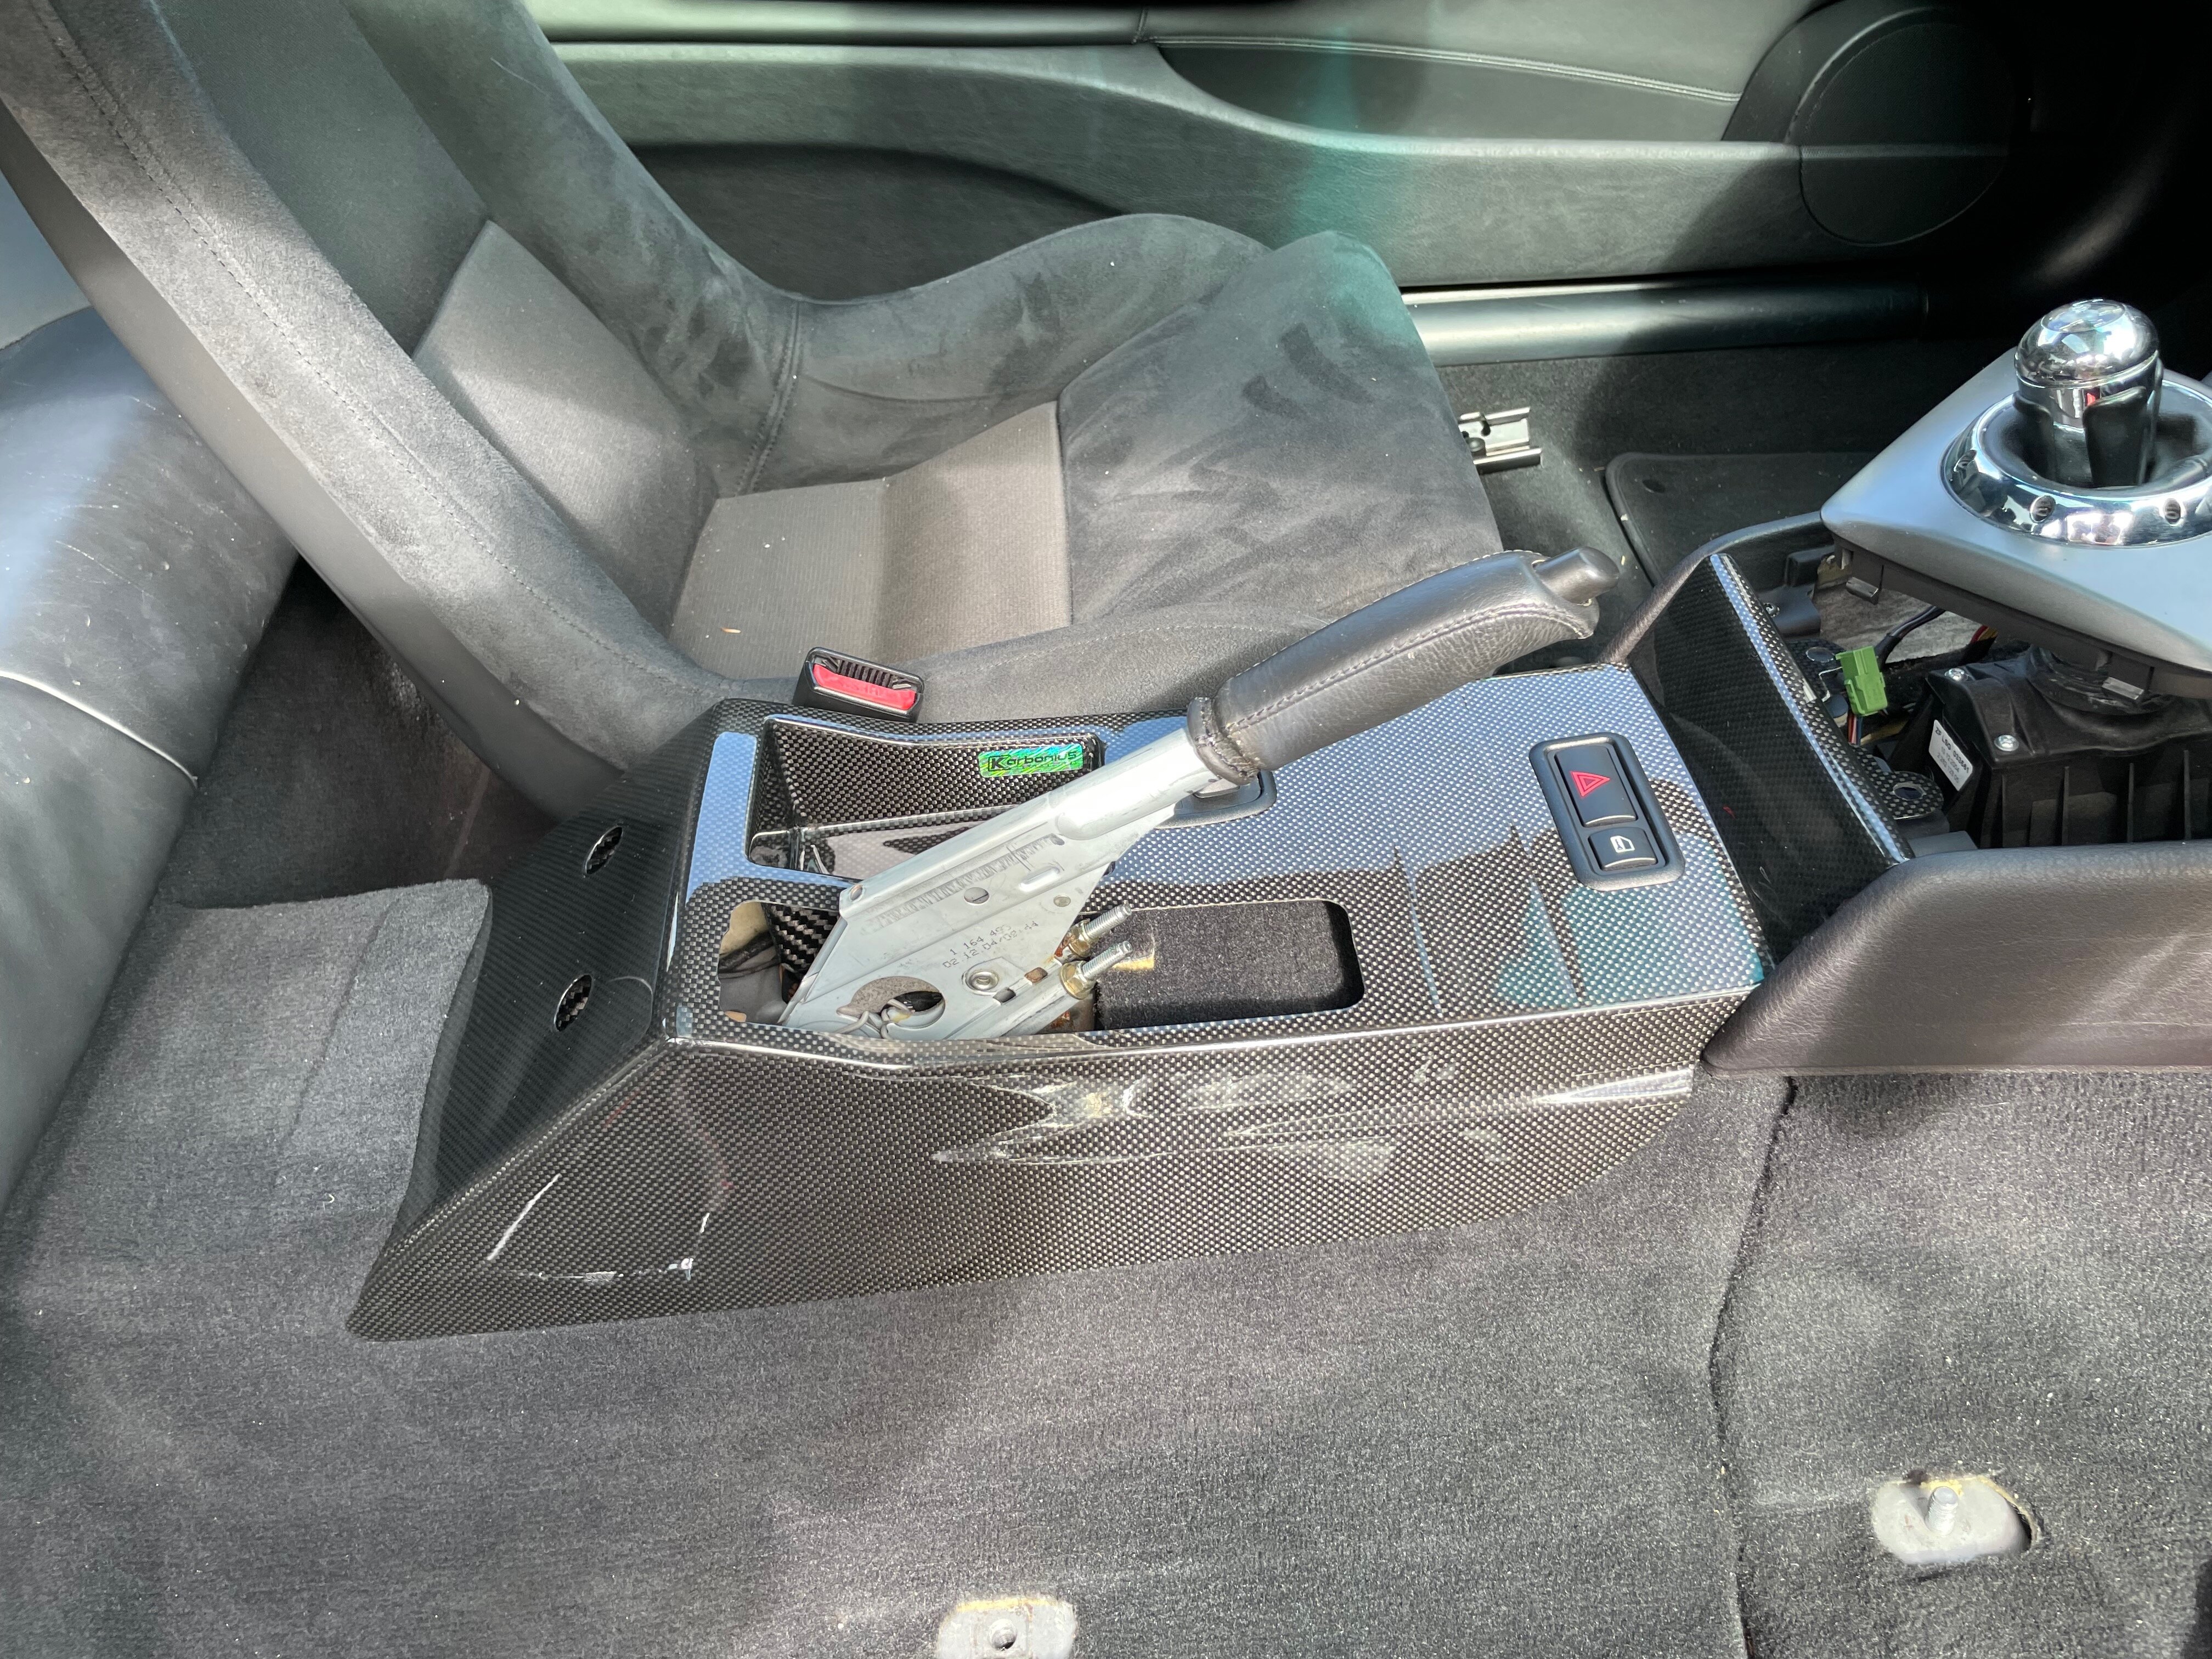
    This finally gave me the opportunity to get the wet vac out and finally clean up the coffee that had presumably been spilt by a previous owner of the car. It looks like it must have spilt on the passenger seat and dripped through to the carpet. (underside of the seat did not show signs of coffee however so πŸ€·β€β™‚οΈ). I did a vacuum and wet vac on the bits that needed it. Just did a fairly quick clean, as still intend to pull everything out and do a deep clean at some point in the future (I was running on limited time today).


    IMG_7109.thumb.jpeg.2681fc35eeac8dd3b01c34845ac3d2eb.jpeg

    That's better!

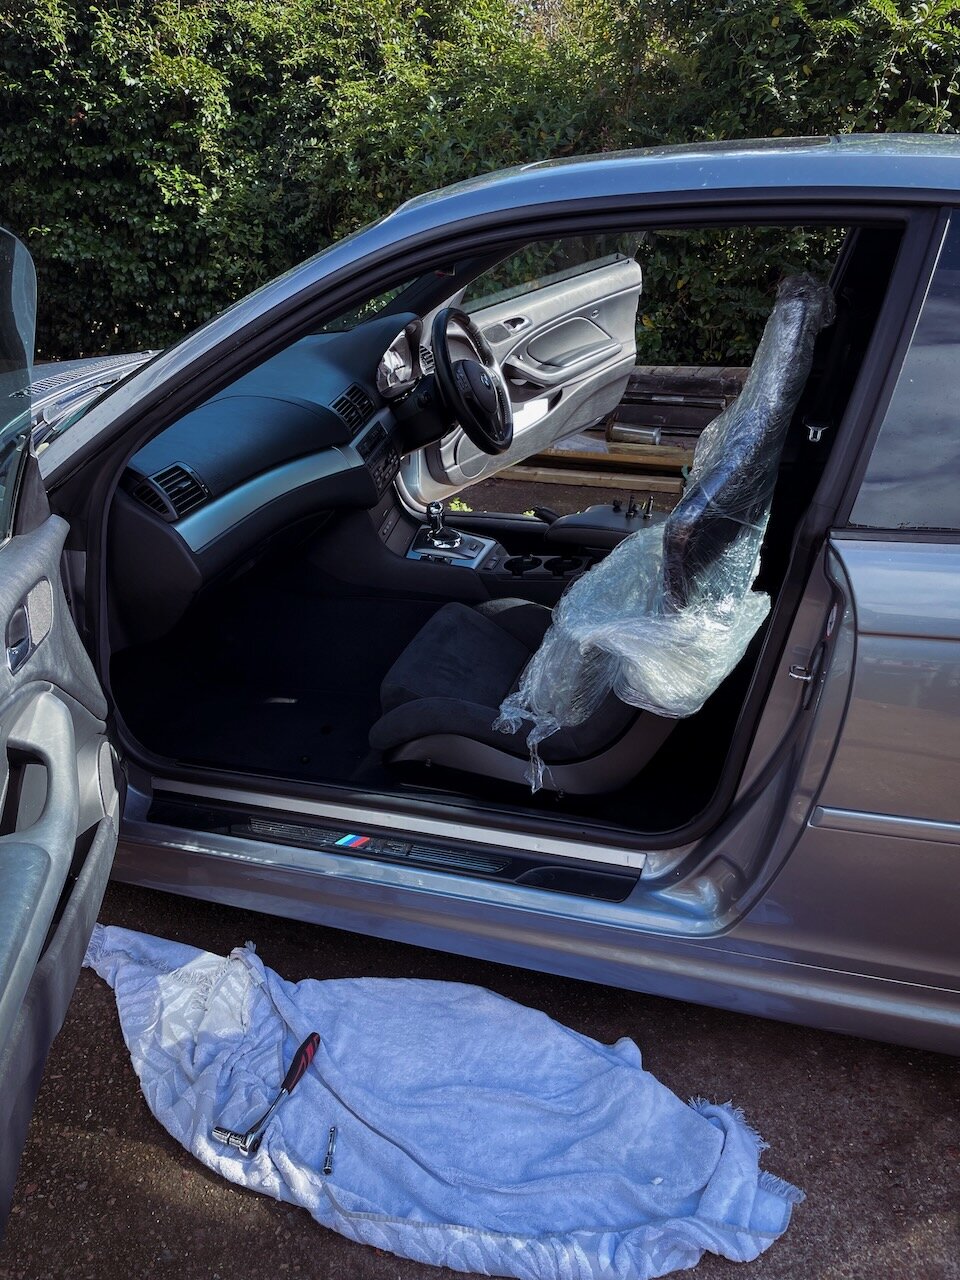
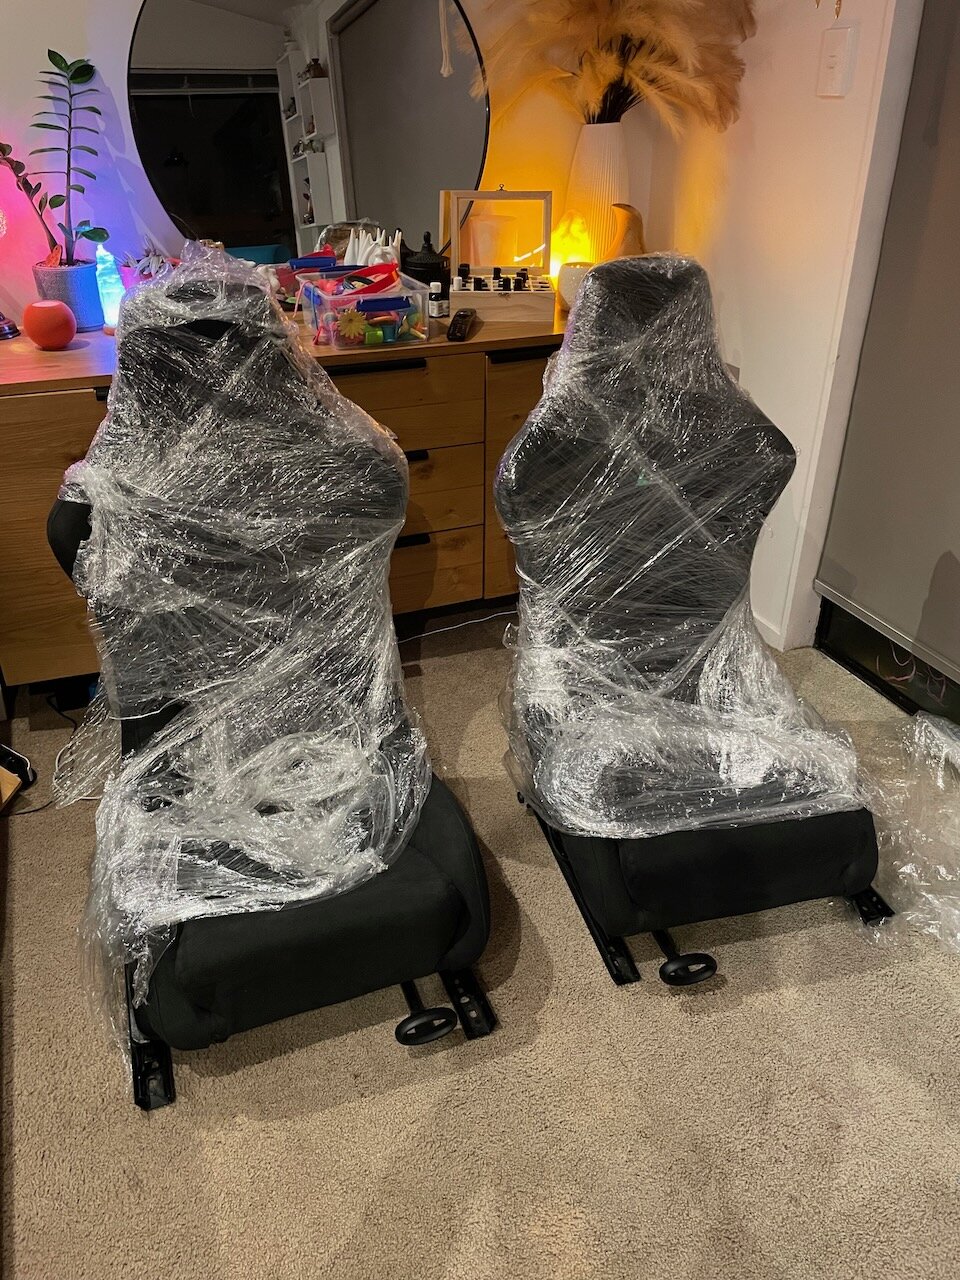
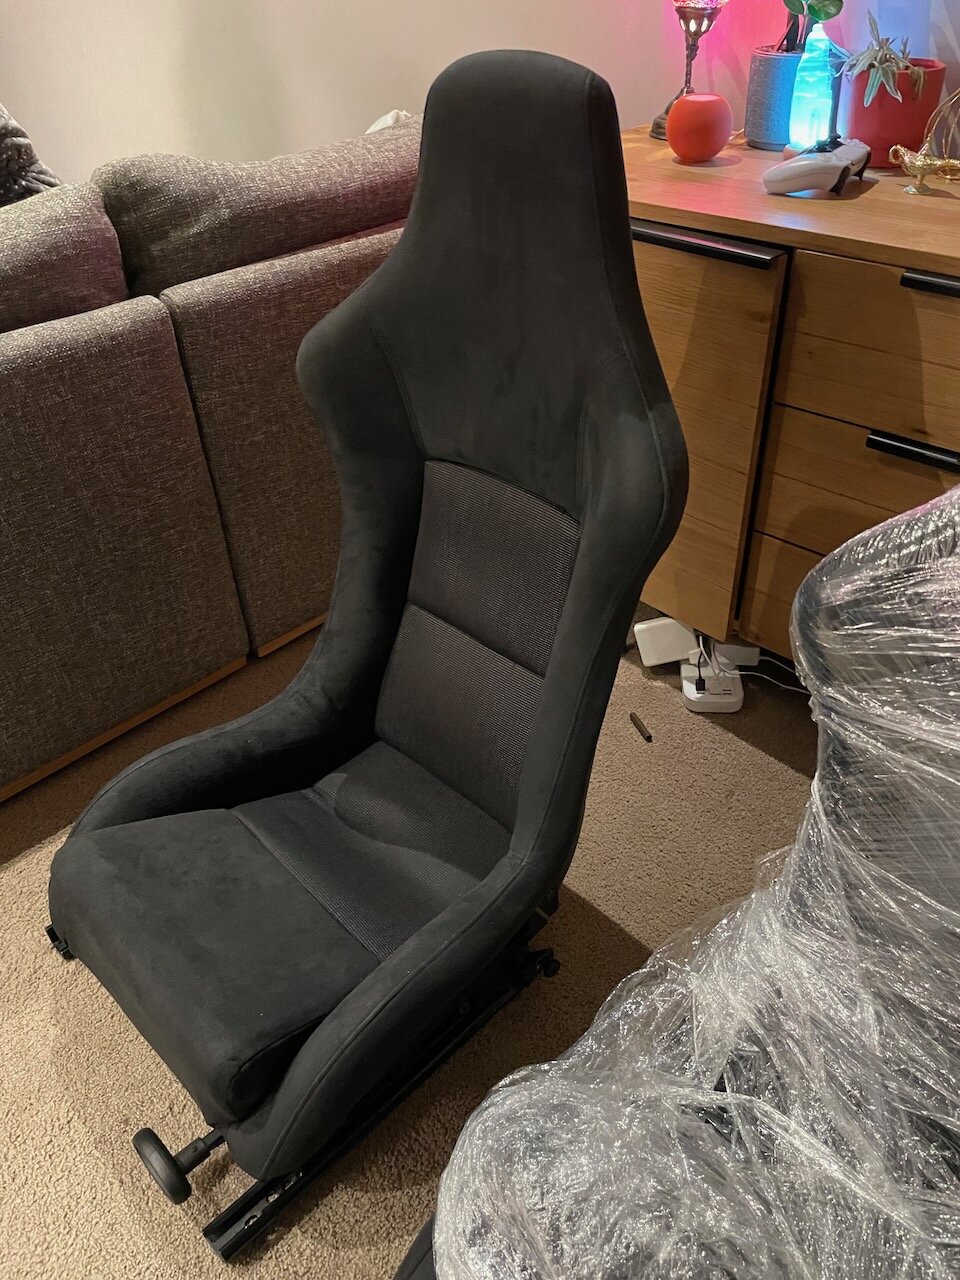
    Then it was time to get the bucket seats into the car. Being significantly lighter this was fairly easy, I used towels etc. round the door to make sure I didn't scratch the seats, but it wasn't really needed as it was easy to fit them through the door and into place.

    IMG_7112.thumb.jpeg.cbe1bf8d7ec5f66137195e25841064ab.jpeg


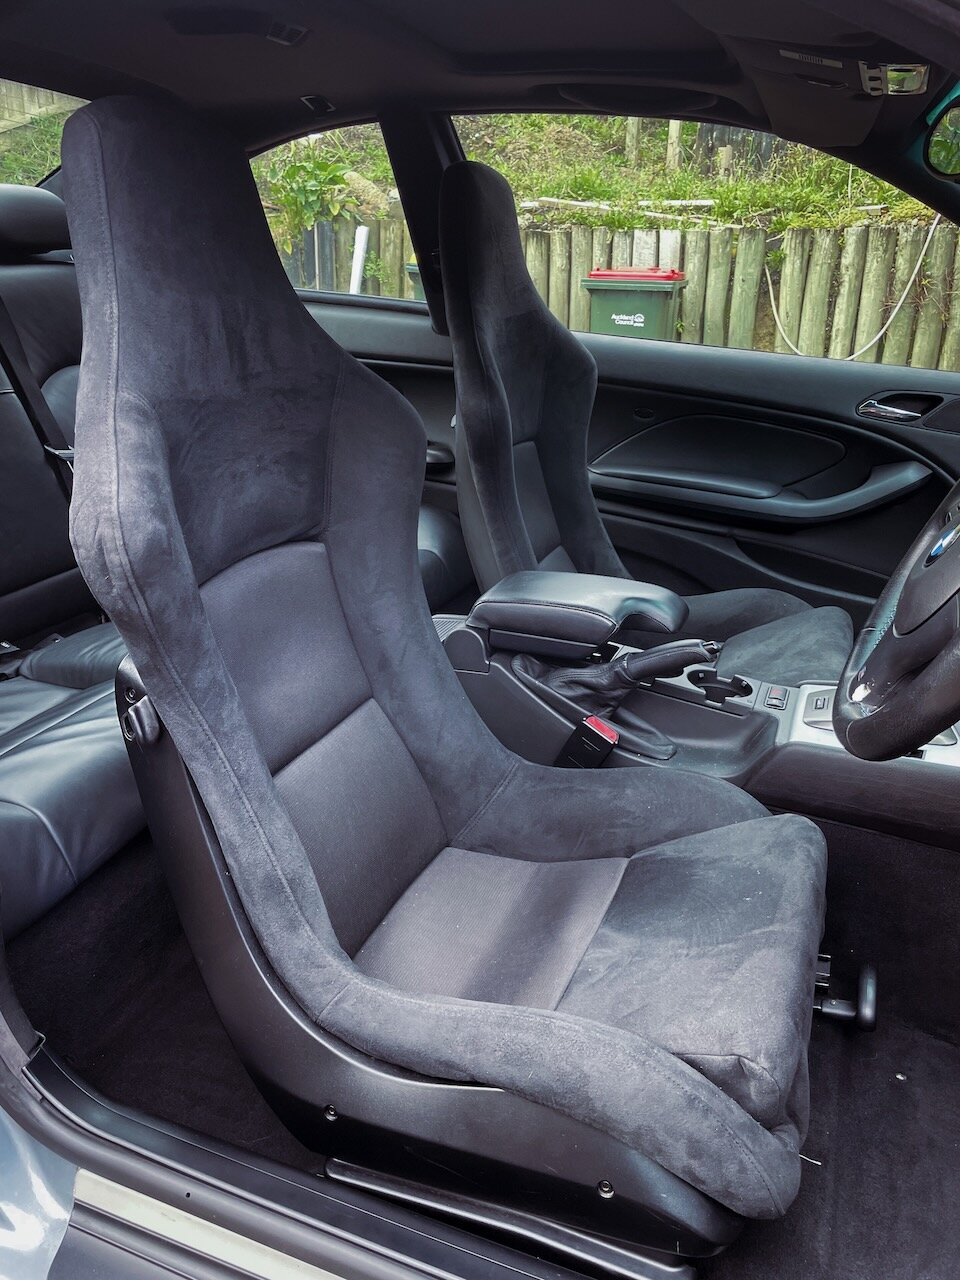
    After connecting the wiring it was on to getting the seat placed properly and torqued down. I followed the advice that M3_Power had given me to make sure you keep sliding the seat back and forwards on the sliders as you tighten it down, to make sure its sliding freely and locking into place correctly with all 4 locking pins when you select a position. That was all pretty straightforward and in short order I had the passenger seat installed.

    IMG_7119.thumb.jpeg.a78ab8f5ca1a74086e3a3e59b42a2809.jpeg


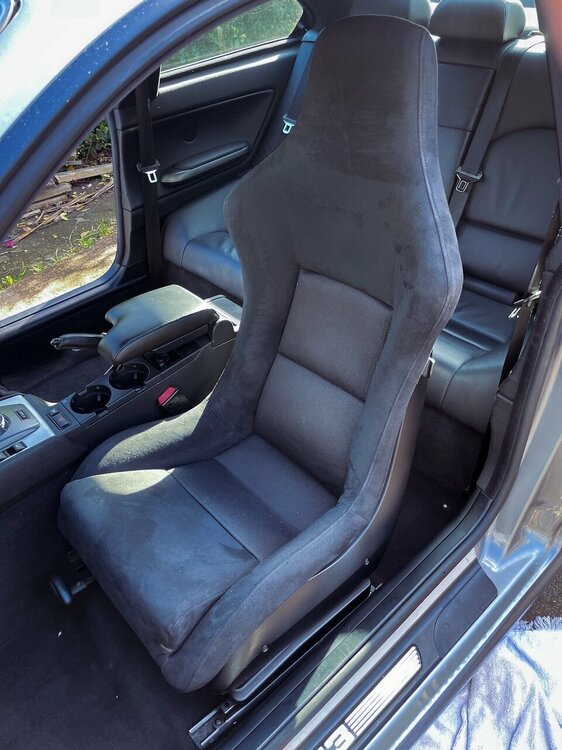
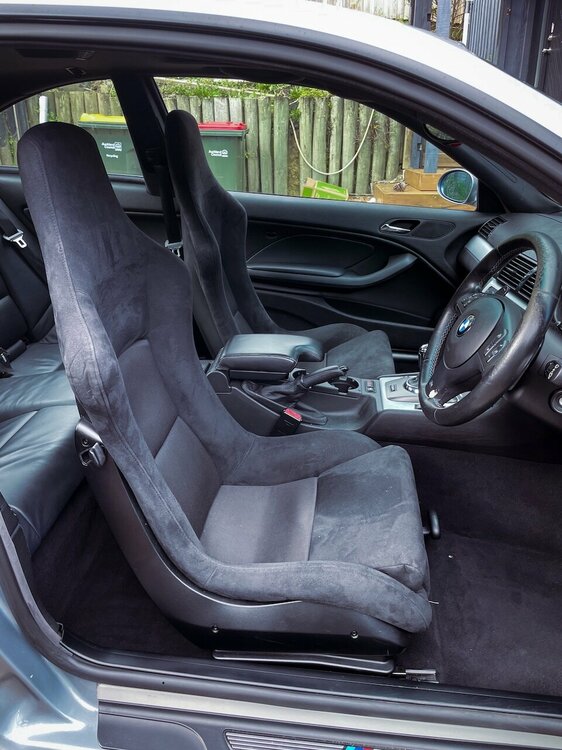
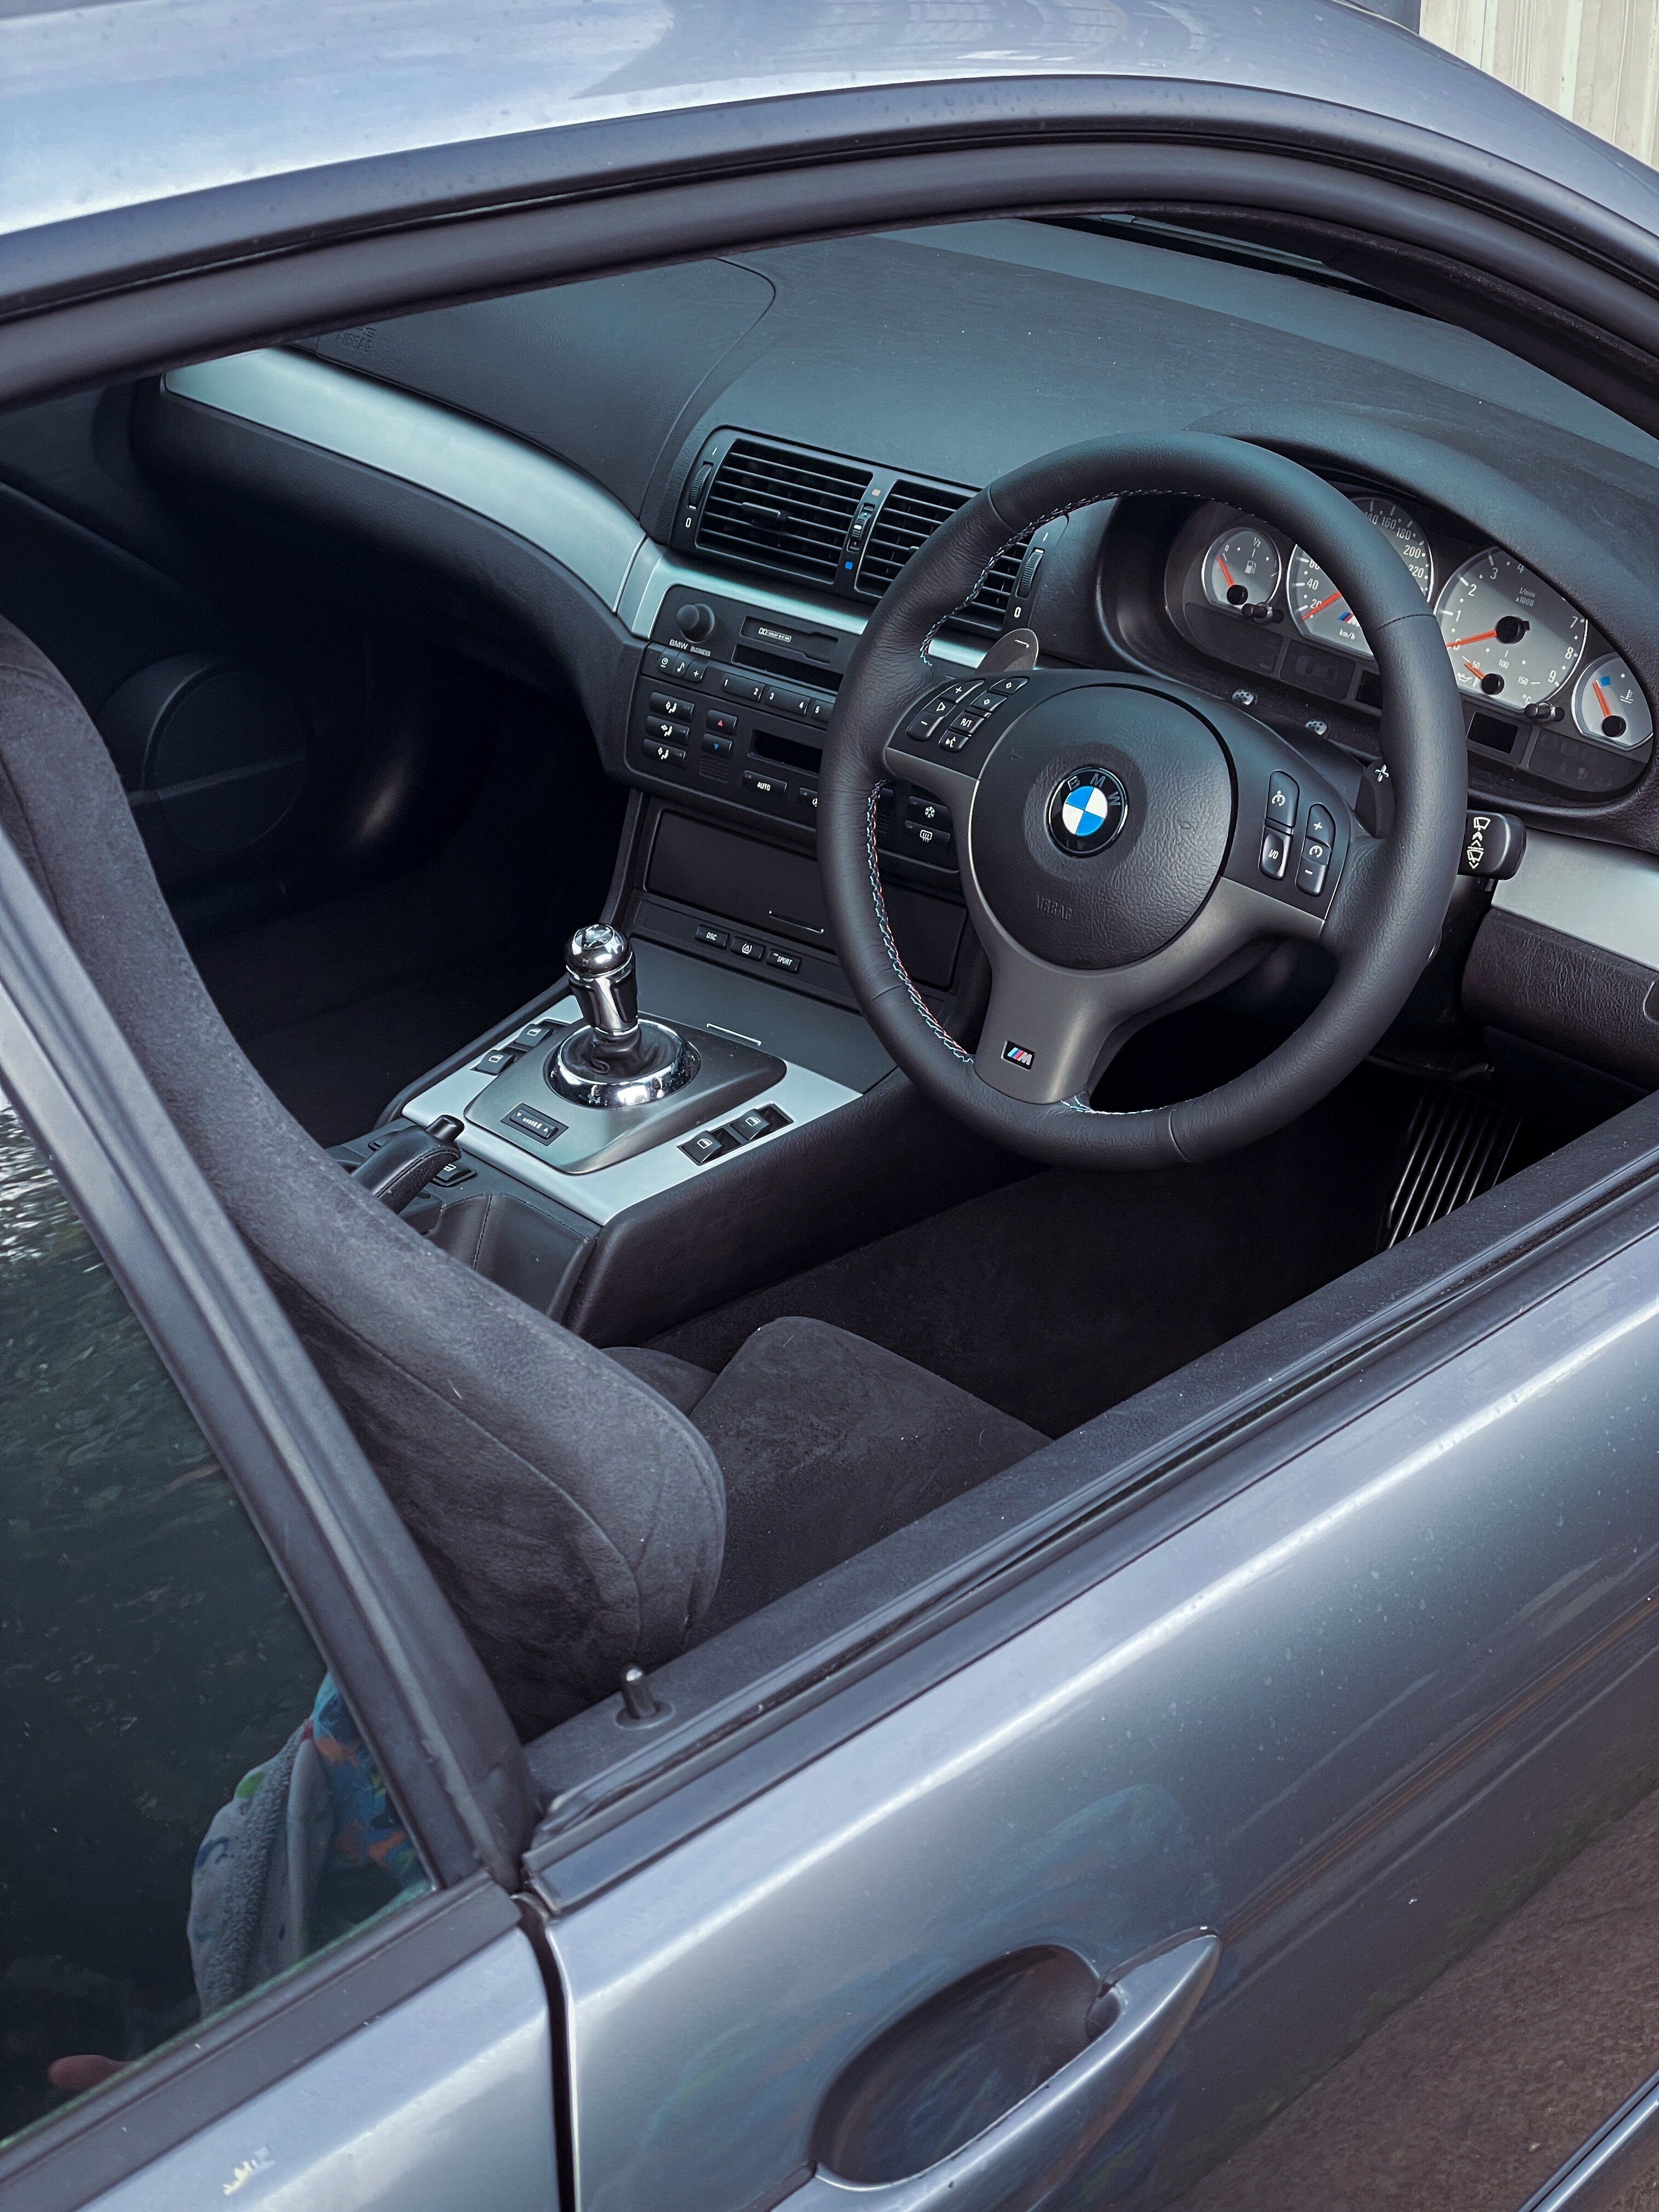
    Then it was on to the driver's side, and again just a case of repeating the process. More straightforward and quicker to do than I was expecting, and THEY LOOK AWESOME!

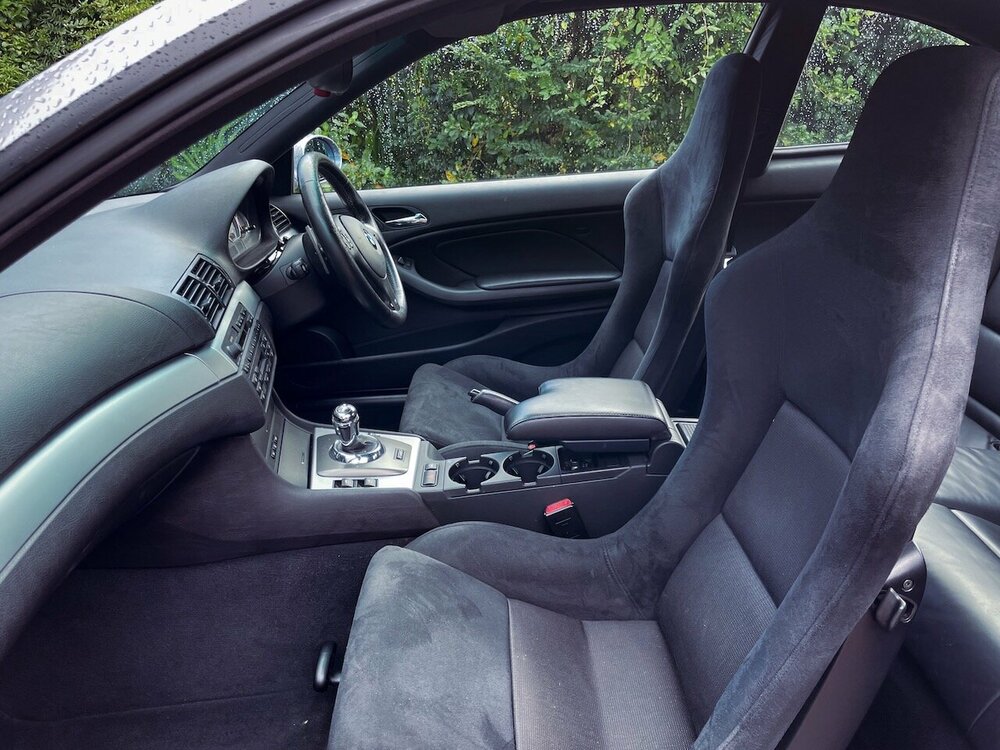
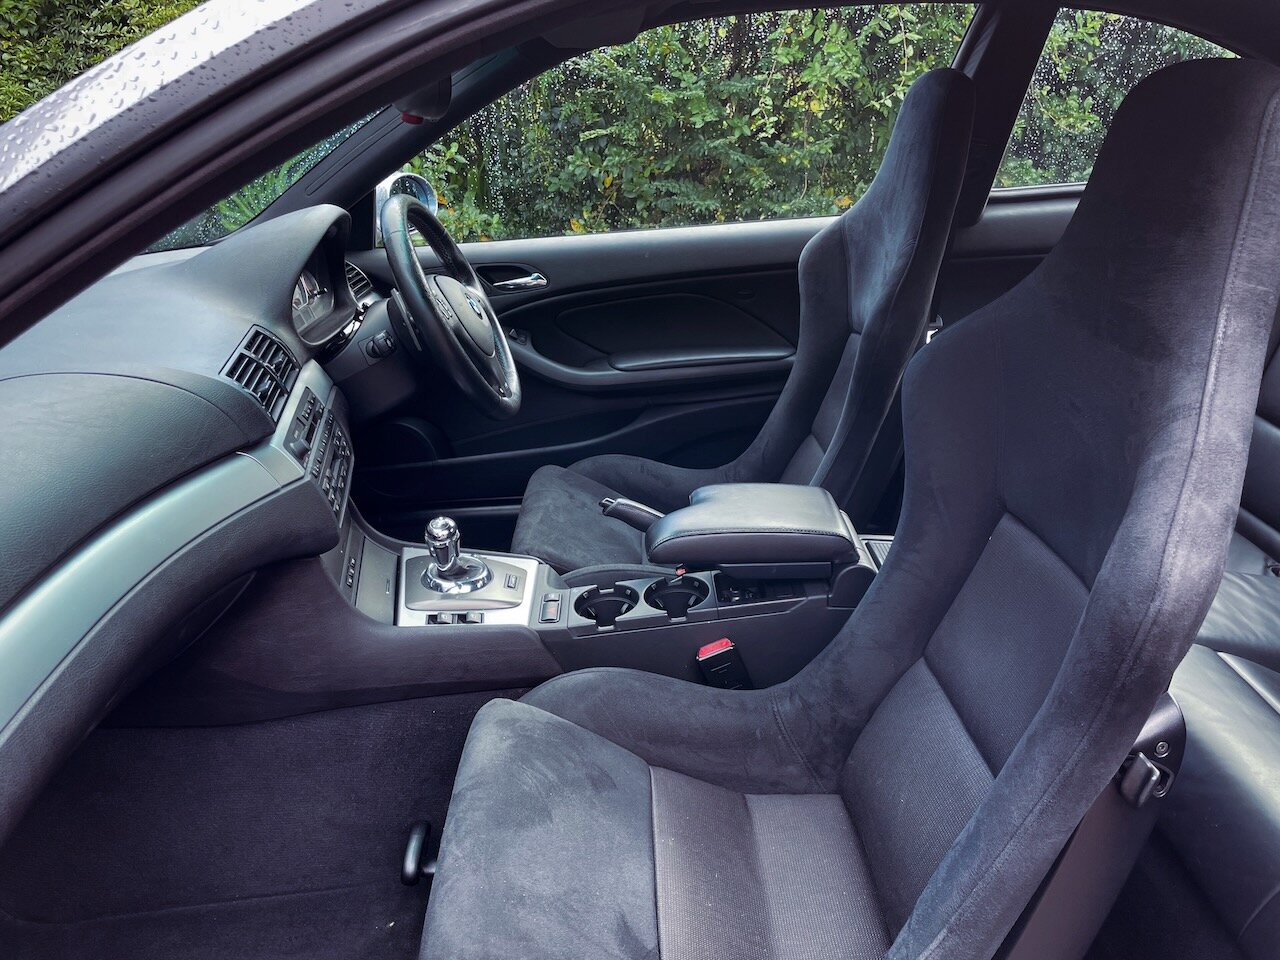
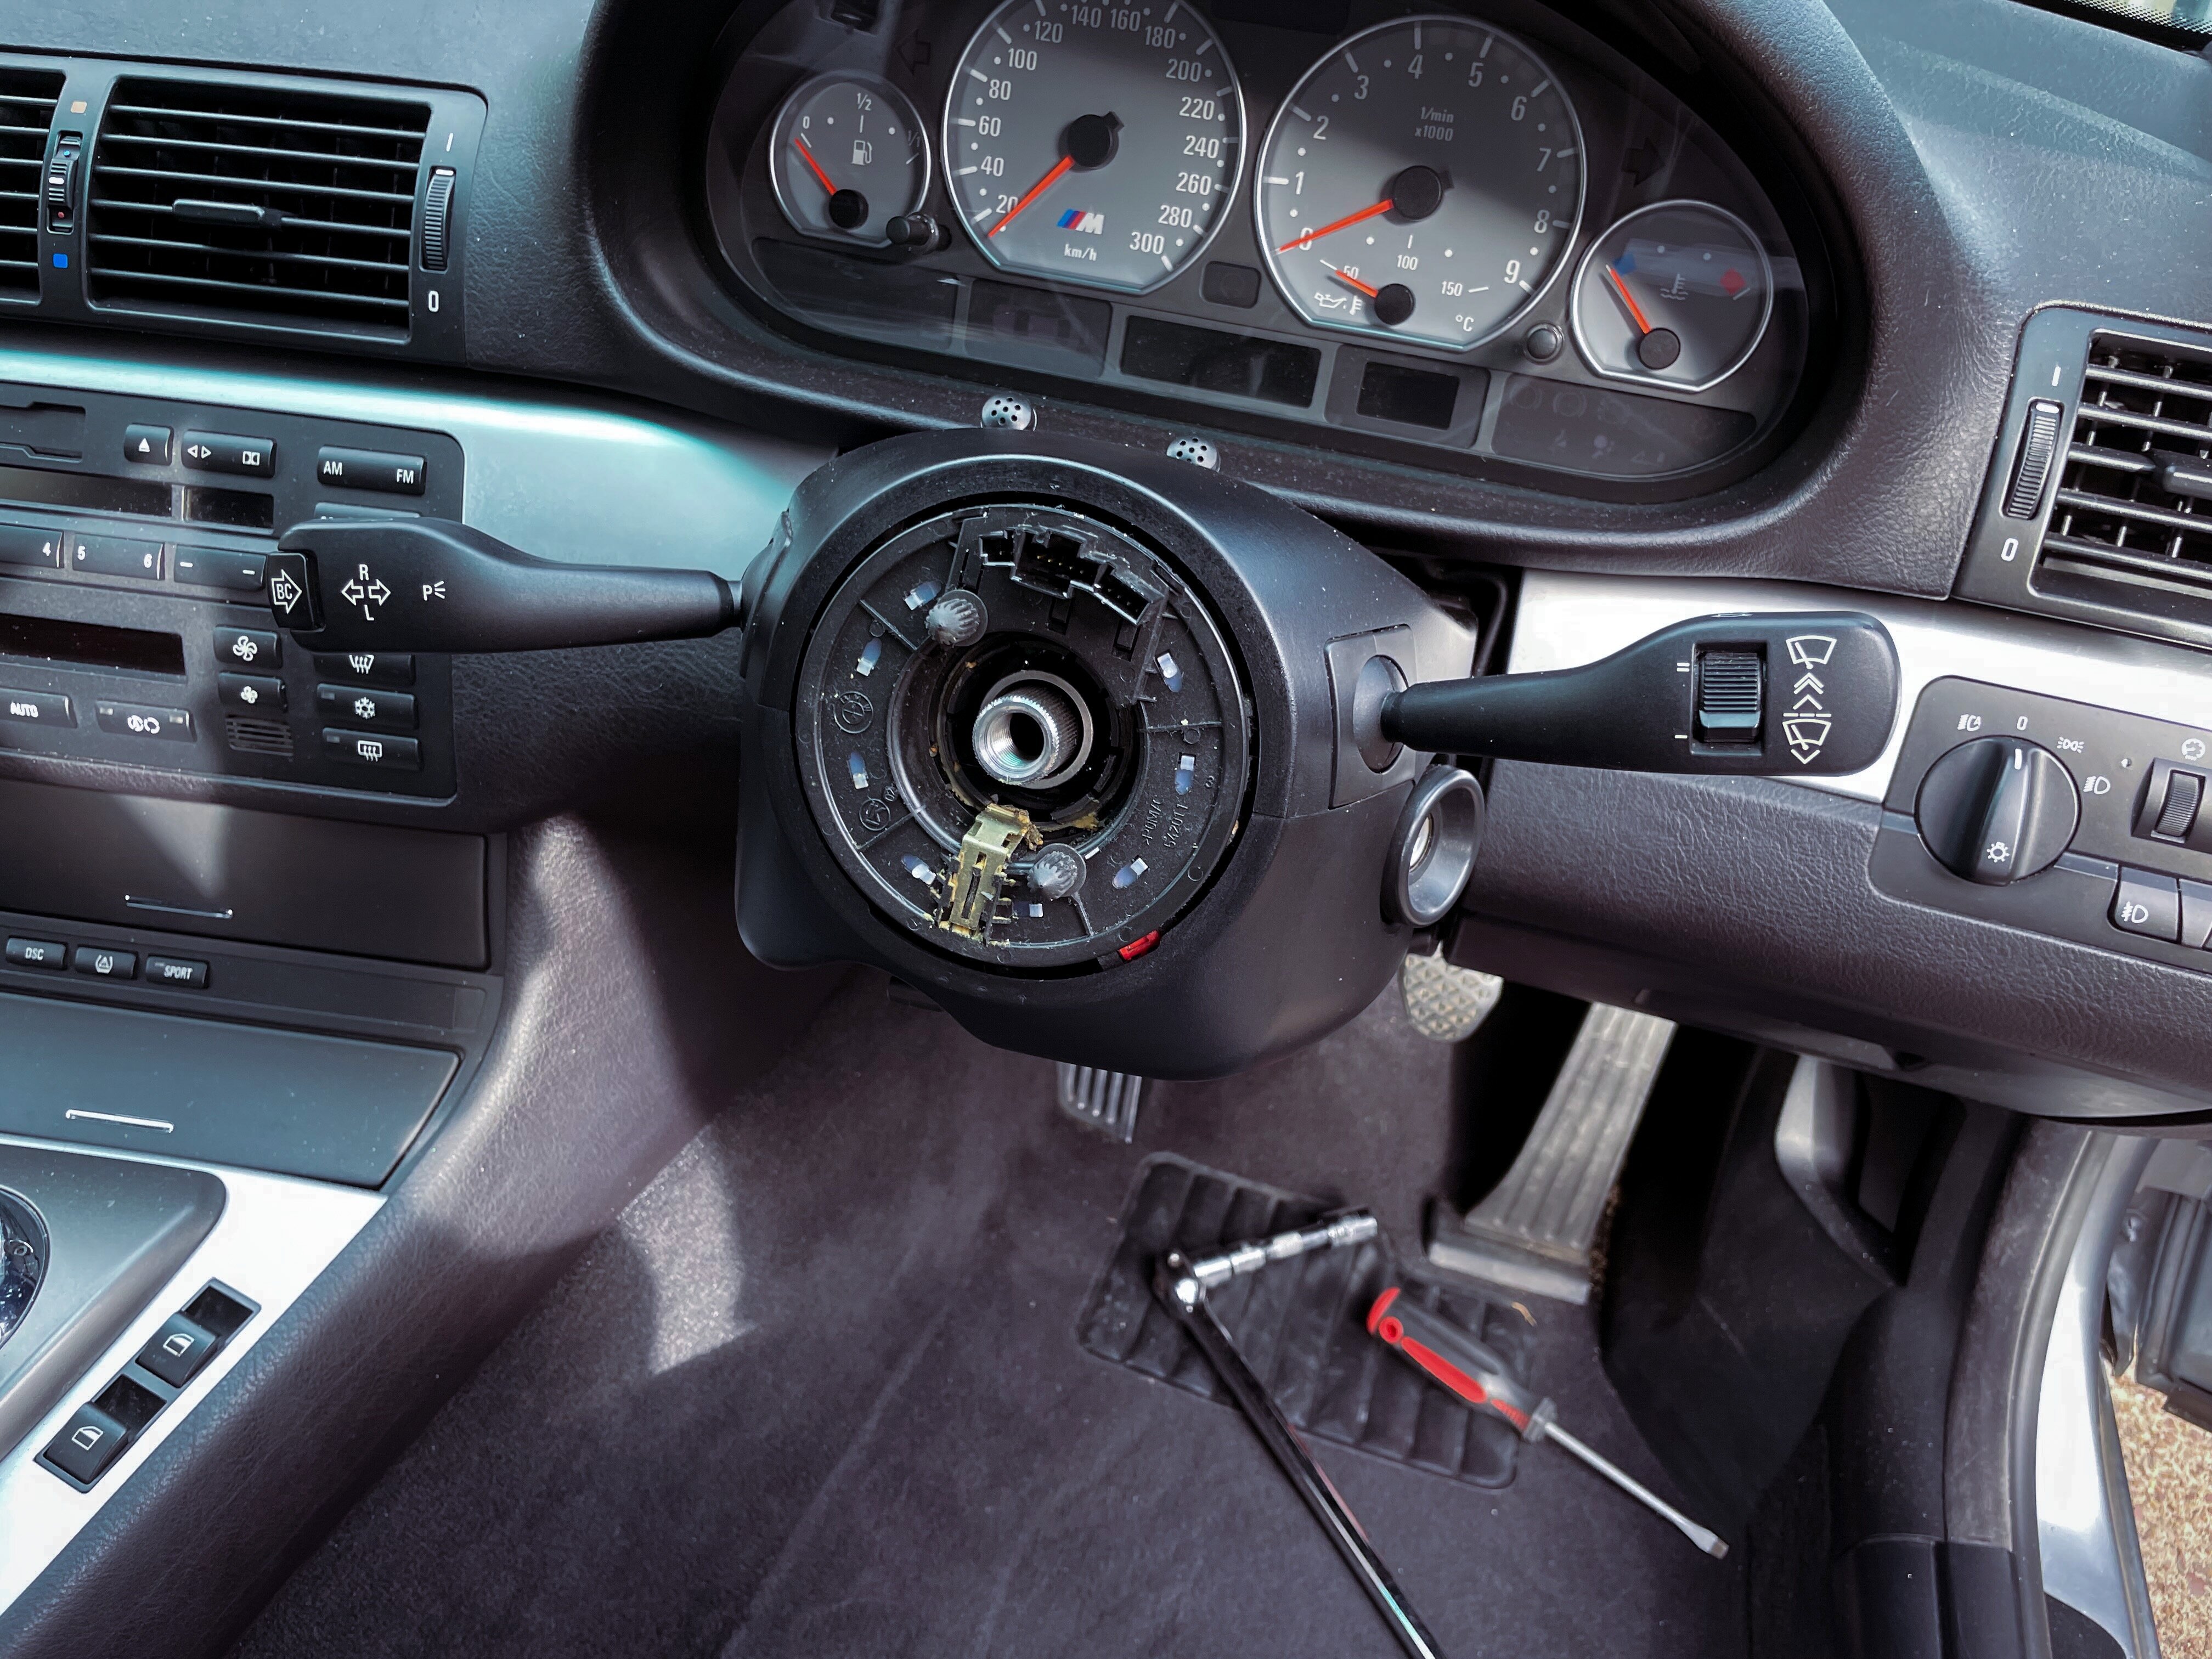
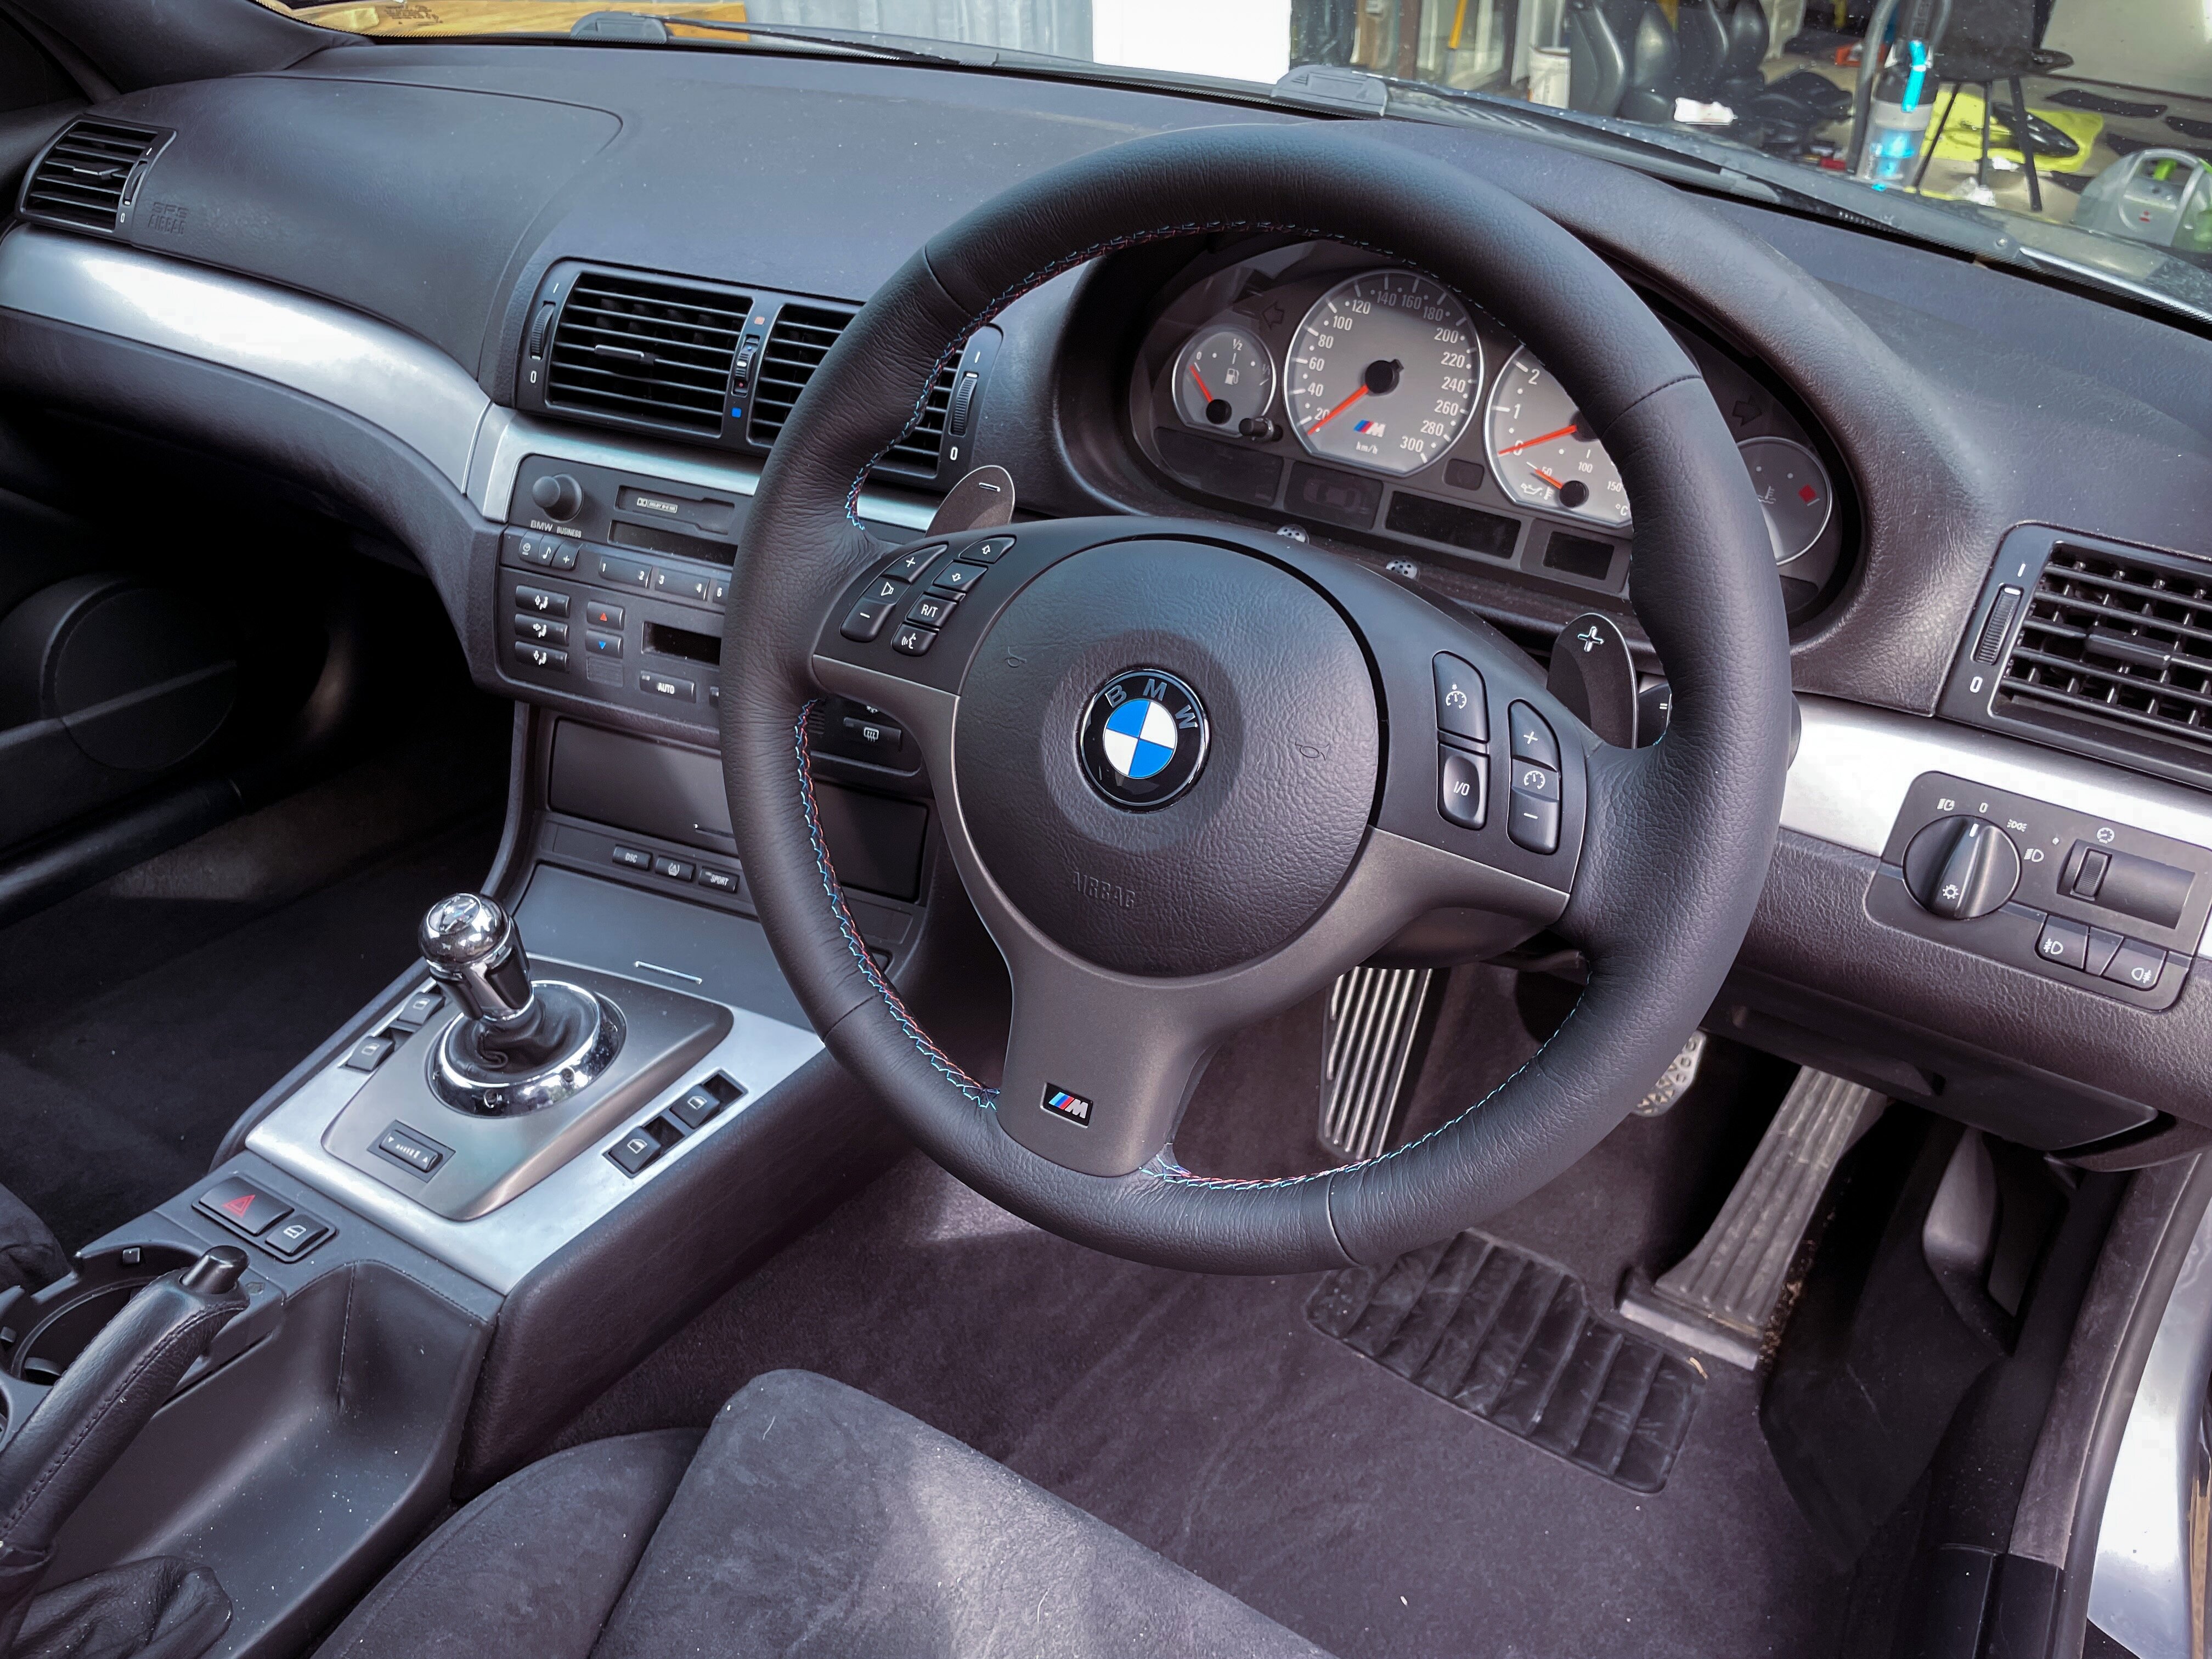
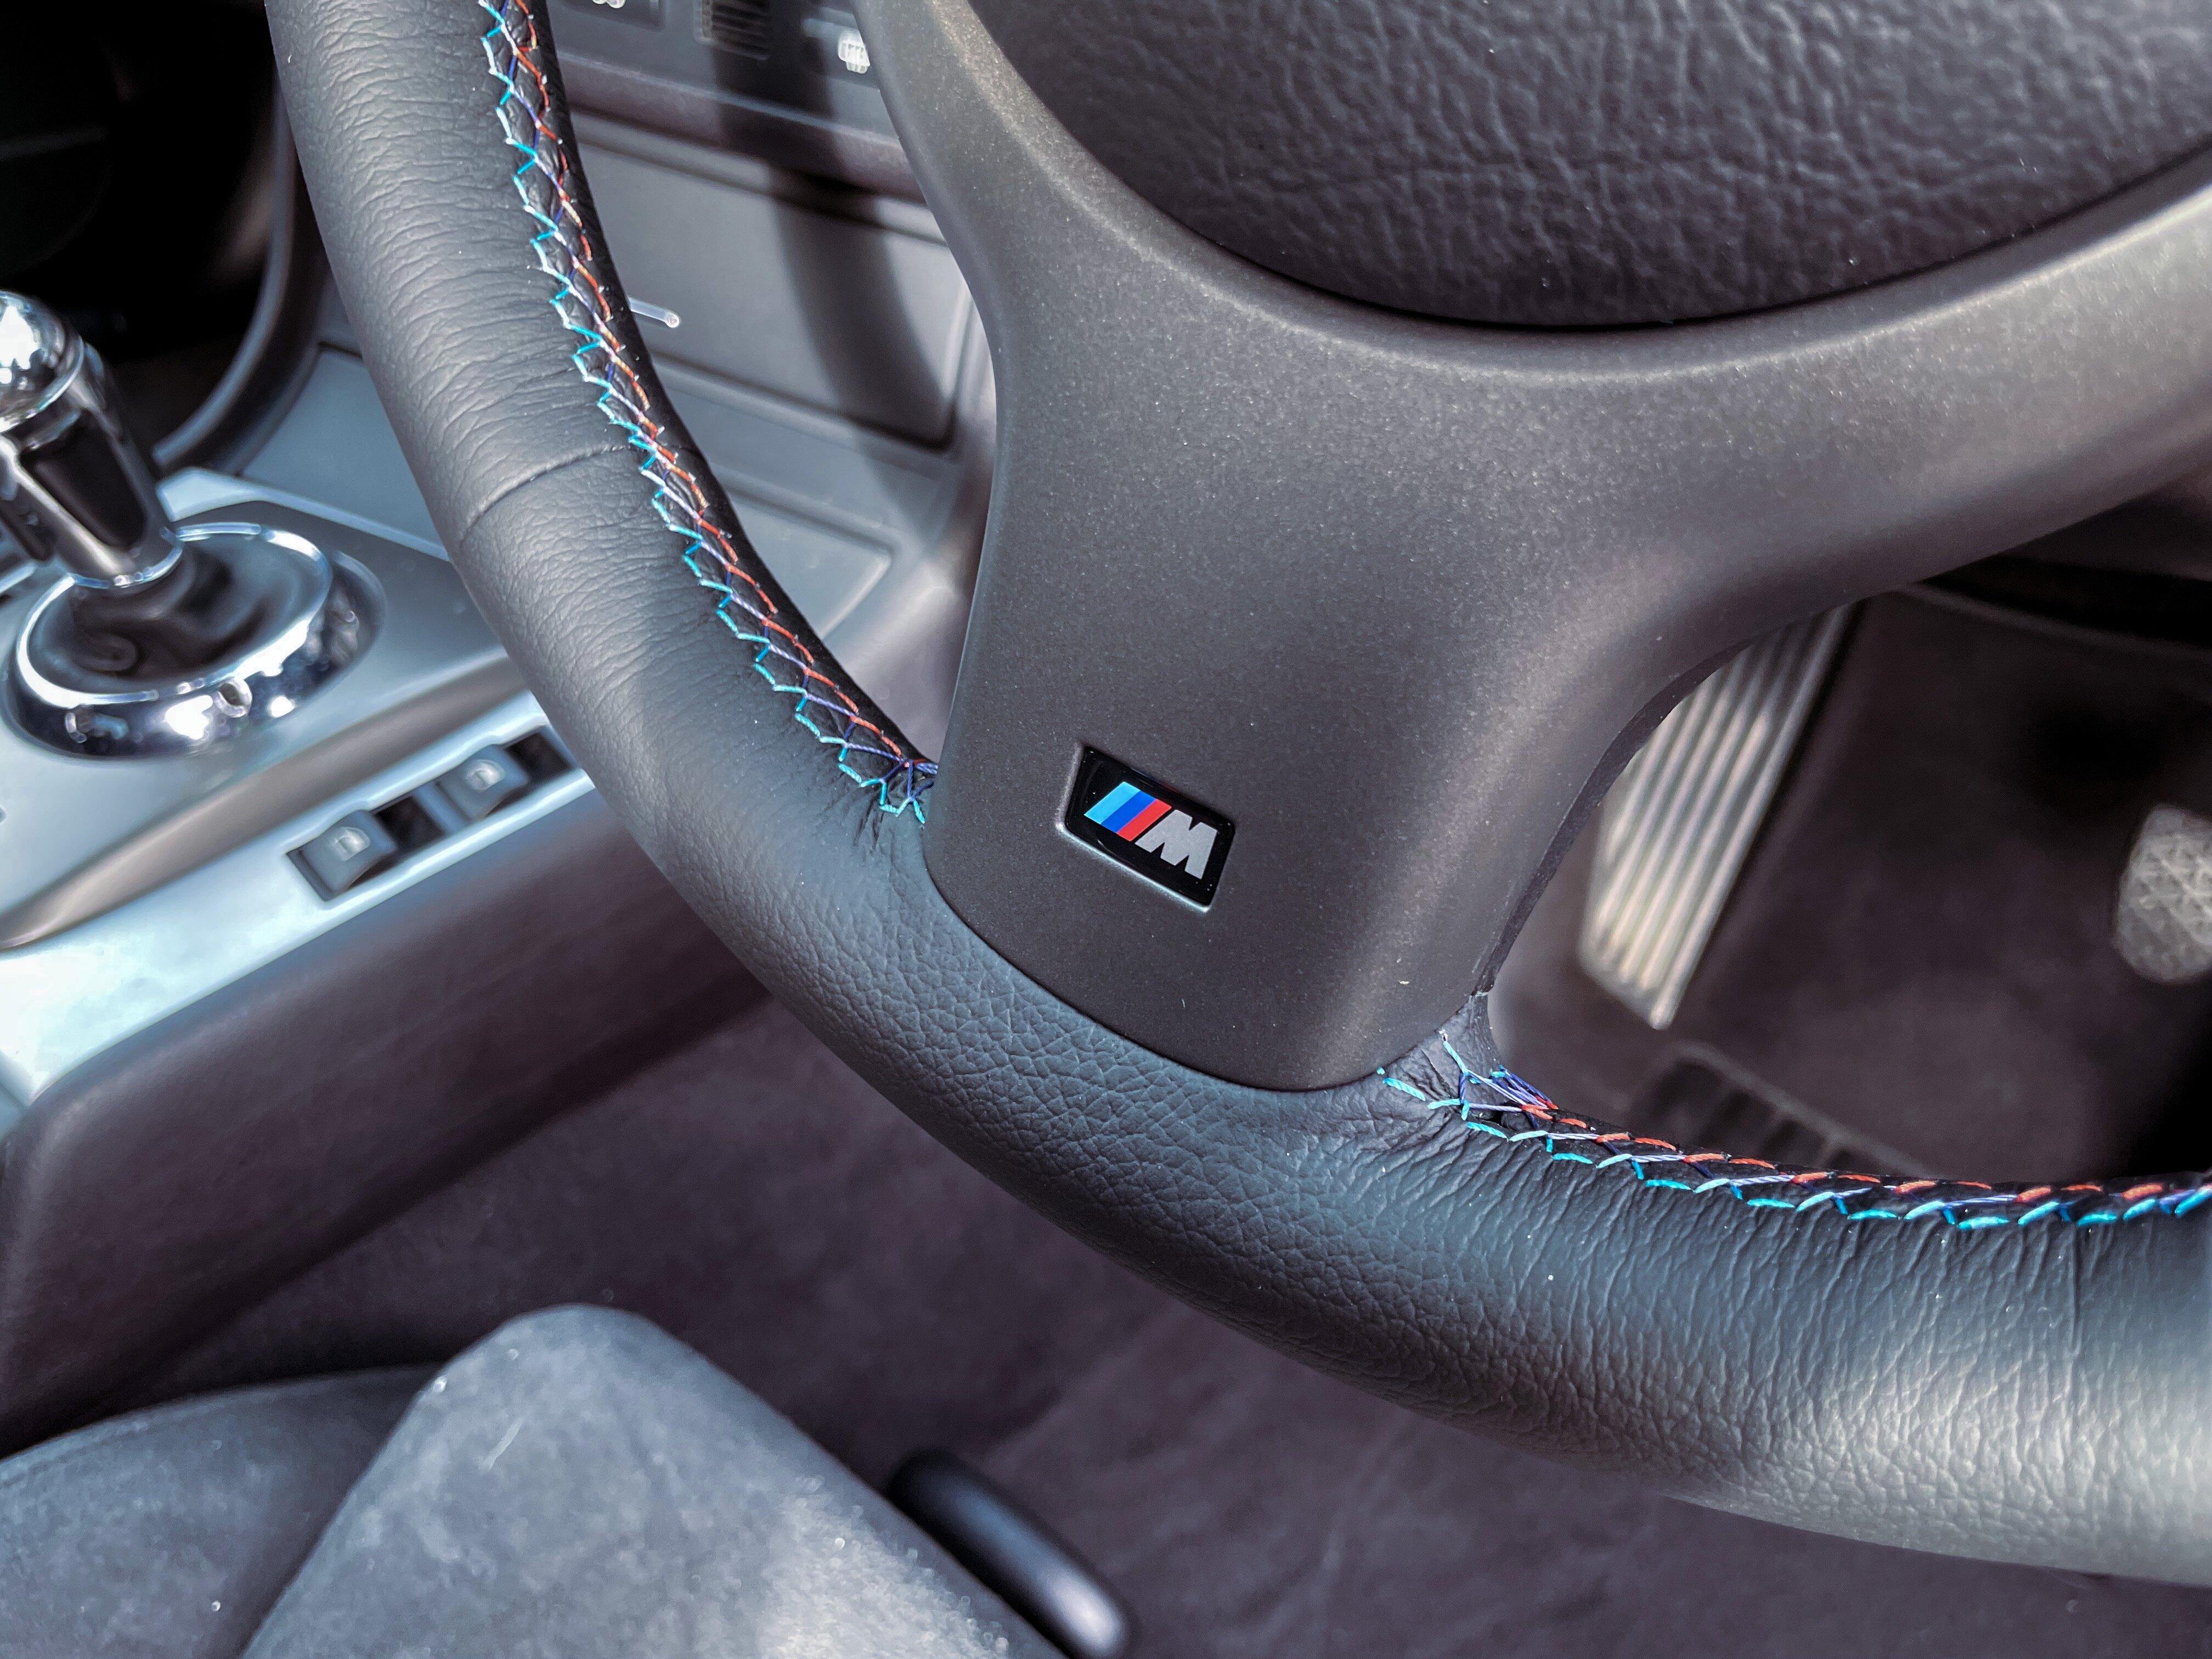
    I haven't had a chance to take the car for a drive yet, but will try to take it for a drive tomorrow. These photos also highlight that I really need to get the new steering wheel installed, as the old one is looking pretty bad now. Might try to get that done tomorrow as well, will see how I go.

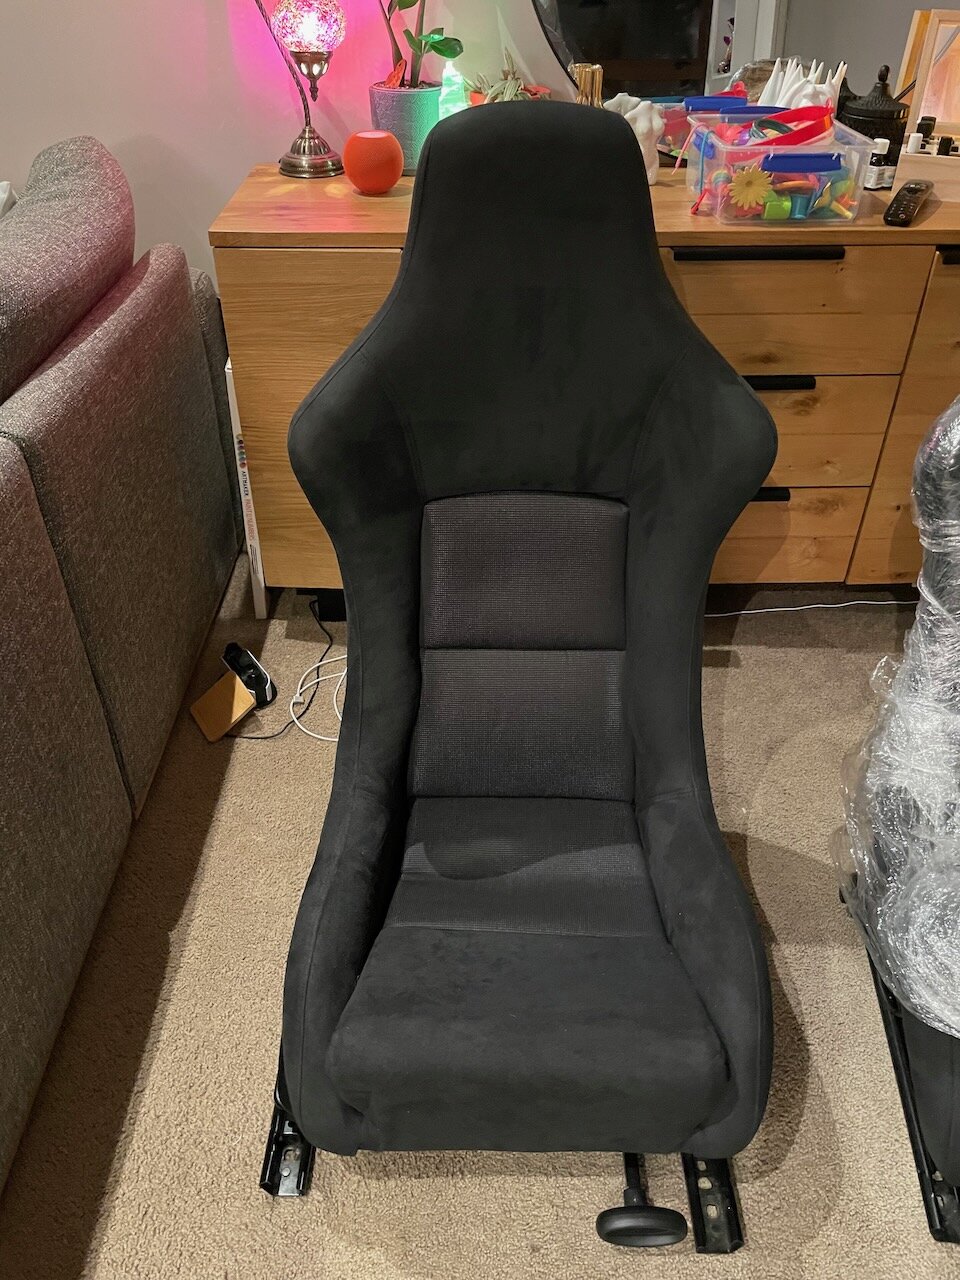
    In terms of the seats I'm super happy with them, they're exactly what I was wanting and it's so satisfying having bucket seats that are genuine, period correct, look awesome, and are in amazing condition. They were of course $$$, so I wasn't completely sure I wouldn't experience some form of buyer's regret, but I have not so far πŸ˜‚

    Very happy 😍

    IMG_7120.thumb.jpeg.e85c730b372d874d85fa0ae54fe9d369.jpeg

    IMG_7122.thumb.jpeg.c6bf4c60698b6cf3590577699bafd4f1.jpeg

    IMG_7123.thumb.jpeg.83bec917415eb81da3f483df862c155c.jpeg

    IMG_7127.thumb.jpeg.15e480bc5b586f06ef2020124cda2b27.jpeg
    ​
    2005 ///M3 SMG Coupe Silbergrau Metallic/CSL bucket seats
    Build Thread:
    https://nam3forum.com/forums/forum/m...e46-m3-journal

    Comment


      #47
      Well another weekend day, another nap time, another short window to get some stuff done on the car.

      The plan for the day was replacing the steering wheel with the new OE item that I purchased last year, but while I waited after disconnecting the battery to be sure to be sure that the airbags were clear to work with I decided that today was finally replacing the gas struts on the boot so that the car no longer sounds like a dying goat when you open the boot lid.

      The old one

      IMG_7144.thumb.jpeg.b77577e36b6c1da1a536c656b8271feb.jpeg


      The new one - not genuine because I couldn't justify $50 more each to get the "E46 M3" stamp on the genuine one, given these are probably going to start groaning again after a couple of years anyway.

      IMG_7145.thumb.jpeg.d2bb7944a6768e6db83b007b25004aaf.jpeg


      Then it was on to swapping out the wheel. Pressing in on the clock springs to release the airbag is the trickiest part of the exercise, but even that was pretty straightforward as I had the new wheel to refer to which meant I was able to see exactly what it was I was trying to press on, and how much force was needed to depress the spring. I had the old one out in fairly short order.

      IMG_7148.thumb.jpeg.5b824ac6ad05215f93e45270f84d58be.jpeg


      And the new one was even easier to install. Pushing the airbag back into place at the end is extremely satisfying.

      IMG_7150.thumb.jpeg.f3672d6365afa088288989eeead89683.jpeg


      IMG_7152.thumb.jpeg.94f8fad7c0972d9494697dbc3d1db304.jpeg


      Am planning on getting the dash and gear surround trim in Titan Shadow at some point so that it all matches/looks original.

      IMG_7154.thumb.jpeg.f6a30926bd0cc85b60187f35d3dc398a.jpeg
      ​
      2005 ///M3 SMG Coupe Silbergrau Metallic/CSL bucket seats
      Build Thread:
      https://nam3forum.com/forums/forum/m...e46-m3-journal

      Comment


        #48
        Great work!

        Comment


          #49
          Originally posted by karter16 View Post
          Well another weekend day, another nap time, another short window to get some stuff done on the car.

          ... I decided that today was finally replacing the gas struts on the boot so that the car no longer sounds like a dying goat when you open the boot lid.

          ​
          Hahahaha groan like a dying goat. Love that description.

          Reminds me that I need to order those struts, too.

          Comment


            #50
            Originally posted by karter16 View Post
            Well it's an exciting week in the life of this project.

            Around 18 months ago I decided that I wanted to take a bit of a deviation from keeping the car stock, and look into options around bucket seats. Although I want to ensure that I can always revert the car exactly to stock, I felt that bucket seats would provide a significant improvement to the driving experience of the car. I find I move around a fair bit in the standard sports seats, so wanted something that would hold me better.

            I looked into many options for seats, and fairly quickly zeroed in on the Cobra Nogaros. I was keen though to keep the look of the seats as in keeping and period correct as possible so I reached out early last year to Cobra to enquire about custom upholstery with Alcantara and laser fabric to replicate the genuine CSL seats. I was pretty excited to hear that they were working on the Munich Edition Nogaros (which were released later that year).

            Unfortunately the other key requirement I had is that I didn't want to have to go through the process of getting a cert. I spent quite a bit of time trying to work out whether there was a path to that using OE sliders, Brey-Krauss (or similar) mounts and Cobra Nogaros. Slid all the way forward you get very close to a 300mm gap, but the other key requirement that the sliding mechanism be accessible to the rear passenger was going to be hard to achieve (and pretty much impossible without going down the cert path).


            As a result, when the Munich Edition Nogaros were released I ultimately didn't pull the trigger (although I still think they're a cool option)


            There was of course one other possible option which met all of my exacting requirements...


            I'm now the proud owner of a pair of genuine CSL seats 😍

            These particular seats came out of a low mileage car and have sat in storage for the last 10 years, so as a result are in amazing condition considering they are 20 years old.

            I only picked them up last night, and probably won't have time until the weekend to get them into the car, but I'll certainly be updating here when I do!


            ​
            Best wishes to you and your family. Health is the most important.

            Please do tell where you got the CSL seats!

            Comment


              #51
              Originally posted by nyc951 View Post

              Best wishes to you and your family. Health is the most important.

              Please do tell where you got the CSL seats!
              Apologies - I missed this.

              Thank you very much - yes indeed - it's been a long medical journey for my family, but certainly makes us appreciate the good times all the more!

              I was lucky to be in the same country as NZ_M3 basically. He had had them in storage for the last 10 years and decided to let them go :-)
              2005 ///M3 SMG Coupe Silbergrau Metallic/CSL bucket seats
              Build Thread:
              https://nam3forum.com/forums/forum/m...e46-m3-journal

              Comment


                #52
                Well doesn't time fly when you have children and a busy job!

                Since my last post I've spend a lot of time with children in hospital and busy with a major go-live at work. I have however managed to drive the car a number of times and enjoy the CSL seats. They make such a difference to the driving experience, you feel so much more connected to the road, held in place, and also means a noticeably quieter interior as they don't move or squeak at all.

                I've also been working on furthering the refresh of the interior.

                To this end I dropped by M3_Power's the other day and picked up this:

                IMG_7655.thumb.jpeg.42af01d739e73355cb4a050336c31009.jpeg


                It's a slippery slope.... The quality of the console is amazing, and I was surprised how lightweight it is (which I shouldn't have been given its carbon fibre). Replacing the standard console with this one gives me multiple benefits. Firstly of course it's awesome, secondly it will be nice to not have my elbow bumping into it, thirdly it gives me the opportunity to properly pull the standard one apart and rebuild it without the squeaks (I purchased a number of replacement parts for it some time ago, so will be able to get to work on it once I've swapped it out).

                I have an order coming for the other bits and pieces I need for the console-swap (mounting bracket, handbrake boot, etc.), so actually swapping it in will probably be a Christmas holidays job.

                The other thing I picked up from M3_Power was this:

                IMG_7656.thumb.jpeg.e57d1c589950a94057e7de99468b559f.jpeg

                The MSport interior (G7AT) uses the same Laser cloth centres as the CSL seats, and the bolsters are Alcantara. The Alcantara is very close in colour to the Amaretta that comes on the CSL seats, it's a couple of shades different, but close enough that you can't tell unless you put them side by side. This is great for me as it means I can put my black leather rear seat into storage along with the fronts to keep them in good condition and can have rears in the car that pretty much match the CSL fronts. I need to give these seats a clean, but also before they go in the car I have a few other things to do.

                Under the rear seat is a butyl-like sound deadening insulation. As we know this goes brittle over time. I removed mine intending to replace it, but when I looked up the part number to replace it I encountered something interesting.

                The part number on what I removed is 51488204055 and is indeed the butyl-style item. Checking on realoem, etc. however this part is not listed as ever having been spec'd to the M3, only to the standard 3 series! As we know realoem isn't infallible, so likely what has happened is that it was used from the factory and then superseded at a later time, and realoem isn't showing the history. I intend to dig into it in more detail when I get a chance. The item that realoem lists (51488252759) is a newer woolly type item as used on newer BMWs. It's very lovely and it looks like this:

                923389644_Screenshot2023-10-14at3_56_36PM.thumb.png.016b668ee45784c9cac2f5a05111b36f.png


                Although it's not the original item, it should be better in every respect, will last better, weighs less than half as much, etc. So I decided to go ahead and order it. It's on it's way and again will hopefully be here in time for the Christmas break.

                The other thing I need to do with the rear seat out is remove the access covers for the fuel pumps, strip them and repaint them, as they are rusting along one edge where moisture has presumably come down through the seat. At the same time I'll strip and repaint the ISOFix anchors as well. Once all that's done then I'll put the new to me rear seat in.

                In the same order I've ordered a bunch of other bits and pieces, notably including Titan Shadow dash trim to replace my silver set.

                I've also ordered some BM-3109 fabric to have a go at redoing the A/B/C pillars. I object to the current price of new ones, and also many people have had trouble recently with the fabric not matching on new items from BMW, so I'll go the DIY route first. If it's not successful (e.g. if I'm not skilled enough at upholstery) then I'll stump up the cash.

                Oh and I finally ordered a replacement ISOFix cover which was actually the very first part I put on my "parts to purchase" spreadsheet back in 2015!

                Anyway - lots of bits and pieces on the go, hopefully everything arrives in time for the Christmas break, when I will hopefully have some time here and there to apply some of the increasing pile of parts to the car πŸ™‚
                ​
                2005 ///M3 SMG Coupe Silbergrau Metallic/CSL bucket seats
                Build Thread:
                https://nam3forum.com/forums/forum/m...e46-m3-journal

                Comment


                  #53
                  Quick update - today the replacement auto-dimming mirror glass for the rear view mirror arrived. I've been meaning to get this sorted since I bought the car in 2015!!!

                  I also received notification over the weekend that the shipment of parts I'm waiting on is with NZ Customs, so just waiting for them to send me the bill and then it will be cleared for delivery. I'm particularly looking forward to getting the rear seat sound insulation and the bracket and handbrake boot for the centre console!


                  ​
                  2005 ///M3 SMG Coupe Silbergrau Metallic/CSL bucket seats
                  Build Thread:
                  https://nam3forum.com/forums/forum/m...e46-m3-journal

                  Comment


                    #54
                    My order from EMIAuto arrived earlier in the week after a bit of a delay at Customs (turns out if you read the invoice properly and pay the correct amount it tends to speed things along).


                    The most exciting thing in this package is the sound insulation for under the rear seat. As I mentioned previously this is a newer item that at some point BMW has used to replace the original butyl item that came from the factory. I've been looking forward to receiving this to see what it's like and to check fitment.

                    It does not disappoint!


                    It's a nicely made piece, it's a soft felt on the outside with firmer layers inside to hold the shape, with the sound material in the core. I haven't got the scales out yet but its weight feels to align with what RealOEM quote. As you can see in the photo it comes with cutout flaps for accessing the fuel pumps. Nicely the cutouts aren't quite complete so there's some little tabs that hold it all in one piece, that you can easily cut with a knife if you need to access the fuel pumps.


                    I haven't done a full fitting yet, but I did have time the other day to do a quick check, and it looks to fit well. The only thing I wasn't able to completely validate without removing the rear seats completely was whether the isofix fittings fit through the existing cutouts. I'll check this when I have some time to get everything out of the rear bench.


                    The other exciting parts of the package were the bits and pieces that I needed to install the CSL centre console that picked up a couple of months ago. I had some time yesterday in between renovations and plastering and got to work removing the existing centre console. Step 1 being to remove the driver's seat.


                    Removing the centre console is straightforward, you just have to remove enough of the trim pieces and inserts to get to the screws holding the rear of the console down.


                    My console had, at some point, been leather wrapped, and whoever did it actually did a nice job of it, it looks and feels good and is much better that what I imagine the soft-touch plastic would look like by now. The flip side to this is that some of the inserts were a bit difficult to remove due to the extra thickness of the leather. On the inside of the console there is also a fair amount of over-spray of the adhesive that they used to affix the leather (not that this affects the end result). Once the gear selector trim is lifted and unscrewed as well, lifting up the handbrake boot means you can then remove the trim at the back of the console and then lift the whole thing up and over the arm rest. This then means you can access the bolts for the arm rest.


                    Once the three bolts are removed (being careful not to lose the metal collars which are loose) the arm rest can be removed. I took this opportunity to then give the whole thing a good vacuum.


                    The module resting on the carpet is the "genuine bluetooth module" which, given I don't use it, I took the opportunity to remove it and wrap up it, and the connector for the rear ashtray light in the soft wrap that the phone wiring is wrapped in. At the same time I installed the new bracket for the CSL/arm rest delete console.


                    With this done I was able to get on to the exciting bit of fitting the console! Prior to this, and not photographed, I took the mirror control and hazard light switch units and spent some time going over them with some wet cotton buds to clean them up and get all the dust and grime out of them that tends to accumulate over time. The other thing that I needed to do as part of fitting the console was make some space for the depth of the hazard light switch by depressing the carpet underneath it. If you don't do this the carpet will offer too much resistance and pop the hazard light switch back out again.


                    With the console in place the next thing was to replace the gear selector trim with the new titan shadow trim I ordered. The car was originally spec'd with this, and at some point it has been replaced with silver trim, which is in excellent condition and very nice, but I wanted to go back to the original colour. While I was doing this I gave the window controls the same cotton bud treatment. It was at this juncture that I discovered that what I thought was a spec of cola on one of the buttons does in fact appear to be collateral damage from when the contents of the rear view mirror leaked out (prior to my ownership). This is a shame as it is corrosive and can't be cleaned off the switch, so I'll need to order a replacement. Fortunately it has only affected one of the two switch units.


                    Once that was done I was able to reinstall the trim. Almost done!


                    Last thing for the console was the installation of the new boot. This is straightforward, just use the factory procedure of cable tying it on and then fit it in place!

                    The last work for the day was to replace the 3 other dash trim pieces. This is easy if you have a set of trim removal tools and in no time I was done and had the driver's seat back in.


                    I'm very happy with the end result. The CSL console very much suits the seats. I have a couple of things left to do to finish that particular project entirely.


                    1: The mirror control switch currently isn't wired in. With everything that I do with this car I want to make it easily reversible (why I don't know as I intend to keep the car for a long time) so rather than just hacking the existing wiring I'm working on building an extension harness to extend the wiring from it's current location in the driver's door back to the centre console. I wanted to actually move the console and check the mirror control switch before I ordered the parts for this side quest.

                    2: I need to order some foam-backed 9002 Alcantara to manufacture a copy of the OE tray-insert in the centre console (since these are NLA).

                    Speaking of NLA, the titan shadow trim I ordered was manufactured in late 2004! Which is interesting and really highlights that with these cars now being 20 years old, when the spare parts run out a lot of these sorts of projects are going to become astronomically more difficult.

                    Anyway, a good little project for a Saturday. When I get the time, Christmas probably, I'll get into the next steps on sorting out the rear seat!


                    ​
                    2005 ///M3 SMG Coupe Silbergrau Metallic/CSL bucket seats
                    Build Thread:
                    https://nam3forum.com/forums/forum/m...e46-m3-journal

                    Comment


                      #55
                      Really enjoying the restorative focus of this build. Awesome to see your dad helping you out, and your son being a part of it as well.

                      As a father of two, it’s hard not to get emotional when reading about your children’s health struggles and long stays in the hospital. I’m sure that’s incredibly draining on you and your family. I know it’s just a car forum, but I hope writing it all out like that helped you unpack it a bit. I hope this project continues to be a healthy and positive outlet and counter balance the daily struggles.
                      Last edited by Avedis; 12-06-2023, 04:18 AM.

                      Comment


                        #56
                        Originally posted by Avedis View Post
                        Really enjoying the restorative focus of this build. Awesome to see your dad helping you out, and your son being a part of it as well.

                        As a father of two, it's hard not to get emotional when reading about your children's health struggles and long stays in the hospital. I'm sure that's incredibly draining on you and your family. I know it's just a car forum, but I hope writing it all out like that helped you unpack it a bit. I hope this project continues to be a healthy and positive outlet and counter balance the daily struggles.
                        Thank you so much for your kind words and encouragement. Yeah it's been a long six years and we'll have more to go, but it's worth it all for the times when the boys are home and well and happy.

                        It is just a car forum, but funny the places you find support and encouragement eh! Nice to have something fun to think about and work on for sure!


                        Sent from my iPhone using Tapatalk
                        2005 ///M3 SMG Coupe Silbergrau Metallic/CSL bucket seats
                        Build Thread:
                        https://nam3forum.com/forums/forum/m...e46-m3-journal

                        Comment


                          #57
                          Quick mid-week update - As I mentioned in my last update I haven't yet routed the wiring for the mirror controls to the centre console location. The reason for this is that I don't want to have to cut/hack into my wiring harness for a modification that I may feel differently about in the future. So that I can avoid cutting or tapping into the existing wiring I ordered some connectors so that I can make a harness extension that connects to the OE plug sited in the drivers door.


                          These connectors arrived today:


                          Now that I have these I can install an extension from the centre console to the door and put these connectors on each end and just plug it all together without any damage to the main harness 😎
                          ​
                          2005 ///M3 SMG Coupe Silbergrau Metallic/CSL bucket seats
                          Build Thread:
                          https://nam3forum.com/forums/forum/m...e46-m3-journal

                          Comment


                            #58
                            Nice, do you have a part number or link for those connectors?

                            As you saw in my build, I recently did the install. I actually started something similar with the harness but changed plans last minute. If you need any info on the wiring/connectors/tools/etc shoot me a message.


                            Comment


                              #59
                              Originally posted by Avedis View Post
                              Nice, do you have a part number or link for those connectors?

                              As you saw in my build, I recently did the install. I actually started something similar with the harness but changed plans last minute. If you need any info on the wiring/connectors/tools/etc shoot me a message.

                              Yes sure,

                              They're an AliExpress special - here's the link: https://www.aliexpress.com/item/1005...7063f19c7KXihb

                              Key thing to note is that you have to bring up the picture for the item/s you want and then add to cart. On this page it's the male and female 6 pin black connectors.

                              Note too that you'll need to cut the little wing off the black connector that plugs in to the mirror control unit so that it fits - trivial with a craft knife.

                              Not for you specifically Avedis as have seen in your build thread you have the same control unit as me, but for others, check your mirror control unit first if you do this as if you have other mirror features you may have a different and/or second connector on your mirror control unit to wire in as well.

                              Thanks yes I've been following your amazing build thread! I'd be keen to see some more photos of how you routed the wiring, but maybe that's coming in the complete diy guide you're putting together?


                              Sent from my iPhone using Tapatalk
                              2005 ///M3 SMG Coupe Silbergrau Metallic/CSL bucket seats
                              Build Thread:
                              https://nam3forum.com/forums/forum/m...e46-m3-journal

                              Comment


                                #60
                                Originally posted by karter16 View Post

                                Yes sure,

                                They're an AliExpress special - here's the link: https://www.aliexpress.com/item/1005...7063f19c7KXihb

                                Key thing to note is that you have to bring up the picture for the item/s you want and then add to cart. On this page it's the male and female 6 pin black connectors.

                                Note too that you'll need to cut the little wing off the black connector that plugs in to the mirror control unit so that it fits - trivial with a craft knife.

                                Not for you specifically Avedis as have seen in your build thread you have the same control unit as me, but for others, check your mirror control unit first if you do this as if you have other mirror features you may have a different and/or second connector on your mirror control unit to wire in as well.

                                Thanks yes I've been following your amazing build thread! I'd be keen to see some more photos of how you routed the wiring, but maybe that's coming in the complete diy guide you're putting together?
                                Thanks for the link. If you shoot me your email in a private message, I will send you a copy of the tutorial. It isn’t done, but the wiring portion of it is complete. I can also send you a link to the crimp tool needed for the MQS connectors used in the mirror plugs.

                                Comment

                                Working...
                                X