Announcement

Collapse
No announcement yet.

Karter16's Silbergrau E46 M3 Journal

Collapse
X
 
  • Filter
  • Time
  • Show
Clear All
new posts

    #61
    Does the mirror switch go to the GM5? If so, why not depin the wires from that and make a new short harness to replace it with? Instead of having the harness go from center console to door and then back to center console

    Edit: Aaah wait no, I think it goes to the memory mirror modules. Carry on...
    Last edited by heinzboehmer; 12-14-2023, 05:28 PM.
    2002 Topasblau M3 - Coupe - 6MT - Karbonius CSL Airbox - MSS54HP Conversion - Kassel MAP - SSV1 - HJS - PCS Tune - Beisan - MK60 Swap - ZCP Rack - Nogaros - AutoSolutions - 996 Brembos - Slon - CMP - VinceBar - Koni - Eibach - BlueBus - Journal

    2012 Alpinweiss 128i - Coupe - 6AT - Slicktop - Manual Seats - Daily - Journal

    Comment


      #62
      Originally posted by Avedis View Post

      Thanks for the link. If you shoot me your email in a private message, I will send you a copy of the tutorial. It isn't done, but the wiring portion of it is complete. I can also send you a link to the crimp tool needed for the MQS connectors used in the mirror plugs.
      Awesome thanks! Will PM now :-)


      Sent from my iPhone using Tapatalk
      2005 ///M3 SMG Coupe Silbergrau Metallic/CSL bucket seats
      Build Thread:
      https://nam3forum.com/forums/forum/m...e46-m3-journal

      Comment


        #63
        And now for today's edition of karter16's Random Side-Quests.

        On my to do list is the radio/nav. I've spent a lot of times working through various options and they all make me sad to some degree as there just aren't any options out there that give me the combination of OE-like and modern functionality that I'm looking for.

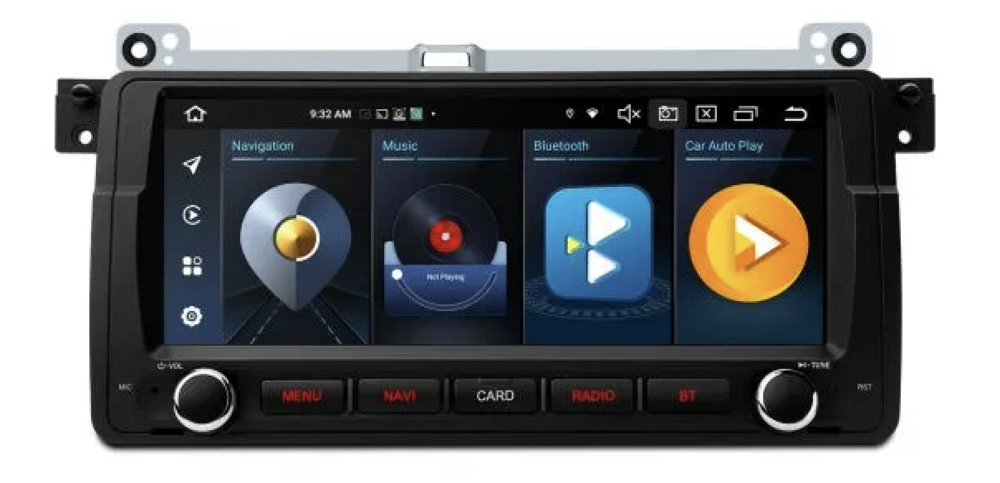
        The current trend in the E46 M3 world seems to be towards minimalism which is fine, but for practicality reasons I want to swap to a touchscreen nav setup that I can run CarPlay on etc. Ideally this looks OE-like, however having said that I'm not a fan of the dated "screen with buttons around it" arrangement that the original E46 nav had. Times have moved on with technology and it's unnecessarily pokey (in my opinion). That said I don't particularly want a big slab of a tablet stuck on the dash either. I'm currently tilting towards something like this Xtrons unit:


        This in itself makes me sad, as I would like to steer well away from the cheap electronics, but that said none of the main manufacturer's offerings enthuse me either. I'm inclined at this point to give the Xtrons a go. If it's rubbish/not reliable then I'll try something else instead. I'm technically competent so don't mind some effort to get things working well, I just need them to be reliable once I've got them setup...

        Anyway, back to my morning cup of coffee quest...

        Regardless of what option I go with, I want to make it feel as OE as possible. One aspect of that is replicating the original boot/splash screen used on the OE Nav. Now of course the OE Nav is more than 20 years old at this point and the original image is low resolution:


        I had a decent search on trusty google but was unable to locate a high-res reproduction of this image, so I decided to make my own.

        I actually used Figma to do this, which is a bit of a random choice, but I'm very familiar with it and its capabilities are more than sufficient for this project. Secondly Figma is a vector image tool, so what I'm producing here is a vector-based image which I can then use to output whatever resolution I like with no loss of image quality.

        Upscaling images by hand, especially graphics/text is part math and part subjective tweaking. To start with I take the source image, resize it to a suitable scale to work with on the canvas (I chose 1280w, large enough to see detail, without being too large and unwieldy). I then started overlaying the text and graphic components. When doing text I tend to use a contrasting colour so that I can get the sizing, etc. approximately right and see what I'm doing:


        Often the challenge can be working out exactly what font has been used. BMW made this nice and easy for me in this instance as they use their own "BMW Helvetica" font for everything 🙂

        Once I figured out the exact size to set the font to, which is trial and error, I was then able to roughly put in the bars with the linear fades on each side. Getting the proportions of the fade right is again just trial and error and viewing at different zoom levels to judge what's right.


        I squared everything up and had an image that looked pretty much like the original, but higher quality. The next step is make sure it replicates the original as closely as possible which is a lot of tweaking and pixel shuffling. I find that the best way to do this is to take the image you've just produced and output it at the same resolution as your original image.

        This gave the the following:


        Looks pretty good huh!


        Actually when we look at the original and the reproduction side by side (repro on top, original on bottom) we can see I haven't quite got it right.


        In the reproduction the BMW text is slightly to the right. This is because I centred the text in the image between the fade bars which I made of equal width on both sides. Doing that on the face of it makes sense, but there's a good reason why BMW tweaked it slightly.


        If we look at this side by side (repro on top, original on bottom):


        We can see that BMW actually made the fade bars on the right hand side slightly wider than those on the left, this is to account for the fact that only the top right edge of the W extends fully to the right of the bounding box for the text, whereas the B on the other side is hard up against it. Although in my image the text is dead centre and everything is symmetrical, the perception to the eye is that there is more whitespace (or blackspace in this case) after the W than there is before the B. To account for this BMW actually made the fade bars on the right hand side come across to the left just a little bit.

        So let's adjust it:


        Getting closer, just a bit more to go:


        Now we're looking pretty good!


        It was a number of iterations to get to this point, but now things are looking pretty similar between the two. I'm happy with this now.

        All of that work means that I how have a fairly faithful, high res, reproduction of the original image ready to go for when I need it.


        This is pretty niche so I can't imagine anyone else really having any use for this, but if you do you're more than welcome - SVG and PNG downloads below :-)


        SVG

        E46 BMW Nav Splash Screen Vector.svg


        1280w png


        2560w png


        2005 ///M3 SMG Coupe Silbergrau Metallic/CSL bucket seats
        Build Thread:
        https://nam3forum.com/forums/forum/m...e46-m3-journal

        Comment


          #64
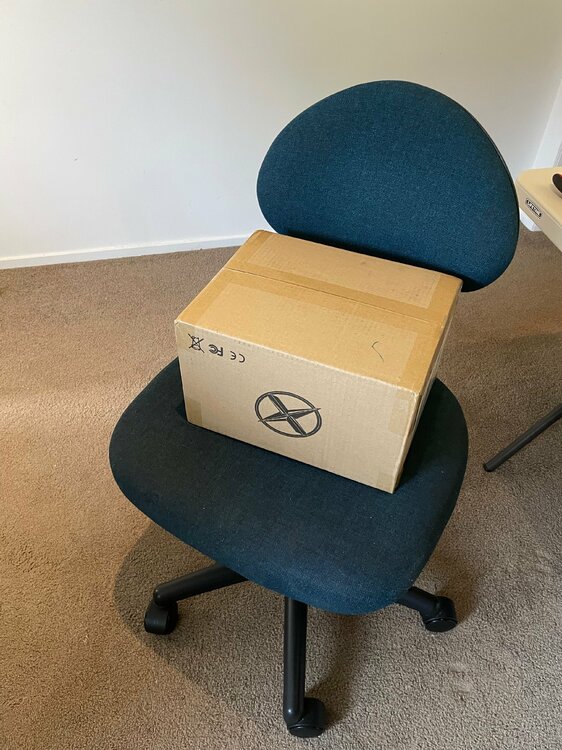
          Well this arrived astonishingly quickly considering I ordered it on Sunday night and it arrived from Hong Kong this morning!

          Click image for larger version

Name:	Post 64_1.jpg
Views:	105
Size:	116.0 KB
ID:	262648


          Not sure what the quality of the product is like, but the delivery and sales service have been excellent.

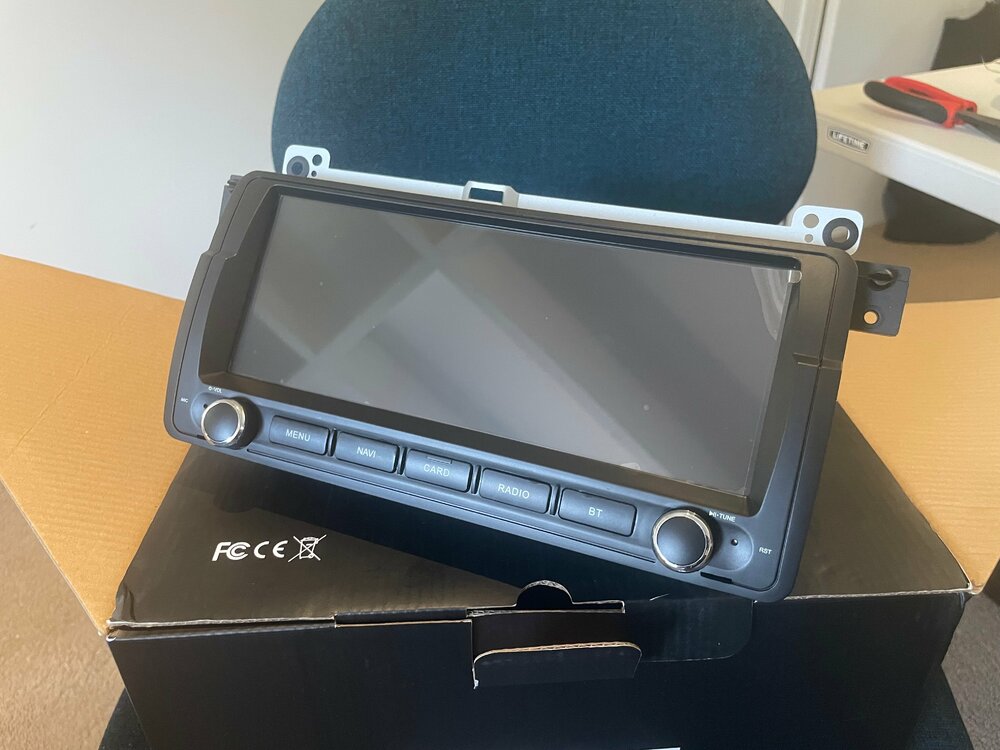
          I went for the IX8246BHL which is the highest spec option for the E46.

          Click image for larger version

Name:	Post 64_2.jpg
Views:	101
Size:	117.5 KB
ID:	262649


          First impressions are better than I was expecting. It seems to be finished nicely, the buttons feel pretty good. The twisty knobs don't have the same inertia feel that the stock ones do, but they're pretty good. The chrome would usually annoy me but I'm kinda interested to see with the SMG whether the chrome on the knobs ties things together a bit.

          I feel a bit of a sense of inevitability about this venture as I have, for years, seen others complaining about their "China-sourced" head units, so if this doesn't work out I have only myself to blame.

          In the end I went with this option because I wasn't very enthused about the tier 1 manufacturers offerings, and secondly because this gives me a more modern unit without too much of the area taken up with buttons, but also without the "slab glued to the dash" look that a lot of other options have.

          As I said previously I'm very comfortable with the tech, so don't mind some fiddling to get it setup, but once it is it needs to be rock solid. Plan to give this a year to see how it goes and will re-evaluate then.
          Last edited by karter16; 04-24-2024, 11:56 PM.
          2005 ///M3 SMG Coupe Silbergrau Metallic/CSL bucket seats
          Build Thread:
          https://nam3forum.com/forums/forum/m...e46-m3-journal

          Comment


            #65
            Originally posted by karter16 View Post
            Well this arrived astonishingly quickly considering I ordered it on Sunday night and it arrived from Hong Kong this morning!


            Not sure what the quality of the product is like, but the delivery and sales service have been excellent.

            I went for the IX8246BHL which is the highest spec option for the E46.


            First impressions are better than I was expecting. It seems to be finished nicely, the buttons feel pretty good. The twisty knobs don't have the same inertia feel that the stock ones do, but they're pretty good. The chrome would usually annoy me but I'm kinda interested to see with the SMG whether the chrome on the knobs ties things together a bit.

            I feel a bit of a sense of inevitability about this venture as I have, for years, seen others complaining about their "China-sourced" head units, so if this doesn't work out I have only myself to blame.

            In the end I went with this option because I wasn't very enthused about the tier 1 manufacturers offerings, and secondly because this gives me a more modern unit without too much of the area taken up with buttons, but also without the "slab glued to the dash" look that a lot of other options have.

            As I said previously I'm very comfortable with the tech, so don't mind some fiddling to get it setup, but once it is it needs to be rock solid. Plan to give this a year to see how it goes and will re-evaluate then.
            Thanks for posting this. Let us know how it performs once installed. Might also get this.

            Comment


              #66
              Well that was easy!

              Mr 2 went to bed early so I had some time after dinner to swap the new head unit in.

              First up is removing the old head unit, the centre vents (the worst bit of the exercise), and the lower console bracket, so that I could install the HVAC relocation bracket.

              Click image for larger version

Name:	Post 66_1.jpg
Views:	113
Size:	189.5 KB
ID:	262643


              Console bracket out.

              Click image for larger version

Name:	Post 66_2.jpg
Views:	101
Size:	131.8 KB
ID:	262644


              How does so much debris get into a sealed area!!!

              The car had had a Parrot bluetooth unit installed, which never worked properly for me, so that had to come out. I was a bit worried about how the wiring for it might have been done. The wiring harness had in fact been cut to put the Parrot unit in series. Fortunately it had been done well and I was able to just unplug the Parrot harness and plug the OE harness back together. I'll tidy it up further in the future, but for now I've wrapped it with fleece tape and packaged it up.

              I then swapped the switch strip and cigarette lighter across to the HVAC relocation bracket (photo taken before swapping over):

              Click image for larger version

Name:	Post 66_3.jpg
Views:	106
Size:	326.4 KB
ID:	262645


              The Xtrons unit comes with an ISO wiring harness and it makes it ridiculously easy to connect the head unit. Just plug it into the Xtrons and plug it into the car harness and that is literally it. Everything just works. The ISO harness comes with some other tails for other harnesses. I intend to remove these connectors I don't need at some point in the future to tidy things up further, but before I do that I'll just run the unit for a while and make sure I'm happy with it.

              Once I'd done a quick test to make sure functions were working I put everything back together, and voila!

              Click image for larger version

Name:	Post 66_4.jpg
Views:	103
Size:	174.4 KB
ID:	262646


              It works.

              As others have noted the dash trim doesn't sit quite right. This appears to be because the clip is built into the Xtrons (see below) and it seems to be slightly too high up - a quick go with a file will fix this I think - again will get back to this over the Christmas break.

              Click image for larger version

Name:	Post 66_5.jpg
Views:	102
Size:	118.3 KB
ID:	262647


              Initial impressions of the head unit?
              • Ridiculously easy to install and get setup - you get a ton of wiring harnesses in the box and it seems intimidating. You only need the ISO one and it's entirely plug and play, no tapping to do, no extra wires to hook into, nothing. Just plug in the additional things you want (GPS, Wifi Antenna, etc. I didn't bother with the USB ports, 4G, etc. as I won't use them).
              • The unit is FAST. No delays anywhere, the UI is fast and responsive.
              • CarPlay seems good so far, I connected my phone via bluetooth and it just worked.

              The real test is going to come over the next few months as I see if it reliably works well and quickly, or if there are gremlins. Promising start anyway, will provide an update in a few weeks once I've used it for a while.
              Last edited by karter16; 04-24-2024, 11:55 PM.
              2005 ///M3 SMG Coupe Silbergrau Metallic/CSL bucket seats
              Build Thread:
              https://nam3forum.com/forums/forum/m...e46-m3-journal

              Comment


                #67
                Nice! My car has factory nav so I'll have to order the longer harness if i get this. Will wait for you to post more feedback before i decide. Cheers.

                Comment


                  #68
                  Just ordered the same unit. Going to try and use your splash screen!

                  Comment


                    #69
                    Originally posted by robgill View Post
                    Just ordered the same unit. Going to try and use your splash screen!
                    Nice one - I've very happy with it so far - better than I was expecting for sure.

                    FWIW he's a copy of the splash screen sized to fit that unit.

                    Click image for larger version

Name:	BMW1280w480h.png
Views:	494
Size:	32.6 KB
ID:	247055
                    2005 ///M3 SMG Coupe Silbergrau Metallic/CSL bucket seats
                    Build Thread:
                    https://nam3forum.com/forums/forum/m...e46-m3-journal

                    Comment


                      #70
                      Looking forward to your review on the headunit. Did you consider the "automotive grade" version? - https://xtrons.com/bmw-rover-mg-andr...b-rom-pe8246bl

                      Comment


                        #71
                        Originally posted by Slideways View Post
                        Looking forward to your review on the headunit. Did you consider the "automotive grade" version? - https://xtrons.com/bmw-rover-mg-andr...b-rom-pe8246bl
                        Yeah I did actually - looked at both options and decided that 8GB of ram on the IX (as opposed to 2GB on the PE) trumped the “automotive grade” hardware of the PE - not that I could actually find out much about the difference.


                        Sent from my iPhone using Tapatalk
                        2005 ///M3 SMG Coupe Silbergrau Metallic/CSL bucket seats
                        Build Thread:
                        https://nam3forum.com/forums/forum/m...e46-m3-journal

                        Comment


                          #72
                          Originally posted by karter16 View Post

                          Yeah I did actually - looked at both options and decided that 8GB of ram on the IX (as opposed to 2GB on the PE) trumped the “automotive grade” hardware of the PE - not that I could actually find out much about the difference.


                          Sent from my iPhone using Tapatalk
                          Would the difference in ram be noticeable if only using the unit to boot directly into wireless Carplay as soon as the car is on?

                          Comment


                            #73
                            Originally posted by Slideways View Post

                            Would the difference in ram be noticeable if only using the unit to boot directly into wireless Carplay as soon as the car is on?
                            I can't say for sure as I've not got both units to compare between. 2GB doesn't seem like much these days, but as you say it doesn't have to do all that much. It would be useful if there was more information available as to what differences there are with the automotive grade hardware as then could make a more informed choice.

                            Maybe we can convince Obioban to open his up 🤪


                            Sent from my iPhone using Tapatalk
                            2005 ///M3 SMG Coupe Silbergrau Metallic/CSL bucket seats
                            Build Thread:
                            https://nam3forum.com/forums/forum/m...e46-m3-journal

                            Comment


                              #74
                              Originally posted by Slideways View Post

                              Would the difference in ram be noticeable if only using the unit to boot directly into wireless Carplay as soon as the car is on?
                              Carplay (and Android Auto) is basically just a screen mirroring service. Your phone does all the graphics/audio processing and then streams encoded video to the display. The display does send some info (like touch input, light/dark mode, etc.) back, but all the heavy lifting is done by your phone. 2GB should be enough for Carplay duties.

                              This of course assumes a properly optimized OS, video decoder, etc. on the nav unit. As far as I know, all these aftermarket Carplay headunits are running a lightly modified version of AOSP, so you should be good there too.
                              2002 Topasblau M3 - Coupe - 6MT - Karbonius CSL Airbox - MSS54HP Conversion - Kassel MAP - SSV1 - HJS - PCS Tune - Beisan - MK60 Swap - ZCP Rack - Nogaros - AutoSolutions - 996 Brembos - Slon - CMP - VinceBar - Koni - Eibach - BlueBus - Journal

                              2012 Alpinweiss 128i - Coupe - 6AT - Slicktop - Manual Seats - Daily - Journal

                              Comment


                                #75
                                When I bought my car in 2015 the auto-dimming mirror glass in the rear view mirror had already failed. For the last 8 years I've been driving the car around with no auto-dimming and a big bubble in the mirror. Because I like to address things promptly I recently ordered a replacement electrochromic mirror glass unit. There are a couple of vendors who specifically supply these, I believe that MirrorJohn is the most well known. My research also brought up some discussion that the unit that these vendors sell is the same thing as is available for significantly less from the likes of AliExpress.

                                I decided to take a punt and ordered from AliExpress. A week or so later this showed up:


                                Click image for larger version

Name:	Post 75_1.jpg
Views:	109
Size:	312.4 KB
ID:	262636


                                It looked the part. I did notice that the two layers of the glass were slightly offset and initially thought this was due to poor assembly. In actual fact it is intentional and is how the positive and negative rails are exposed and attached.

                                The last few days I have gotten around to doing the replacement. It's a fairly easy process so long as you are careful and take your time. I wrote a DIY guide which you can find here: https://nam3forum.com/forums/forum/m...g-mirror-glass

                                Removing the mirror from the car is easy, removing the front bezel less so. The bezel is held on with a series of little plastic clips. With the plastic having become fragile over time, and BMW not designing the unit to be taken apart, the clips have a tendency to break.

                                Click image for larger version

Name:	Post 75_2.jpg
Views:	103
Size:	84.9 KB
ID:	262637


                                Click image for larger version

Name:	Post 75_3.jpg
Views:	102
Size:	118.6 KB
ID:	262638


                                With the unit disassembled it's then just a case of removing the PCB bracket from the old mirror glass:

                                Click image for larger version

Name:	Post 75_4.jpg
Views:	101
Size:	130.3 KB
ID:	262639


                                And then preparing it for affixing to the new mirror.

                                Click image for larger version

Name:	Post 75_5.jpg
Views:	102
Size:	209.4 KB
ID:	262640


                                The existing writeups on replacing the mirror glass are then very light on this next key step which is to affix the PCB bracket to the new mirror. It's important to get this right so that the forward facing light dependent resistor is aligned correctly. I solved this by essentially reassembling the unit with the PCB in place. I then clipped the bracket to the PCB and used the front bezel to help align the mirror.

                                Then it was just back to reassembly. As I mentioned I broke some of the clips when disassembling (this seems as though it's pretty inevitable). MirrorJohn's advice is to glue the bezel back on, but I didn't like that suggestion as it would stop me from opening up the mirror again in the future. So I decided to come up with something better.


                                I used some brass pins from a 2.54mm PCB header and heated them up and embedded them into the stubs of the broken clips. I then used Araldite to secure them in place. This worked beautifully and the bezel clips securely in place. Very happy with the end result.

                                Click image for larger version

Name:	Post 75_6.jpg
Views:	102
Size:	111.3 KB
ID:	262641


                                The rest of the mirror reassembly is straightforward and in no time I had it back in the car.

                                The auto dimming feature is really cool - the AliExpress unit seems to work well (not that I can talk to longevity) - I'm glad I didn't fork out more than twice as much for what certainly appears to be the same thing!


                                Click image for larger version

Name:	Post 75_7.jpg
Views:	102
Size:	84.7 KB
ID:	262642
                                Last edited by karter16; 04-24-2024, 11:53 PM.
                                2005 ///M3 SMG Coupe Silbergrau Metallic/CSL bucket seats
                                Build Thread:
                                https://nam3forum.com/forums/forum/m...e46-m3-journal

                                Comment

                                Working...
                                X