If this is your first visit, be sure to
check out the FAQ by clicking the
link above. You may have to register
before you can post: click the register link above to proceed. To start viewing messages,
select the forum that you want to visit from the selection below.
Was out of town for a while and finally got back yesterday. I did manage to find some time to fill the brake system though. Filled the system up and bled it without much fuss. Brakes feel like they did before (engine off still) and no immediate leaks. Set up my professional leakdown tester and left it overnight to double check that there were no issues:
No leaks anywhere after 15ish hours. I'm pretty confident that the brakes are good at this point.
However, I would like to make sure that the calipers on each axle are applying the same force to the rotors, but I'm not fully sure how to approach this. Want to do this to rule out the possibility of there being points along the lines that got pinched when bending. I'm thinking that I can slightly pressurize the system with the power bleeder and then measure the torque required to spin the axles. Doing this at a couple different pressure settings should give me a good idea of how things are behaving. Anyway, I won't be doing this until I drive the car around for a bit to shake out any residual air in the system and rebleed a couple more times.
Worst case, I'll find out if they're not applying the same force the next time I'm on track and get on the brakes at the end of a straight.
One thing I'm not happy with is the clutch feel. It feels terribly spongey. I should have just capped that line off instead of fully draining it, but too late for that. Plan is to do the same thing as with the brakes. Drive it around to shake out any trapped air bubbles and then rebleed a bunch of times.
A pinch in a hose won’t affect your steady state torque, it’ll only act in transients. Think of a pinch like an orifice (similar to a shock damper) or the EE component would be a capacitor. At steady state, no effect, but during ramp up it will limit pressure. Your proposed test won’t catch a pinched tube
If you have a pinch, the car will veer to one side on brake application, and to the other side on removal as one piston will act slowly.
That is, unless you blocked all flow, in which case one caliper won’t work at all and your test will catch that.
I would just visually follow all the lines with your flashlight and road test when there aren’t many cars on the road.
‘02 332iT / 6 | ‘70 Jaguar XJ6 electric conversion
Yeah you're right! I'm glad I put that idea up here before wasting time on it. All the bends look smooth and I know I don't have a fully blocked tube because I was able to bleed all four corners. I guess I'll just put everything back together and go do a road test. Hoping to have the car driving this weekend.
Started putting everything in the engine bay back together. This involved reinstalling all the harnesses I had moved out of the way, as well as reassembling the engine.
First thing to do was adapt the existing brake booster hose to the new booster, as the MK20 and MK60 boosters have the check valve on opposing sides. Luckily, the vacuum line for the MK20 booster is longer, so this just involved cutting the line and crimping it onto the new check valve.
Peeled back some of that cloth wrap and cut right where the razor blade is:
Aaand done:
I must admit that cutting that line and making the cut look good took an embarrassingly long amount of time. I didn't have an extra one of those crimp hose clamps, so I didn't want to remove the line from the air rail. In hindsight, I should have ordered two clamps (one for the hose rail and one for the check valve) and done this off of the car.
This was one of the few things in this project that basically bolted right up. Glad it did because the MK60 specific part is like $300. Thought about replacing the hoses anyway, but none of them are cracked or have any obvious vacuum leaks. Still pliable and looking good, so I didn't think it was necessary.
After that, I put the rest of the stuff back together. Starting to look like a car again!
Still to install are a couple bits of engine bay plastics, driveshaft, exhaust and wheels. Should be able to find some time to knock that out this weekend.
I also want to get the adapter harness ready, but I won't be installing that just yet. Want to make sure the mechanical side of things is good before jumping into the electrical stuff.
First, I put more of the engine bay back together. Goal of this project was to make it look like the car came with an MK60 from the factory, so I bought and installed everything that was different. Good example of this is the grommet that goes to the drug bin:
I then bled the clutch slave using this technique:
Clutch pedal no longer feels terrible! Before this, I was able to depress it about 40% of the way with basically no effort. Now it feels just like it felt before I drained all the fluid from it.
Last thing I did was to get the gas tank reinstalled. Would have probably been much easier with another person, but oh well. Here's a pic of the cleaned up tank:
The tank comes with some foam to keep it from rubbing on the chassis. All of the foam on mine was falling off, so I replaced with some stuff I had in the garage. Hoping this lasts for a while.
I also replaced the fuel filler hose with one from mpower22 (thanks!) and some new hose clamps.
Now just need to reinstall the driveshaft, exhaust and random plastic bits. Pretty excited to have the car driving again soon.
I must admit that cutting that line and making the cut look good took an embarrassingly long amount of time. I didn't have an extra one of those crimp hose clamps, so I didn't want to remove the line from the air rail. In hindsight, I should have ordered two clamps (one for the hose rail and one for the check valve) and done this off of the car.
Everything's coming together looking really good. A great tip I'll share with you next time you need to cut vacuum hose - try using PVC cutters, they work wonders and leave a factory-clean cut on these smaller rubber hoses. I started using those on the M3 and haven't looked back!
Original Owner - 2003///M3 -6MT/LSB/Impuls/Anthracite M3Forum.net member since Dec 2002
Everything's coming together looking really good. A great tip I'll share with you next time you need to cut vacuum hose - try using PVC cutters, they work wonders and leave a factory-clean cut on these smaller rubber hoses. I started using those on the M3 and haven't looked back!
Thanks! That would have been great to know a couple days ago. I'll buy a pair of PVC cutters to keep around for the next time I need to cut vacuum hose.
Started by swapping out the CSB on the driveshaft. I would very rarely hear a grinding-type noise when driving the car that I could not pinpoint, but the CSB was the prime suspect, so I ordered one just in case. I replaced it about 25k mi ago when I did subframe plates, so I wasn't expecting the rubber to have failed, but maybe something else had.
Turns out the metal sleeve for the rubber that is pressed into the carrier somehow had gotten loose. I was able to freely spin it by hand. Tried to capture this in pics:
The rubber part was actually completely fine. It's torn in the pics because I was impatient on removal and didn't really care about conserving it. Here's another pic showing how loose the sleeve was in the carrier. I was able to push it out this much with just my fingers:
Not entirely sure what caused this failure, but the sleeve on the replacement part was not loose at all.
I bought the Rein part to replace this because FCP said it was OE. Part came in a Rein bag and I thought it was funny that they didn't even bother to remove the BMW logo from it:
Old part that failed was also a Rein part, but that one did have the logo removed:
Anyway, enough about that. Just hope this new one doesn't fail as fast as the previous one did.
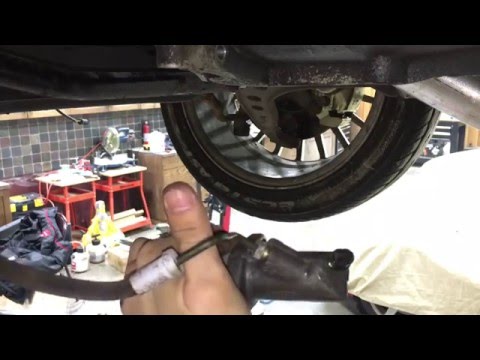
After that I put the exhaust, wheels and plastics back on the car. Have done this one million times, so no real surprises here. Then went for a quick test drive:
First impressions is that it feels exactly the same as before, which is great! No weird pulling to one side or squirreliness under braking. Brakes do need a couple more bleeds, but I'll get to that once everything is wired up so that I can bleed the ABS unit too. Also as far as I can tell, there's no more leak at the VANOS gasket, which is also great.
I've been slowly working on the harness. Hoping to get that done and code everything this week. Then I can actually test the thing.
Oh one thing I forgot to mention is that I also swapped out the connectors on the body harness for the wheel speed sensors so that I could use the new style. Was expecting it to be annoying because of being on my back underneath the car, but it was actually quite simple, especially with the gas tank out of the way. Only thing that tripped me up a bit was that the early cars have three wires going to the front wheel speed sensors, while the later cars only have two. Turns out the extra wire is just a ground, so I depinned it from the old connector, put some heat shrink around it and stuffed it out of the way.
Wiring time! Such a relaxing thing to do after all that mechanical work.
Some dining table shots of the progress because the garage workbench is still a mess:
Yesterday, I got all the wires pinned and the twisted pairs twisted. Not pictured are the brake fluid level sensor and DSC sensor connectors.
Next steps are to put all the wires in their corresponding spots and solder the other ends to the PCB I made. Should be ready to go on the car after that.
For now, I'll just zip tie everything together and run the harness across the engine bay, in case I need to troubleshoot. Once I've validated it though, I'll wrap it up in tesa tape and route it into the interior. Plan is to pull the MK20 connector into the cabin and connect it to the harness in the glove box area. I'll then route the rest of the harness behind the dash and out into the DME area. Should look completely factory when finished.

Comment